Want to create a custom block for your website?
By the end of this guide, you will discover how easily you can create custom WordPress blocks, even without any coding skills.
Hereβs a glimpse into what you will learn:
Can plugins really help? What plugins you can use Practical steps in using each plugin Letβs get started.
Can you make custom blocks without much coding?
While weβre now a long way from the classic editor, the basic blocks available in the Gutenberg are not enough for advanced users.
Now, there are at least two ways to create a custom Gutenberg block:
Through coding Through plugins The usual method is pure coding since it allows more advanced customizations on new custom blocks. Unfortunately, many of us donβt code soβ¦ π
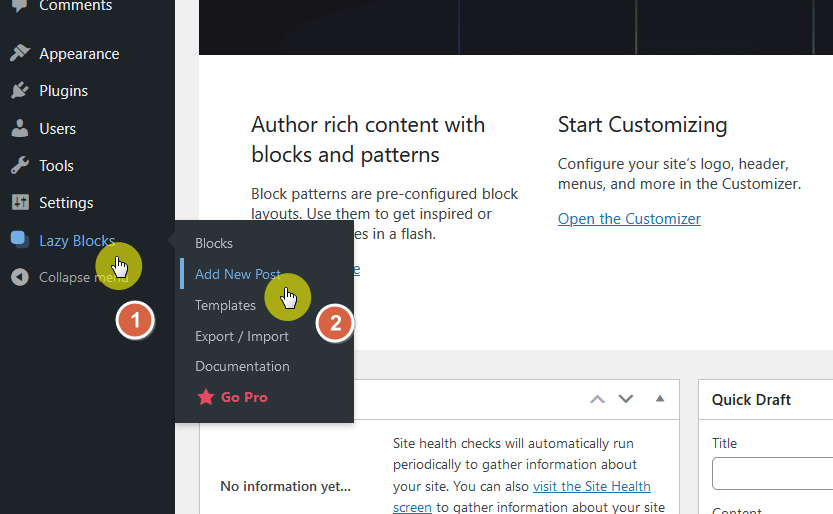
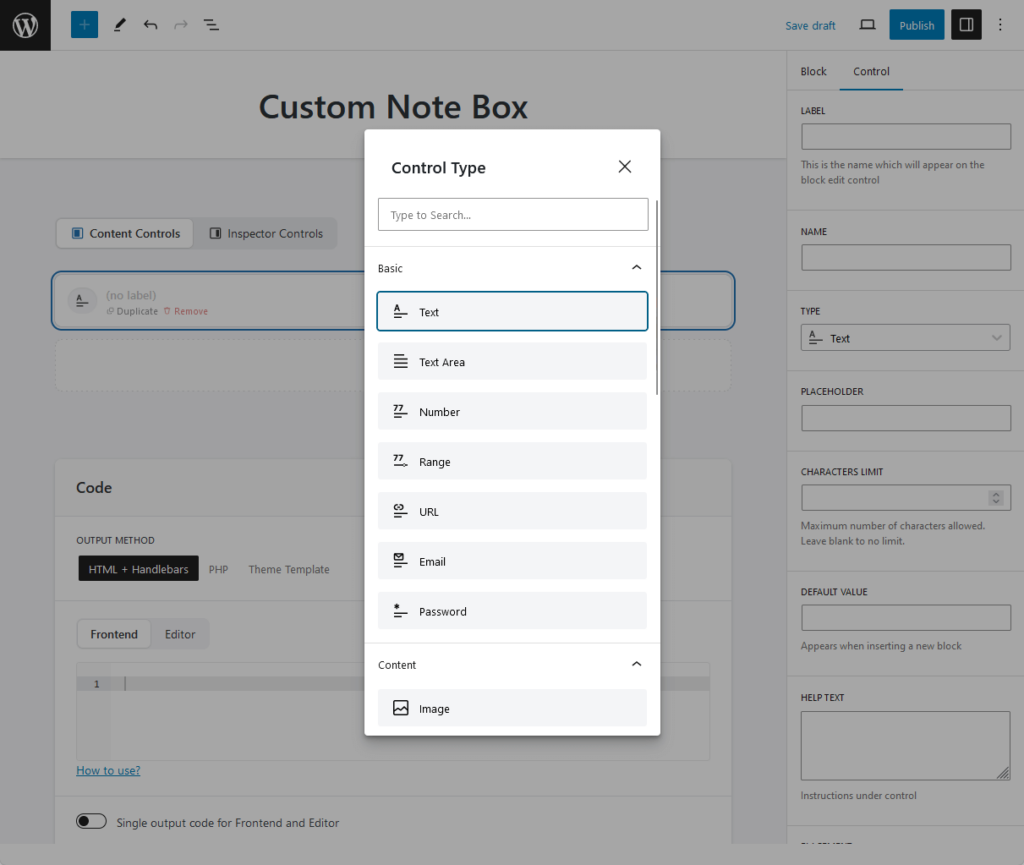
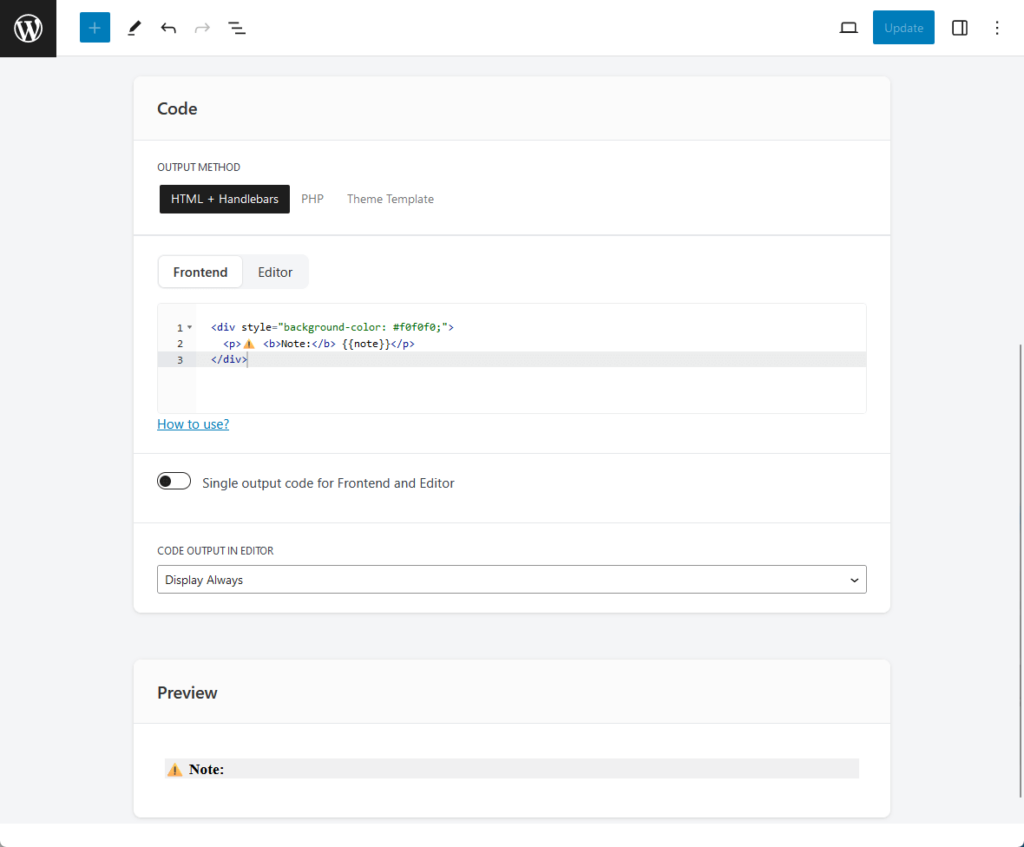
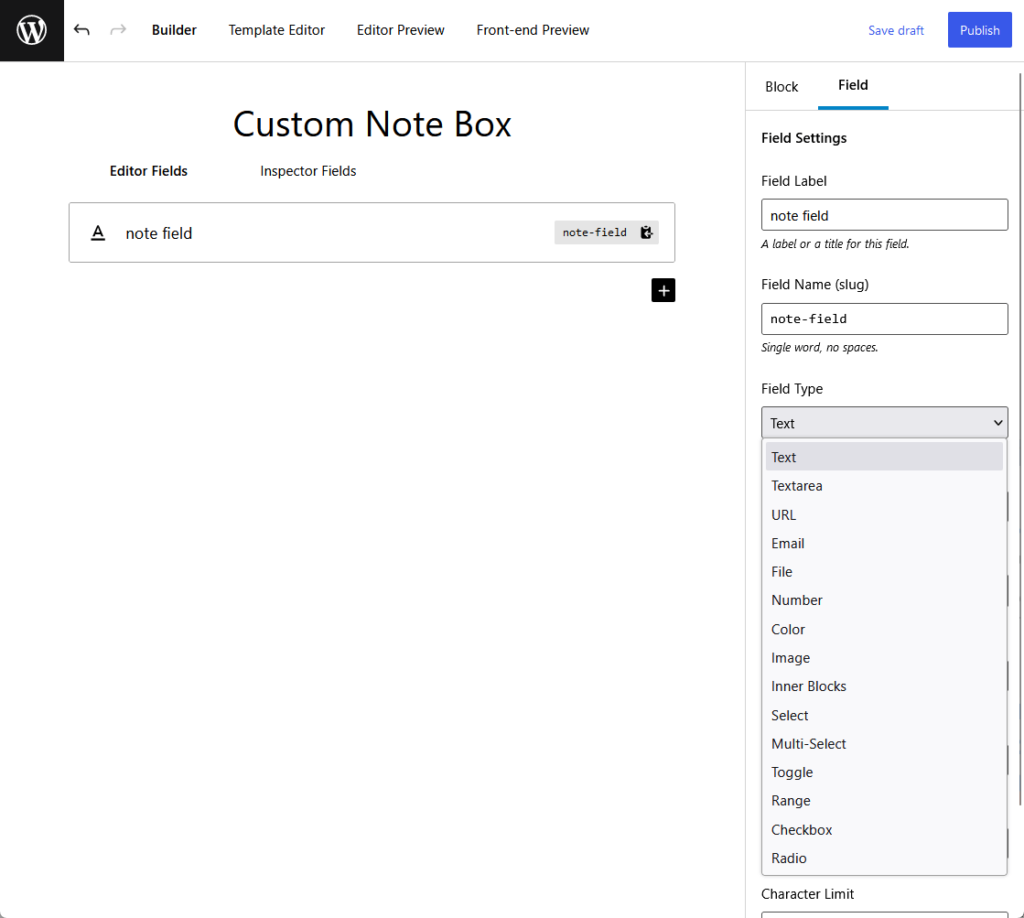
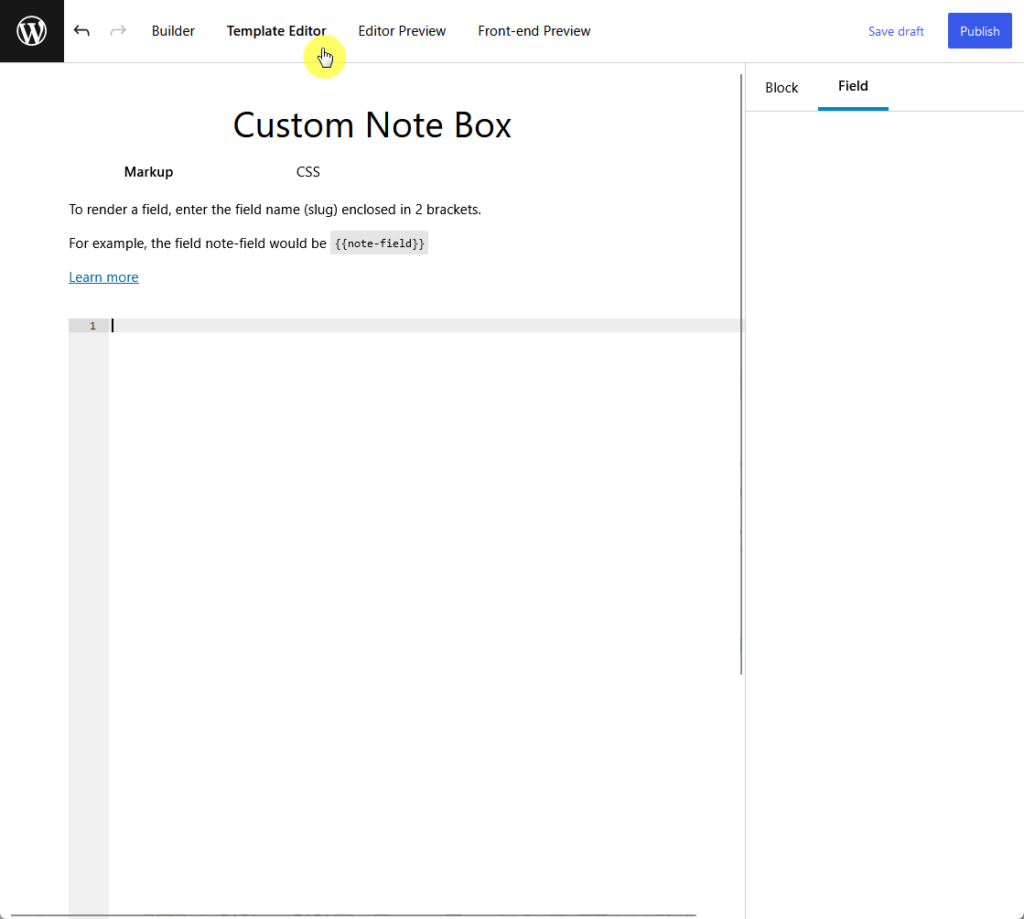
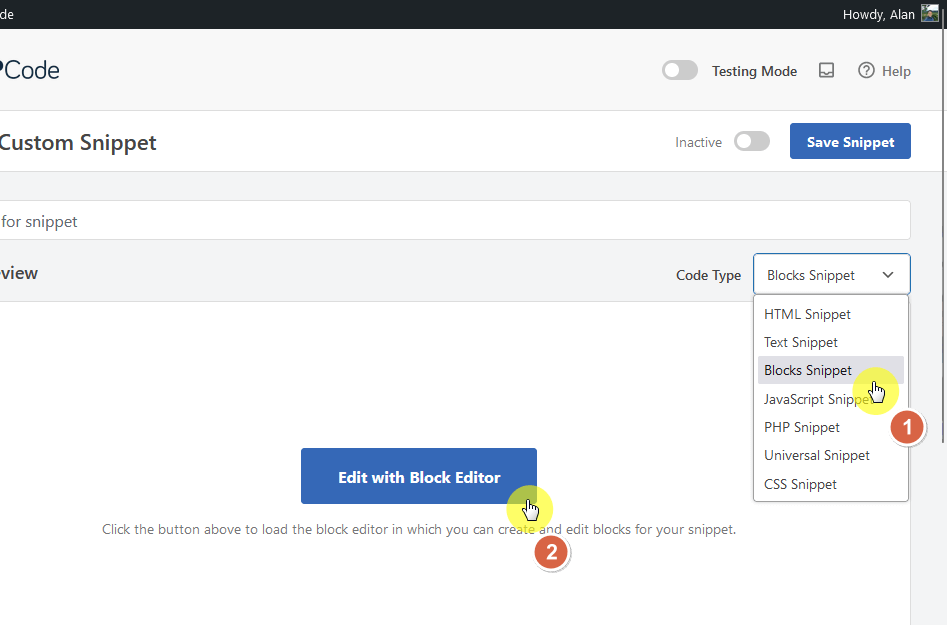
On the bright side, there are plugins that can help create custom Gutenberg blocksβββalbeit these are simpler custom blocks.
These plugins have a block builder which allows you to choose from pre-configured mini-blocks to create the custom block.
So yes, you can create a custom block without much coding. But these blocks are simplerβββdonβt expect complicated blocks here .
As you create custom WordPress blocks without coding, remember that reliable web hosting like Hostinger is crucial for your websiteβs success.
Hostinger ensures your custom blocks run smoothly, offering fast loading times and exceptional uptime.
Discover the Hostinger advantage for your WordPress site:
Enjoy a 99.9% uptime guarantee Affordable pricing at just $2.49/month (use the code darrel10 to get a discount) Global performance and reach with Hostingerβs optimized hosting platform Choosing Hostinger means more than just selecting a web host:
Itβs about boosting your websiteβs potential with a hosting service thatβs dependable, high-performing, and offers great value for your investment.
How to Make Custom Blocks Using Plugins
Although there may be more plugins you can use to create custom blocks, I like the functionality of the three here since theyβre easy to use.
β οΈ Note : For the purpose of this tutorial, I will create a custom note box block similar to what youβre reading right now using the available tools from the plugins.
Letβs start with the first one:
1. Lazy Blocks (Modern)
Lazy Blocks is a WordPress plugin that enables the creation of custom blocks visually , without requiring coding skills.
Itβs designed to simplify the process of adding custom functionality to your WordPress site.
Lazy Blocks allows you to create custom blocks and meta fields for specific post types, offering a flexible approach to content managementββ.
π» Key features
Custom block creation : You can create custom blocks and define their properties, such as name, icon, and category. Control fields : Lazy Blocks offers a range of control fields, including basic text and image selectors, content fields like rich text and galleries, choice fields like checkboxes, and advanced controls like color pickers. Multilingual support : The plugin is compatible with WPML (WordPress Multilingual Plugin), making all text controls of custom blocks translatable. Developer-friendly options : Although tailored for users without coding expertise, Lazy Blocks also provides PHP filters and actions, allowing developers to customize blocks more extensively. Multiple output methods : Supports custom PHP, HTML with Handlebars, and template files in the theme folder.
Hereβs how to use Lazy Blocks:
Step 1: Add a new block
Add a new plugin from the repository within your admin dashboard.
Search for the pluginβs name and then install and activate it on your website.
Now that the plugin has been installed, you can start creating the new block.
Hover your mouse over the pluginβs name from the sidebar and click on the add new post button :
This will bring you to a page that kind of looks like the page you see when you create a new post.
For starters, I named the new custom blockβ ββthe slug also automatically updated into the name:
The sample custom block Iβm creating is super simple (just for demo purposes), and will only need one mini-block to complete.
On the content controls tab, all you have to do is add the components of your own custom block (the button will automatically create a text component by default).
Fortunately, itβs also the component we need for the purpose of this guide.
The important thing to remember when adding a component is to give it a label , which is needed later when adding the frontend code.
I have also added a placeholder just to spice things up:
Step 3: Enter the output code
After setting up the components and doing the adjustments you need, you will need to enter the usage code so the contents will show up on the front end.
Fortunately, if youβre not that familiar with the code, you can check Lazy Blockβs documentation for the usage code.
For example, hereβs the usage code for using the text component:
I used the simplest method (HTML) and added a bold design to copy the sample note box found in the previous section.
Hereβs the code I used:
<div style="background-color: #f0f0f0">
<p>β οΈ <b>Note:</b> {{note}}</p>
</div>
Since thereβs a background color to the box weβre trying to create, I also added a style snippet (with the help of research + the browserβs inspect tool).
Thereβs also a preview window so you can see whatβs going on:
Step 4: Publish and test the block
Publish the block so you can use it when creating a post or a page (the button is on the upper-right side similar to publishing a post).
You will now see the custom WordPress block on the list of Gutenberg blocks you can add to a post or page:
Since the block was designed to take an input, you will have to enter the actual note you want to display.
You can then check the preview or published post to see the results:
2. Genesis Custom Blocks (Free)
Genesis Custom Blocks is a powerful tool for WordPress developers, designed to leverage the block-first approach of modern WordPress.
It works seamlessly with the WordPress block editor (Gutenberg) and enables the creation of custom blocks tailored to specific design and functionality requirements.
Its focus is on providing a streamlined experience for developing custom blocks, from design implementation to unique functionalities and integration with third-party apps and pluginsββ.
π» Key features
Familiar user interface : It offers an interface that is intuitive and easy to navigate within the WordPress admin, making it user-friendly for those already familiar with WordPress. Flexible block fields : The plugin supports a growing list of block fields, allowing for a wide range of functionalities to be added to the custom blocks. Simple templating : It simplifies the process of building block templates, either using the built-in editor or familiar WordPress development practices. Developer-friendly functions : Offers functions that are easy to use and interact with the data stored in custom block fields. Extensive block fields : Includes various fields such as inner blocks, text, image, URL, toggle, textarea, select, and more.
Hereβs how to use it:
Step 1: Add a new block
As with any other plugin, search for it in the repository and then install and activate it:
You have two options to add a new block:
Hover your mouse over the pluginβs name > add new Go to the plugin page and click the add new button Hereβs an illustration of the second method:
Step 2: Add a new field
The next page is the custom block builder.
Similar to what we did with Lazy Blocks:
Give the custom block a name Press the (+) button to add a new field From there, enter the field label.
You can change the type of component (default is text) by clicking on the field type and selecting the mini-block you want to add.
Hereβs how it looks:
Once again, the field label is important since we would need that when adding the code in the block template editor.
After youβre done adding all the fields and customizing the field settings, itβs time to move on to the coding part.
Step 3: Enter the markup code
From the builder, you then have to go to the template editor , where you will see a code editor:
The way it works is similar to Lazy Blocks, even in calling out the fields or the components (this time, using the field label).
Hereβs the code (looks similar to the one in Lazy Blocks):
<div style="background-color: #f0f0f0">
<p>β οΈ <b>Note:</b> {{note-field}}</p>
</div>
β οΈ Note : You can check the documentation if you need help with code references for the fields, functions, and filters.
Although thereβs a CSS tab (besides the markup tab), I opted to include the styling within the container since thereβs only one.
Hereβs what it looks like:
By the way, thereβs an editor preview and front-end preview in case you want to see how it looks like on the front end without going to a post.
Step 4: Publish and test the block
Even if you to the preview tabs, you can publish the custom block right away using the button in the upper-right corner.
Now, the custom block will appear on the blocks list:
After adding the block, you will then have to enter the actual note to display.
This is because we set the block to receive input from the user:
Once you publish the post, you will see a result similar to the one we got when using the Lazy Block (well, since theyβre basically the same custom block).
Here it is:
3. WPCode (Snippet)
WPCode , formerly known as βInsert Headers and Footers by WPBeginner,β is a widely-used WordPress plugin for managing code snippets.
It simplifies the process of adding code to WordPress sites without editing theme files.
WPCode is especially useful for inserting scripts like Google Analytics, custom CSS, Facebook Pixel, and more in various areas of a website, including headers and footersββ.
This is also your best option if the custom block you want to make is composed of pre-existing blocks in WordPress.
β Warning : Unfortunately, the feature we need is locked behind the pro version, so you need to buy the pro version to use it for custom blocks.
π» Key features
Easy code insertion : Facilitates adding header and footer scripts and custom PHP, JavaScript, CSS, and HTML code snippets directly from the WordPress dashboard. Code snippets library : Features a library of tested and proven WordPress code snippets for functionalities like disabling REST API, allowing SVG file uploads, and more. Custom code generators : Includes generators for custom post types, taxonomies, WP Queries, sidebars, widgets, and navigation menus, streamlining the process of adding custom functionalities. Conditional logic and priority : Provides conditional logic for code snippets, allowing for targeted application based on user roles, page URLs, and other criteria, along with prioritization of code execution. Import and export functionality : Facilitates the easy import and export of code snippets, ideal for managing multiple websites or development in staging environments.
Hereβs how to use it:
Step 1: Add a new snippet
Get the pro version first of the plugin. Install and activate it on your website.
Once you have that, proceed to the plugin page from the sidebar panel and click on the add new button :
From there, go to the add your custom code box .
Hovering your mouse over it will reveal the use snippet buttonβ ββclick on it:
Step 2: Create a blocks snippet
From there, choose the blocks snippet code type and click on the edit with block editor button on the center of the page:
Since you would be asked to save the snippet, might as well give it a name before going into the block editor.
The next page is literally a block editor, so you can:
Assemble the custom block here Click the update button Return to the code snippet builder Before you insert the block snippet, make sure to set it to active and click the update button.
Itβs found in the upper-right corner:
Step 3: Insert the block snippet
Now, unless you want to auto-insert the block code snippet in your post, itβs likely that you want to place it manually.
For this, scroll a little until you get to the insertion options:
Select shortcode as the insert method Copy the shortcode Go to the post or page where you want to insert the custom block.
Add a shortcode block first:
Remember the shortcode earlier?
All you have to do is paste it on the field provided:
As you might have expected, it will output a similar result.
There might be a little difference here since the custom block was literally made of existing blocks on your website.
For example, you can see that the background color of the note box covers a lot more (and looks better too):
Building Custom Gutenberg Blocks
Creating custom WordPress blocks is now easier and more accessible, even without coding expertise.
With the evolving landscape of WordPress tools, users can effortlessly personalize and enhance their websites, tailoring them to unique specifications and improving overall user experience.
This marks a significant step forward in democratizing web design, making it possible for anyone to craft a dynamic and functional website.
With custom WordPress blocks, letβs not forget the importance of exceptional web design.
Elevate your websiteβs look and functionality with Darrel Wilsonβs premium Elementor Template Kits.
Darrel Wilson has an incredible offer that you simply canβt ignore:
Get lifetime access to all premium template kits designed for Elementor Complete with 2 years of dedicated support Only for $99βββthatβs already for the lifetime access Step into a world of smart design and make your website stand out with our Elementor Template Kits.