Want to enable GZIP compression?
In this guide, you will learn easy methods to enable GZIP compression in WordPress, which is important in boosting your site’s performance.
Here’s a glimpse of what you will discover:
What GZIP compression is How to enable GZIP compression How to verify GZIP compression Ready? Let’s get started!
What is GZIP compression? GZIP compression is a method that allows you to make your website faster by reducing the size of files sent from your web server to visitors’ browsers.
Enabling GZIP compression is particularly beneficial if your WordPress website has a lot of content or uses large files.
This whole process of GZIP compression happens almost instantaneously , improving the user experience by speeding up page loading and data transfer times.
By reducing the amount of data transferred, you also use less bandwidth , which can be a cost-saving measure if your hosting provider charges based on bandwidth usage.
How to Enable WordPress Gzip Compression There are several plugins available that cater to GZIP Compression for different types of WordPress sites.
However, for this guide, we will be using three plugins that are at the top of their game in ensuring page speed and performance:
WP-Optimize WPRocket W3 Total Cache 👉 Related : The Best WordPress Caching Plugins (Free and Paid Plugins)
As you go through the methods, remember the foundational role of your hosting service in website performance and efficiency.
This is where Hostinger comes into play, offering an unparalleled hosting solution that perfectly complements your WordPress optimization efforts.
Discover the Hostinger advantage for your WordPress site:
Enjoy a 99.9% uptime guarantee Affordable pricing at just $2.49/month (use the code darrel10 to get a discount) Global performance and reach with Hostinger’s optimized hosting platform With Hostinger, you’re not just choosing a web host:
You’re empowering your website with the speed, reliability, and performance it needs to stand out in the digital world.
Method 1: WP-Optimize WP-Optimize various optimization methods , such as GZIP compression.
This feature compresses your web pages and style sheets before they’re sent over to the browser, which can drastically reduce transfer time.
This compression is particularly effective because CSS and HTML files, which often contain a lot of repeated text and whitespace, can be compressed significantly.
In addition to GZIP compression, WP-Optimize provides image compression, database cleaning, and caching features, making it a versatile tool for optimizing your website.
👉 Related : WP-Optimize Review: No Refund Policy a Dealbreaker?
GZIP compression: Efficiently compresses HTML, JavaScript, and CSS files and reduces their size significantly for faster website load times.Image optimization: Includes functions for compressing images in various formats and other options for both lossy and lossless compression and a restore originals function.Database optimization: Cleans and optimizes your database by removing unnecessary data and reducing its size for improved efficiency.Caching capabilities: WP-Optimize caches your site’s posts and pages as static files, thereby reducing the processing load and speeding up your website.Sophisticated scheduling: Allows for the scheduling of automatic optimization at specific times, ranging from daily to monthly options.Minification of CSS and JavaScript: Minifies CSS, JavaScript, and HTML files to further improve performance.Additional features in the premium version: While already robust, the premium version offers multisite support, advanced database optimization options, and much more.
After downloading and activating WP-Optimize on WordPress, click on its corresponding icon on the left sidebar of your account.
From there:
Click on the cache icon at the top of the page Then on the GZIP compression option. Finally, turn on GZIP compression by clicking the enable button:
WP-Optimize is easy to use and capable of enhancing multiple aspects of website performance, making it a valuable tool for those focused on speed and efficiency.
Method 2: W3 Total Cache W3 Total Cache enhances website performance through customizable caching and optimization techniques.
This plugin is widely recognized for its ability to significantly reduce file sizes, which enhances browser rendering speeds.
Additionally, it supports integration with content delivery networks (CDN) like Cloudflare, making it a versatile tool for global website optimization.
W3 Total Cache stands out for its deep customizability and extensive feature set that caters to both basic and advanced optimization needs.
👉 Related : W3 Total Cache Review: Overpriced or Overpowered?
GZIP compression: W3 Total Cache uses GZIP compression to minimize the size of HTML, CSS, and JavaScript files.Minification and concatenation: It reduces the size and combines HTML, CSS, and JavaScript files for quicker delivery and execution.CDN support: The plugin offers comprehensive support for various CDNs to ensure enhanced global content delivery and website speed.Browser caching options: W3 Total Cache provides detailed settings for browser caching, like setting Last-Modified headers, cache control headers, and entity tags (eTags).Database caching: Tailored caching options for different hosting environments with specific recommendations for shared hosting accounts.Customizable settings: Extensive customization options are available for fine-tuning every aspect of caching and performance, suitable even for beginners.Cloudflare compatibility: It integrates seamlessly with Cloudflare and provides enhanced performance and security features.
After downloading and activating W3 Total Cache on WordPress, head over to its corresponding icon on the left sidebar of your account.
From there:
Click on the settings dropdown at the top of the page Then on the browser cache option Scroll down among the array of featuresTick that box that will enable the GZIP compression Don’t forget to click on save settings to finish the job.
W3 Total Cache is known for meeting both basic and advanced performance needs , making it the top choice for millions of WordPress site administrators.
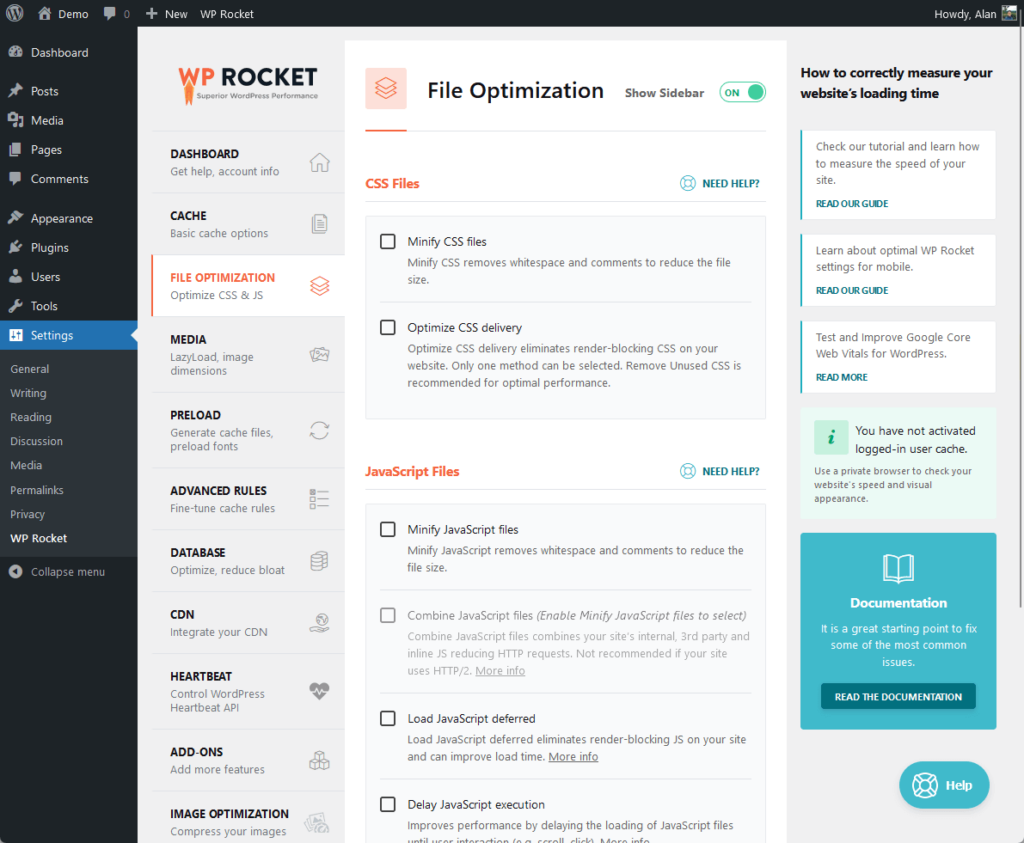
Method 3: WP Rocket WP Rocket user-friendly interface, and effectiveness in enhancing website performance.
Users like WP Rocket with its easy setup and instant performance enhancement upon activation and for optimizing various aspects of WordPress websites.
The plugin offers a variety of features that work together to improve site speed , such as page caching, GZIP compression, and file optimization.
WP Rocket also offers additional functionalities like mobile detection, Cloudflare compatibility, multilingual support, and more.
GZIP compression: WP Rocket utilizes GZIP compression to reduce the size of your HTML, CSS, and JS files, speeding up their delivery to the user’s browser.Page caching: Automatically creates static HTML files of your pages for quicker loading times.Cache preloading: Emulates a visit to each page to ensure the cache is always ready to improve the site’s performance from the first user visit.Browser caching: Reduces load times for repeat visitors by storing commonly accessed files in the user’s browser.File optimization: Minifies and combines CSS and JavaScript files to reduce their size and the number of HTTP requests.Lazy loading for media: Optimizes how images and videos load on your site to effectively improve loading times and user experience.Database optimization: Cleans and optimizes your WordPress database to reduce its size and improve efficiency.
Although WP Rocket does not have a free version, its scaled pricing guarantees a cost-effective solution to your website speed needs.
One difference with WP Rocket is that GZIP is automatically enabled (on Apache and LiteSpeed servers) — no need to press a button.
You won’t find any button that will enable you to do so:
Its ability to drastically improve page speed with minimal configuration makes it a go-to solution for enhancing site performance and, consequently, SEO rankings.
👉 Related : WP Rocket Review: Is It Worth the High Price Tag?
⚠️ Note : If you need to add the gzip compression yourself, WP Rocket provided
How to check if GZIP is enabled? After boosting your website’s speed with GZIP Compression using one of these advanced plugins, the final step is to put it to the test.
For this, you can use this website GZIP compression test tool to check if GZIP compression is enabled.
Additionally, it monitors real-time page performance, offers alerts for important performance shifts, and includes a historical performance data feature.
⚠️ Note : You can also use another GZIP compression checker tool. There are lot of them out there.
Optimizing your website’s performance is important not only for both user experience and search engine ranking but also for you to edge against online competitors.
Keep in mind that a fast website boosts user engagement and plays a vital role in achieving your online goals in today’s expanding digital environment.
Wrapping up, it’s time to focus on enhancing your site’s design and functionality.
Darrel Wilson presents an enticing offer — access to an exclusive collection of premium Elementor template kits.
Secure lifetime access to all premium Elementor template kits:
Get lifetime access to all premium template kits designed for Elementor Complete with 2 years of dedicated support Only for $99 — that’s already for the lifetime access Embrace this opportunity to elevate your WordPress site with Darrel Wilson’s premium Elementor templates, blending aesthetics with performance.