Need to download all your images from your site library?
By the end of this guide, you will learn how to easily download all your images from the media library on your WordPress website.
Here’s some of what we’ll talk about here:
Why download your images Using the export tool Using a media download plugin Ready? Let’s get started.
Downloading images from the WordPress Media Library is necessary for creating backups, website migrations, or restoring original files after they’ve been lost or deleted.
Additionally, having a local copy of media files allows for offline editing or optimization , which can be re-uploaded to improve website performance.
This process also ensures that all media content is preserved in case of website failures or data loss (or if you want to have your own offline copy).
Fortunately, it’s not as hard as you might think as there are some tools and even plugins that can help you download all those images.
WordPress provides a convenient export tool within its dashboard that facilitates the export of all images uploaded within a specified timeframe.
This will download your entire library as an XML file rather than individual image files like how you first uploaded them.
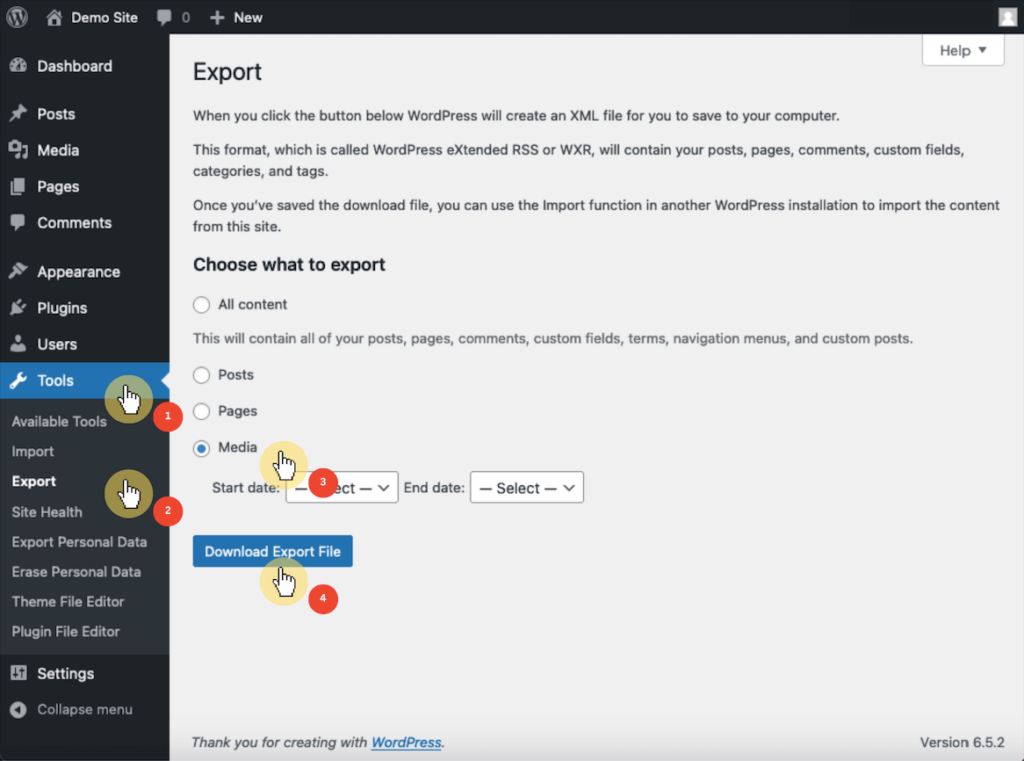
Anyway, to use this feature, log into your WordPress dashboard and do the following:
Navigate to tools > export Choose the media option Specify the date range Then hit the download export file button:
This will then generate an XML file that you can save to your computer.
This XML file is particularly useful as it can be imported into another WordPress site with the help of the WordPress importer tool.
⛔ Warning : Since this is an XML file, you can only use it for importing to another website or platform’s media library that accepts XML files.
Ensuring your WordPress site runs smoothly and efficiently often boils down to choosing the right web hosting service.
This is where Hostinger stands out, offering a reliable and performance-driven hosting solution for WordPress sites.
Discover the Hostinger advantage for your WordPress site:
Enjoy a 99.9% uptime guarantee Affordable pricing at just $2.49/month (use the code darrel10 to get a discount) Global performance and reach with Hostinger’s optimized hosting platform Choosing Hostinger means investing in a hosting service committed to delivering speed, stability, and superior performance for your website.
Make the smart choice and experience the difference with Hostinger today.
Using a plugin is particularly useful if you want to automate the process and potentially include additional metadata about the files in the export.
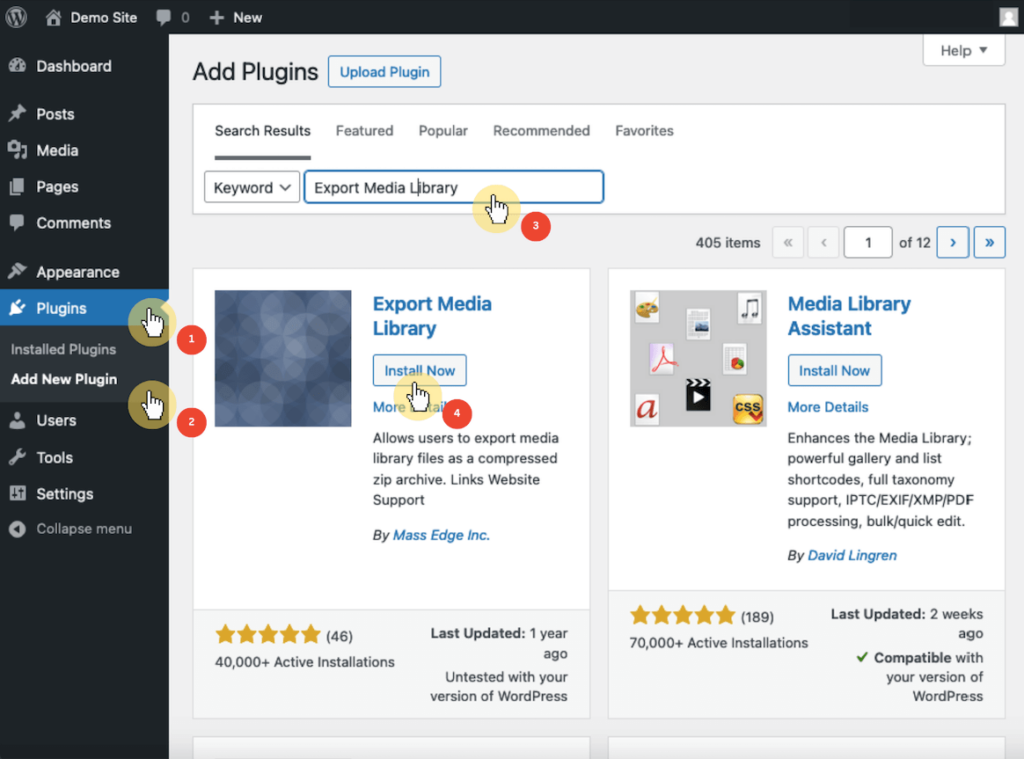
A good example of this plugin is the Export Media Library which you can easily install from the plugin repository.
Search for it
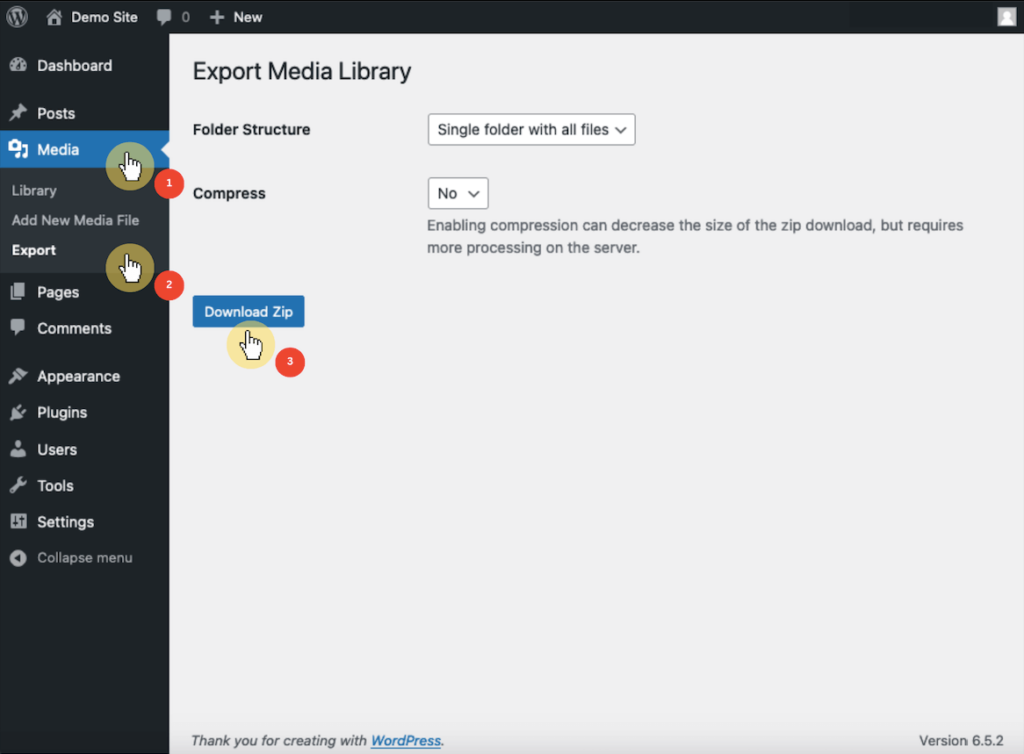
Once the plugin is activated, you will now be able to see a new media > export option in the admin dashboard.
From there:
Select your export preferences (folder structure and compression) Click the download zip button After downloading the zip file, all you have to do is extract the contents and you will then see the individual images in your media library.
⚠️ Note : The plugin hasn’t actually been tested with the latest 3 major releases of WordPress. Upon testing, it’s still free and safe to use (or else it wouldn’t be in the repository anymore).
Method 3: Using an FTP Client
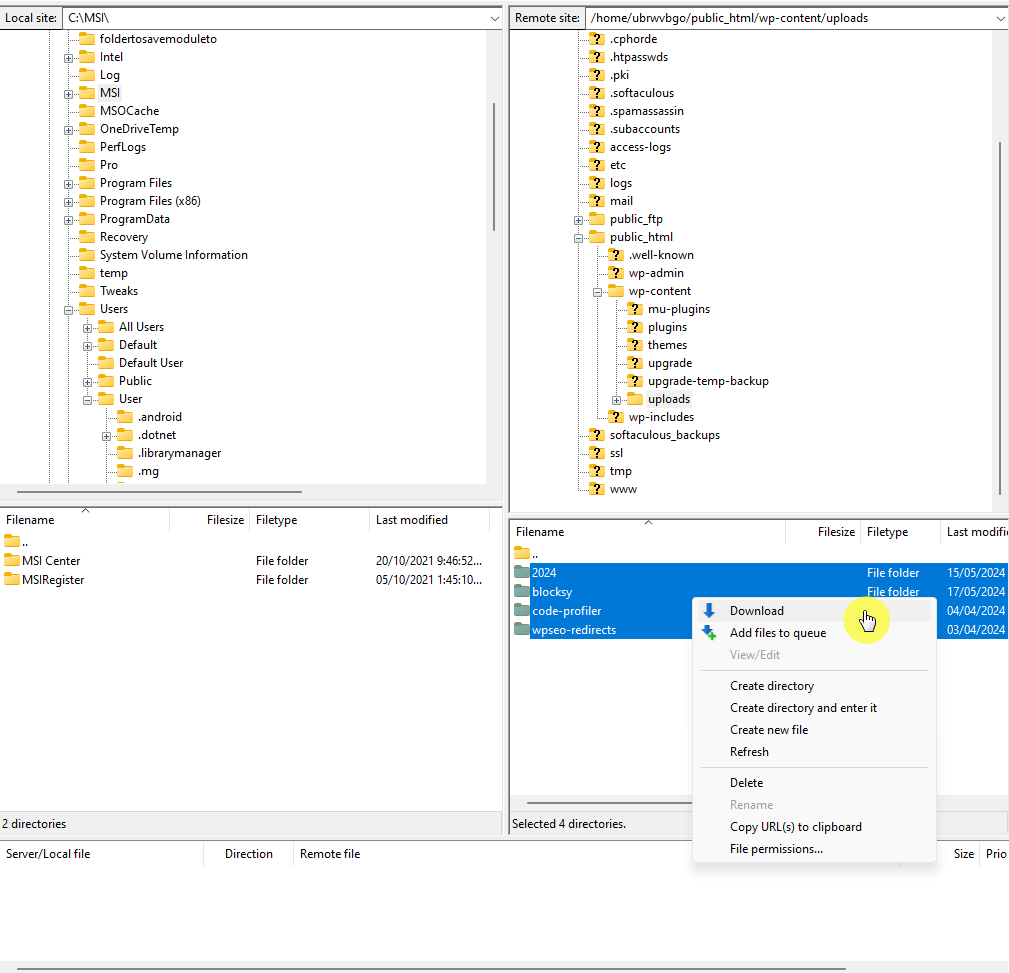
For those who prefer a more technical method to download all image files from the entire media library, using FTP (file transfer protocol) is a viable option.
An FTP client is software that facilitates the transfer of files between your computer and the server where your website is hosted.
Once connected:
Navigate to the wp-content/uploads directory Select and download all the images in the library The “uploads” folder is where all the uploaded media library files are located. 🙂
This method is particularly useful for users who need to manage large volumes of media or require direct access to the server files for backup or migration purposes.
Method 4: Using the Control Panel or File Manager
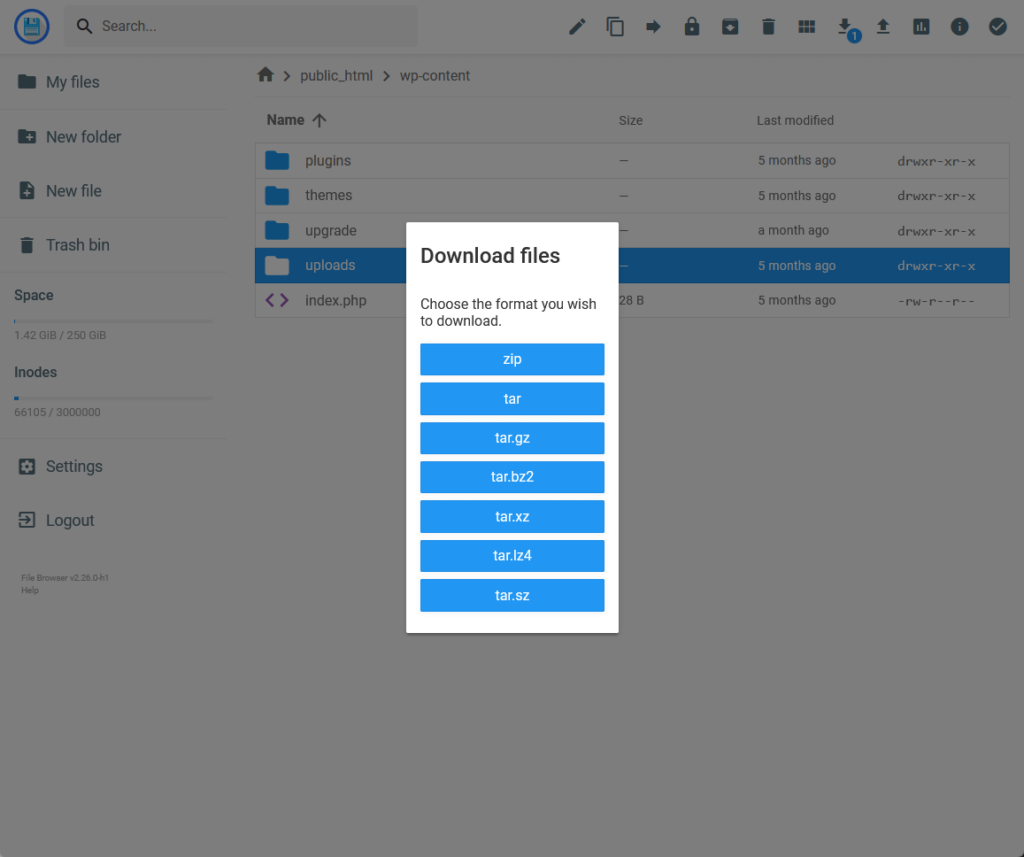
Another method involves using the control panel or file manager provided by your web hosting service, useful for those who may not be comfortable with FTP.
For example, Hostinger has its own hosting panel that has a file manager functionality (cPanel also has one).
The steps are basically the same as using an FTP client:
Navigate to the wp-content/uploads directory Download the whole folder Choose the format for the download Using Hostinger, this is what I see:
Once compressed, the file can be downloaded to your local computer.
This method is advantageous as it uses the web hosting provider’s graphical interface , simplifying the process of accessing and downloading your website’s media files.
👉 Related : Hostinger Review: Budget-Friendly Hosting Powerhouse?
Choosing the Right Method
Selecting the best method to download images from the entire WordPress media library depends on your individual needs and technical comfort level.
Each method offers unique advantages, so it’s important to assess your specific requirements and technical capabilities before deciding which one best suits your needs.
If you’re new to WordPress, use the export tool (if you want to reimport it later on) or an export media library plugin to keep your images offline.
It’s also essential to consider enhancing your site’s design and functionality with ease.
This is where Elementor template kits come into play, providing a seamless way to elevate your website’s appearance.
Secure lifetime access to all premium Elementor template kits:
Get lifetime access to all premium template kits designed for Elementor Complete with 2 years of dedicated support Only for $99 — that’s already for the lifetime access This offer is designed to make your life easier by eliminating the hassle of frequent updates and support costs.
Feel the ease and efficiency of these premium templates and keep your site effortlessly stylish and functional.