
Want to add a menu to your website?
By the end of this guide, you will learn how to easily add a menu to your website using the site editor, plugins, and theme customizer.
Here’s some of what we’ll talk about here:
Ready? Let’s get started.
Adding a menu to your WordPress site is important for improving user navigation and the overall user experience.
It acts as a roadmap, guiding visitors through the site’s content efficiently and helping them quickly find the information they need.
With a well-designed menu, you can also reduce bounce rates and improve site usability, which are key factors that search engines consider.
There are a few ways to add a menu to your WordPress site (the more you explore the dashboard, the more you will learn how to do this).
Let’s start with the easiest one:
Using the built-in site editor via the WordPress dashboard is the most straightforward approach to adding a menu to your site.
Here’s how to do it:
To create a navigation menu in WordPress, you can use two different methods — through the menus section under appearance or through the customize section.
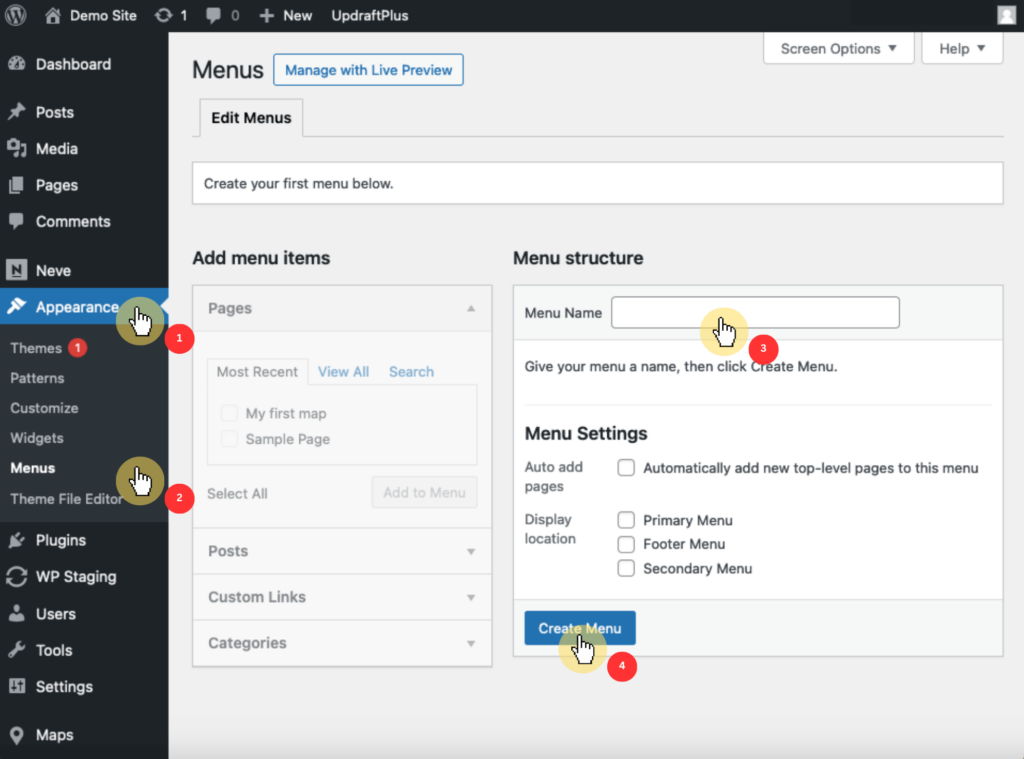
To create a navigation menu in WordPress from the menus section under appearance, do the following:
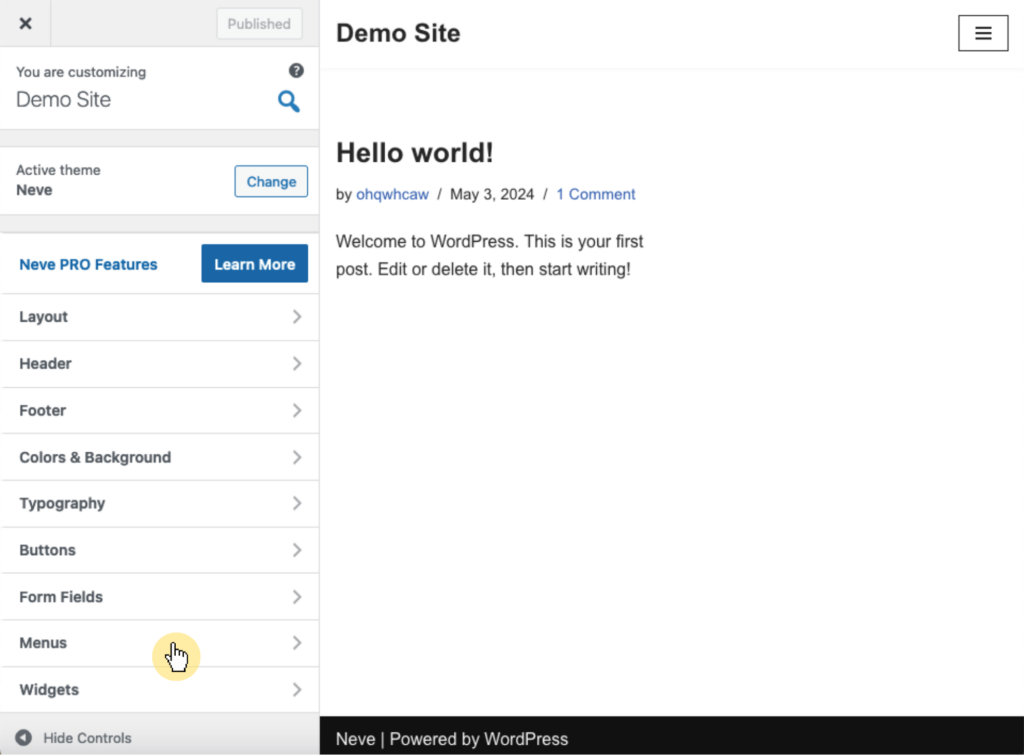
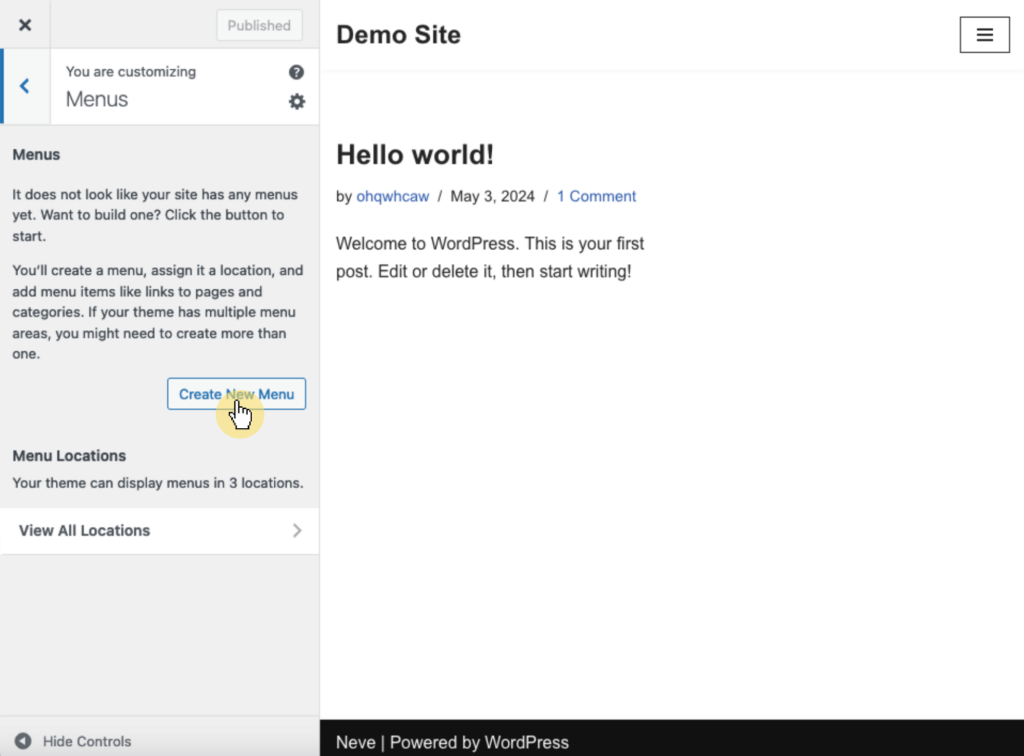
To create a navigation menu from the customize section, do the following:
Nice and easy! 🙂
While creating your navigation menu is important, ensuring your website is hosted on a reliable platform is equally important.
This is where Hostinger shines, offering unparalleled hosting solutions tailored to your needs.

Discover the Hostinger advantage for your WordPress site:
By choosing Hostinger, you’re not just opting for a hosting service:
You’re investing in a partner committed to delivering speed, reliability, and enhanced performance for your website.
To add a menu item from the WordPress menu editor:
You may also want to add categories, custom links, or specific pages/posts — options you can see by exploring the add menu items section.
To add a menu item from the customize section:

Add here the items you think would be most beneficial if a visitor can access them right away through the website menu.
To organize your menu from the menus section under appearance, drag and drop menu items to reorder them.
If you want to create a submenu, drag an item slightly to the right under another item.
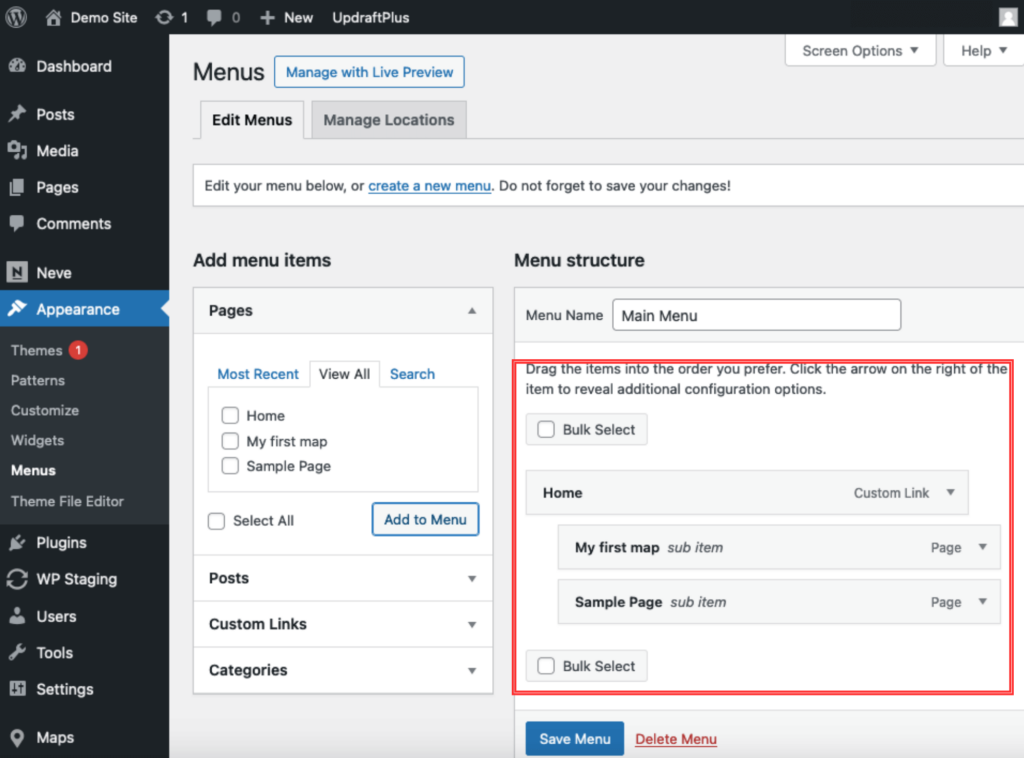
Having a submenu is a nice way to organize the menu items especially when there’s an obvious hierarchy to them.
After doing all those steps, your menu should look like this:
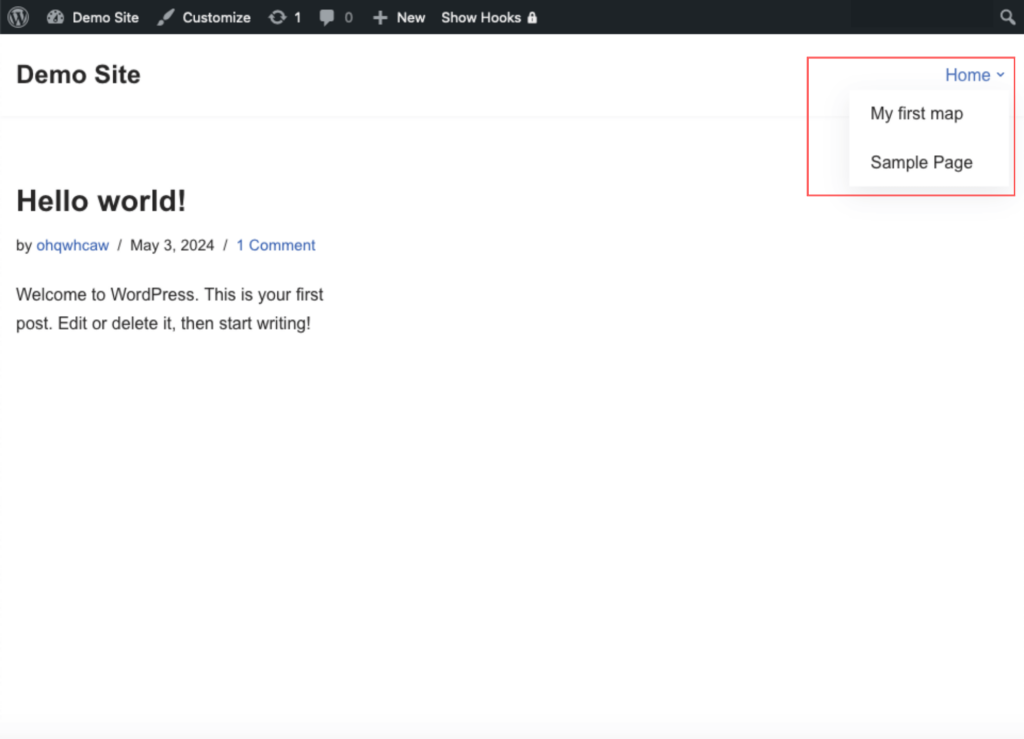
Well, it looks simple since this is only a demo — but once it’s fully populated, it looks good together with the theme you installed.
Another approach to adding a menu involves the use of plugins, which are useful for creating complex navigation structures like mega menus.
Fortunately, there are a lot of plugins available for this which offer extended functionalities beyond the default WordPress menu settings.
👉 Related: Best WordPress Mega Menu Plugins: Overview + Key Features
A good example of that is the Max Mega Menu plugin:
Search for it in WordPress and then install and activate the plugin:
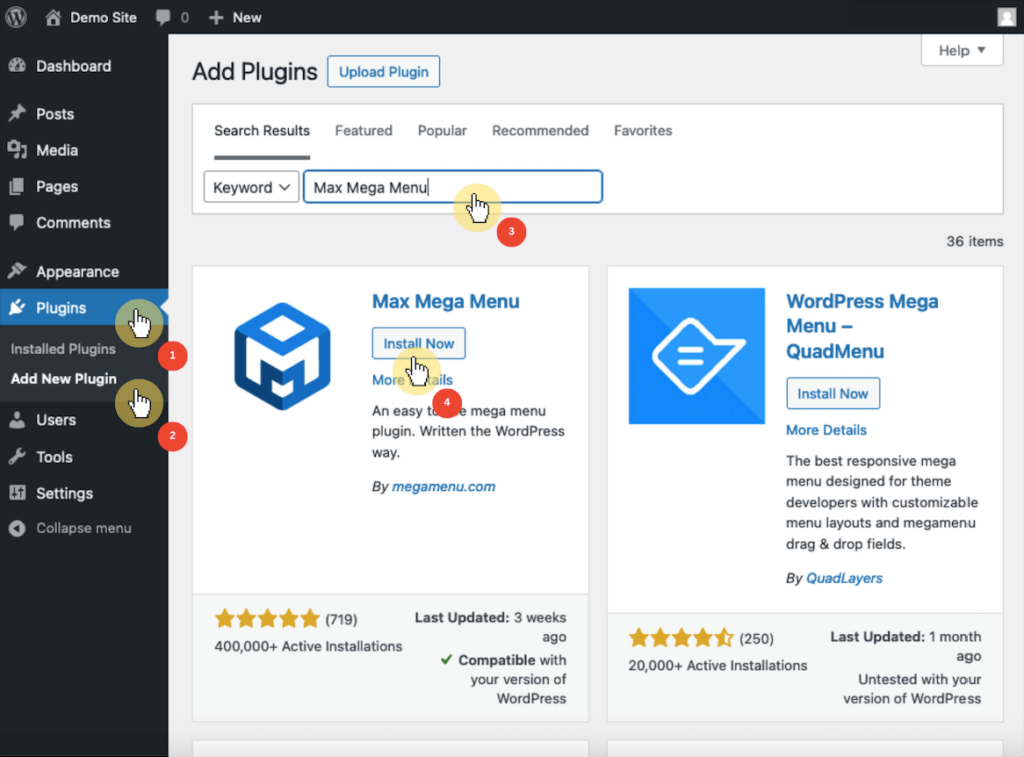
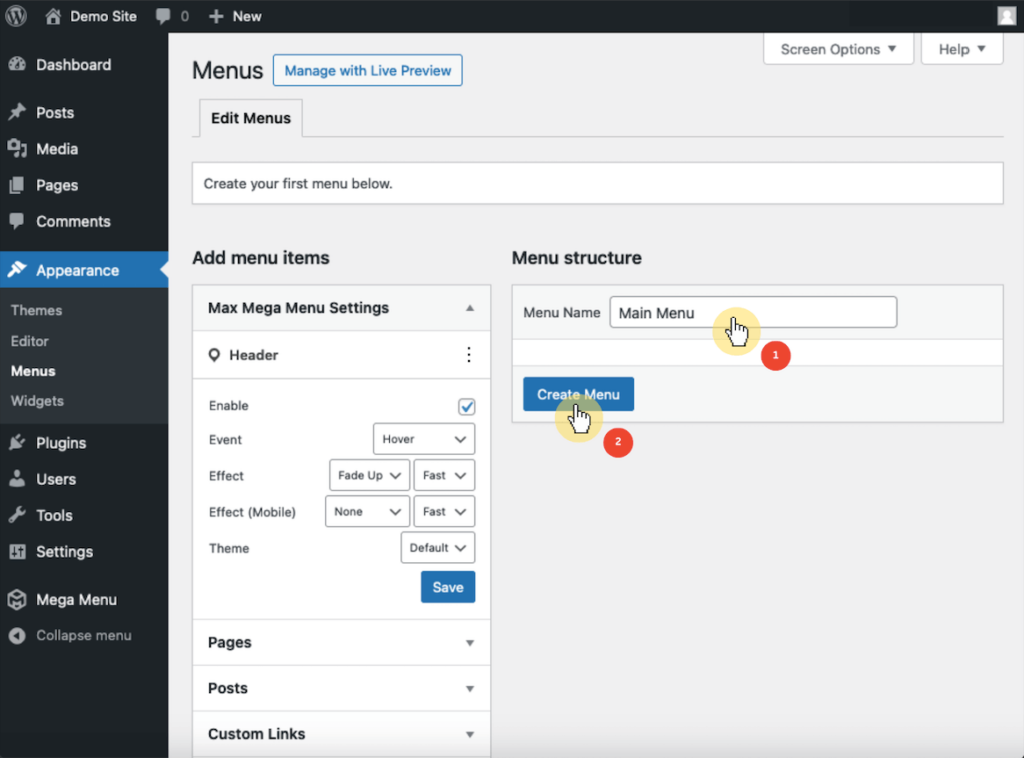
This process integrates the Max Mega Menu plugin into your WordPress dashboard under the appearance > menus page.
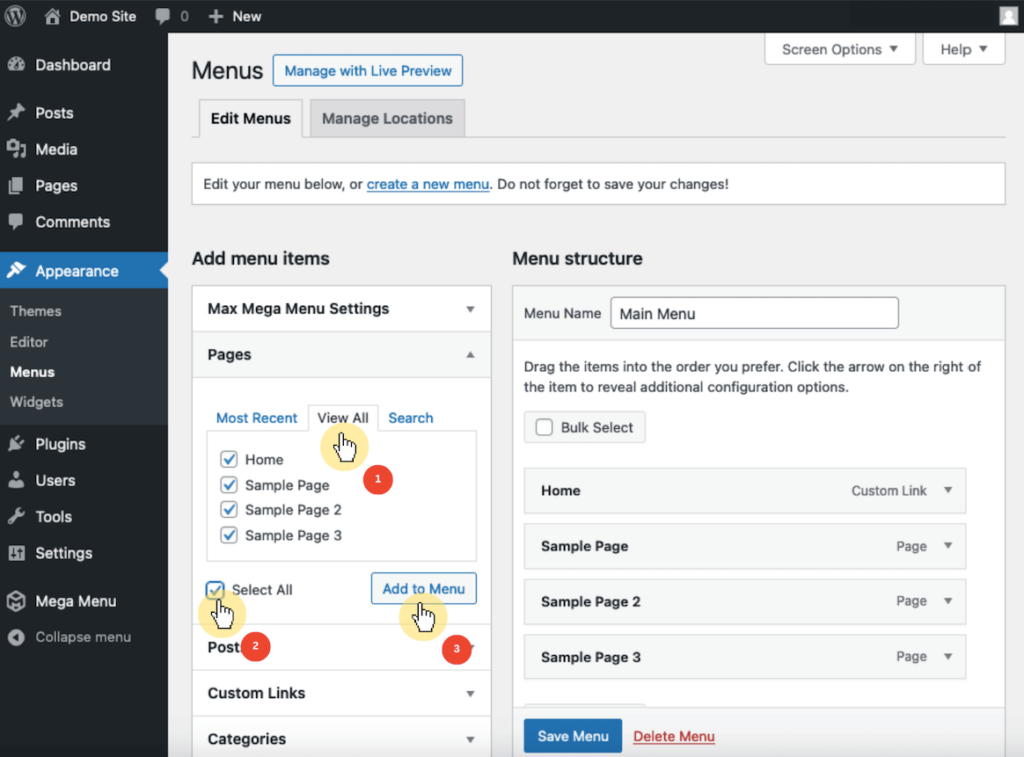
At the top of the menu editor page, enter a name for your new menu in the menu name box > click the create menu button to start your new menu.
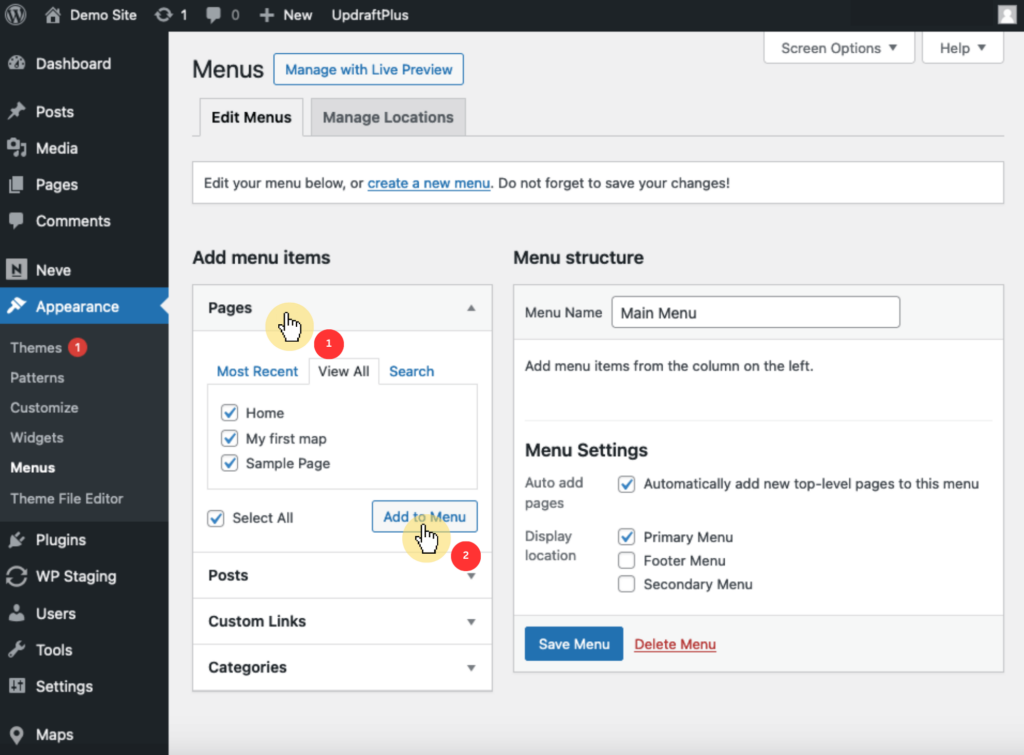
To add pages to the menu, click on the view all tab to display all your site’s pages.
Then check the boxes next to the pages you want to include in your menu> click the add to menu button.
This part is quite similar to creating a regular menu.
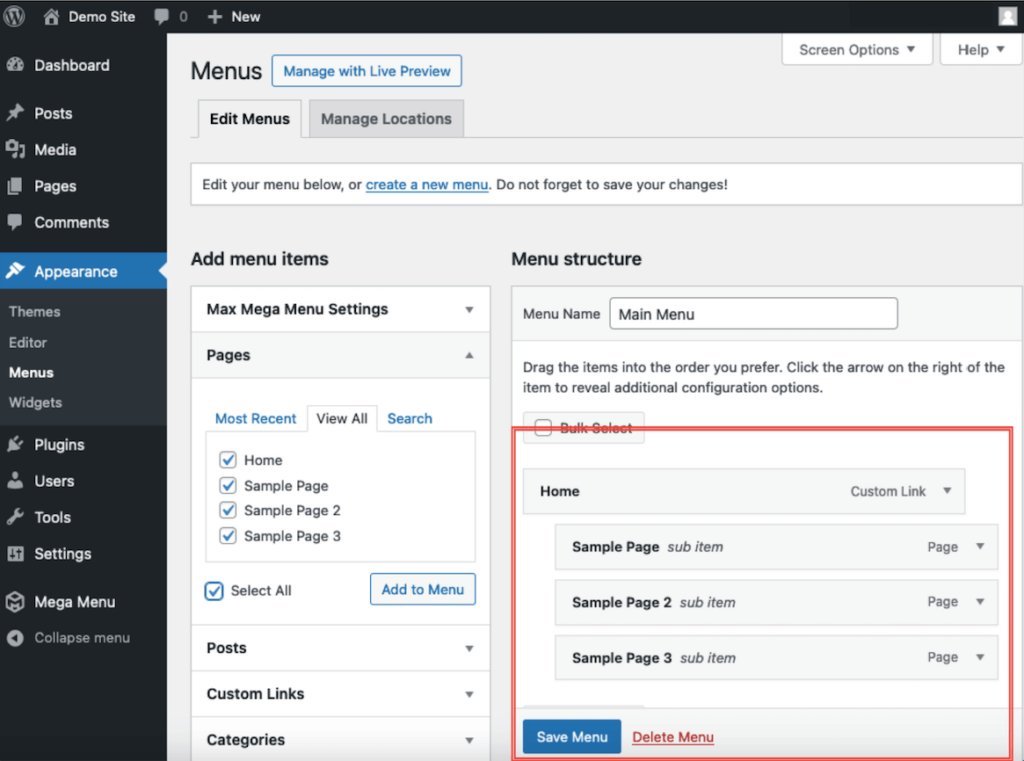
In the menu structure section, drag and drop the menu items to reorder them according to your preference.
To create subitems, simply drag a menu item slightly to the right beneath another item, shaping a drop-down menu effortlessly.
Scroll down to the bottom where you see the display location and select the location where you want the menu to appear.
Themes like the Astra theme might have options like primary menu, footer menu, etc. — in this example, you would only see the header option.
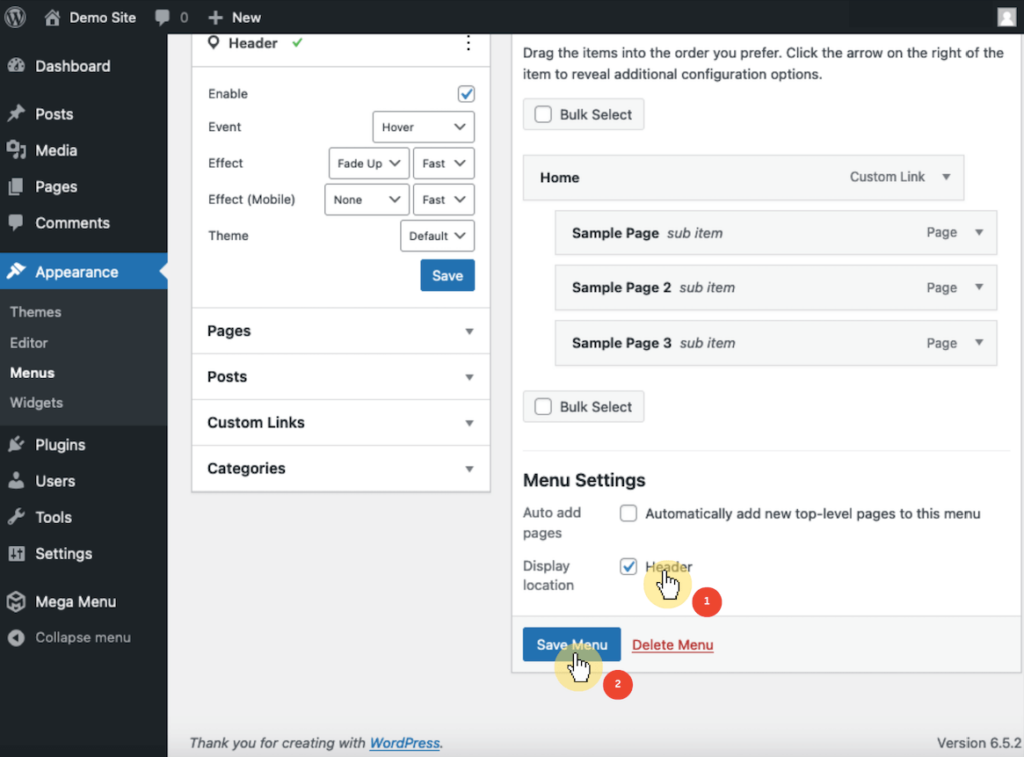
Once you’re satisfied with your menu’s structure and location, click the save menu button to apply the changes.
You can also create custom menu themes or modify existing ones using the theme editor under mega menu > menu themes.
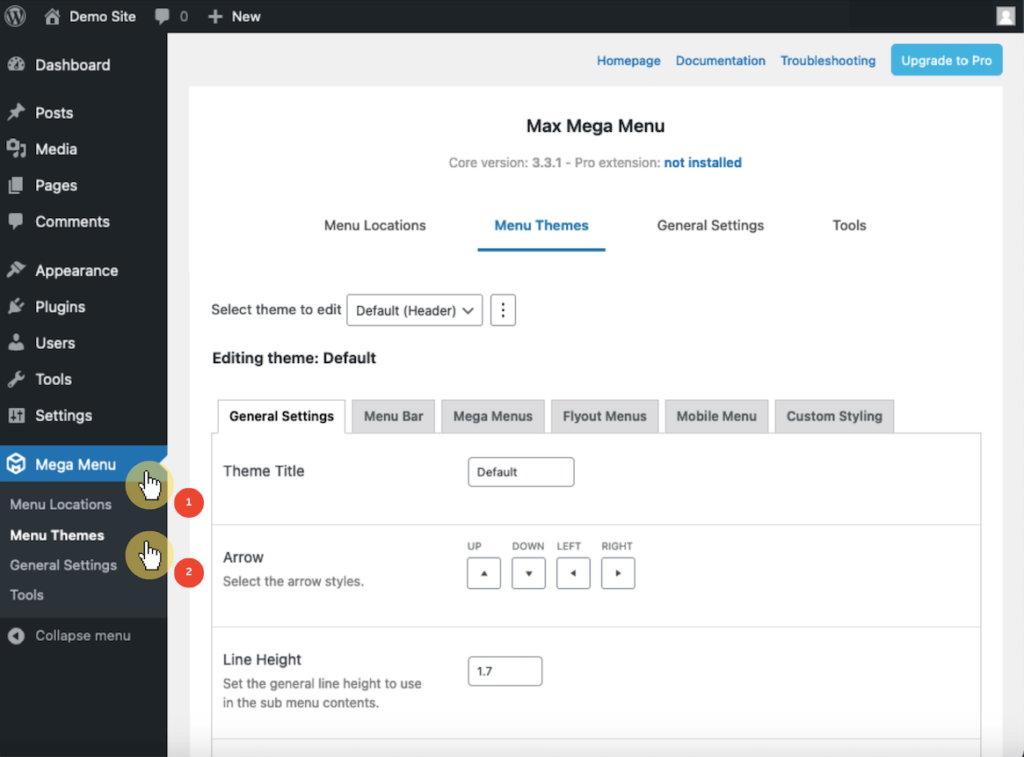
This editor allows you to fine-tune the appearance of your menus, including transitions, background colors, and item styling.
Once you’ve created or edited a theme, apply it to your menu through the appearance > menus settings.
This final method leverages the capabilities of theme customizers and page builders, which provide a more intuitive and visual approach to menu design.
For example, here’s how the header builder in Elementor looks like:
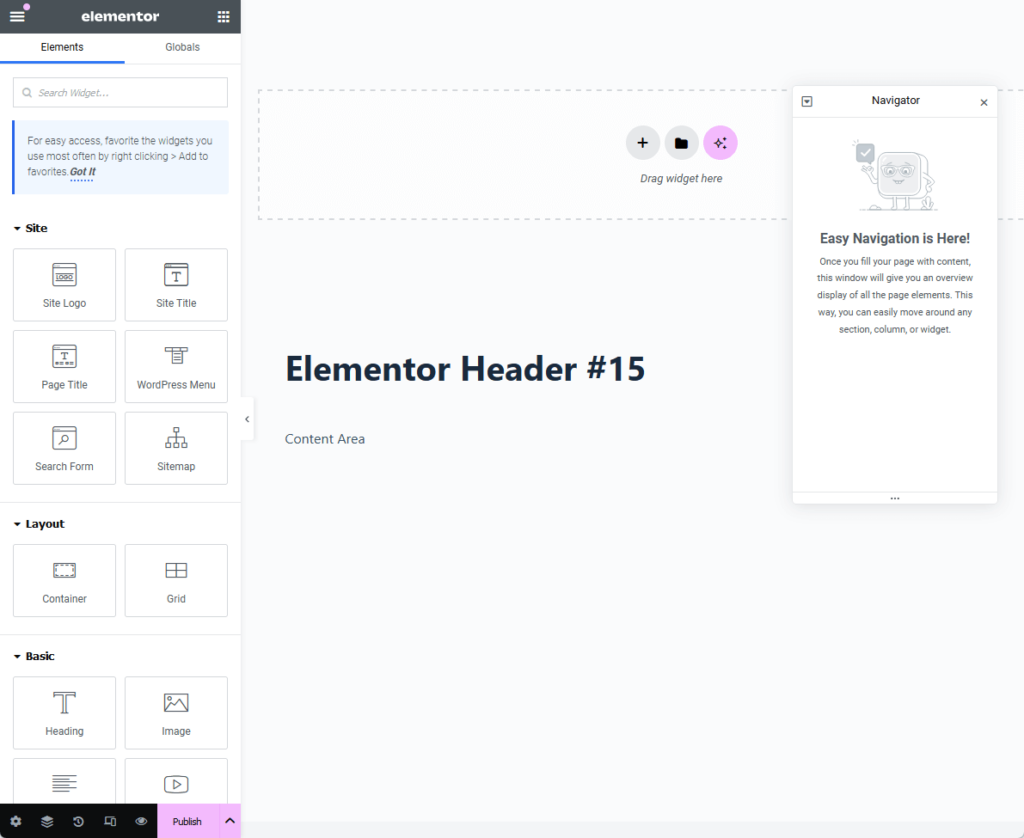
You can basically add different components to the header, decide on the layout, and basically create a mega menu.
For those who prefer a more hands-on approach, this is perfect since they provide a drag-and-drop interface that simplifies the menu creation process.
This method is particularly beneficial for users who desire a high degree of flexibility and control over their site’s navigation design.
When designing menus for your WordPress site, it’s important to prioritize responsive design to ensure that your menus function seamlessly across mobile devices.
Many themes and plugins offer responsive menu options that adapt to different screen sizes, maintaining usability and design integrity.
Additionally, incorporating accessibility best practices is essential for creating menus that are inclusive and navigable for all.
Wrapping up, let’s take your website design to the next level with premium Elementor template kits.
Darrel Wilson offers an incredible deal to simplify your web design process.

Secure lifetime access to all premium Elementor template kits:
This offer allows you to maintain a stylish and updated website effortlessly.


