Not sure how to fix this problem?
By the end of this guide, you will learn different methods to fix the “link you followed has expired” error.
Here’s what we’ll talk about here:
Ready? Let’s get started.
Ever wondered why WordPress sometimes throws the error “The link you followed has expired”?
This occurs primarily when you attempt to upload a WordPress theme or plugin that exceeds the maximum file size, PHP memory, or execution time limits set by your hosting provider.
These limits are in place to ensure server performance and security, but they can sometimes be too restrictive, especially for larger files.
With that, here are methods you can use to fix this issue:
When encountering errors like this, your web hosting provider plays a crucial role in your site’s performance and stability.
While resolving such issues is essential, it’s equally important to consider the reliability of your hosting service.

Discover the Hostinger advantage for your WordPress site:
Choosing Hostinger means you’re investing in a hosting partner dedicated to providing superior services.
Using WPCode to fix the error involves increasing the server limits for file upload size, PHP memory, and execution time directly from your WordPress dashboard.
I recommend this as it avoids the need to manually edit core WordPress files like functions.php, .htaccess, or php.ini, which can be risky and complex for beginners.
WPCode allows you to insert custom code snippets safely and efficiently to ensure that your changes are preserved even when you update or change your theme.
Here’s how to do it:
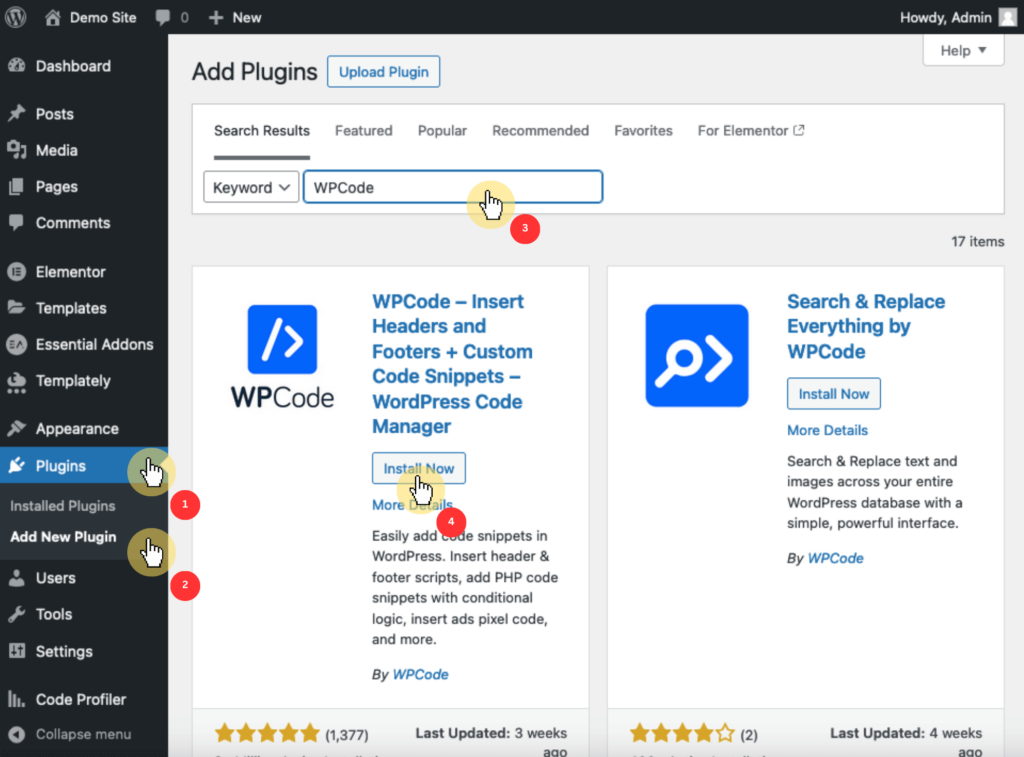
From your WordPress admin panel, navigate go to plugins > add new and search for “WPCode – Insert Headers and Footers + Custom Code Snippets”.
After that, click install now and then activate.
Nice! 🙂
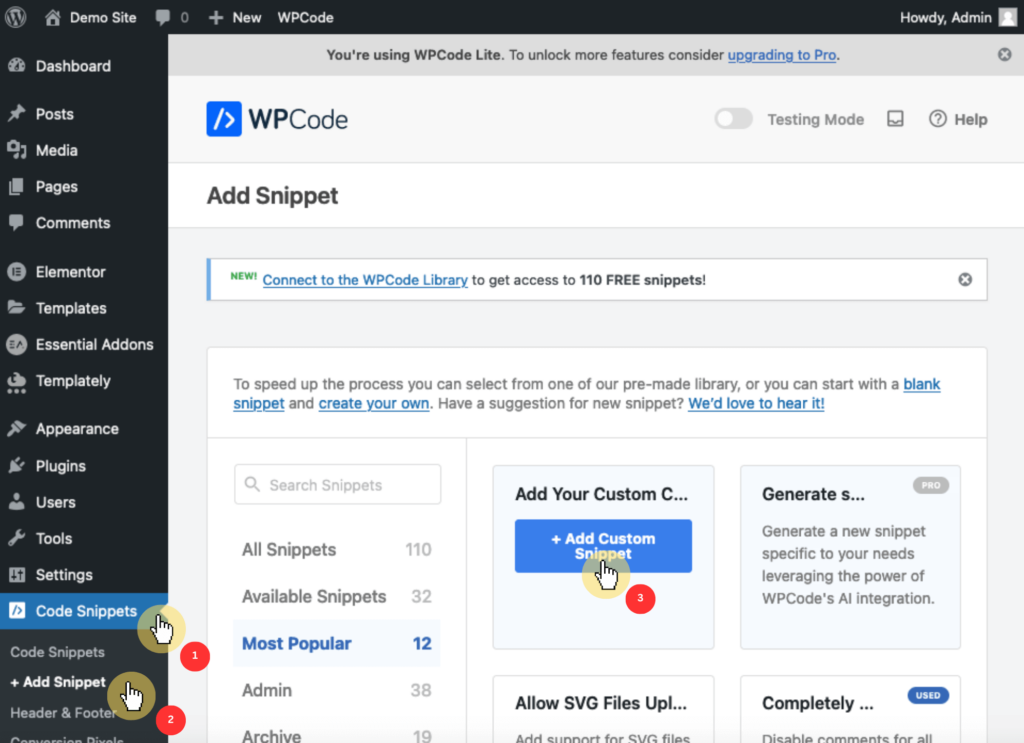
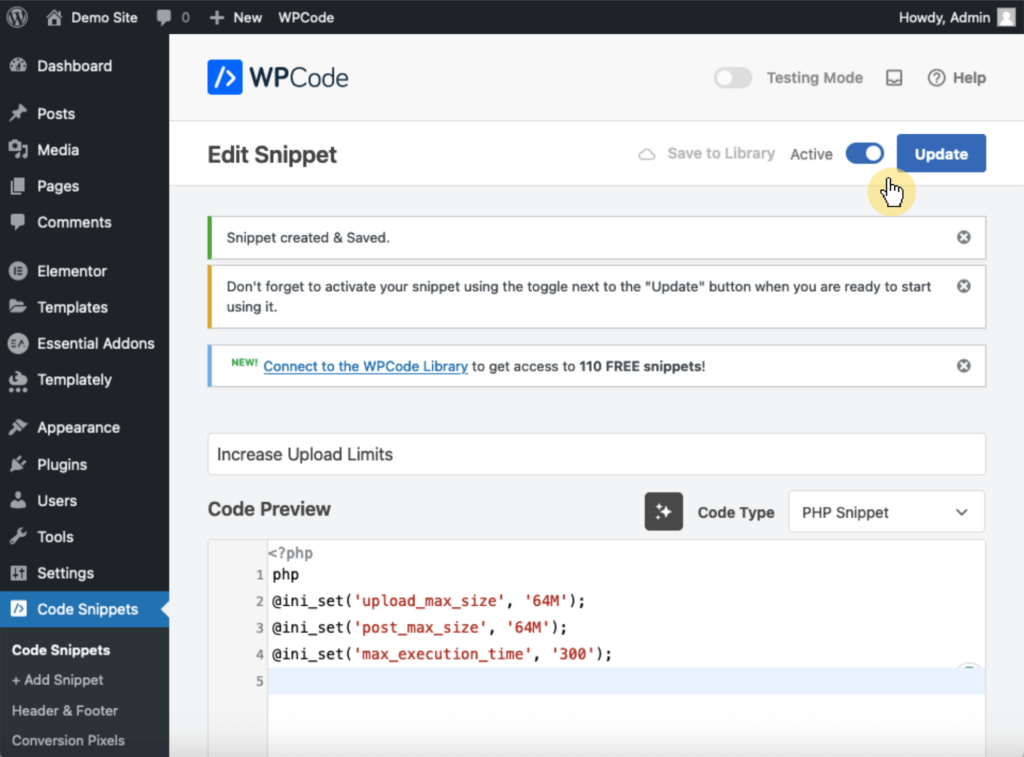
Go to the WordPress admin sidebar, select code snippets, then choose add snippet.
Afterward, click on add custom snippet to input your custom code.
Next, configure the snippet by entering a name (like “increase the upload limits) and selecting PHP snippet from the code type dropdown menu.
Then, insert the code by copying and pasting the following into the code preview field:
php
@ini_set('upload_max_size', '64M');
@ini_set('post_max_size', '64M');
@ini_set('max_execution_time', '300');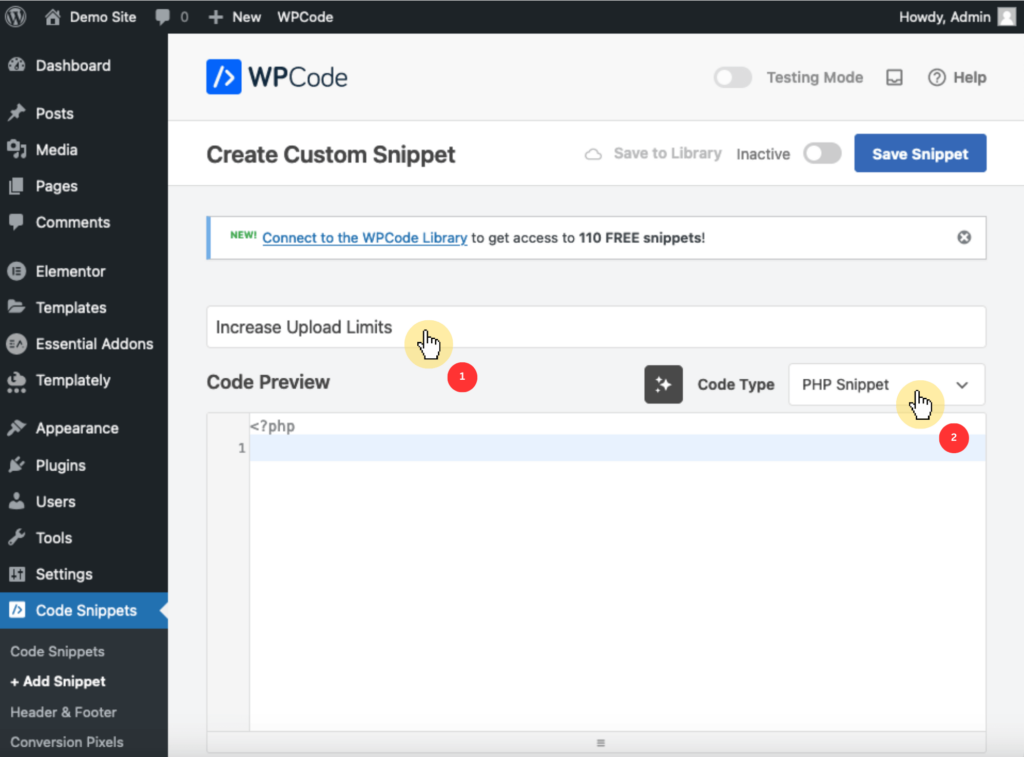
This code sets the maximum file upload size to 64MB, allows POST data up to 64MB, and extends the maximum execution time for PHP scripts to 300 seconds.
Adjust these values as needed.
To save and activate the snippet, click save snippet > toggle the inactive switch to active:
Pretty easy, right? 🫡
Increasing the PHP memory limit in the wp-config.php file helps prevent WordPress from running out of memory.
This method directly affects your WordPress core configuration by allocating more memory for PHP processes to ensure that your site can handle larger files.
This is particularly useful for sites with extensive multimedia content or numerous plugins that require more resources than the default settings allow.
Here’s how to fix the error using this method:
To reach the website’s root directory, use an FTP client such as FileZilla or the File Manager tool in your web hosting control panel (cPanel).
Navigate to the root directory of your WordPress installation, typically named public_html.
In the root directory, find the wp-config.php file.
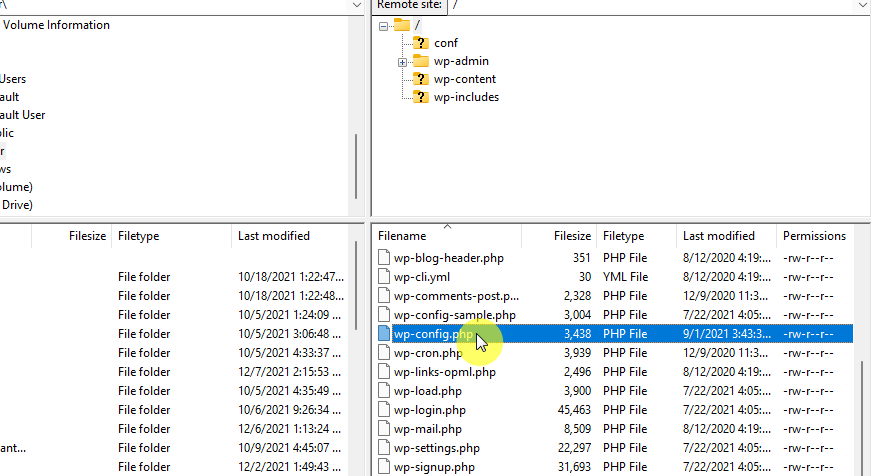
This file contains your basic WordPress configuration settings.
To edit the wp-config.php file, open it for editing using a text editor.
Then, add the following line of code just before the line that says /* That's all, stop editing! Happy blogging. */:
php
define('WP_MEMORY_LIMIT', '256M');
This code increases the PHP memory limit to 256MB.
⚠️ Note: You can adjust this value to a higher limit if needed, but starting with 256MB is generally sufficient for most sites.
To save and upload the file, save the changes to the wp-config.php file, then, if you used an FTP client, upload the modified file back to your server.
To verify the changes, visit your WordPress site and try uploading the theme or plugin again to see if the error is resolved.
Nice and easy! 🙂
The .htaccess file is a powerful configuration file used by the Apache webserver to manage high-level settings for your website.
By editing this file, you can control various server directives, including file upload size, post size, and script execution time.
This method is particularly useful for users on shared hosting plans where access to the php.ini file or server-level settings might be restricted.
Here’s how you do it:
Similar to the previous method, first access the WordPress root directory by using an FTP client like FileZilla or the File Manager app in your cPanel.
Next, go to the root directory of your WordPress installation, which is usually named public_html.
In the root directory, find the .htaccess file:
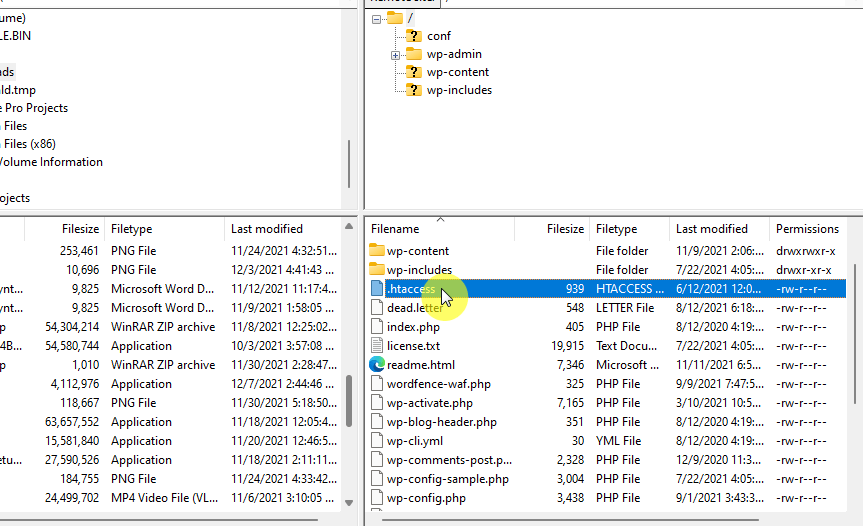
If it’s not visible, make sure your file manager or FTP client is configured to show hidden files.
To edit the .htaccess file, open it for editing using a text editor.
Add the following lines of code at the end of the file:
php_value upload_max_filesize 64M
php_value post_max_size 64M
php_value max_execution_time 300
php_value max_input_time 300
This code sets the maximum file upload size and POST size to 64MB each, extends the PHP script execution time to 300 seconds, and also increases the maximum input time to 300 seconds.
Adjust these values as needed.
Save the changes to the .htaccess file, and, if you used an FTP client, upload the modified file back to your server.
The php.ini file is the primary configuration file for PHP on your server, controlling various settings that dictate how PHP behaves.
This method directly impacts how PHP processes execute, making it a powerful way to manage resource allocation for your WordPress site.
By increasing the limits in this file, you can resolve issues like “The link you followed has expired” by allowing larger file uploads and extending the time PHP scripts can run.
Here’s how:
Just like with the previous methods, connect to your website’s server using an FTP client such as FileZilla or your hosting provider’s File Manager.
Go to the root directory of your WordPress installation, usually named public_html, and find the php.ini file.
If it’s not present, you may need to create a new file named php.ini.
To edit the php.ini file, open it for editing using a text editor.
Add or modify the following lines to increase the relevant limits:
upload_max_filesize = 64M
post_max_size = 64M
max_execution_time = 300
This code raises the maximum file upload size to 64MB, sets the maximum POST data size to 64MB, and extends the maximum execution time for PHP scripts to 300 seconds.
Adjust these values as needed based on your site’s requirements.
To save and upload the file, save the changes to the php.ini file.
If you created a new file, make sure it’s saved in the root directory where PHP scripts are executed, typically the root directory of your WordPress installation.
Upload the modified file back to your server if you used an FTP client.
Depending on your hosting setup, a web server restart may be necessary for the changes to take effect.
This can usually be done through your hosting control panel. 🙂
The methods earlier should work in solving the error.
If, for any reason, the issue persists, you can try updating your PHP version, which can improve your website’s performance and resolve compatibility issues.
To update your outdated PHP version, log in to your hosting account, navigate to the cPanel, and select the latest PHP version from the PHP Version section.
You should also look for potential plugin conflicts, as they can lead to various issues, including the “The link you followed has expired” error.
If the error message persists after trying the above methods, contacting your hosting provider is a practical next step.
Your hosting provider can increase the PHP memory limit, maximum file upload size, and maximum execution time, or offer other solutions to fix the error.
Wrapping up, the key aspect of creating an engaging website is utilizing high-quality design templates.
That’s where Darrel’s Elementor Template Kits come into play, offering a comprehensive solution for all your design needs.

Secure lifetime access to all premium Elementor template kits:
Grab these template kits to simplify your web design process and keep your site modern and professional.