Are you looking to enhance your WordPress site’s security by mastering IP address blocking?
By the end of this guide, you will know how to implement robust IP address blocking to elevate the security of your site.
Here’s a sneak peek of what you will uncover:
Ready to secure your site? Let’s dive in!
Every device that connects to a network utilizing the internet protocol is identified by a distinct numerical code, referred to as an IP address.
It serves as a device’s identifier and allows it to send and receive data over the internet, ensuring that the information reaches the correct destination.
Here are reasons why you might need to block some IP addresses:
| Reason | Description | Benefits |
| Preventing spam and malicious attacks | Blocks proactive measures to safeguard your WordPress site from irrelevant content and harmful code. | Keeps the site clean, improves user experience, and enhances security. |
| Stopping unauthorized login attempts | Thwarts bots and malicious actors from guessing login credentials to gain unauthorized access to your site. | Maintains the integrity and security of your website; ensures only authorized access. |
| Reducing server load from known bad sources | Prevents IP addresses associated with DDoS attacks from overwhelming the server with high-volume requests. | Preserves bandwidth, ensures website speed and availability, and can reduce costs. |
Here’s an example:
In September 2023, Kuwait’s Ministry of Finance was the target of a phishing ransomware attack (here’s the source).
To counter this threat and prevent further damage, Kuwait swiftly isolated the Ministry and other government systems.
That was a clear example of how blocking or isolating IP addresses from which attacks originate can help protect critical infrastructure and prevent the spread of an attack.
Recognizing the need to block IP addresses underscores the crucial role of web hosting in your website’s security and performance.
Secure your WordPress site further with SiteGround’s robust hosting service, crafted for superior performance and enhanced security.

Here’s what you stand to gain with SiteGround:
With SiteGround, you’re not just choosing a hosting service — you’re choosing a partner dedicated to speed, stability, and superior performance for your website.
But how do you know what specific IP address to block?
Identifying the right IP addresses to block involves monitoring your website’s traffic and analyzing patterns.
There are two easy ways to do this:
If the suspicious IP addresses that you want to block are from the comments, there’s an easy way to do that (especially useful if moderate your comments).
From the admin dashboard, navigate to the comments section using any of the methods below:

👉 Related: How to Change the WordPress Admin Color Scheme (Guide)
You will see here a list of all the comments made on your website.
Each comment entry typically displays the following:
Here’s an example of Darrel’s site (spam section of the comments):
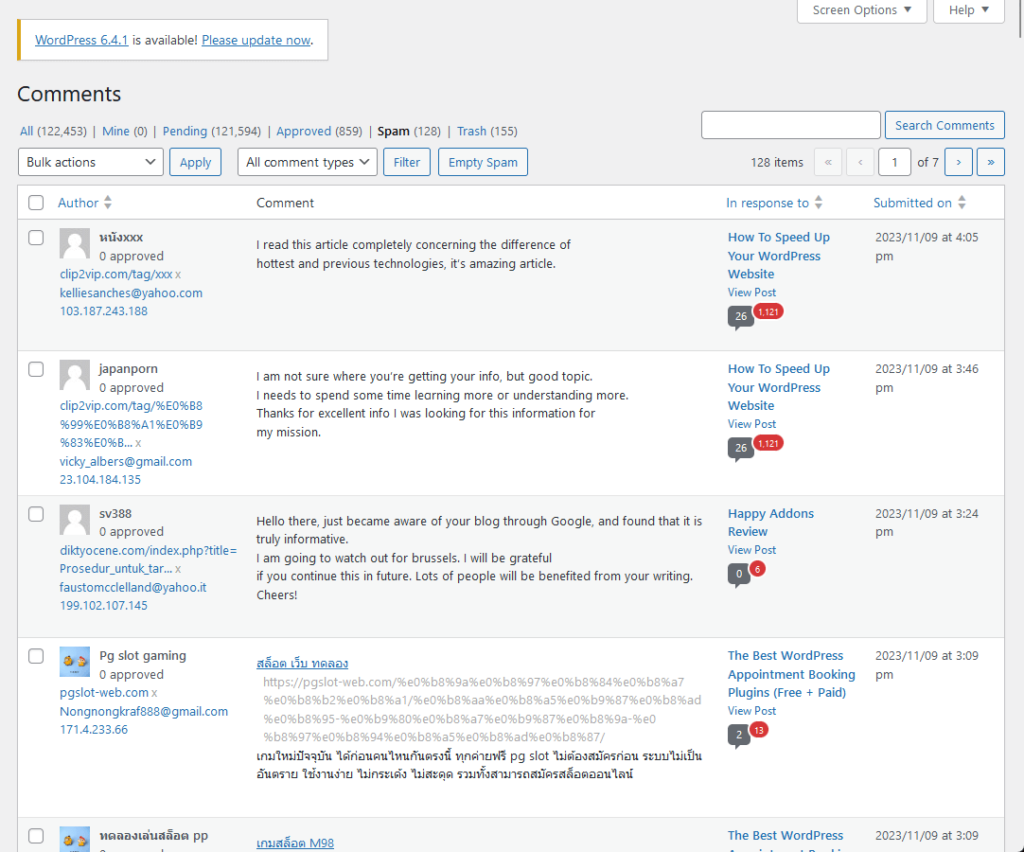
You can spot potential spammers by looking for patterns such as multiple comments from the same IP address in a short period, or comments containing irrelevant links and content.
Once you identify an IP address that seems suspicious, you can take steps to block it to prevent further spam or malicious activities on your site.
For this, you need to access your hosting account and get to the control panel admin (the button that will get you there varies from one hosting to another).
For example, with A2 Hosting, you can see the login button right in the client area:

👉 Related: A2 Hosting Review: Is the cPanel Integration Enough?
If you’re using a cPanel, follow these steps:
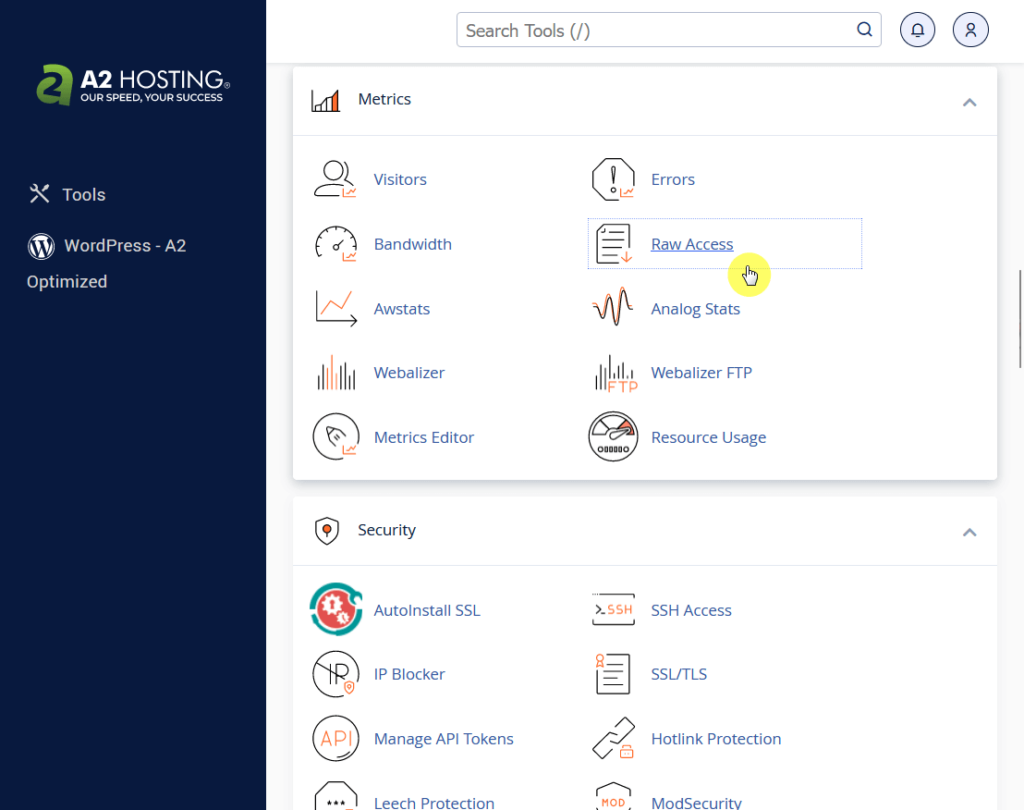
Within the raw access page:
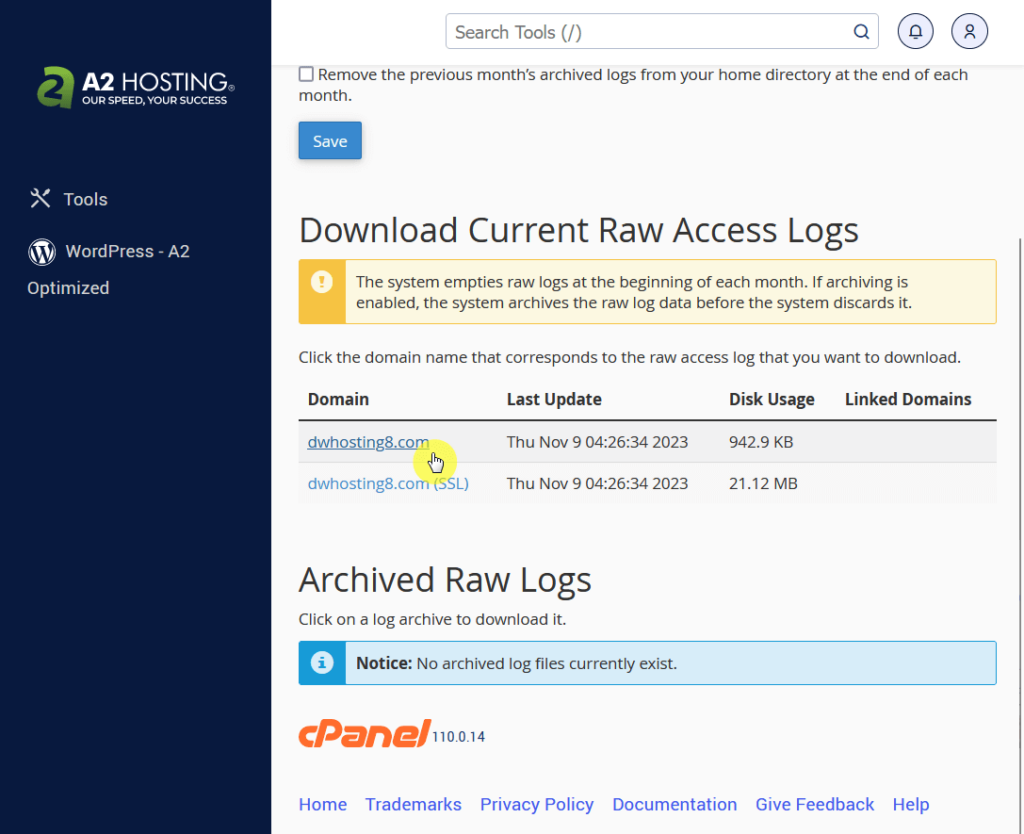
These logs contain detailed records of every request made to your website — including the following details:
By analyzing these logs, you can identify suspicious patterns, such as frequent access requests in a short time frame, indicating potential malicious behavior.
Now that you know how to find the IP addresses that may pose a threat to your WordPress site, how exactly do you go about blocking them?
Fortunately, blocking IPs is a straightforward process, and in this section, we will walk through the different techniques you can use to keep your site secure.
Disallowed comment keys in WordPress are essentially filters you set in the discussion settings to block comments containing certain words, names, URLs, emails, or even IP addresses.
If a comment contains anything listed in your disallowed comment keys, it won’t be published on your site.
Here’s how:
From your WordPress dashboard sidebar:

Once you get to the discussion options:
Make sure to enter one IP address per line:
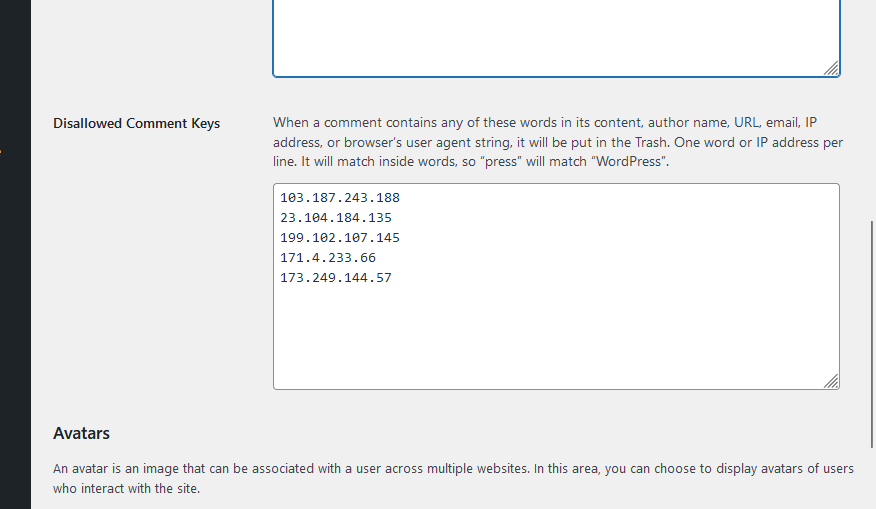
Now scroll down to the bottom of the page and click the save changes button:

The IP Blocker tool in cPanel is a feature that allows you to block specific IP addresses from accessing your website.
It’s a user-friendly method for implementing IP address bans without having to edit your site’s .htaccess file manually.
Here’s how:
To use the IP Blocker tool, log in to your cPanel account:

Enter the IP address on the box provided and click the add button:

Unfortunately, as you can see, you can only add 1 IP address at a time. If you use this method with lots of IP addresses, it will take you a lot of time.
After entering an IP address, you will see a success banner on another screen.
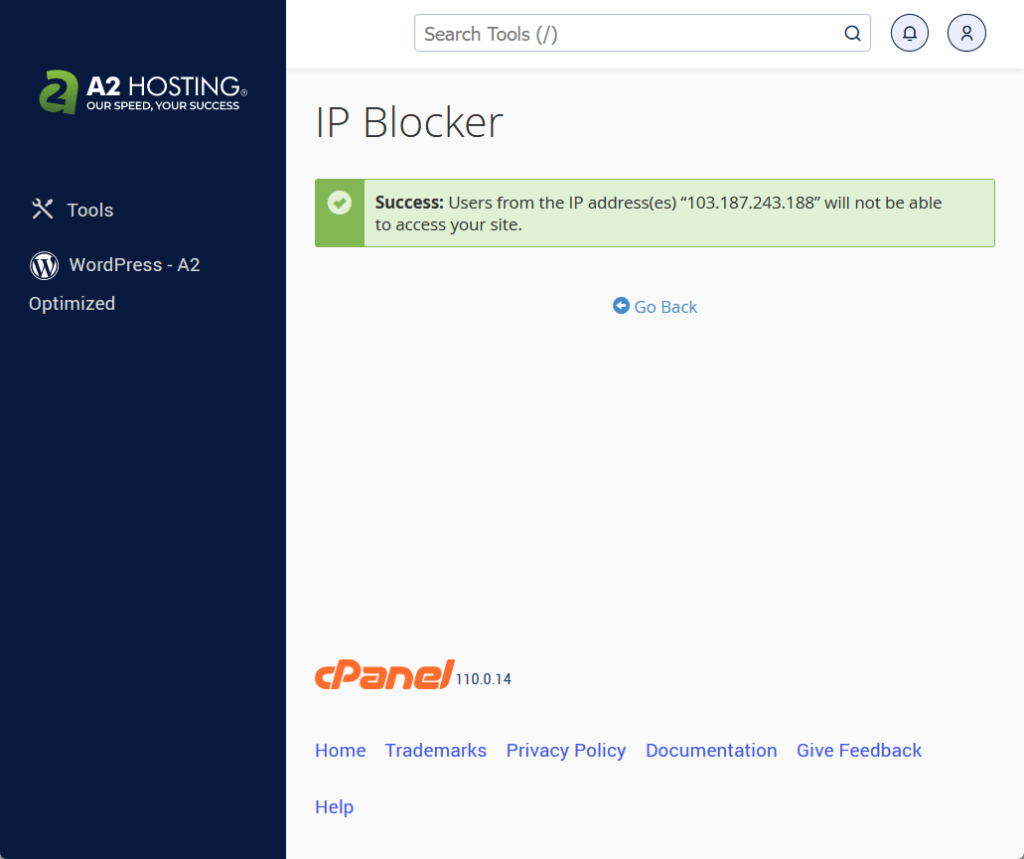
Once you’ve added the IPs to the block list, cPanel will automatically update the .htaccess file to deny access to these addresses, preventing them from interacting with your website.
If you go back to the previous page, the IP address you blocked will also show in the currently blocked IP addresses:

Manual blocking via the .htaccess file is a method that involves editing one of the core configuration files of your WordPress website.
The .htaccess file resides in the root directory of your WordPress installation and can be used to enforce various site-wide rules, including IP blocking.
Here’s how:
There are 2 ways you can access the .htaccess file:
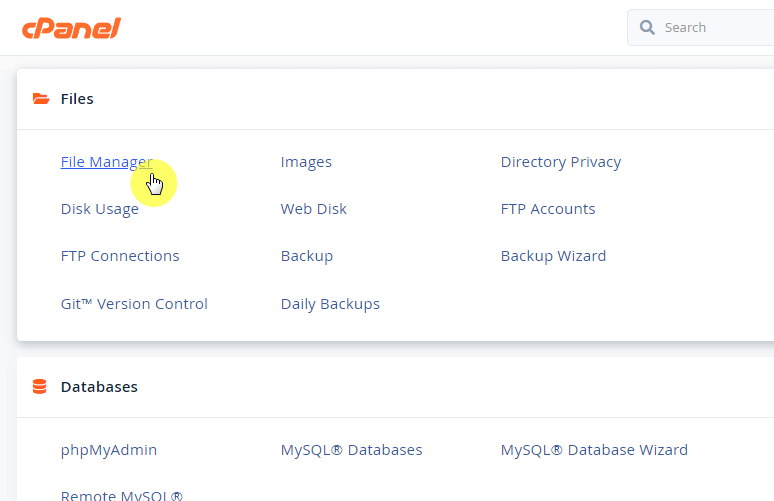
For the first option, this works if you have access to the cPanel — the file manager app (something like a Windows Explorer) is in the files section:
Unfortunately, if your web host doesn’t give you a file manager app, your only choice is to use a transfer protocol program like Filezilla.
It allows you to upload/download files to/from your server — like this:
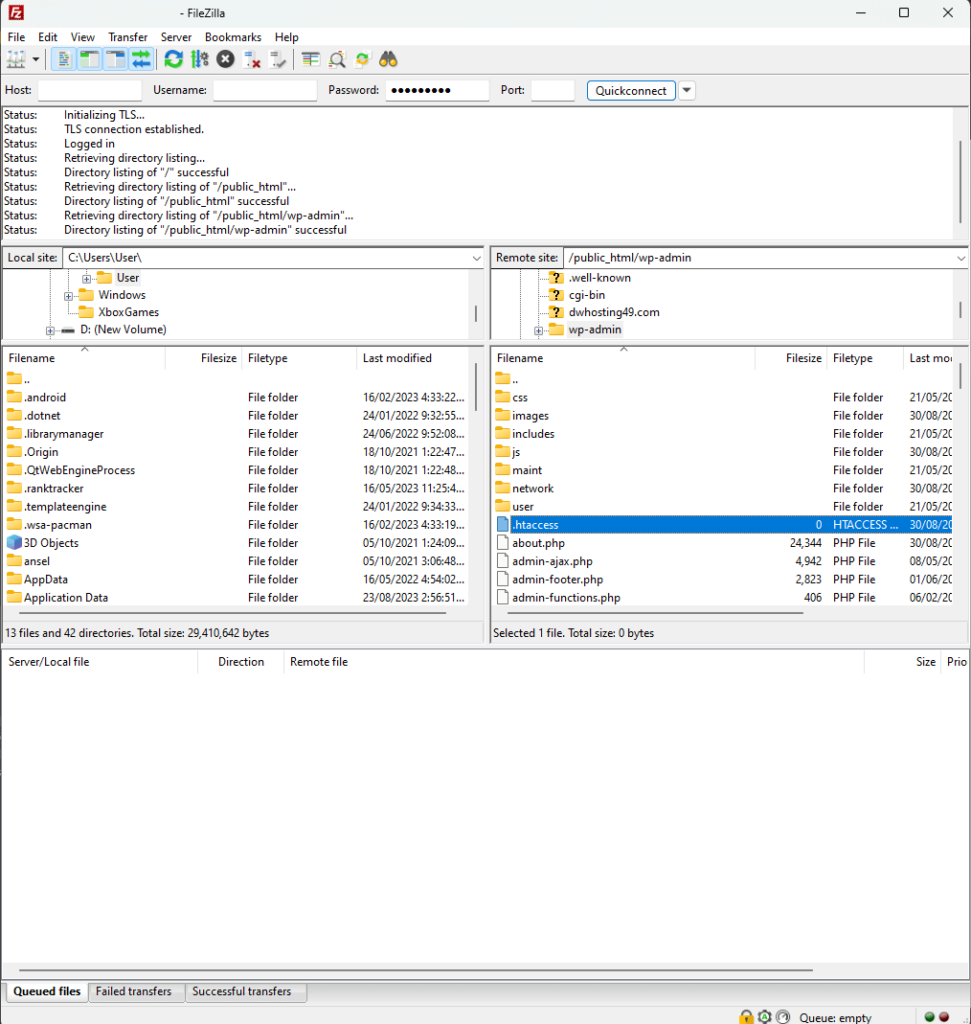
⚠️ Note: For file transfer protocol, you need the IP address and server credentials. Check with your hosting provider if you can’t find these details.
If you’re using a file manager app, you may be surprised to find the .htaccess missing. That’s because these kind of files are hidden by default.
You need to show hidden files like this (cPanel file manager):
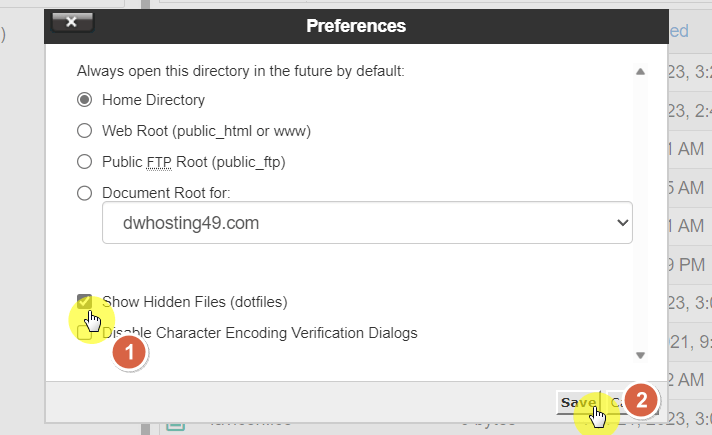
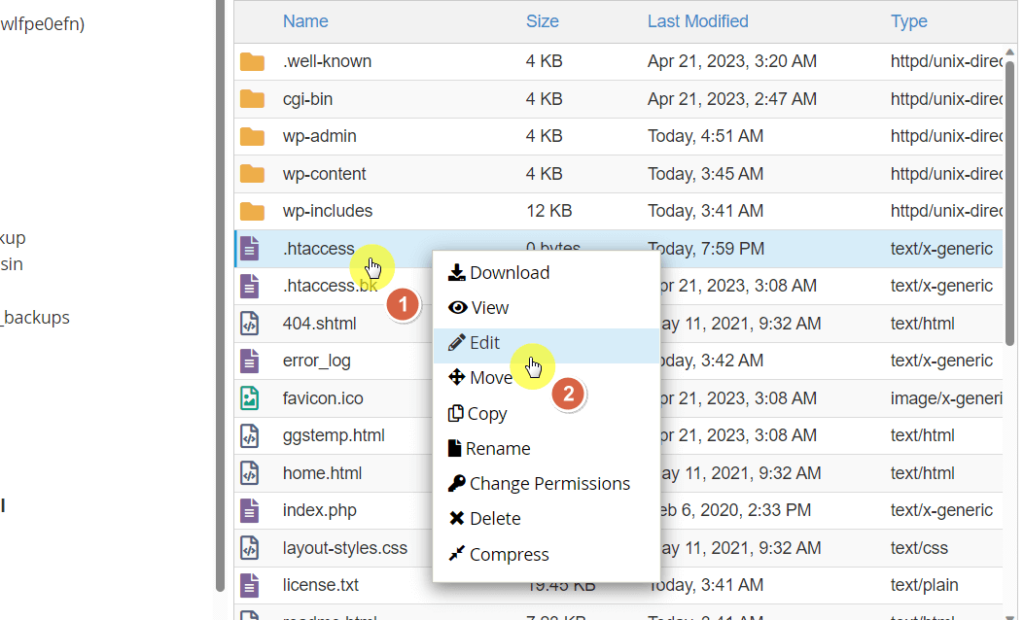
Can you see the file now?
If yes, all you have to do is right-click on it and select the edit option:
If you can’t find the file, then you need to create it.
Fortunately, it’s quite easy:
.htaccess⛔ Warning: After saving the file, check the folder where you saved it. If the name is .htaccess.txt, delete the .txt part.
Inside the notepad, enter the following script/code (with the IP addresses you want to block):
order deny,allow
deny from 103.187.243.188
deny from 23.104.184.135
deny from 199.102.107.145
deny from 171.4.233.66
deny from 173
allow from all
The IP addresses after deny from are the ones that will be blocked. Make sure to replace those IP addresses in the script/code.
If you check the file and you find that it’s there, there’s no need to delete it and create a new one — simply edit it out.
Similar to the steps above, simply paste the code and enter the IP address that you want to block:
order deny,allow
deny from 103.187.243.188
deny from 23.104.184.135
deny from 199.102.107.145
deny from 171.4.233.66
deny from 173
allow from all
If you’re using a program like Filezilla, you may have to download the file, edit it, upload it again and overwrite the existing file.
But if you’re using a file manager app, just copy and paste the code and save the changes:
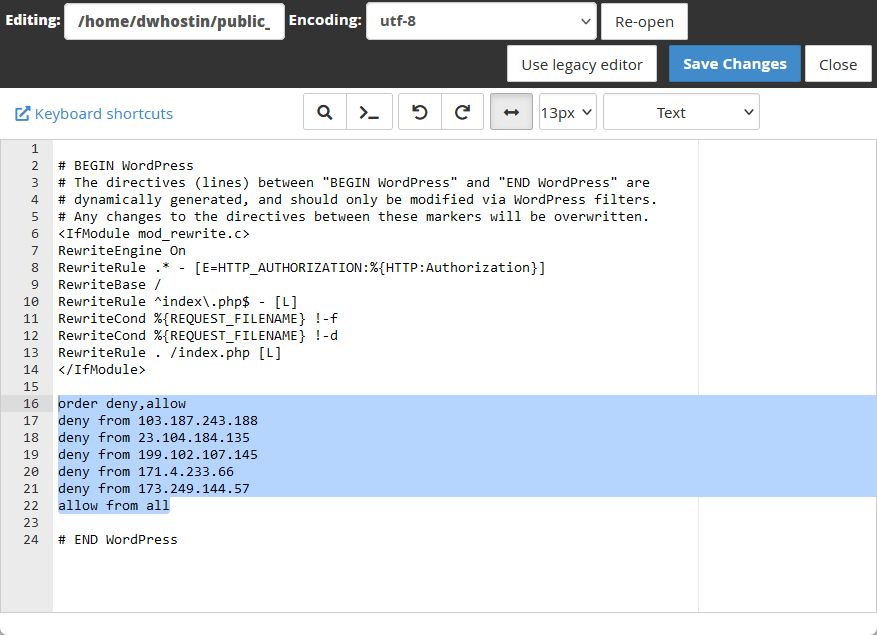
Make sure the paste the code below the #END WordPress line in the .htaccess file.
If you prefer to use plugins, there are a lot of options out there — including full-fledged WordPress security plugins.
But if you only need the IP address blocking functionality, there are three plugins you can use:
The IP Location Block plugin is designed to prevent unwanted access to your WordPress site by blocking visitors based on their geographic location.
It also includes specific protections to safeguard against certain types of online attacks.
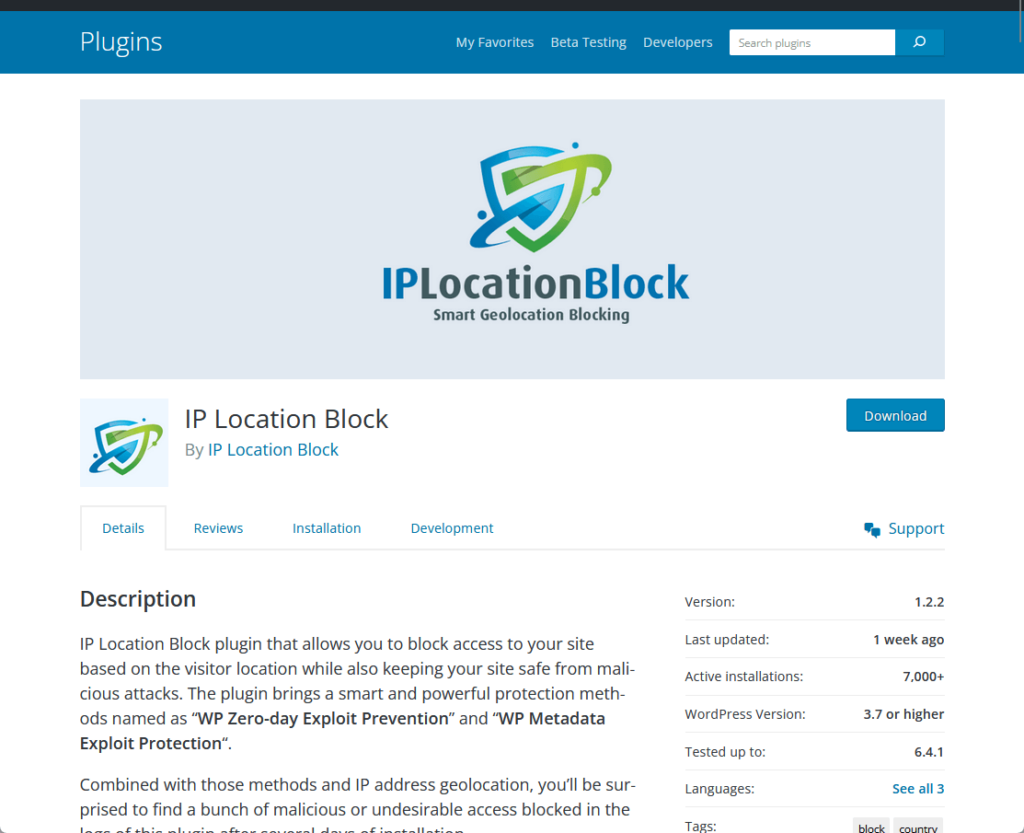
💻 Key features
This plugin focuses on giving you the power to block individual or ranges of IP addresses.
It’s a straightforward solution to enhance your site’s defense against persistent security threats.

💻 Key features
AIS: IP Blocker allows you to defend your WordPress site against spammers and hackers by blocking malicious IP addresses.
⛔ Warning: As of the time of writing, the plugin hasn’t been tested with the last few WordPress versions. No negative feedback though, but try at your own discretion.
💻 Key features
Securing your WordPress site by blocking IP addresses is a crucial step in safeguarding against cyber threats.
Armed with the tools to detect and block harmful IPs, either through manual edits or IP-blocking plugins, you can now enhance your site’s defenses.
Keep your digital space safe and ensure a seamless experience for your users with these straightforward security measures.
Wrapping up, it’s vital to address the often cumbersome and costly task of updating themes and templates.
Darrel Wilson offers a solution to simplify your web design endeavors.

Get lifetime access to all premium template kits crafted specifically for Elementor:
Embrace the ease of this offer and keep your site effortlessly stylish and up-to-date.


