Do you want to simplify your client interactions and secure sensitive data without breaking the bank?
By the end of this guide, you will be equipped to create a secure, efficient, and user-friendly client portal on your own.
Here’s what you will learn here:
Ready to elevate your client experience? Let’s dive in!
A client portal acts as a centralized hub where all project updates, messages, and documents are stored — eliminating clutter and confusion associated with email threads.
For example, if you’re a digital marketing agency, you can use the portal to share real-time SEO reports, campaign strategies, and even timelines with your clients.
The second pivotal reason is enhanced security.
A client portal provides a secure environment for sharing sensitive documents, protected by features like SSL certificates and data encryption.
For instance, if you’re a legal firm, you could securely share case files, legal documents, or even court appearance schedules with your clients through the portal…
All without worrying about data compromise.
Basically, a client portal not only simplifies interactions but also adds a layer of trust and confidentiality that clients highly appreciate.
Fortunately, creating a WordPress client portal doesn’t have to be expensive.
There are paid options available (more on this later). But if you’re starting out or the budget is tight, then starting with a free method is a great option.
Here are the steps:
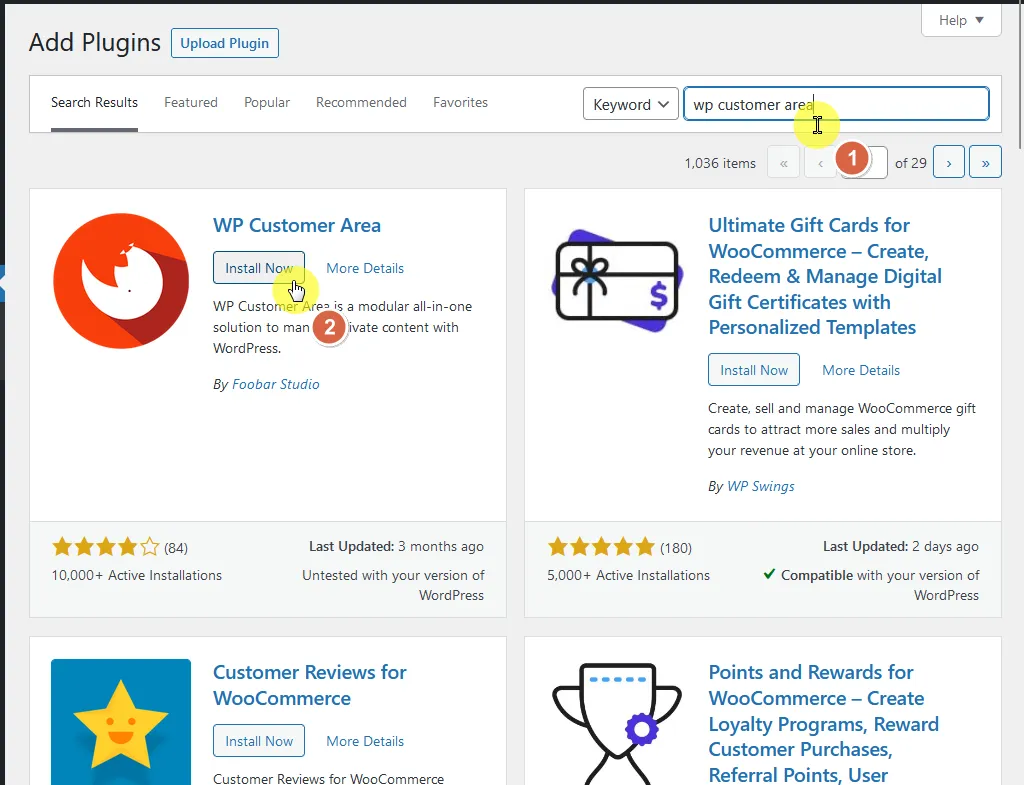
The plugin we will be using here is WP Customer Area. I will explain more about this plugin under the free options section.
Go to the add plugins page of the admin dashboard:
After activating the plugin, the setup wizard will kick in.
All you need to do is click on the create pages and menu button:

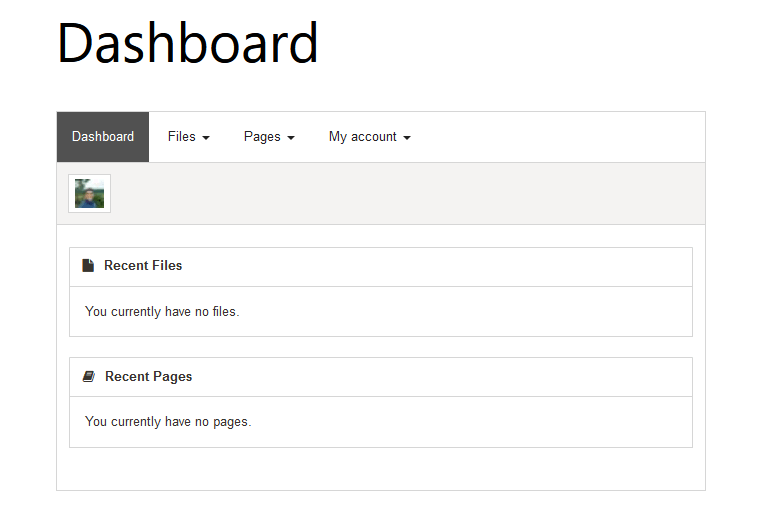
This will then create various pages like the following:
Here’s an example of a page that was created:
In addition to pages, the plugin will also create a menu. If you want to check it, you can go to appearance > menus on the WordPress dashboard.
Back to the setup wizard, the next step is to click the configure permissions button:
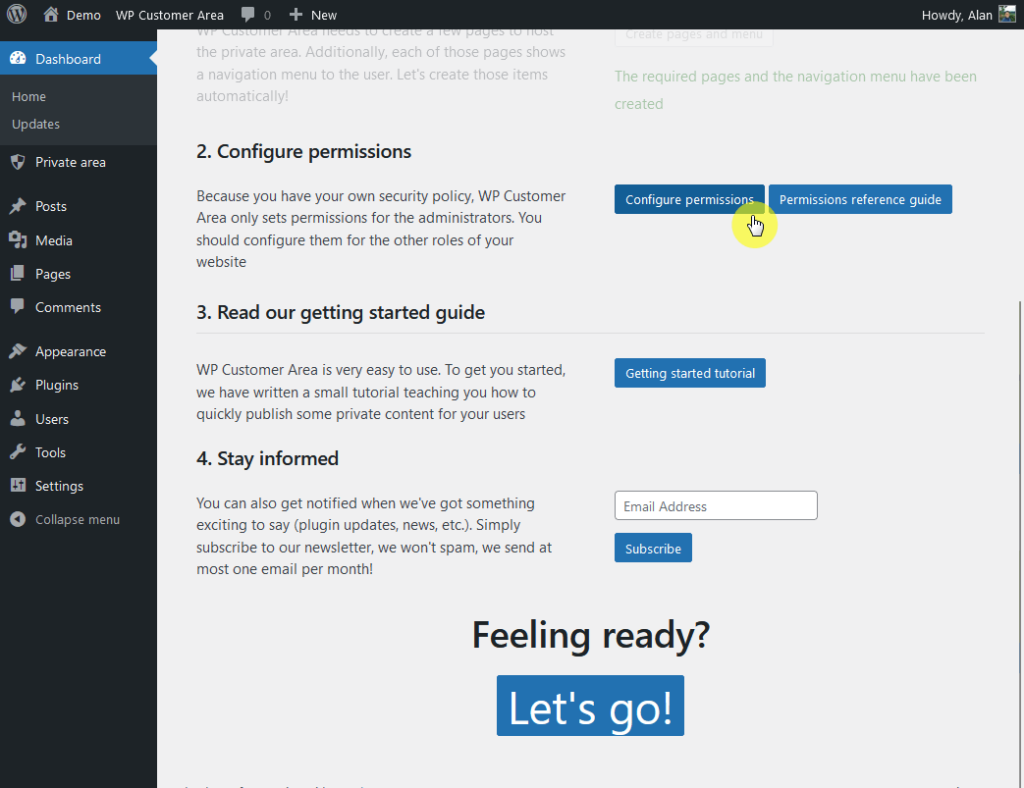
The plugin will only set the necessary permissions for site administrators. For the rest, you will have to grant them yourself.
After clicking the button, the plugin will bring you to another page where you can adjust the permissions granted to other types of users.
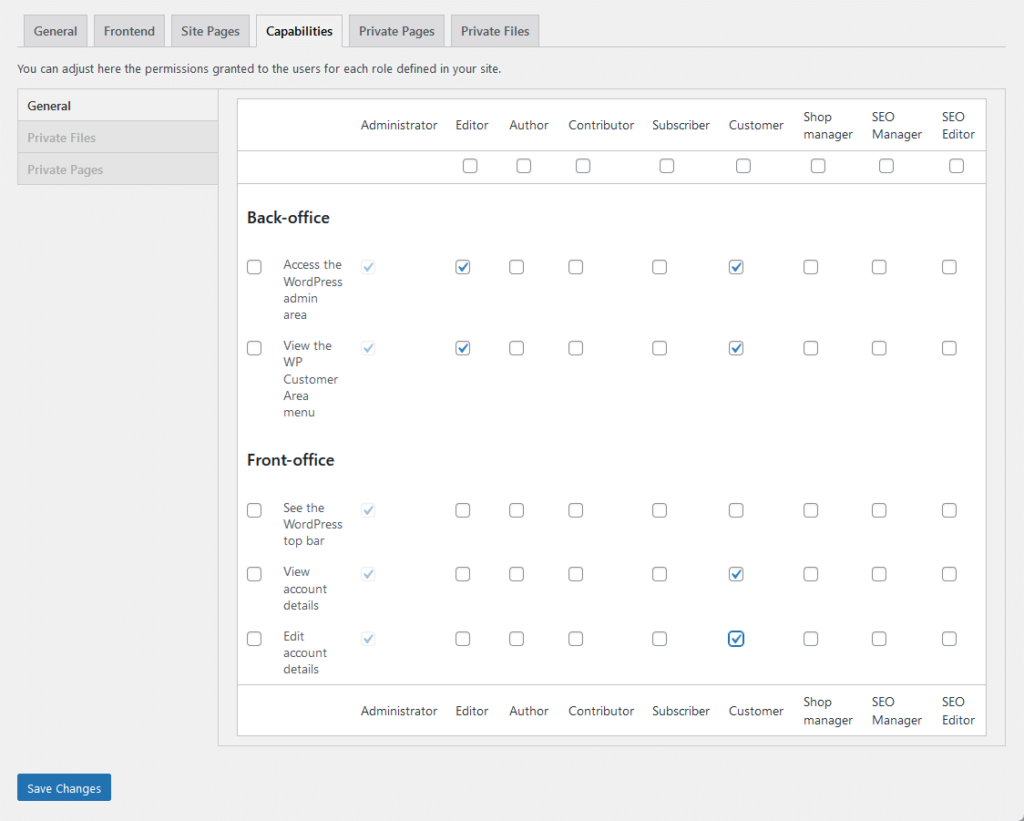
Make sure to save the changes after you’re done adjusting the permissions.
⚠️ Note: You don’t have to set permissions for every role listed — only the ones that you currently have/assign. It’s also important to note that there are three tabs of permissions: general, private files, and private pages.
If the site is new and you haven’t made many changes to the default settings, you may have seen this warning at the top:

The issues here are:
From experience, you can fix both issues by fixing the first one.
Go to settings > permalinks from the admin dashboard:
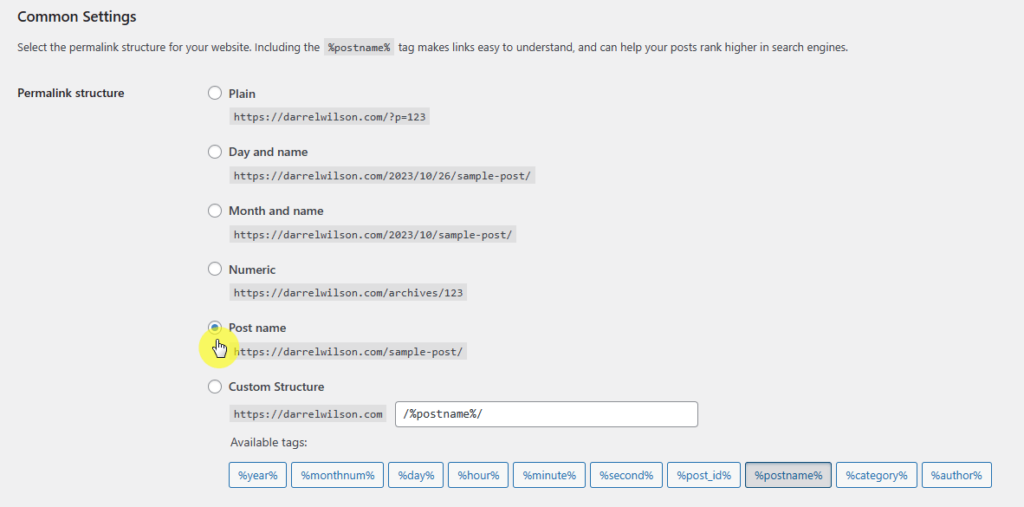
I recommend you choose the post name option since it’s the best choice and the most logical one out of all the options.
After saving the changes, the error message from the plugin will now disappear.
Your client or customer portal is now ready.
But before you onboard clients or customers into it, it’s important to make sure everything is set up correctly.
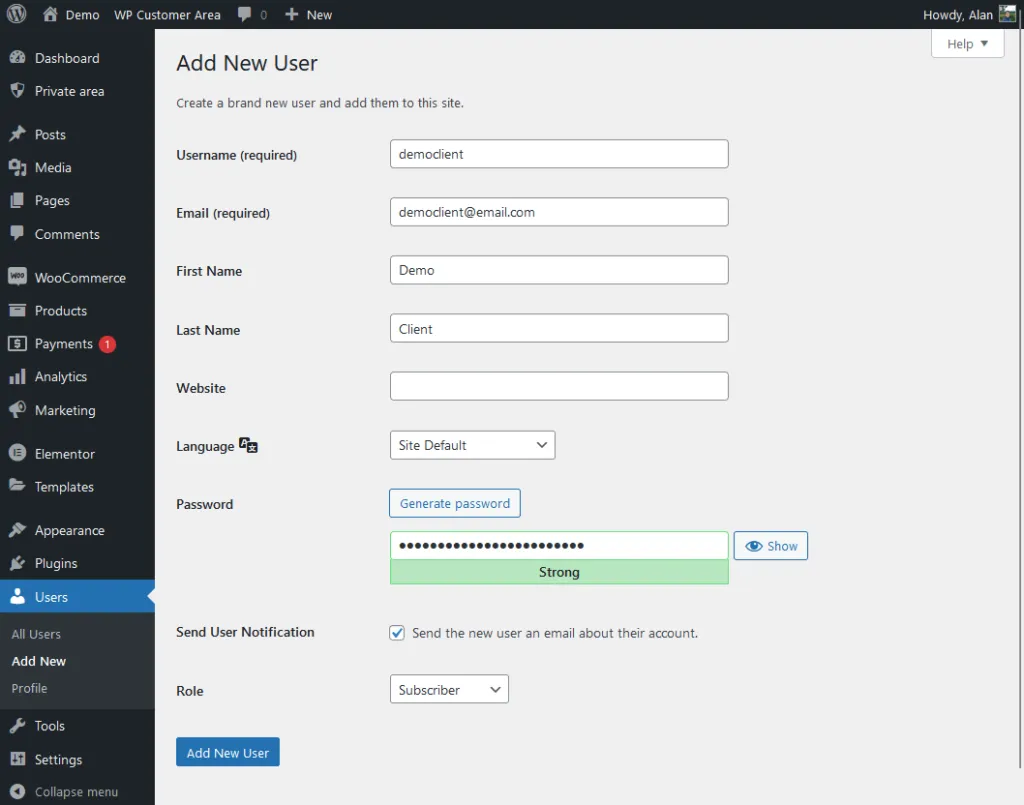
For that, let’s start by creating a dummy client user:
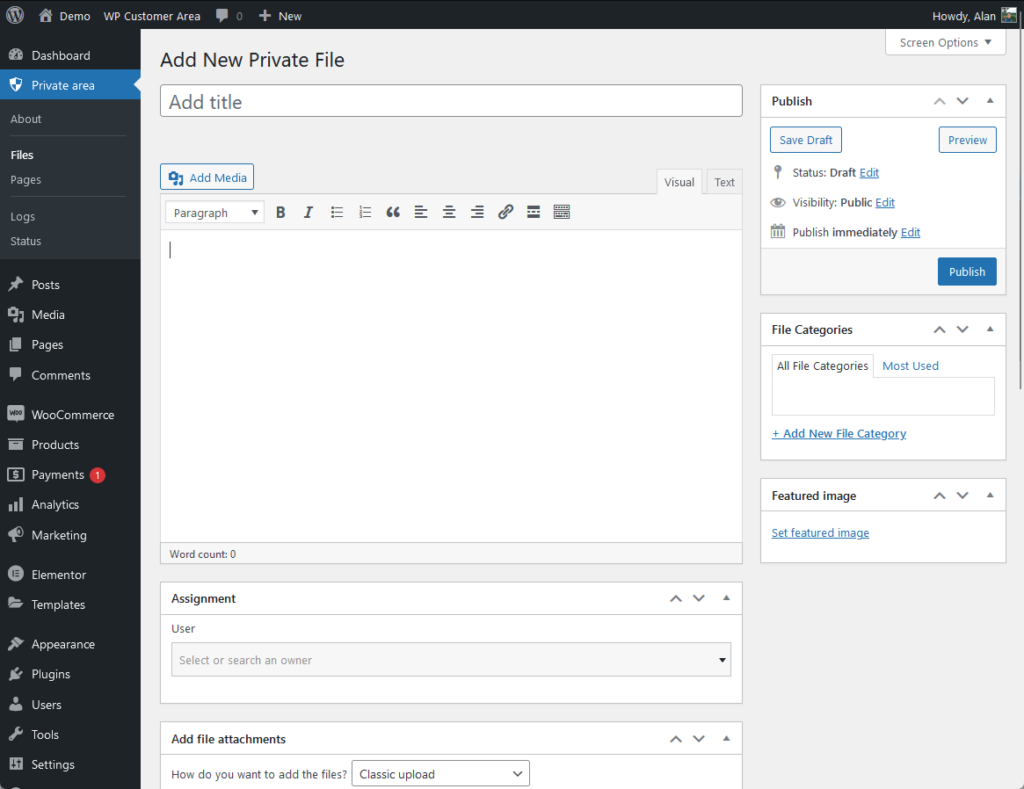
What’s next now is to create a private file for the demo client:
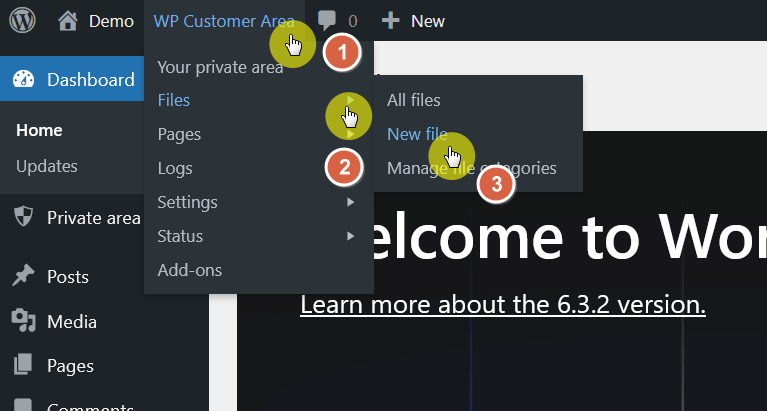
You can also go to private area > files on the sidebar panel of the admin dashboard and add a new private file from there.
This will bring you to a page that looks similar to when you create a product in WooCommerce:
Since this is a demo only, I uploaded one of Darrel Wilson’s Elementor template kits to serve as the demo private file.
By the way, when adding a file for a specific client, don’t forget to indicate the user assignment:
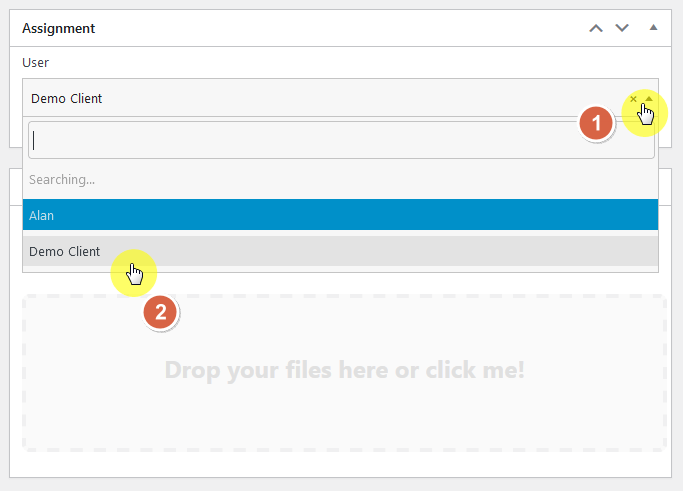
For easy management, it would help if you create file categories so you can organize the files according to what they are or their uses.
It would be helpful especially if you would be working with different types of files on your client projects.
Now that you’ve uploaded a demo file using one of Darrel Wilson’s Elementor template kits, let’s talk about simplifying your site maintenance.
Do you find it cumbersome to keep updating your themes and templates, not to mention the costs for ongoing support?

Darrel Wilson has an incredible offer that you simply can’t ignore:
Imagine never having to worry about updates or paying for support again. This is the new era of Elementor templates, designed to make your life easier.
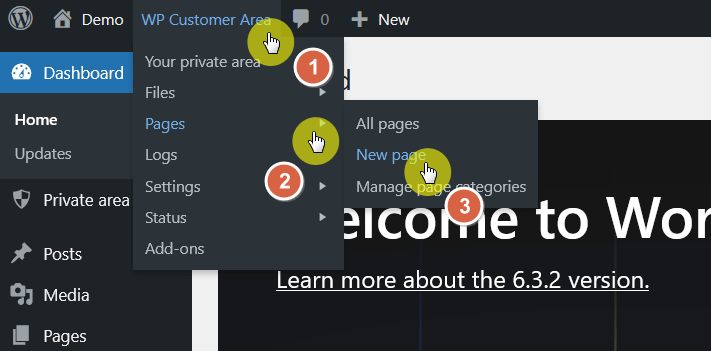
Another vital component you need to test out is creating a private page.
These pages can provide detailed information on your processes, your terms of service, or any other information your clients need to know.
For this:
The editor looks similar to adding a new private file. If the page is only for a specific user, make sure to indicate it in the assignment box.
For demo purposes, I’m using a generic term of service template:
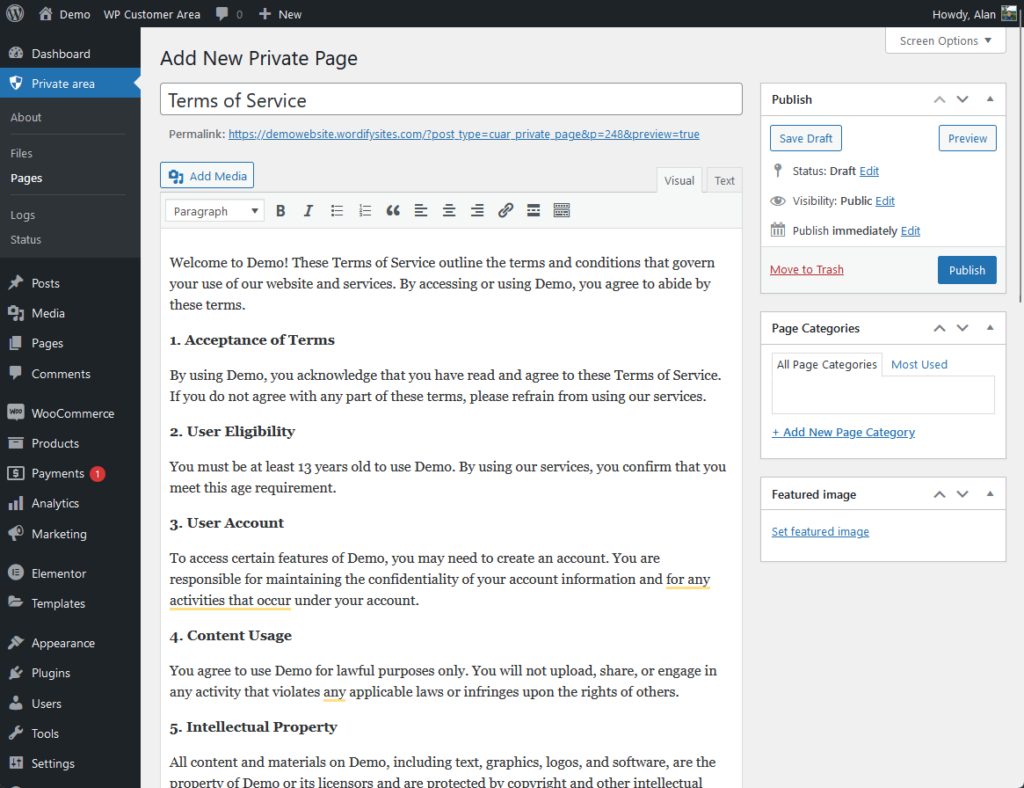
Similar to pages/posts published through WordPress, you can allow/disallow comments, put an excerpt, change who the author is, and more.
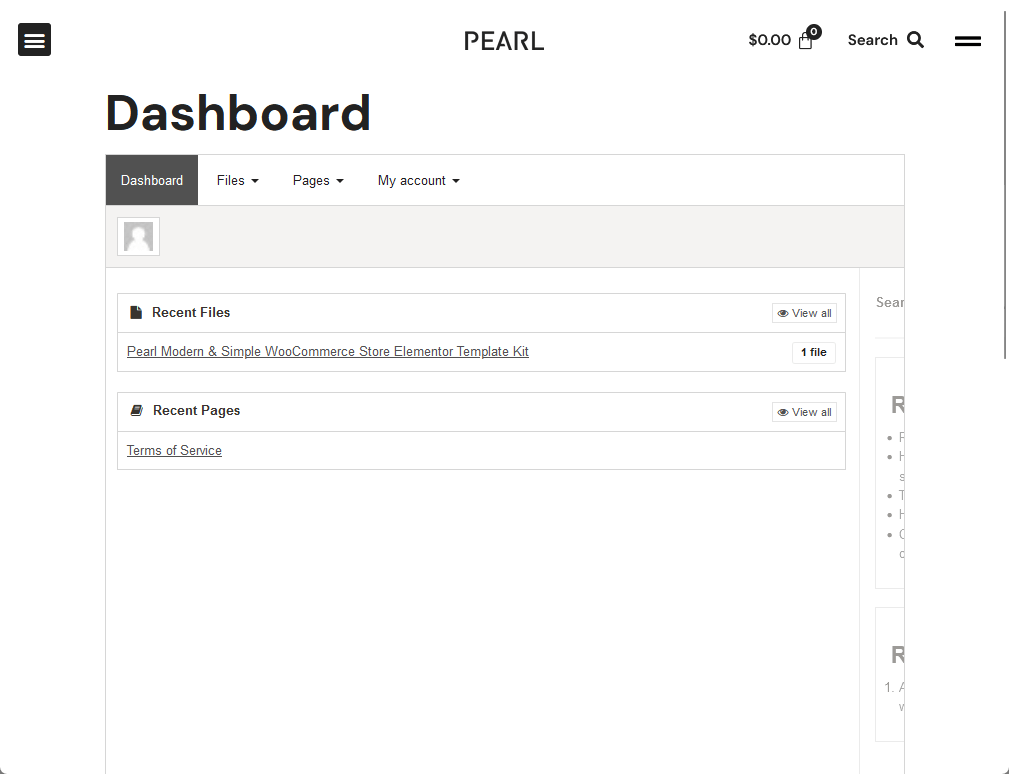
It’s now time to test out the client portal and see what it looks like from the side of your client:
The demo client information refers to the details you filled out in Step 5.
The dashboard is the first thing they would see:
From there, you can go and click the newly created file and page.
Starting from the file, this is what your client would see:
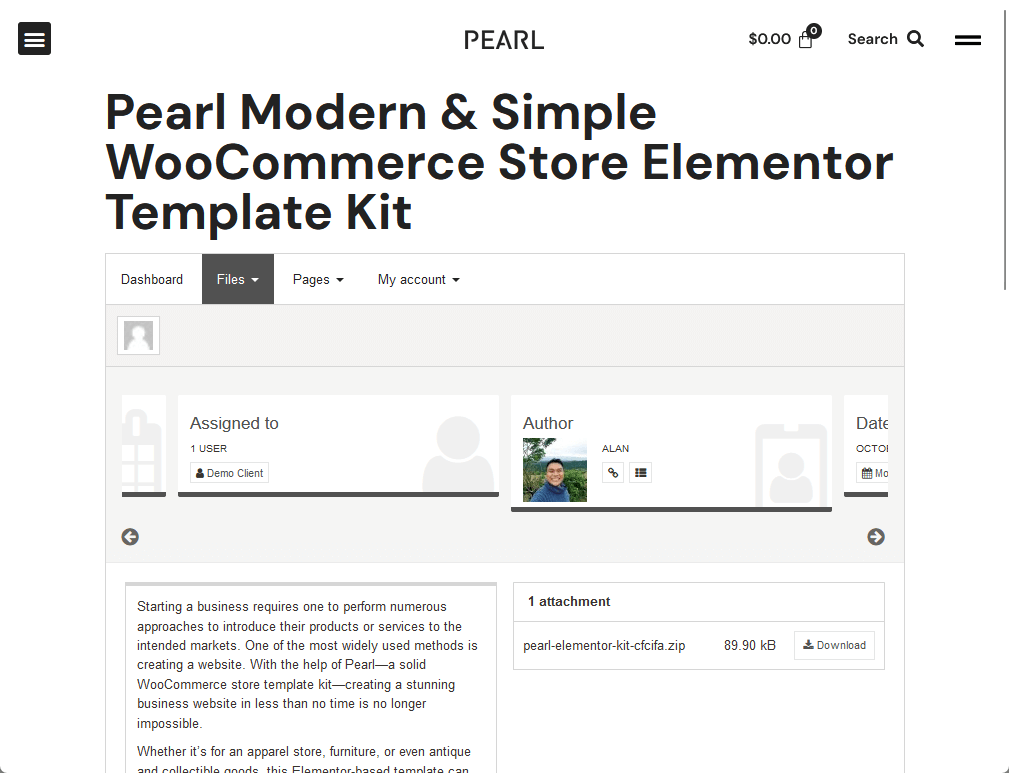
Nice!
Now here’s the private page:

It’s awesome, right? 😎
In terms of looks, it’s not the best. But it looks professional enough, gets the job done, and most of all, wouldn’t cost you anything.
You can always manually design the portal using code. There are also paid add-ons that you can buy from the plugin’s website.
The plugin we used in the tutorial above is free. But if you want, there are other free options/alternatives you use.
Let’s talk about the free options you can use:
Creating private pages stands out as an easy yet effective method.
WordPress has a built-in feature that allows you to set the visibility of a page to ‘Private,’ meaning only logged-in users with the appropriate permissions can access it.
⚙️ How it works
When you create a private page in WordPress, it becomes invisible to the public and search engines.
Only users with a specific role, usually administrators and editors, can view these pages.
You can extend this functionality to other user roles or specific clients by using additional plugins or custom code.
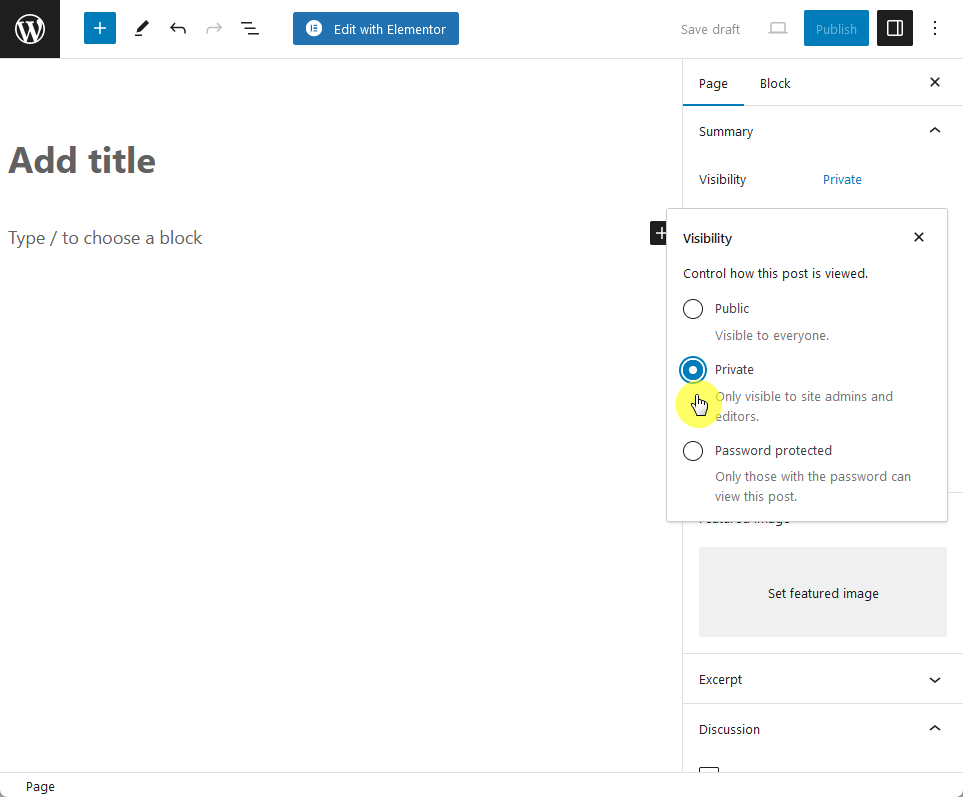
🚧 How to create a private page
The way it works is quite simple.
While editing a page/post, all you have to do is click on the visibility button on the right sidebar panel and change the visibility to private:
🔕 Limitations
While creating private pages is convenient and straightforward, it does have its limitations:
Another straightforward yet effective free option for creating a secure client portal in WordPress is the use of password-protected pages.
Unlike private pages, which are only accessible to logged-in users with specific roles, password-protected pages can be accessed by anyone who has the password.
⚙️ How it works
When you set a page to be password-protected in WordPress, it becomes inaccessible to the general public.
A password prompt appears when someone tries to access the page. Only those with the password can view the content.
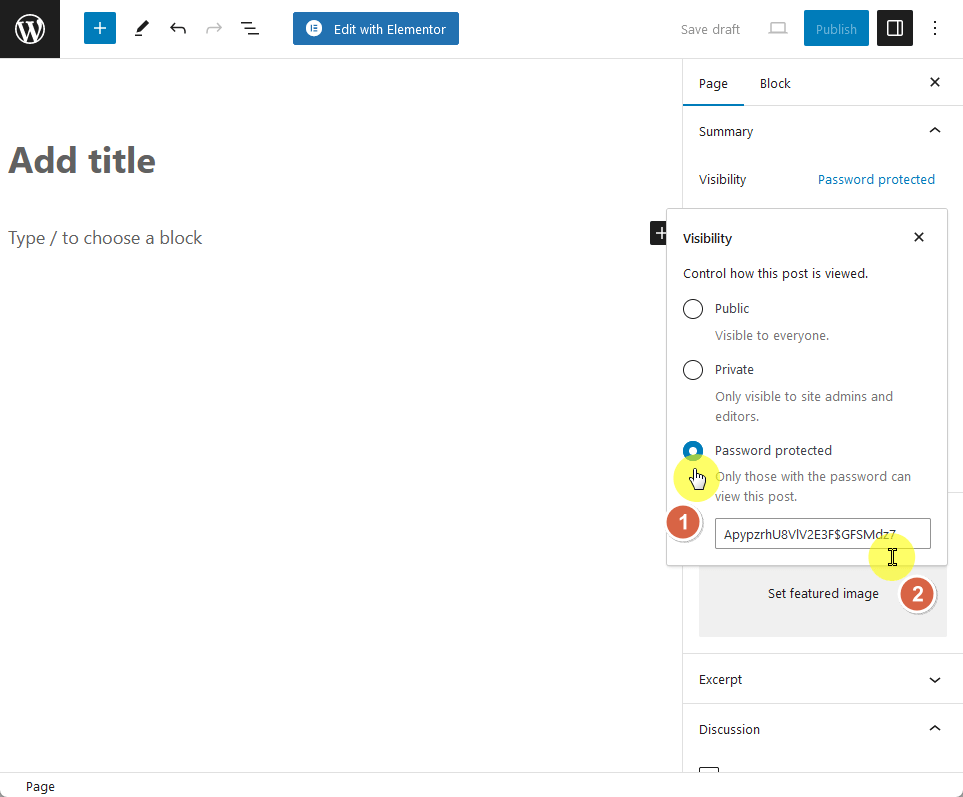
🚧 How to create a private page
Well, creating a password-protected page is similar to creating a private page.
The option is still on the visibility — but this time:
How does it look on the front end?
Well, if someone tries to view the page, they will see the following screen:
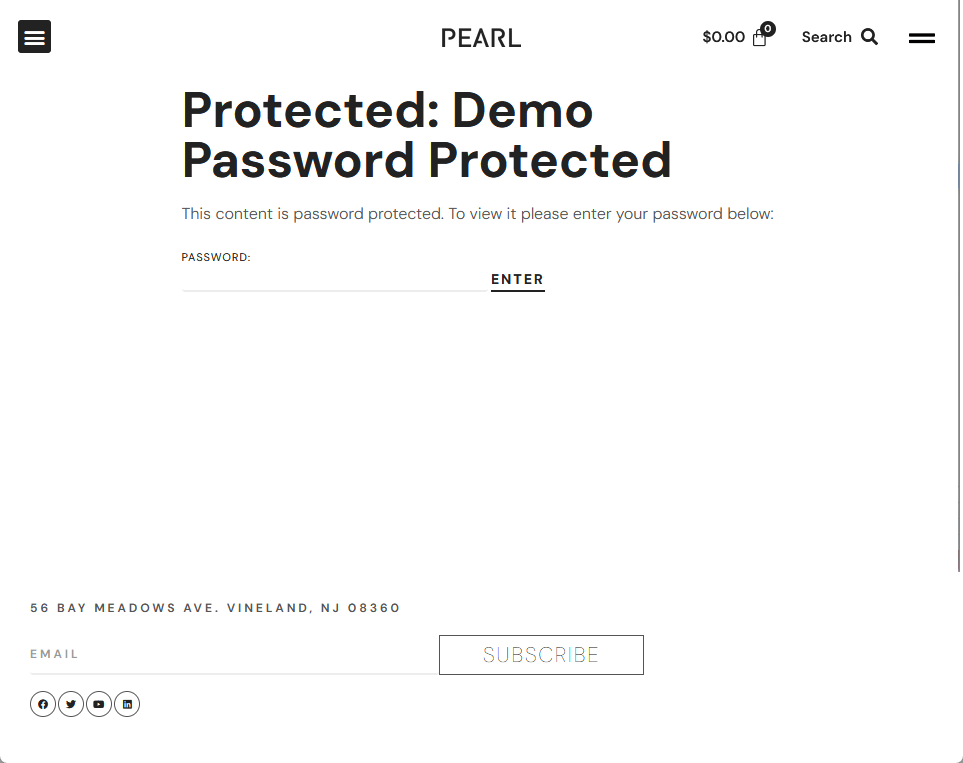
🔕 Limitations
Password-protected pages are a simple solution, but they come with limitations:
This is what we used earlier.
WP Customer Area is a modular all-in-one plugin to manage private content on your WordPress site.
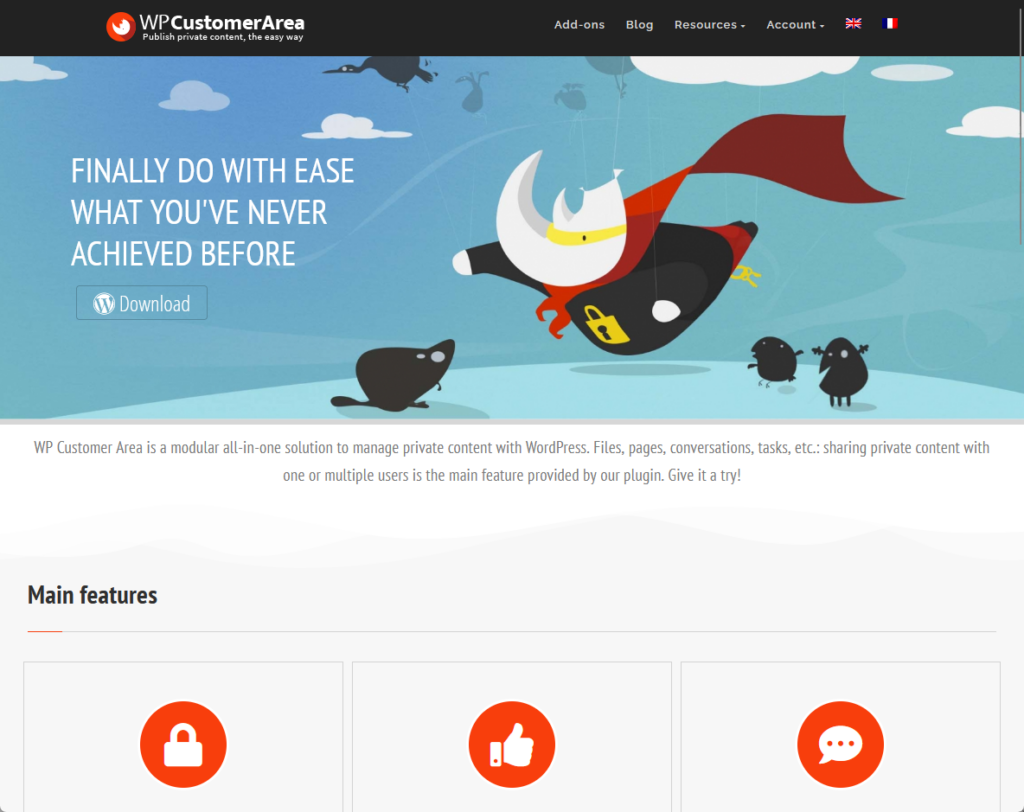
It allows you to create a secure and private area where registered clients can access exclusive content such as files, pages, or even custom post types.
💻 Key features
👍 Pros
👎 Cons
This plugin allows you to create a secure space where each registered client has a private page.
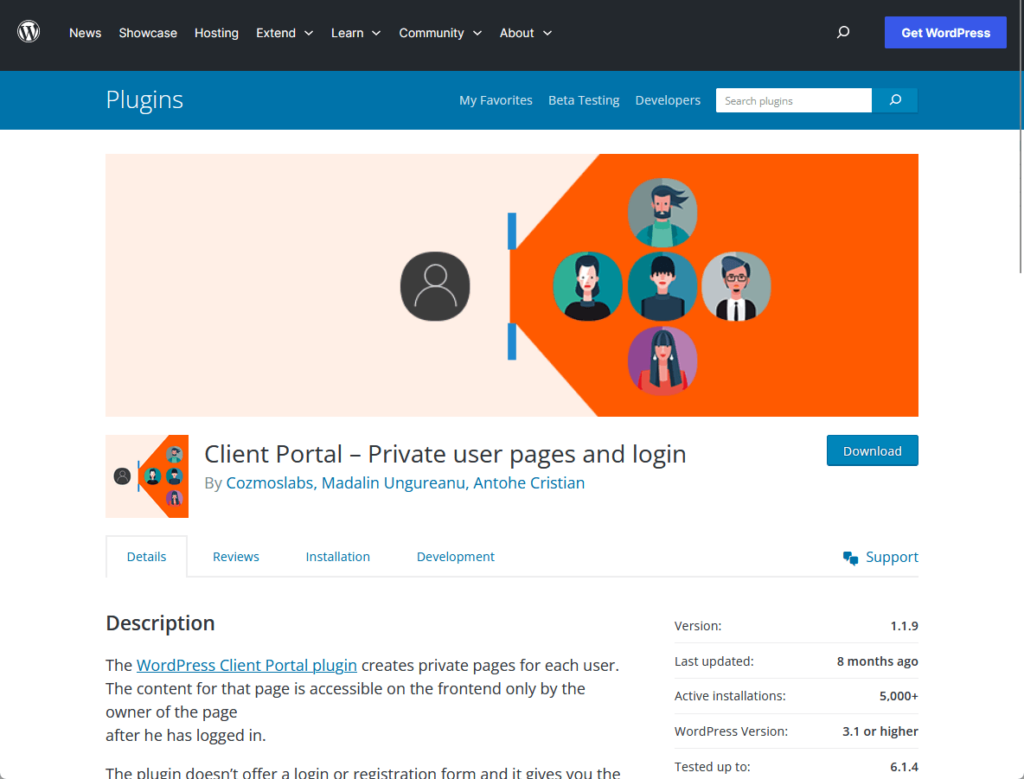
These private pages serve as a portal where clients can access personalized content, messages, and files.
💻 Key features
👍 Pros
👎 Cons
There are a few premium plugins that you can use to create a more expansive client portal experience for your clients.
Here are some of the plugins you can use:
SuiteDash is a premium, cloud-based platform that integrates a wide range of business tools into a single dashboard.

From client communication to project tracking and billing, SuiteDash aims to eliminate the need for multiple software solutions.
Its compatibility with WordPress makes it an attractive option for those already using the platform for their website.
💻 Key features
👍 Pros
👎 Cons
💰 Pricing
SuiteDash offers various pricing plans to cater to different needs.
What’s awesome with their pricing is that SuiteDash doesn’t enforce contracts, which greatly minimizes the risk involved.
MemberPress is a user-friendly WordPress plugin designed to create membership-based websites.
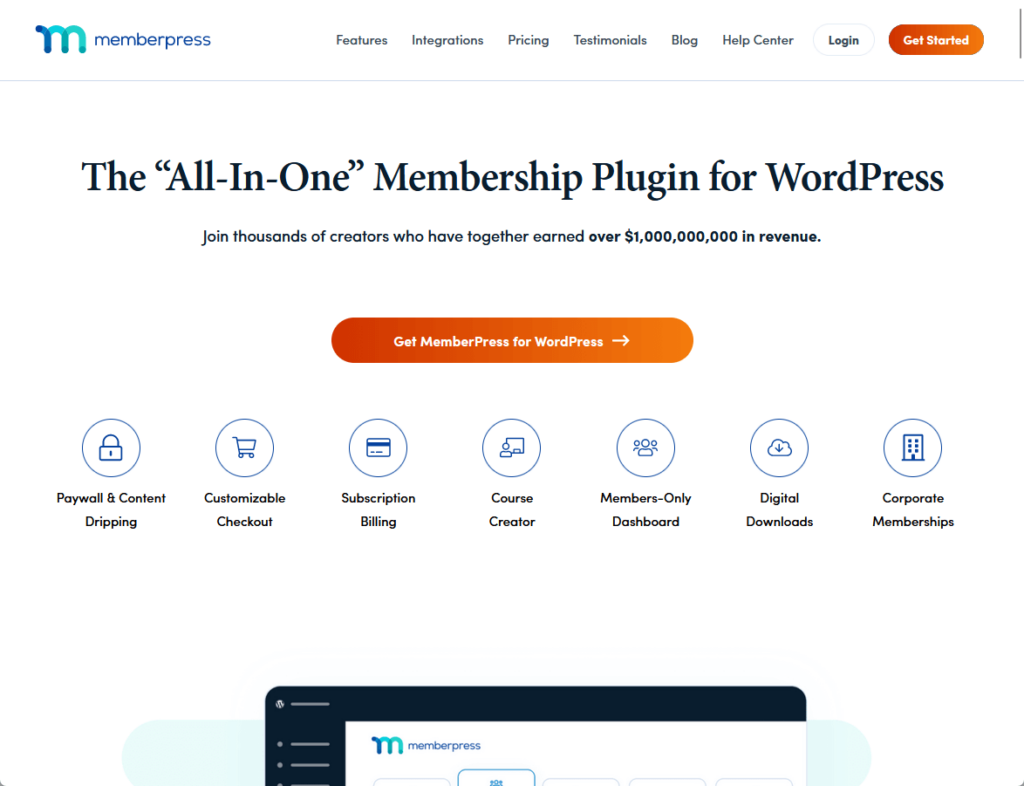
It enables you to restrict content access based on membership levels, making it an excellent choice for a client portal where different tiers of access might be necessary.
It’s highly regarded for its ease of use and seamless integration with various third-party services.
👉 Related: MemberPress Review
💻 Key features
👍 Pros
👎 Cons
💰 Pricing
MemberPress offers multiple pricing plans:
Restrict Content Pro’s primary function is to allow you to restrict content and offer subscription levels.
It’s a versatile plugin that can give you the ability to manage client access to specific content based on subscription tiers or individual settings.
💻 Key features
👍 Pros
👎 Cons
💰 Pricing
Restrict Content Pro offers a variety of pricing plans:
While free options for WordPress client portals provide basic functionalities and are great for small businesses or freelancers on a tight budget:
Paid options offer a slew of advantages that could be highly beneficial for your business in the long run.
These premium solutions come with advanced features, better security, and dedicated support, among other perks.
Here’s an overview of some key benefits that make paid options worth considering:
| Benefit | Description |
| Advanced Features | Access to project management tools, advanced file sharing, and customizable dashboards. |
| Enhanced Security | Higher levels of encryption, two-factor authentication, and regular security updates. |
| Dedicated Support | Access to customer service and technical support, often 24/7. |
| Scalability | Easy to expand features and user capacity as your business grows. |
| Customization | More options to tailor the look and functionality of the portal to fit your brand. |
| Integration | Seamless integration with other business tools like CRM software, payment gateways, and email marketing platforms. |
Opting for a paid client portal solution may require an initial investment, but the array of advanced features and benefits often make it a wise long-term decision.
Creating a secure WordPress client portal on your WordPress website is a smart move that can streamline client interactions, enhance security, and build trust.
Whether you’re on a budget or looking for those with premium features and dedicated support, there’s a solution that fits your needs.
Whatever route you take, a well-implemented client portal can significantly elevate the client experience, making it a win-win situation for everyone involved.
You’ve learned how a client portal can boost your client’s experience and your workflow. But without reliable web hosting, even the best portal won’t perform well.
That’s where SiteGround comes in, offering a web hosting solution that stands out from the rest.
Get top-notch hosting for all your multilingual website needs:
By choosing SiteGround, you’re not just getting a hosting service:
You’re investing in speed, stability, and peak performance for your website, including your newly created client portal.


Jan Atsma
Hi Darrel.
Why promote a plugin wich is not updated for 8 months?
hassan basha
thank you soo much for all efforts
Vincent
@Jan Atsma The plugin is still actively maintained. The base plugin may not receive an update while some addons would receive one. So while it appears the plugin is not updated frequently, we maintain 21 addons, and release updates regularly.
Vincent, plugin author
De Poorter David
Make a video about this too 🙂
thanks