
Looking to display all your WordPress posts on a single page but not sure how to go about it?
By the end of this guide, you will have the knowledge and tools to effectively display all your posts on a single page.
Here’s everything in this guide:
Ready to dive in? Let’s get started!
I’m going to take the realist view here and consider both the advantages and the drawbacks.
Whether or not it’s a good idea largely depends on your specific needs, the volume of your content, and your overall website strategy.
Here are some pros and cons to consider:
👍 Pros
👎 Cons
As for SEO, displaying all your posts on a single page is a bit of a gray area.
While long-form content is generally good for SEO, there’s a limit to how much search engines will value this.
Too much content on a single page can dilute your keywords and confuse search engines about the page’s focus, which can harm your rankings.
If you have made up your mind and are now determined to display all your posts at once, I will share with you some methods that you can use.
Starting with the method where all you need is already in your WordPress site:
Displaying all the WordPress posts on a single page in WordPress using the latest posts block is a seamless process that doesn’t require additional plugins.
Here’s an example:

⚠️ Note: This block has one limitation — you can only show 100 posts at a time (although if you think about it, a hundred is already plenty).
Let me show you how to do it:
Navigate to the page or blog post where you want to display all the posts.
Then, follow these series of steps:
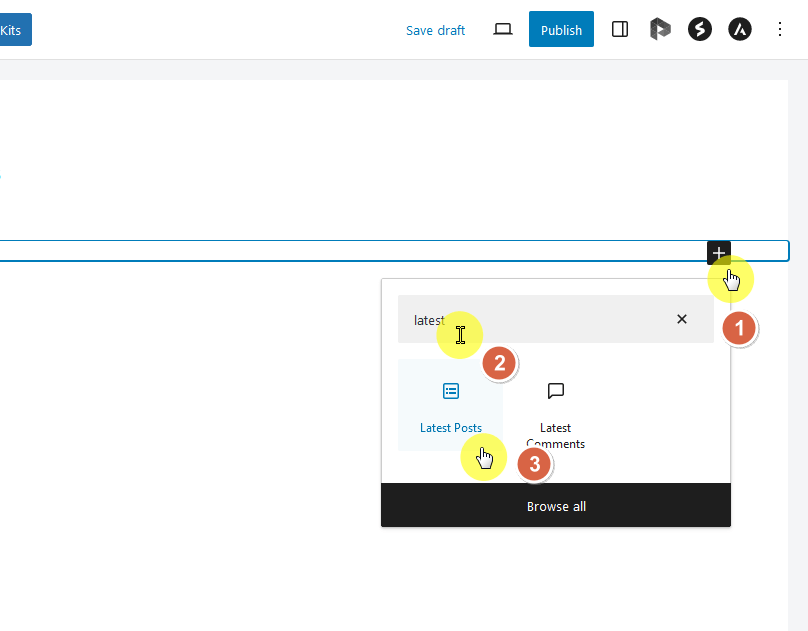
Alternatively, you can also choose to browse all the available blocks and search for the latest posts block from there.
When you find it, click on it as well:

Once the latest posts block is added, you will see block-specific controls allowing you to manipulate how the posts are displayed.
You can see the block settings on the right panel:

⚠️ Note: If you don’t see the settings panel, click the latest posts block first. If there’s still nothing, then you need to click the settings button beside the publish button.
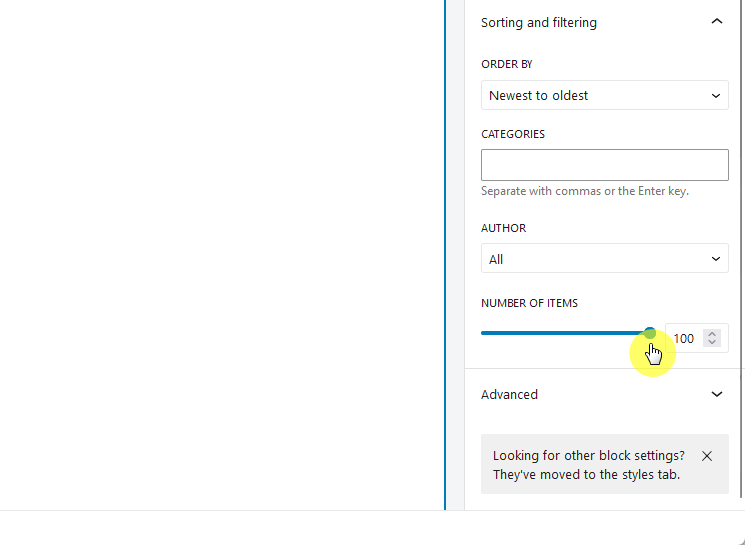
The option for setting the number of items is found at the bottom of the settings panel.
You can set it right away to its maximum value, which is 100 (only 100 items can be shown at one time in the front end).
Besides the number of posts, you will find options to control the content, meta information, and featured images of the posts.
You can choose to show full post content or an excerpt, show or hide the author’s name and post publish date.
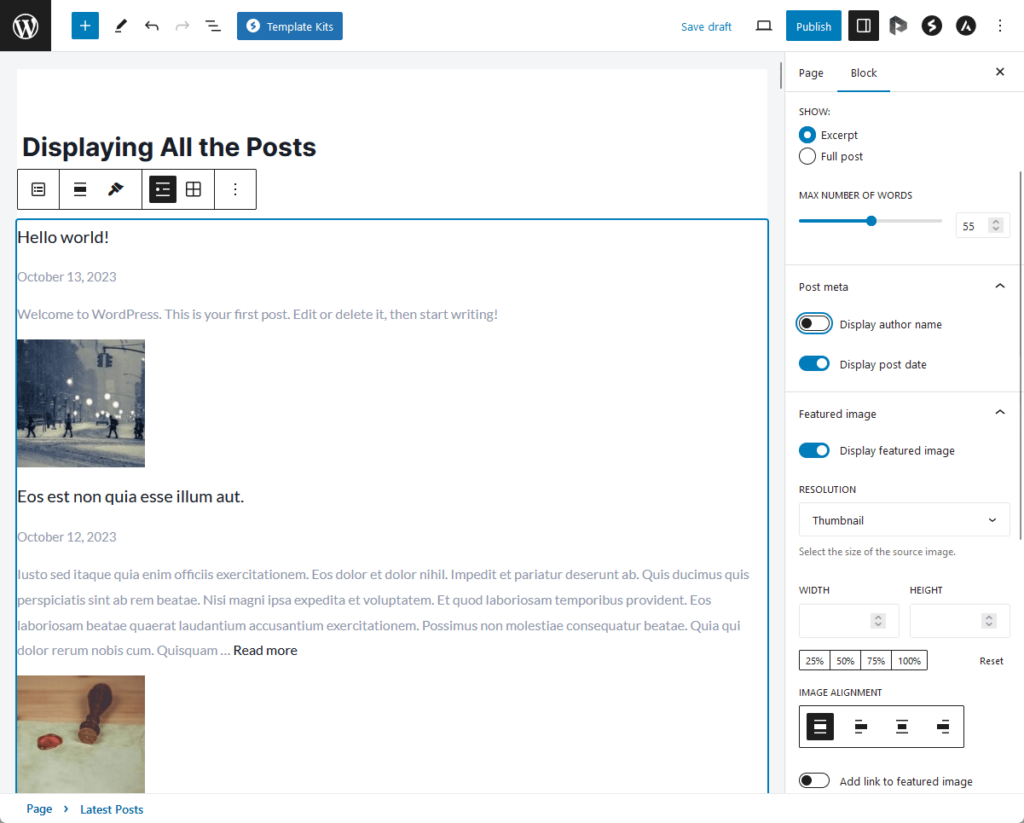
At the bottom part of the screenshot above, you can see that you can even configure featured image settings including resolution, dimensions, and alignment.
The latest posts block settings also allow you to order posts (e.g., newest to oldest, alphabetical A to Z), and filter posts based on categories or subcategories.
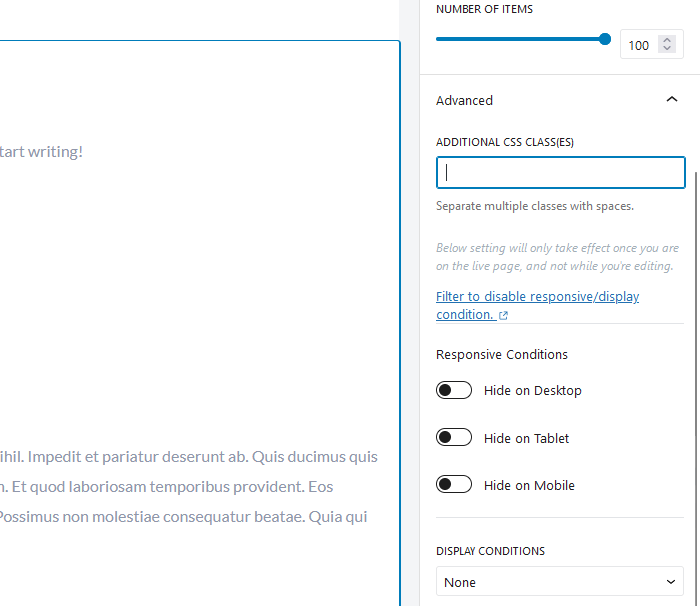
For further customization, an advanced tab is available in the block settings which lets you add a CSS class to your block, enabling you to write custom CSS and style the block.
After configuring the block to your liking, you can preview the changes to see how it would look to your readers.
Using the latest posts block is a straightforward way to display your most recent blog posts, making it easier for your readers to see what’s new on your blog.
This feature is especially useful as it doesn’t necessitate the installation of new plugins, which keeps your WordPress installation lean.
🏗️ Block alternatives
Besides the latest posts block, there are at least two you can use that can help you display all your posts.
For example, the archive block would instead group your posts into day/week/month/year, depending on what you set.
It will create something like this:
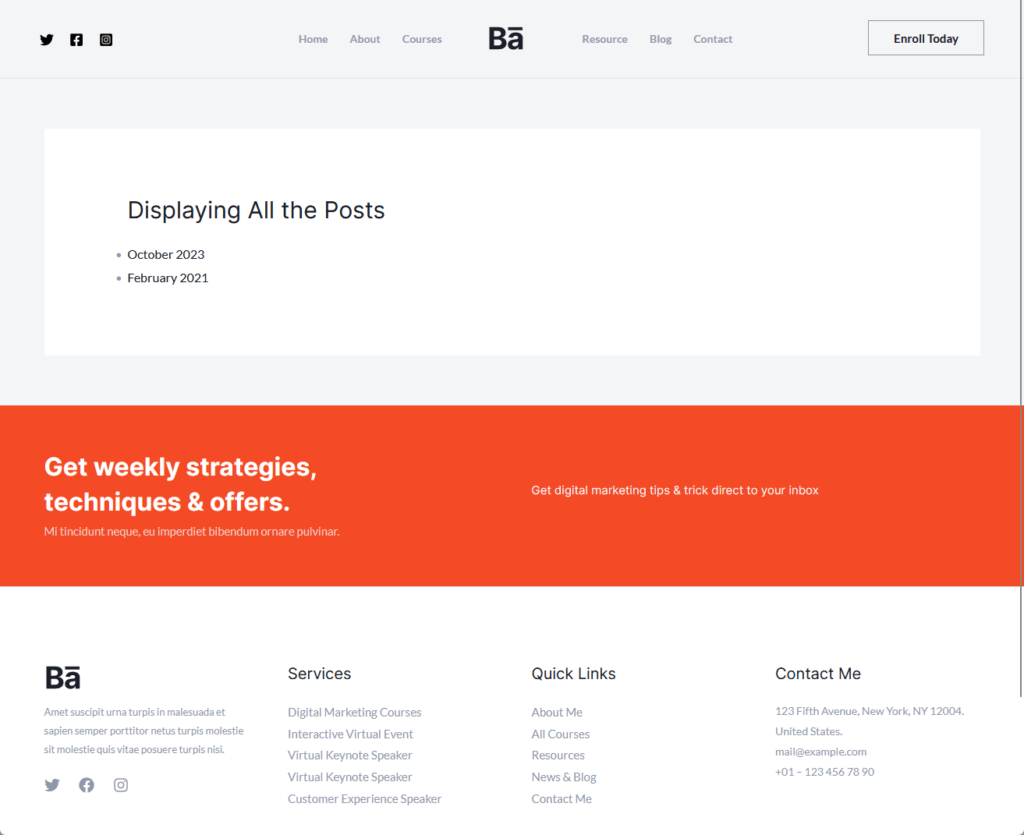
If the user clicks on a date, the site will bring that user to an archive page that corresponds to the date he/she selected.
Personally, if I need to display all my posts, I prefer to implement some groupings into them like what this block did.
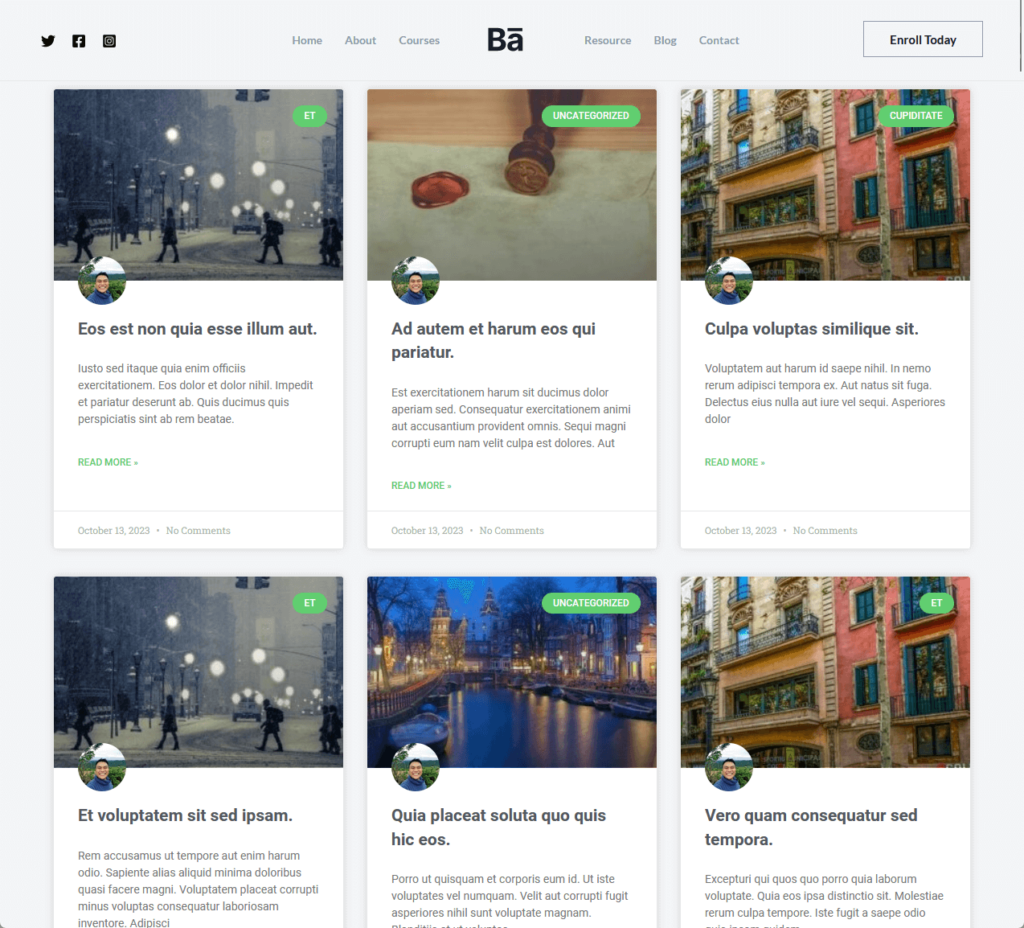
Another alternative is using a post masonry block.
Strictly speaking, it’s not an out-of-the-box block. But it comes with most extra block plugins and page builders out there.

If you use Elementor, you can simply use the post element to create a better-looking page with all your posts in it.
Here’s an example:
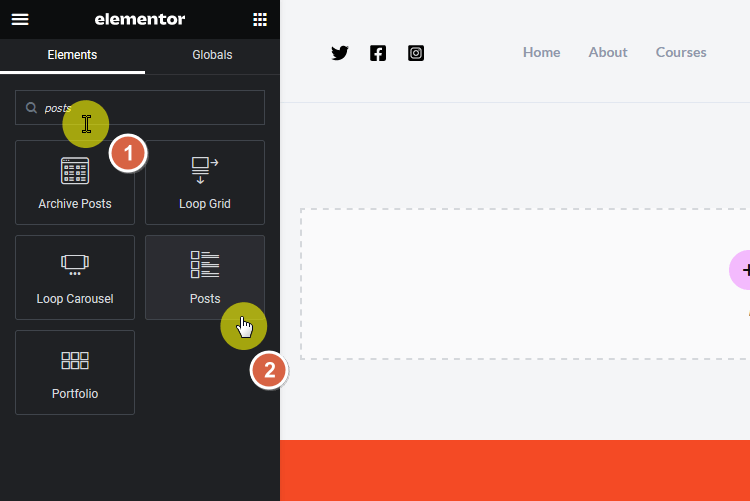
When editing the page using Elementor, simply find the post element.
Once you find it, add it to the page:
After adding the element to the page, the left panel will transform into element settings where you can customize the element.
👉 Related: Elementor Review
From here, you can change the posts per page number (like how I changed mine to 100 posts per page):
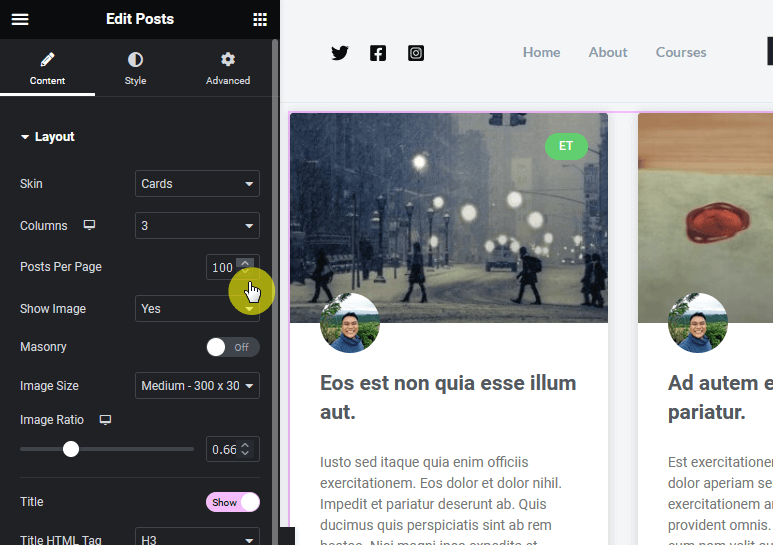
⚠️ Note: The Elementor post element is locked behind the pro version. Unfortunately, this means that free users won’t be able to use this feature.
After exploring how to use Elementor’s Post Element for your posts, let’s pivot to another key element: your website’s themes and templates.
Keeping them updated can be a chore, not to mention the costs involved. But what if there was a way to simplify all this?

Get lifetime access to all premium template kits designed specifically for Elementor:
Consider this offer as a seamless extension to your Elementor toolkit. It’s not just about displaying posts; it’s about overall site optimization.
Displaying all your posts on a single page in WordPress can be achieved by using an archive plugin like Simple Yearly Archive.
Essentially, this plugin allows you to display your posts in a year-based list, segregating the posts according to their year of publication.
Here’s how to use it:
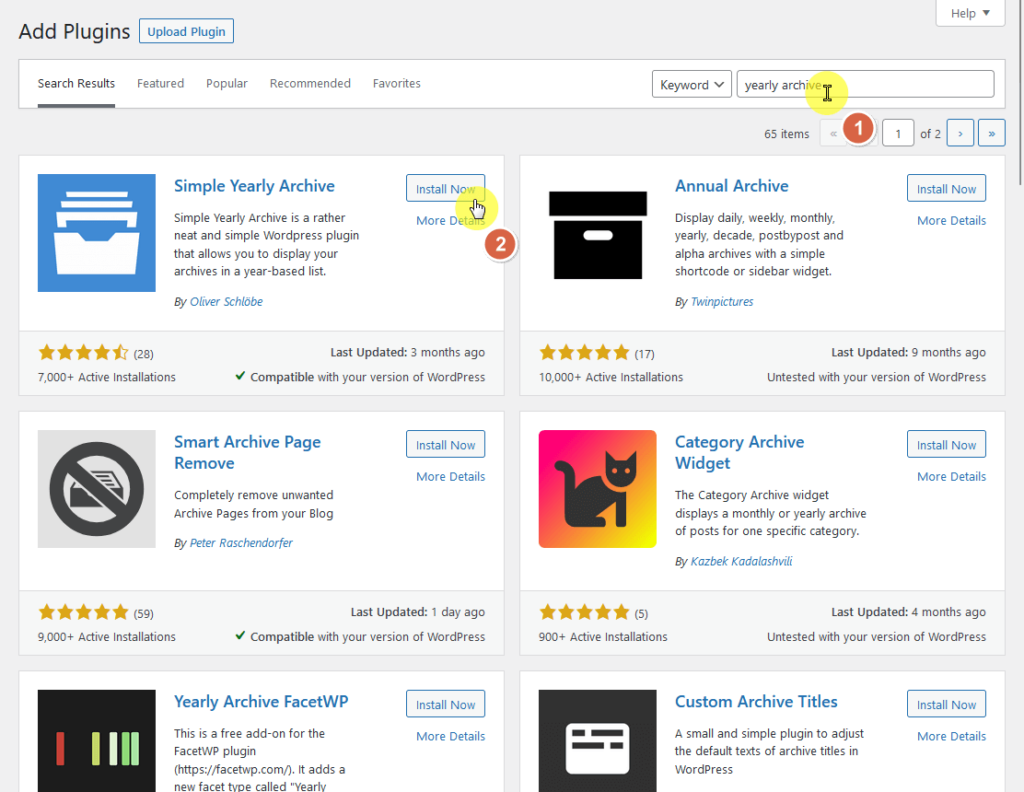
To use this plugin, search for it on the repository and then install and activate the plugin:
After the installation part, you need to customize the data format in order for the plugin to work properly.
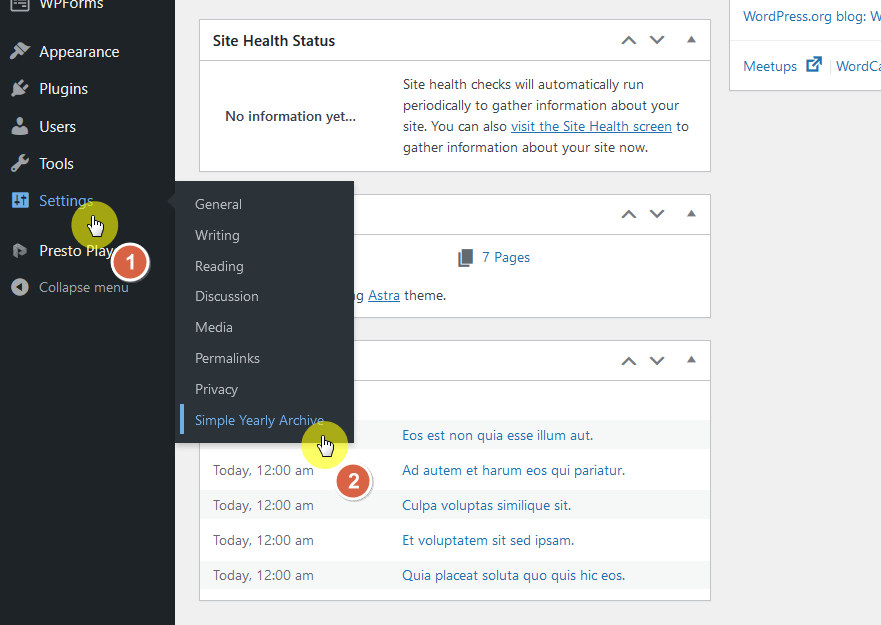
Go to Settings > Simple Yearly Archive from the left sidebar menu:
From there, you need to select the date format you prefer.
Click on the examples dropdown and select the date format you want to use:
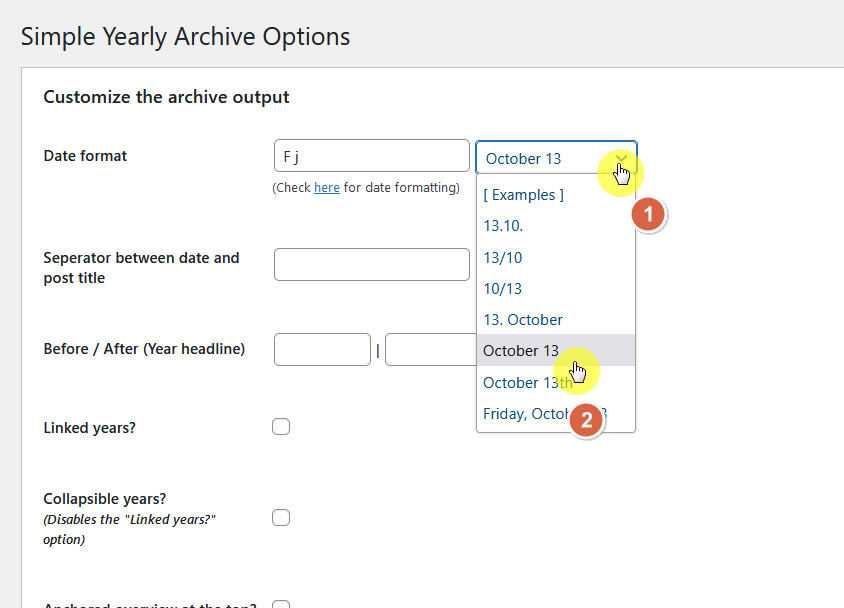
You can also see here the configurations you can do (like show the thumbnail, the post author, excerpt settings, and more).
Don’t forget to save the changes.
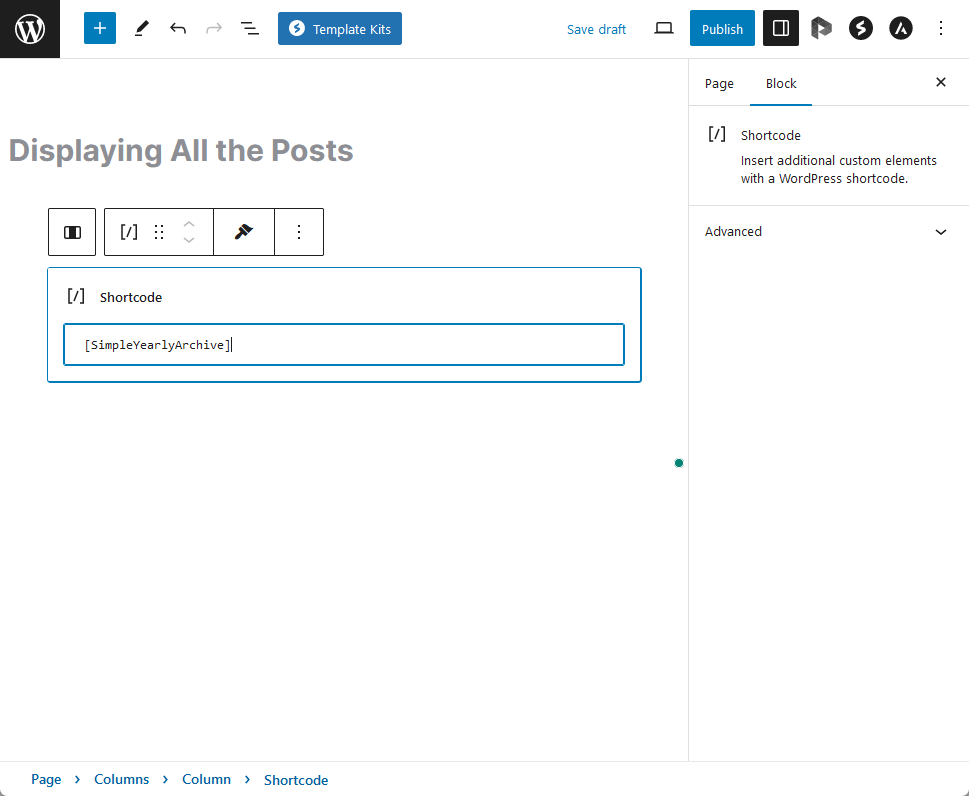
To display all the posts on a page, navigate to that blog page and add the shortcode block:
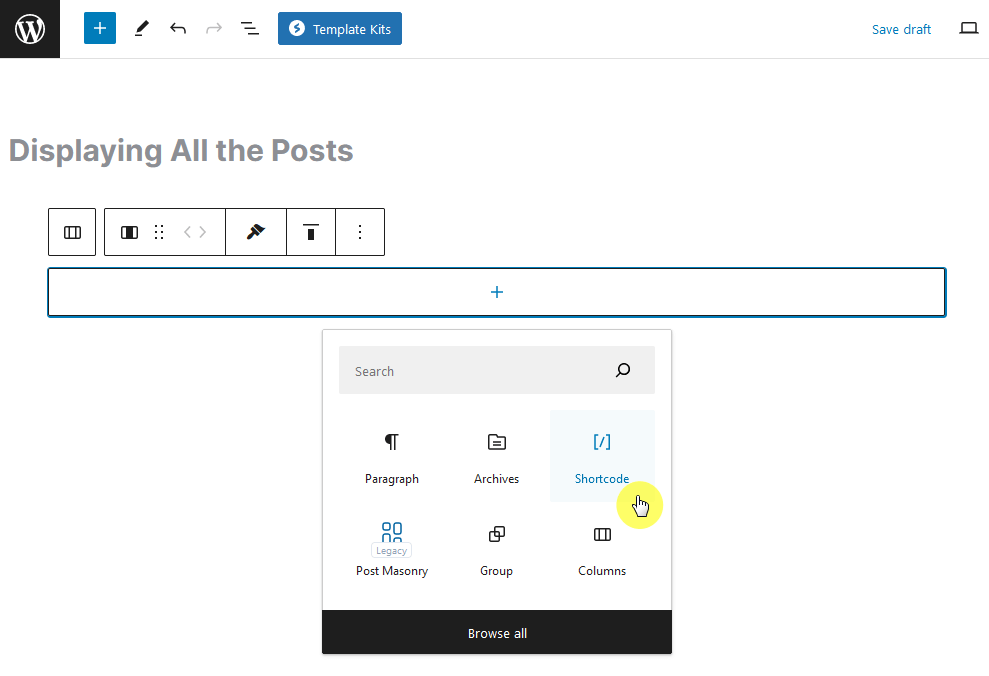
The shortcode is [SimpleYearlyArchive]
Enter that into the field and update the page:
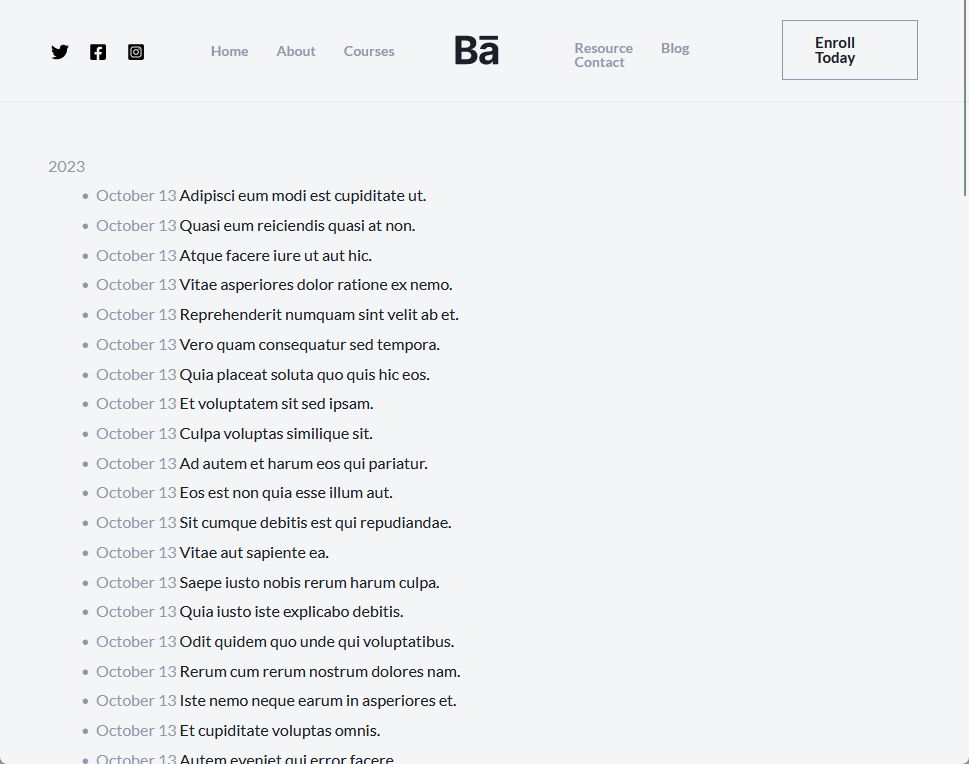
The plugin, as I explained above, operates similarly to the standard WordPress archive but with a yearly separation of posts.
Here’s the result:
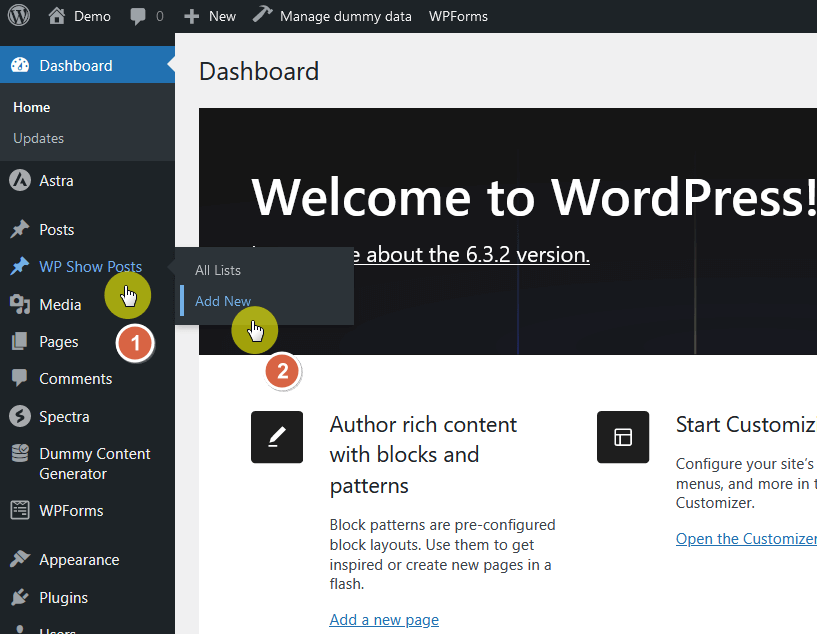
Another plugin you can use is WP Show Posts.
It’s a powerful tool designed to provide WordPress users with the flexibility to display posts anywhere on their website using a simple shortcode.
Here’s what it looks like from the front end:

Find the WP Show Posts when adding a new plugin. Then, install and activate the plugin on your website.

The plugin works by enabling you, the user, to create a post list with all the settings/configurations that you want.
For that, you still need to create a new list:
This will bring you to the post settings of the list.
By default, the plugin only displays 10 posts per page — simply change that.
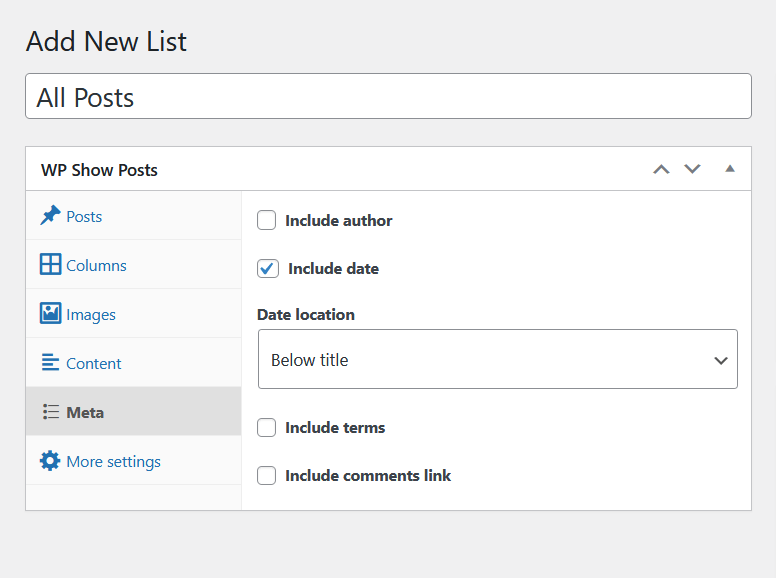
Besides that, you would also find a lot of other customization options:
Here’s an example of what you see on the meta settings page:
Once you’re done, simply publish that list.
Below the publish box on the post lists page, you can see a usage box with the shortcode and the function php code.
On the target page, add a new shortcode block:
Go back to the previous page where the shortcode was shown.
Copy and paste the shortcode into the field.

This plugin allows you to display posts anywhere on your website using a simple shortcode, and it works with any theme.
This is another plugin that you can use to show all your posts on one page.
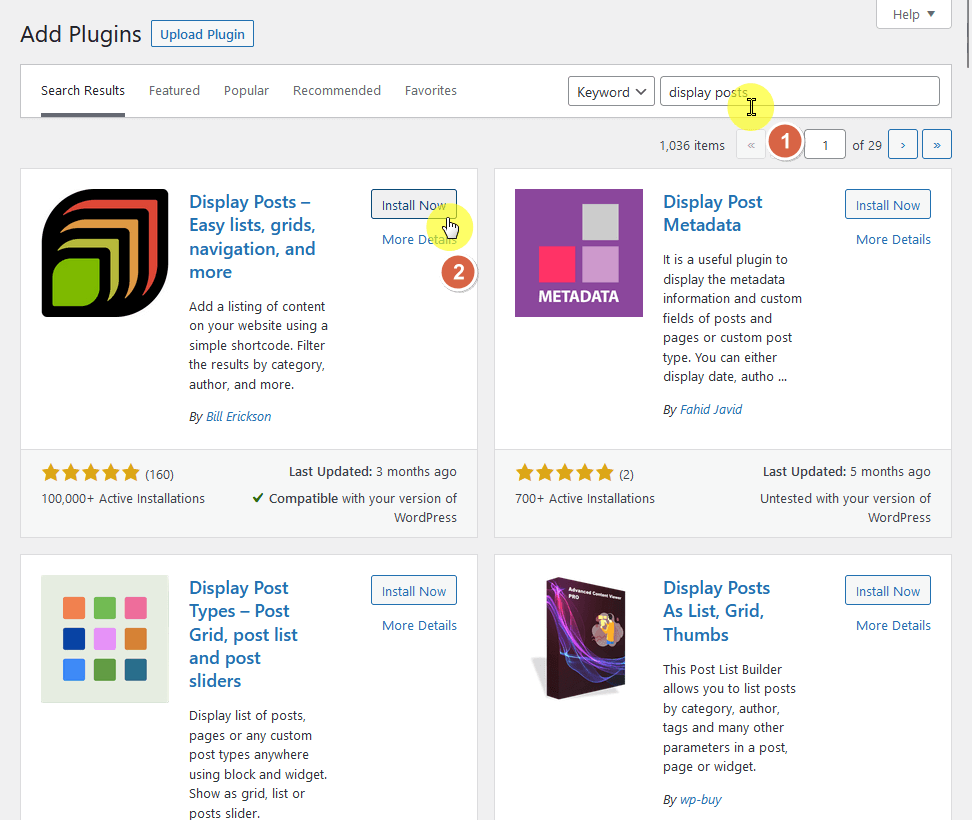
The Display Posts plugin is a handy tool that allows you to effortlessly list content from across your WordPress website.
Here’s how to use it:
Search for “display posts” when adding a new plugin to the site. When you find it, click the install now button and then activate it.
This plugin is more similar to Simple Yearly Archive in a way that there are no settings or configurations page.
To use this plugin:
[display-posts] in the content editor.[display-posts category="news"]posts_per_pageOn the target page, add a new shortcode block:
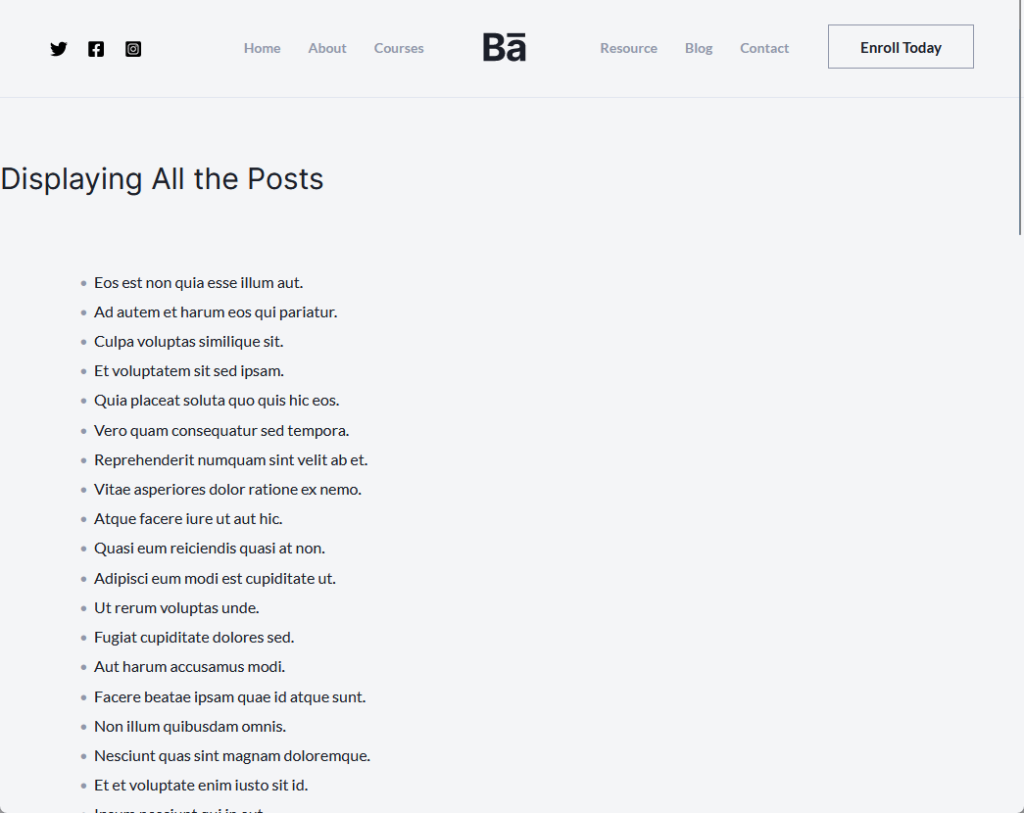
Then, all you have to do is enter the shortcode into the field, in which case, we want to display 50 posts per page.
The shortcode will then be: [display-posts posts_per_page="50"]
Once you preview the page (or publish/update it), you will then see the results:
Choosing whether to display all your posts on a single page is not a one-size-fits-all decision. It comes with its own set of pros and cons, affecting user experience, SEO, and site performance.
If you’ve weighed these factors and decided to go ahead, there are various methods to achieve this, especially if you’re using WordPress.
Ultimately, the best approach will depend on your site’s objectives, the nature of your content, and the audience you’re targeting.
Whatever you choose, ensure that it aligns with your overall website strategy for the best results.
As a final note to our guide on displaying all your WordPress posts on one page, don’t overlook the importance of a reliable web host.
Displaying all your posts at once can put a strain on your server, making a robust web hosting solution more vital than ever.
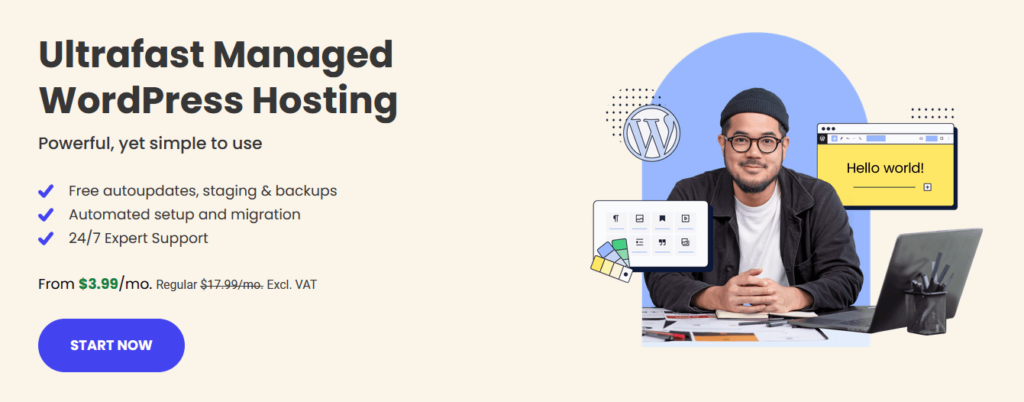
This is where SiteGround shines, offering a hosting service that’s perfectly aligned with your needs:
Opting for SiteGround means investing in a faster, more reliable website, which is essential when displaying all your posts on a single page.


