Tired of the same old look in your WordPress admin dashboard?
This guide will walk you through changing the admin color scheme to make your experience more visually appealing.
Here’s what you will learn:
Let’s dive in!
“Why should I even bother changing the admin color scheme on my WordPress website?”
Well, it depends…
For me, when I started using WordPress, the color scheme in the admin area looked a little bland. For you, it can be different.
Here are some reasons why you might want to personalize this “usually” overlooked aspect of your website management experience:
| Benefits | Why It Matters | Key Advantages |
| Improve User Experience | Do you spend a lot of time managing your site? | Visual comfort: Easier on the eyes for long hours of work. Better navigation: Enhances efficiency. |
| Personalization and Branding | Do you want your WordPress dashboard to reflect your brand’s identity? | Match your brand: Seamless branding experience. Unique feel: Personalized dashboard. |
| Accessibility | Struggling with visual discomfort or accessibility issues? | Visual impairments: Makes the dashboard more accessible. Color psychology: Affects mood and productivity. |
| Enhance Focus and Productivity | Easily distracted or fatigued in the admin area? | Reduce eye strain: Work for longer periods without discomfort. Clarity: Helps you focus on your content. |
Now, if you want to change the color scheme, you can do it right in the admin area.
Changing the default admin color scheme in WordPress is incredibly simple and doesn’t require any technical expertise.
For that, you need to get to your user profile page:
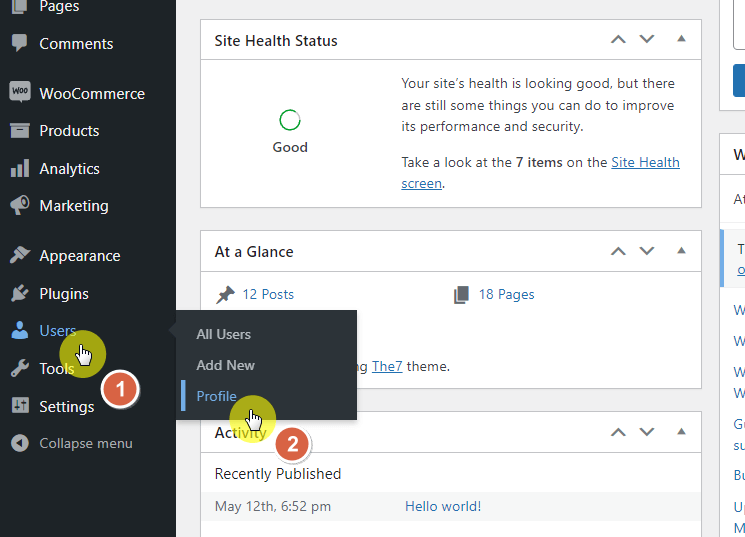
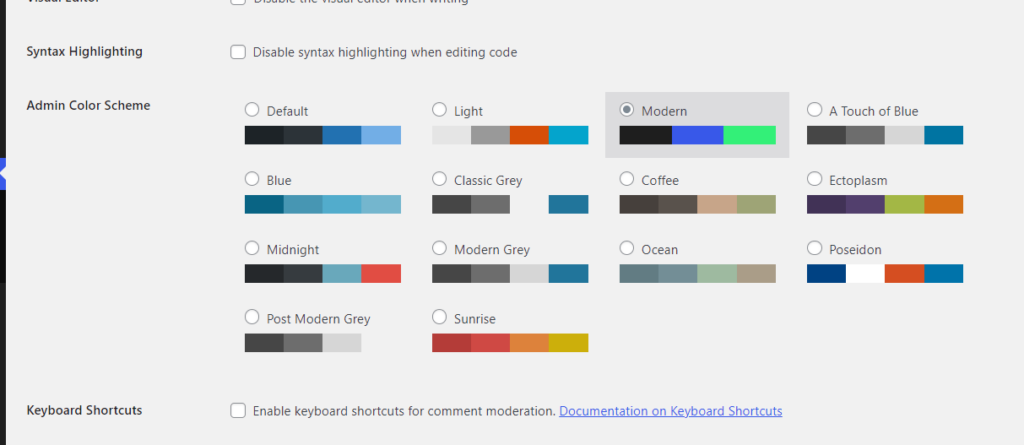
Immediately, you will be able to spot the admin color scheme section.
Currently, there are 8 choices (aside from the default color scheme) to choose from:
If you click on one, it will immediately change the color scheme and you will be able to assess if you like it or not.
In case the color scheme doesn’t change right away, you might need to refresh the page or clear your browser cache first.
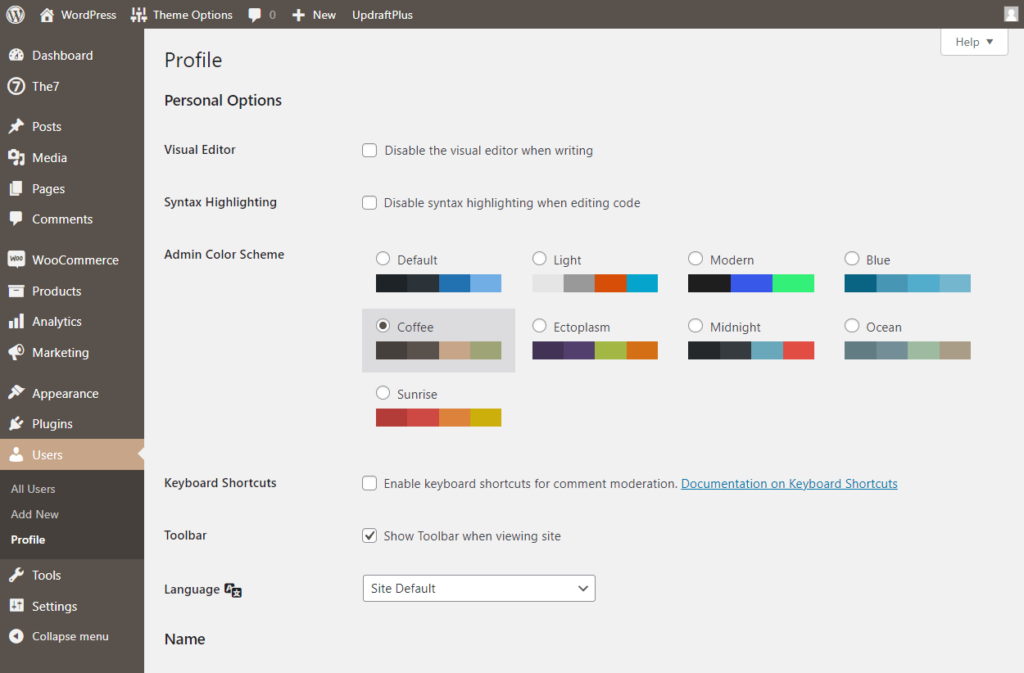
Once you find the color scheme that you prefer, all you have to do is click the update profile button at the bottom of the page.
⚠️ Note: You can also do this for other users. Simply select their user profile from the all users page and edit their color scheme like how you edited yours.
If you want to go back to your old color scheme, simply repeat the steps and select your previous choice.
Just changed your WordPress admin color scheme? Great! But customization doesn’t end there.
Darrel Wilson has an equally game-changing offer focusing on your website’s themes and templates.

Get lifetime access to all premium template kits designed for Elementor:
By taking advantage of this offer, you can not only enjoy a personalized admin dashboard but also streamline your site’s overall look and functionality.
It’s a win-win for any WordPress user!
I made a separate section here in regards to customizing the admin color scheme since it will require more work.
Some minor notes here:
⛔ Warning: Outdated WordPress plugins might cause compatibility issues. Plugins in general can cause vulnerability issues — but they’re generally safe. 🙂
Let’s start with the first one:
This is a little technical. But if you stick with the steps and follow the screenshots below, you will be all right.
It’s a bit lengthy so I will divide this into three steps:
The color schemes available in WordPress are limited.
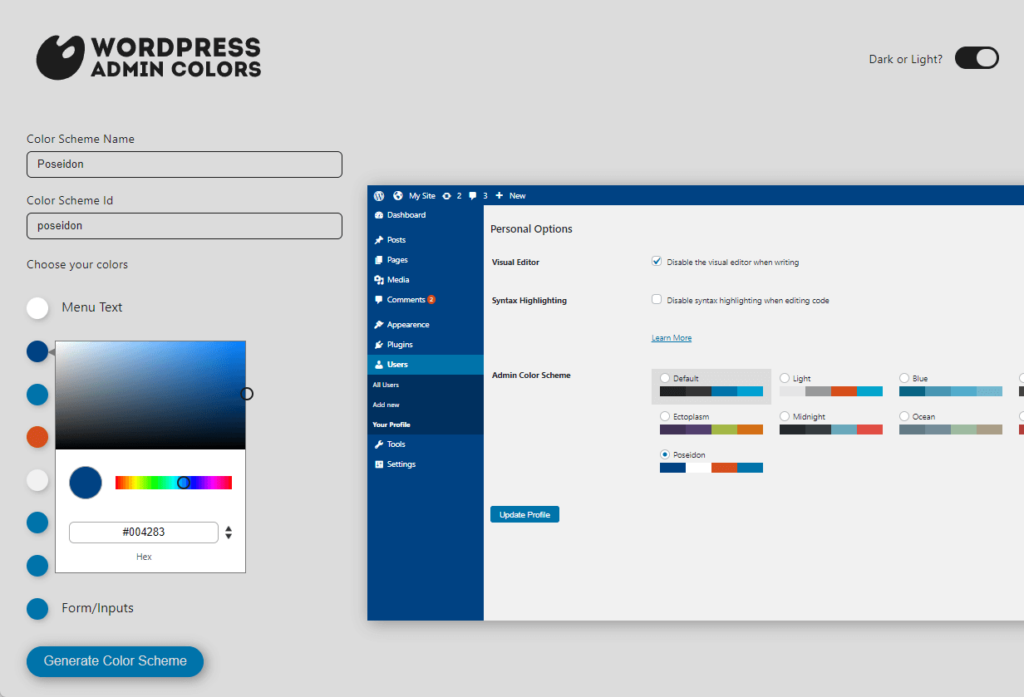
If you want more, you need to create them yourself. Fortunately, you can use this website called WordPress Admin Colors for that.
Simply visit the website and click the start creating button:
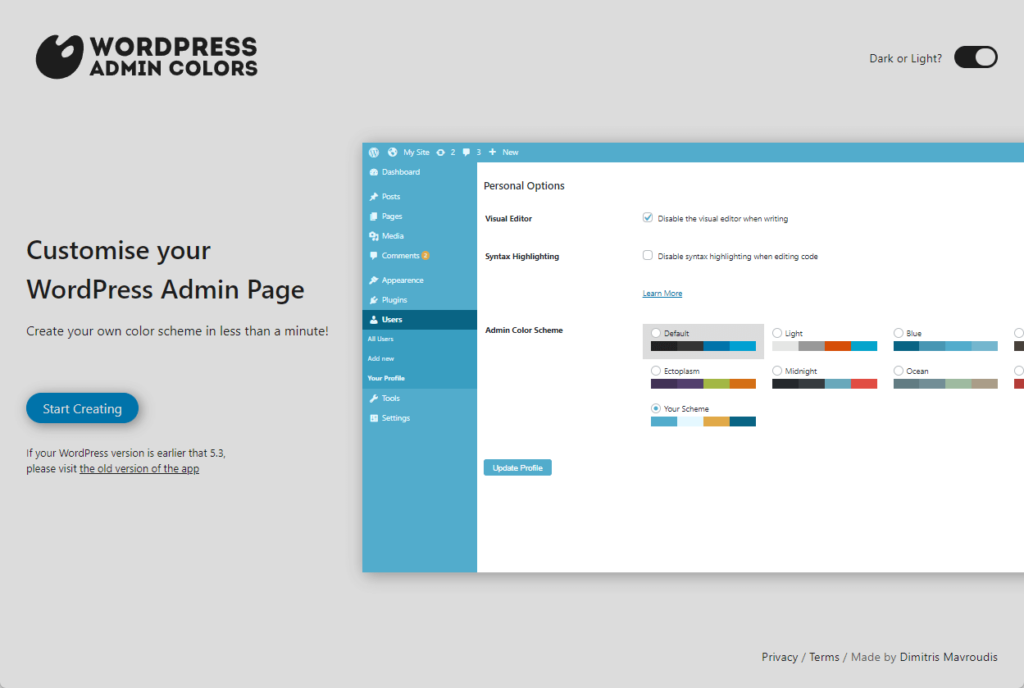
For starters, give your color scheme a name. The ID will automatically generate from the name (though you can change it yourself).
Next up is the colors:
Once you’re done with all of that, all you have to do is click the generate color scheme button at the bottom of the page:
Don’t close the website yet:
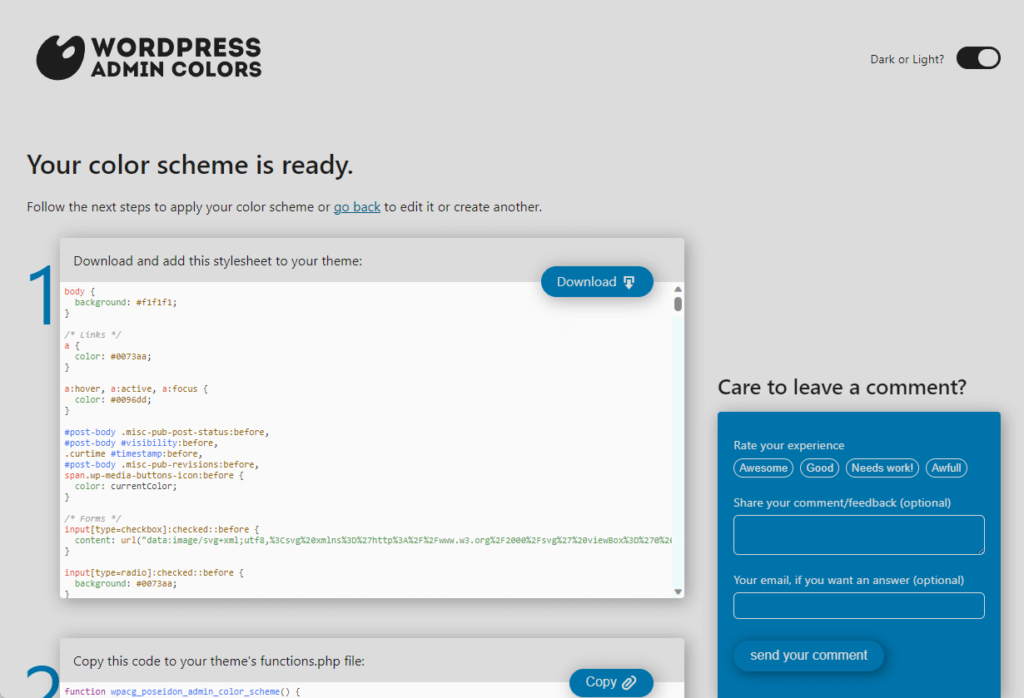
A little background on what you downloaded:
What you downloaded is called a CSS stylesheet — which is like a design guide for websites. This is what determines the color of the admin area.
You need to upload the stylesheet into the theme folder of your site using either of the following:
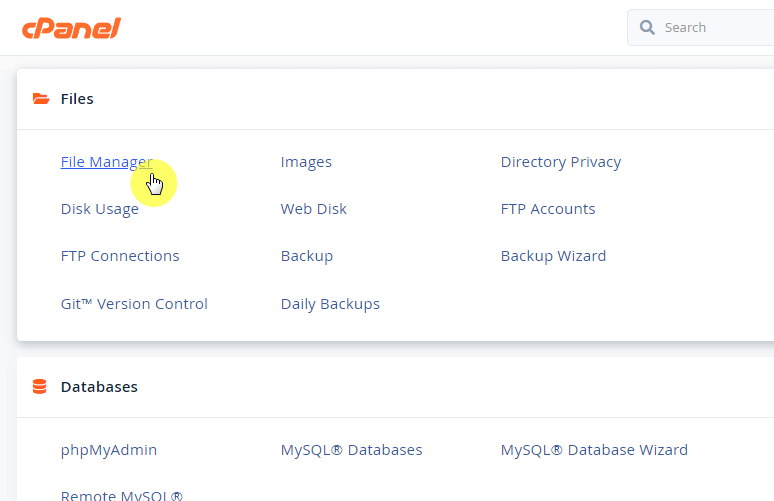
If you have a cPanel, open it up and click the file manager icon under the files group. (For those without a cPanel, check with your webhost).
Browse toward the theme folder of the theme that you’re currently using.
In general, the pathway should be public_html > wp-content > themes > name of the theme.
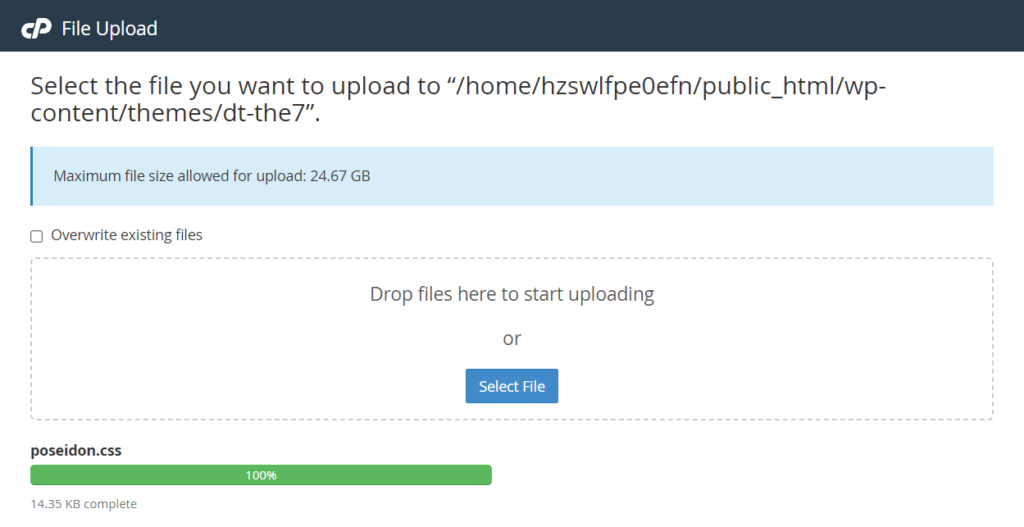
Once there, click the upload button:
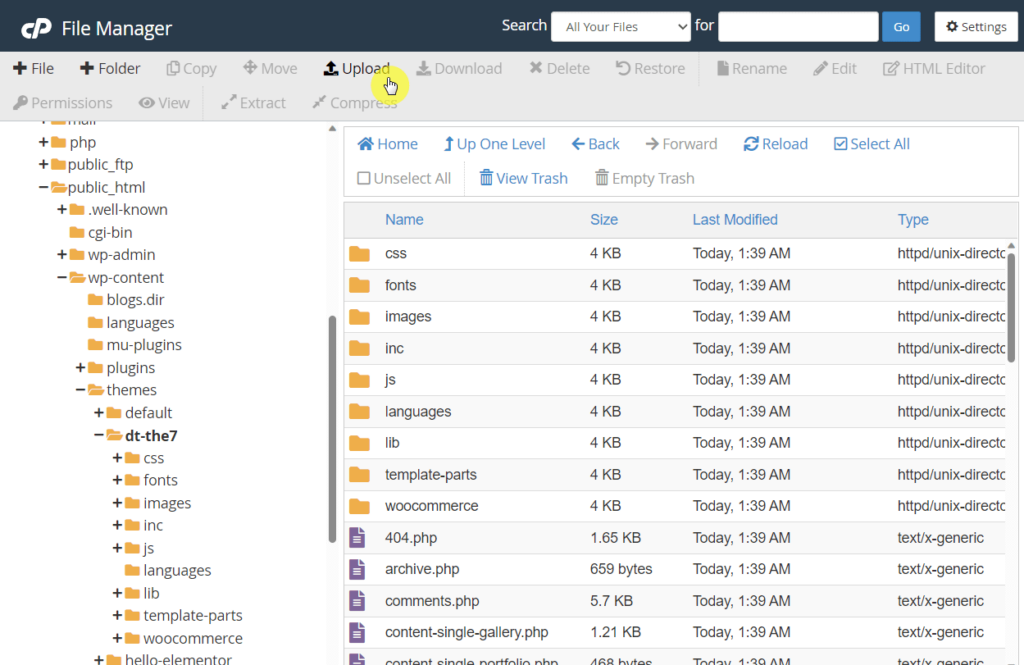
On the next page, simply upload the stylesheet.
Like this:
If you don’t have access to a cPanel, or your webhost doesn’t have a file manager app, you can use transfer protocol programs like Filezilla.
This is what it looks like:
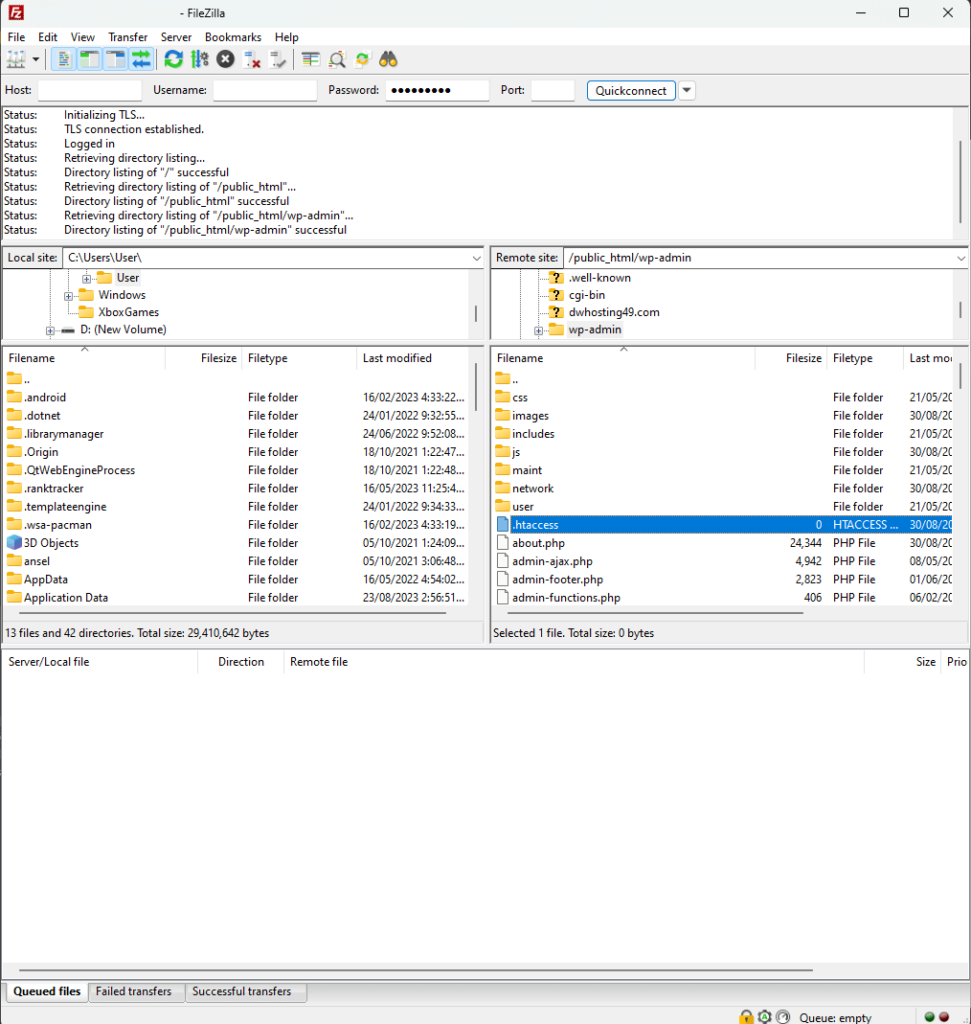
⚠️ Note: To use file transfer protocol programs, you need the IP address and server credentials (username and password). You can ask your host for this if you can’t see yours.
Once you have Filezilla opened:
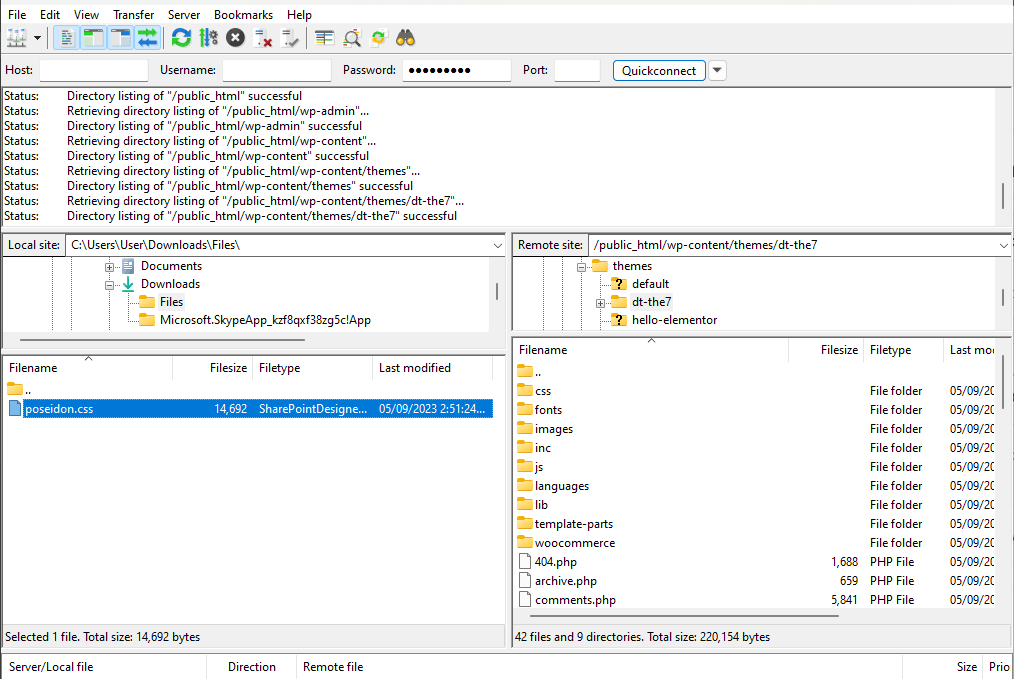
After that, drag the style sheet from the left window to the right window. That will upload the file.
⚠️ Note: The stylesheet only works with the plugin you’re currently using. If you switch to another plugin, you need to reupload the stylesheet file to the new theme folder.
What’s left now is to add the code snippet to the functions.php file of your theme.
There are two methods here:
I don’t recommend the first since it’s risky. You might end up destroying your theme and site.
You can use it if you know already (and if that’s the case, you know where it’s located and how to use the theme file editor).
For a post snippets plugin, there are a lot of them. I use the WPCode plugin so that’s what I will be using in this guide:
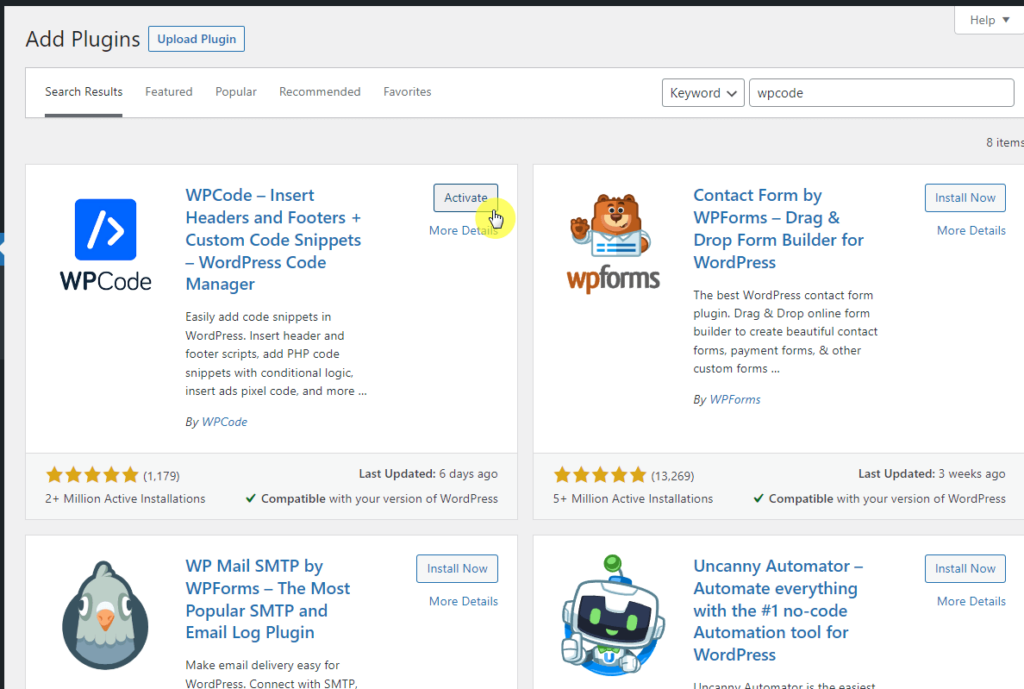
After installing the plugin, it will redirect you to the plugin page.
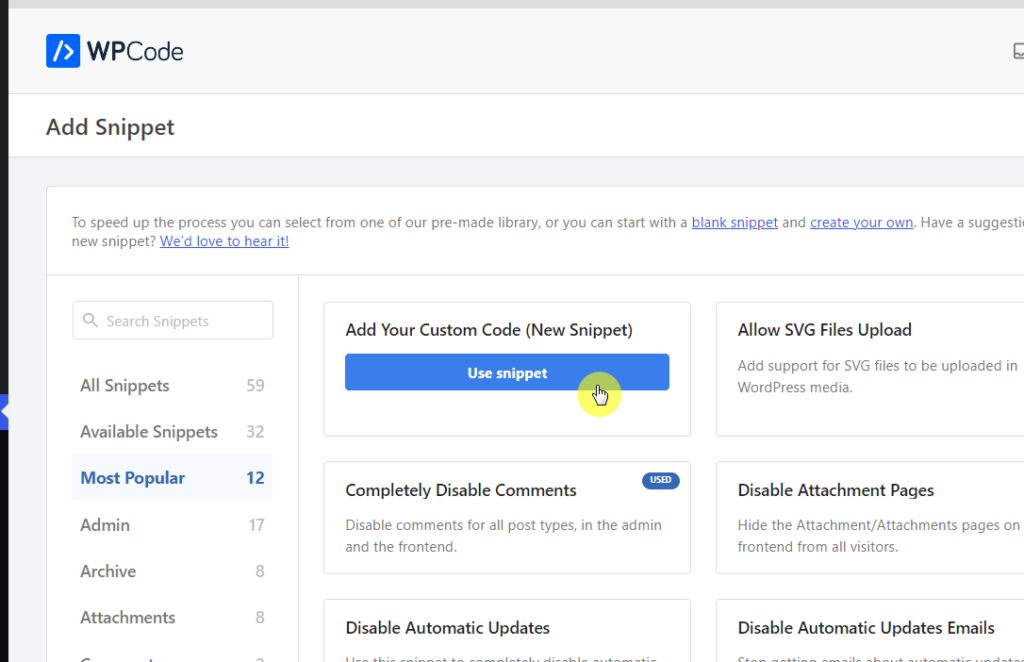
But in case you’re coming from a different page, here is how you can add a custom code using the plugin:
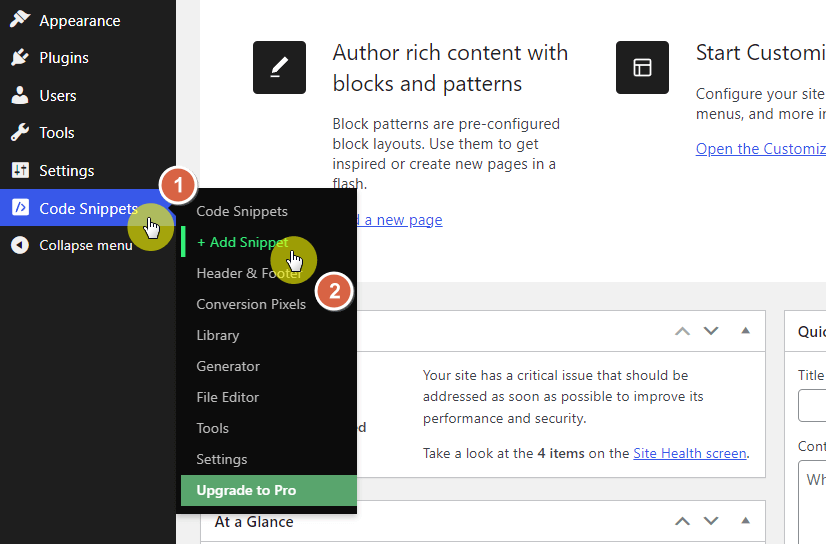
From there:
You’re almost there. 😊
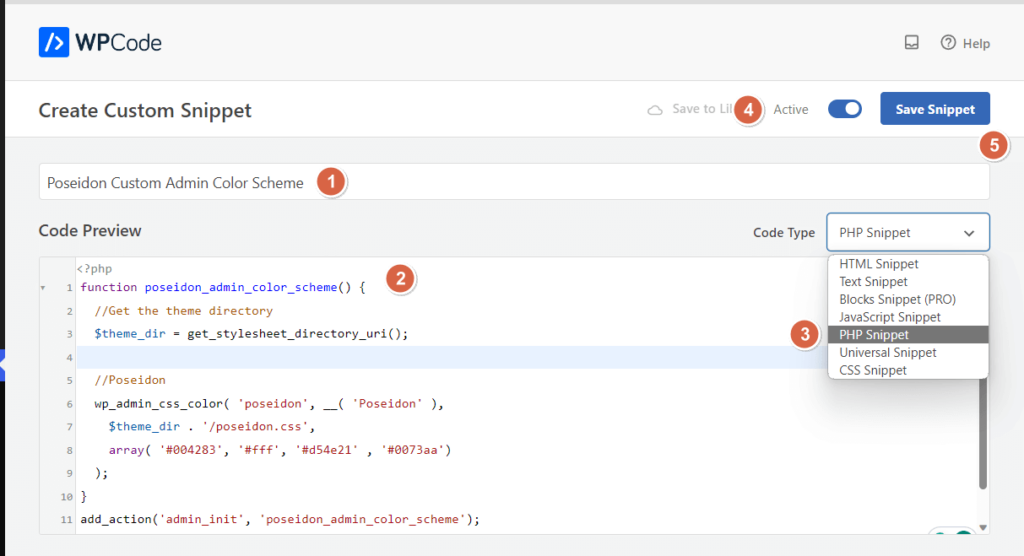
Now finish entering the code snippet:
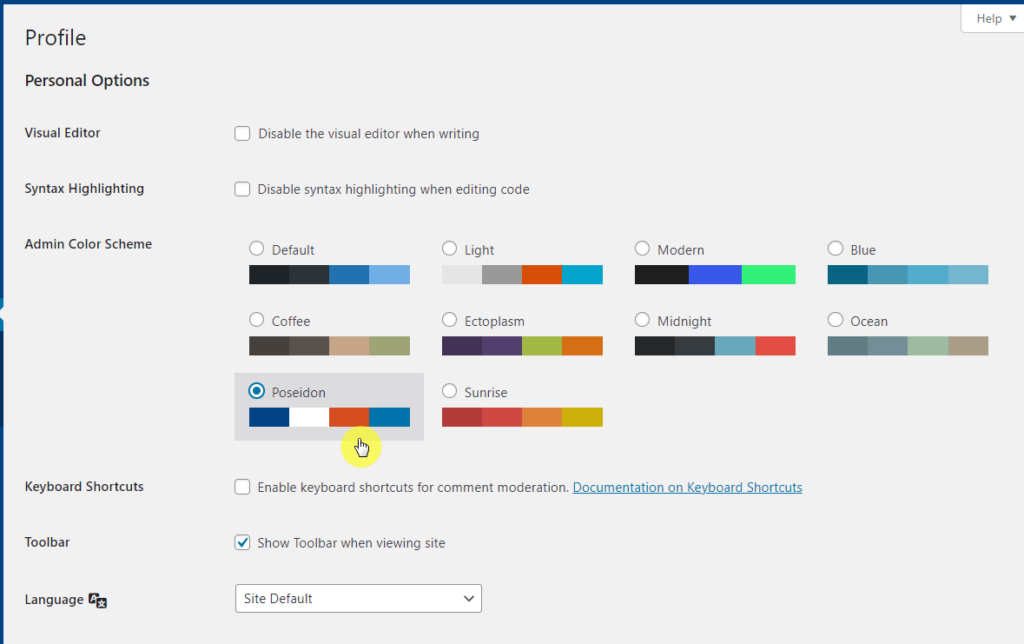
If you go back to your profile page, you will now see the new admin color scheme.
To use it, all you have to do is click on it and save the changes.
On my first try, the new admin color scheme didn’t appear.
Upon further inspection, I found out that WordPress Admin Colors added a prefix to the name of the color scheme.
For example, this is the first few lines of the original code:
function wpacg_poseidon_admin_color_scheme() {
  //Get the theme directory
  $theme_dir = get_stylesheet_directory_uri();
I’m not sure what the problem is, technically speaking, but I know that the name of the color scheme should be Poseidon.
So I experimented and removed the “wpacg” part of the code, so it’s like this now when it worked:
function poseidon_admin_color_scheme() {
  //Get the theme directory
  $theme_dir = get_stylesheet_directory_uri();
If the new admin color scheme didn’t show up on your side, check the code as I did and try removing the prefix.
In addition, other code snippet plugins might also not work — for some reason. I tried them out (I thought the problem was with the plugin) and nothing seemed to happen.
So I suggest sticking to WPCode for this implementation.
It has been a bumpy ride learning how to upload a file to your server and add a code snippet.
But if you’re not comfortable with coding, plugins that can change the admin color scheme are your best friend.
Now, there used to be many plugins for this. Unfortunately, only two remained to be well-maintained, so they’re the only ones I will recommend:
The ACOS – Custom Admin Color Scheme is a WordPress plugin developed by Plugna.
It allows you to change the admin color scheme with a simple color picker.
For it’s usage, it’s quite straightforward:
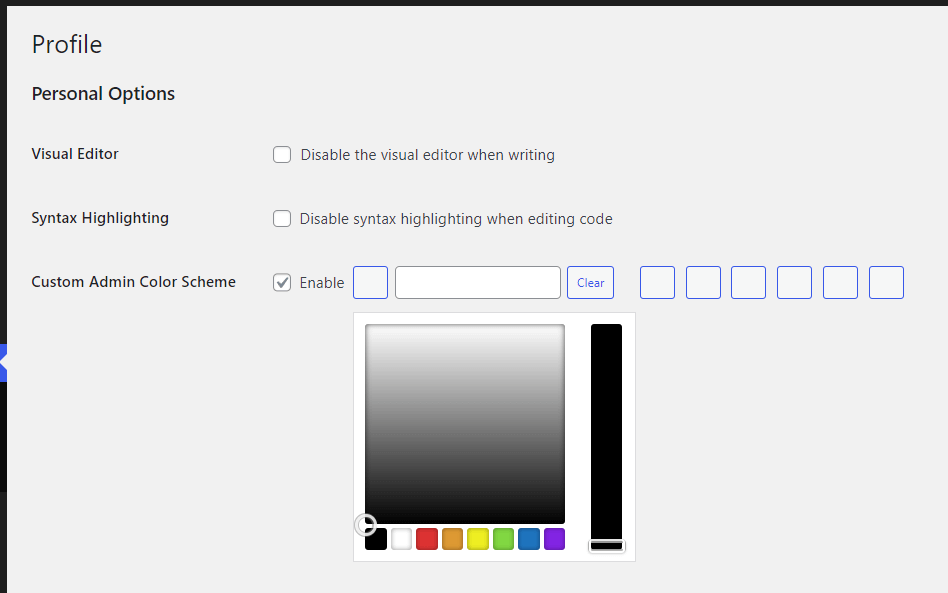
The only caveat that I see here is that there are no labels for each color picker.
That means you wouldn’t know what each color picker is for until you see what they changed.
The Grey Admin Color Schemes plugin, developed by Greg Ross, offers a variety of grey color schemes for your WordPress admin area.
Each grey color scheme brings unique highlights and button colors:
You can see them on the admin color scheme section of your profile page:
The problem here is that, unlike the first plugin, this plugin doesn’t include the capability to create your own color schemes.
Now that you know that you can create your own admin color schemes, how do you pick the perfect colors for those schemes?
Fortunately, there are various online tools designed to help you choose a harmonious and visually appealing color palette.
Whether you’re a seasoned designer or a complete newbie, these tools can simplify the process and guide you toward making an excellent choice.
These tools automatically generate color palettes based on a primary color, an image, or even a mood.
These tools help you find complementary or contrasting colors based on color theory.
Accessibility should never be an afterthought.
These tools help ensure your chosen colors are legible to everyone, including those with visual impairments.
Changing the WordPress admin color scheme is not just a matter of aesthetic preference — it impacts user experience, branding, accessibility, and even productivity.
As you have read, there are multiple reasons to consider making a shift from the default settings.
Whether it’s to:
…the customization possibilities are numerous.
The flexibility and range of options available make WordPress an excellent platform for those who wish to customize their admin experience.
By taking advantage of these features, you can create a workspace that is not only visually appealing but also enhances your day-to-day interactions with your website.
Personalizing your WordPress admin color scheme can significantly improve your user experience and workflow.
But why stop at color customization?
For those looking to take website customization to the next level, Darrel Wilson has an unmissable offer:
Don’t miss this opportunity to further simplify and beautify your WordPress experience.


