WordPress is one of the most popular content management systems available, and it’s widely used by bloggers, businesses, and individuals to create websites of all shapes and sizes. One of the most important aspects of building a website with WordPress is creating pages that are engaging, informative, and visually appealing. In this guide, we’ll cover everything you need to know to create stunning pages with WordPress.
Understanding WordPress Pages In WordPress, pages are a type of content used to create static, non-chronological content that typically doesn’t change very often. Pages are used to create essential parts of your website, such as your “About Us” page, “Contact Us” page, “Services” page, and more. Pages are often used for content that doesn’t fit into the chronological structure of blog posts, such as information about your company, product pages, or detailed descriptions of your services.
Pages are hierarchical, which means that you can create sub-pages (also called child pages) under your main pages. This allows you to organize your content in a logical and easy-to-follow structure. For example, you might create a main “Services” page and then create child pages for each service you offer.
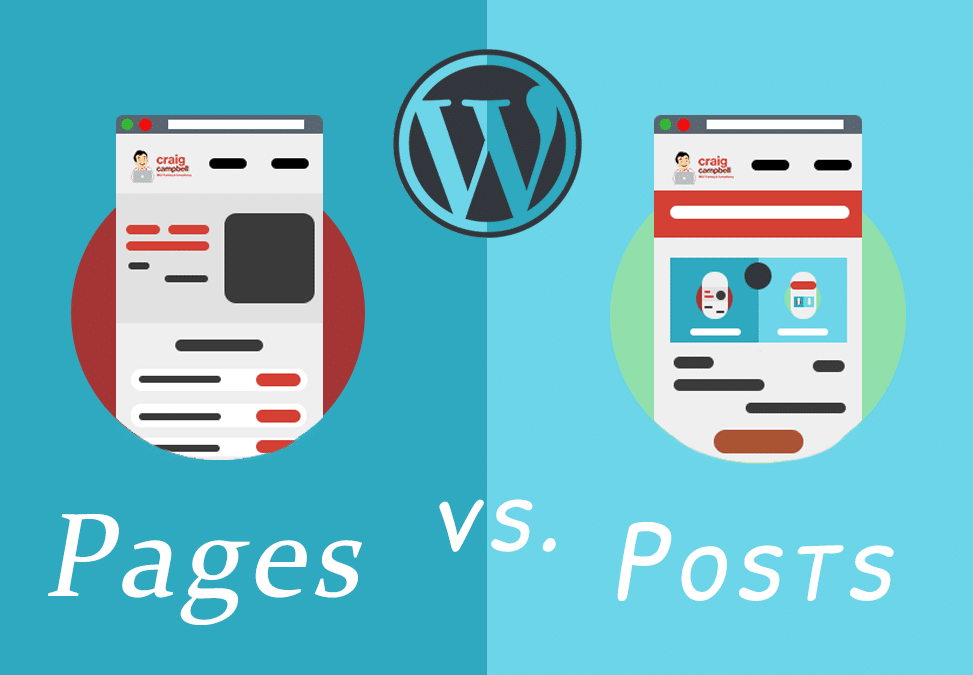
Differences Between WordPress Pages And Posts While pages and posts might seem similar initially, they serve different purposes in WordPress. Posts are typically used for blog content and are displayed in reverse chronological order on your website. Your most recent blog post will be displayed first, followed by your older posts.
Pages, on the other hand, are used for static content that doesn’t change frequently. Unlike posts, pages are not displayed in reverse chronological order and don’t have categories or tags like posts do. Pages are also not displayed in your website’s RSS feed, meaning they’re not included in the automatic notifications sent out to your subscribers when you publish new content.
Another key difference between pages and posts is that pages don’t have comments enabled by default. This means that visitors to your website can’t leave comments on your pages, which can be good if you don’t want to deal with spam comments or don’t want your visitors to engage in a discussion on a particular page.
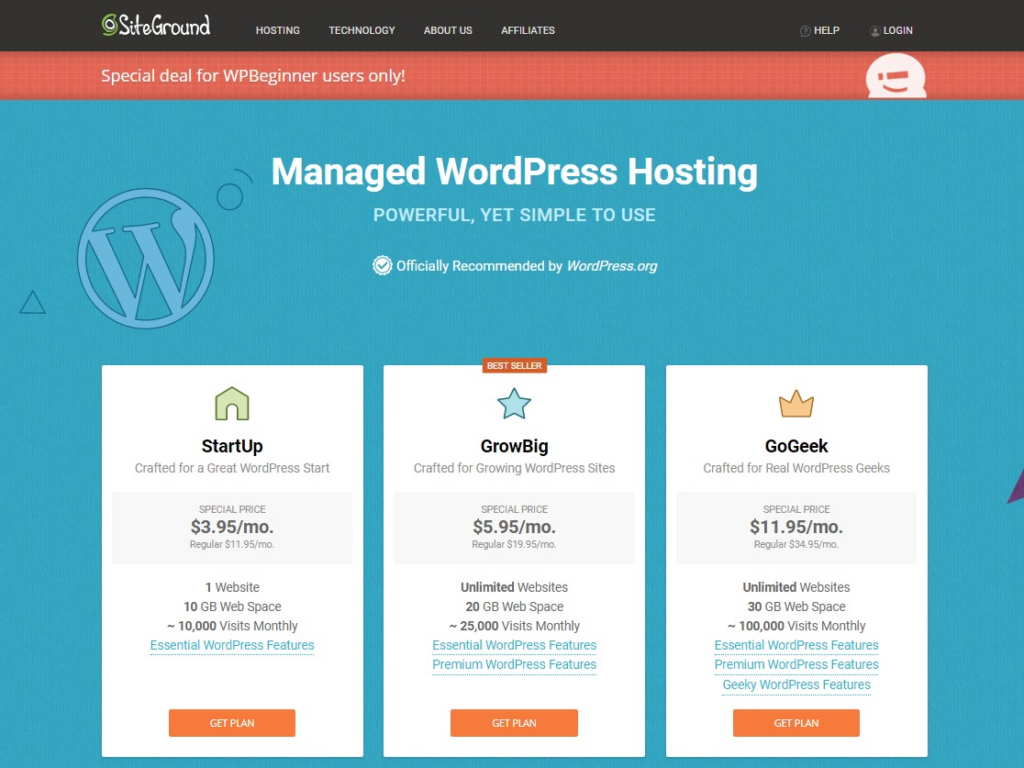
Setting Up Your WordPress Site To get started with WordPress, you’ll need to install it on your web hosting provider. Most web hosts offer one-click WordPress installations, making the process quick and easy. Here you can find the list of popular hosting providers that we tested.
In the process of choosing a hosting provider, it’s essential to evaluate elements such as reliability, speed, security, and customer support. Make sure to select a provider well-equipped to manage your website’s specific traffic and storage needs.
Selecting And Installing A WordPress Theme Once you’ve installed WordPress, the next step is to choose and install a theme. WordPress themes control the appearance and layout of your website. There are many free and paid themes available in WordPress, so take some time to browse through them and find one that fits your needs.
To install a theme, go to the “Appearance ” menu in your WordPress dashboard and select “Themes”. From here, you can browse and search for themes, preview them, and install them directly from the dashboard.
Configuring Initial Settings Before you start creating pages in WordPress, there are a few initial configurations you’ll need to set up for your theme:
Site Title and Tagline: Go to Settings > General and set your website’s title and tagline. These are important for SEO and branding.
Permalinks: In Settings > Permalinks, select the URL structure for your pages and posts. The most common structure is “Post name”.
Reading Settings: If you have a static homepage, go to Settings > Reading and set the “Your homepage displays” option to “A static page”. Then select your desired page for the homepage and the blog page.
Theme Settings: Each theme comes with its own options. Navigate to Appearance > Customize, where you’ll find settings related to the theme, like the color scheme, typography, layout options, and more. Configure these as per your preference.
Widget Areas: Depending on your theme, you’ll have different widget areas like sidebar, footer, etc. Customize these areas as needed in Appearance > Widgets.
Menus: Create and manage your website’s navigation in Appearance > Menus.
Plugins: Install any plugins that you may need for your website. Some themes recommend specific plugins for optimal functionality.
Remember, these are the basic configurations. Depending on your specific theme and your needs, you might have additional settings to configure.
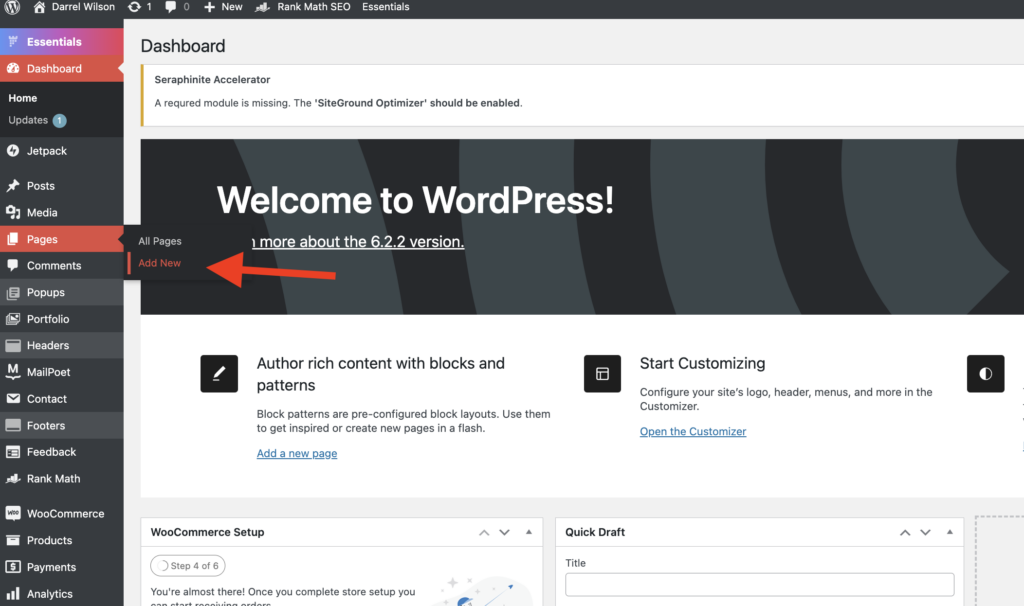
Creating A New Page In WordPress ( Step-By-Step ) To create a new page in WordPress, go to your dashboard’s “Pages” menu and click “Add New”. This will take you to the Gutenberg editor, where you can build your page.
Choose A Page Title And Permalink Structure Choosing the right page title and permalink structure is a crucial step in setting up your WordPress website. Let’s explore each element in detail:
Page Title: The page title, also known as the title tag, is a brief description of the page’s content. It’s what shows up in search engine results, browser tabs, and when the page is shared on social media. A well-crafted page title can significantly enhance your site’s SEO and usability. It should be descriptive, concise, and ideally, include keywords relevant to the page content.
Permalink Structure: Permalinks, short for “permanent links,” are the full URLs to your site’s posts, pages, and other content. They’re what users use to navigate your website and what search engines use to crawl it.
Post name is the most commonly used and SEO-friendly structure, including only the post title in the URL.
Your structure should be like this :
Example www.yourwebsite.com/top-10-vegan-recipes-for-beginners Not Like:Wrong Example: www.yourwebsite.com/?p=123 You can also use the Yoast SEO plugin for helping you optimize your page titles and permalink structures, as well as other aspects of your SEO. Yoast SEO enables you to easily edit the slug (the end part of the URL) of each page and post. This means you can ensure your URLs are concise and readable, and include your focus keywords.
By utilizing Yoast SEO, you can make your page titles and permalinks more effective, enhancing your site’s SEO and usability.
Publishing And Saving Drafts When it comes to creating content on your WordPress site, understanding the difference between publishing and saving drafts is key. These features allow you to control when and how your content is made visible to your audience.
Publishing : Clicking the ‘Publish’ button will immediately make your post or page visible to the public. You can find this button in the top right corner of the WordPress editor.
Saving Drafts: By clicking the ‘Save Draft’ button, your changes will be stored, but not visible on the live site. This is particularly useful if you’re still working on the content or if you want to review or approve it before publishing.
It’s important to note that WordPress also automatically saves your work as you go along. This ‘autosave’ feature ensures you won’t lose your progress, even if you forget to manually save the draft.
Designing Your Page With The WordPress Editor The Gutenberg editor is the default editor in WordPress, using a block-based system for building pages. This editor has simplified the process of adding interactive elements like links, buttons, and other interactive features in WordPress. These elements play a significant role in enhancing the user experience on your site.
This means you can add various types of content to your page by adding different blocks.
To add a new block to your page, click the “+” icon in the editor. From here, you can choose from various block types, such as text blocks, image blocks, video blocks, and more. You can also customize the settings for each block, such as font size, color, and alignment.
The Gutenberg editor makes formatting text, images, and other content on your page easy. You can use the toolbar at the top of the editor to apply formatting such as bold, italic, and underlined text. You can also resize and align images, add captions, and apply filters.
When you want to add a link in Gutenberg, you start by selecting the text that you want to convert into a hyperlink. Once you do this, a toolbar will appear. This toolbar contains the link icon which, when clicked, will give you the option to enter the URL to which you want the text to link. It also provides an option to open the link in a new tab.
If you’re keen on adding buttons to your posts or pages, the Block Editor has a dedicated ‘Button’ block. Once you’ve added a button block, you can customize the button text and add the URL for the button link. Furthermore, you can also stylize the button, changing its color, shape, and size to match your website’s aesthetic.
Overall, the Gutenberg editor provides a user-friendly interface that makes it easy to enrich your WordPress site with interactive features, helping to engage and retain your audience more effectively.
Using Page Builders For Advanced Design While the Gutenberg editor in WordPress is a great tool for creating pages, it may not offer the customization and design flexibility some users require. This is where page builders come in. Page builders are plugins that allow you to create and customize pages using a drag-and-drop interface.
Some popular page builders for WordPress include Elementor, Beaver Builder, and Divi. These builders offer a variety of features, such as pre-designed templates, advanced styling options, and integration with third-party plugins.
Step-By-Step Guide To Creating A Page With A Page Builder To create a page with a page builder, first, you’ll need to install and activate the page builder plugin of your choice. Once activated, you can create a new page and select the page builder option from the editor.
From there, you can select a pre-designed template or start building your page from scratch by adding and customizing elements using the drag-and-drop interface.
One of the benefits of using a page builder is its level of customization and design flexibility. You can customize every aspect of your page, from the layout and colors to the fonts and spacing.
You can add and customize elements such as sliders, forms, and pricing tables. Many page builders also offer integration with third-party plugins, allowing you to add even more functionality to your pages.
Uploading Images And Embedding Videos In addition to text and other page elements, you can add media, such as images and videos, to your WordPress pages. To add an image, click the “+” icon in the editor and select the image block. You can then upload an image from your computer or choose one from your media library.
You can use the video block or paste the URL into a text block to embed a video. WordPress supports embedding videos from popular platforms like YouTube, Vimeo, and Facebook.
WordPress offers a variety of plugins that allow you to add forms, maps, and other interactive elements to your pages. Popular form plugins include Gravity Forms, Contact Form 7, and WPForms. You can use plugins such as Google Maps Widget or WP Google Maps for maps.
When adding media to your pages, optimizing them for performance and SEO is important. This includes compressing images to reduce file size and using descriptive file names and alt tags for images to improve accessibility and search engine optimization.
You can also use plugins such as WP Smush or ShortPixel to automatically compress and optimize your images for better performance.
Structuring Your Page For Seo And User Experience Structuring your page effectively is crucial for both SEO and user experience. This involves organizing content in a logical and user-friendly way, making use of headings, and implementing SEO best practices.
When it comes to organizing your content, think about how your users will navigate the page. Make sure the most important information is near the top, and use a logical flow that guides the user through the content. Break up text with headings, bullet points, and images to make it more readable.
Implementing Headings And Subheadings Headings and subheadings not only help to structure your page but also provide important clues to search engines about the content of your page. Proper headings can help improve your page’s readability and make it easier for users to find the information they’re looking for.
In WordPress, you can use the Gutenberg editor to add headings and subheadings to your page content. Be sure to use heading tags (H1, H2, H3, etc.) properly to maintain a clear hierarchy.
Keywords and metadata are important for SEO and can help search engines understand the content of your page. When creating a new page, research relevant keywords and incorporate them into your page content, including in the title tag and meta description.
WordPress offers several plugins, such as Yoast SEO and All in One SEO Pack , that can help you optimize your pages for search engines by analyzing your content and providing suggestions for improvement.
Ensuring Mobile Responsiveness And Accessibility Mobile responsiveness means your website automatically adjusts to fit the screen size of the device it’s being viewed on. A responsive site looks good and is easy to navigate, whether it’s viewed on a desktop, a tablet, or a smartphone. Most modern WordPress themes are built to be responsive, but it’s essential to test this. You can use tools like Google’s Mobile-Friendly Test for this purpose.
Accessibility, on the other hand, refers to the design of products, devices, services, or environments for people with disabilities. In the context of a website, this means ensuring your content can be accessed by everyone, including people who use assistive technologies like screen readers. Some ways to improve accessibility include providing alt text for images, ensuring sufficient color contrast, using clear and legible fonts, and including captions for videos.
WordPress offers a variety of plugins to help with both mobile responsiveness and accessibility. However, it’s also essential to follow best practices in your site design and content creation. By ensuring your site is both responsive and accessible, you can reach a wider audience and provide a better user experience for all visitors.
Integrating Your Page With WordPress Menus And Widgets It is a step in website creation where the newly built pages are added to the site’s navigation system through menus. Additionally, interactive elements or additional features called widgets are integrated into these pages to increase functionality. This stage is vital in enhancing your site’s user experience by ensuring easy navigation and providing useful tools and features to your visitors.
Menus in WordPress help visitors navigate your site. Once you’ve created a page, you can add it to any menu on your website. Creating a menu in WordPress is a straightforward process. Here’s how you do it:
From your WordPress dashboard, hover over ‘Appearance’ and then click on ‘Menus’. If you haven’t already created a menu, you’ll need to make one. To do this, enter a name for your menu in the ‘Menu Name’ box (this name won’t be visible on your website; it’s just for your reference) and then click ‘Create Menu’. Now you can add items to your menu. On the left side of the ‘Menus’ screen, you’ll see boxes titled ‘Pages’, ‘Posts’, ‘Custom Links’, and ‘Categories’. To add a page to your menu, click on the ‘Pages’ box to expand it, then click the checkbox next to the page you want to add. Click ‘Add to Menu’ and the page will appear on the right side of the screen under your menu structure. You can organize your menu items by dragging and dropping them into the order you want. If you drag a menu item to the right, it will become a submenu item. Once you’re satisfied with your menu, don’t forget to click ‘Save Menu’. Remember to check your live site to make sure the menu appears as expected. If you want to make changes, you can always go back to ‘Appearance’ > ‘Menus’ to edit the menu.
Incorporating sidebars and widget areas into your WordPress site can enhance its functionality and user experience. Sidebars and widget areas are spaces on your site where you can add various widgets, which are small blocks of specific functionality.
To incorporate sidebars and widget areas, follow these steps:
Understand Your Theme’s Widget Areas : First, you need to understand where your theme allows you to add widgets. Most themes offer at least one sidebar and several other widget areas, often in the footer or header.
You can check these areas by navigating to Appearance > Widgets in your WordPress dashboard.
Adding Widgets: On the Widgets page, you’ll see a list of available widgets on the left and your widget areas on the right. To add a widget, simply drag it from the left and drop it into one of the widget areas on the right. Alternatively, you can click on the widget, select the desired widget area, and click ‘Add Widget’.
Configuring Widgets: Most widgets have configurable settings. For example, the ‘Text’ Widget allows you to add custom text or HTML, while the ‘Recent Posts’ widget allows you to set the number of posts to display. After adding a widget to a widget area, click on it to expand and configure its settings.
Reordering Widgets : You can also reorder the widgets within a widget area. Simply drag and drop them into your preferred order.
Saving Changes: WordPress automatically saves your changes as you add, configure, or reorder widgets.
Remember, the key to effectively incorporating sidebars and widget areas is to consider what information or functionality would be most useful to your visitors. This could include a search bar, a list of recent posts, a custom menu, or a sign-up form for your newsletter.
Conclusion Congratulations on learning how to create stunning pages with WordPress! With the knowledge you’ve gained, you can now confidently design and publish content that engages and delights your visitors. Remember to keep practicing and refining your skills to create the best pages for your website.
Always remember the importance of user experience and search engine optimization, as these factors can significantly impact your website’s success. By following best practices and regularly updating and maintaining your pages, you can improve your website and keep your audience engaged.
Thank you for joining me on this journey, and I wish you all the best in your future page-building endeavors with WordPress!