Want to create a video?
By the end of this guide, you will learn how to make a YouTube video in a few simple steps, and some tips and tricks.
Here’s what we’ll talk about here:
Why start a channel on YouTube If videos are still relevant today How to launch your first video Ready? Let’s get started.
Why start a YouTube channel?
With over 2 billion logged-in monthly users, YouTube has evolved from a simple video-sharing site to a powerful platform for content creators.
Users watch a billion hours of video every day. To put that in perspective, that’s over 114,000 years of video consumed every day.
YouTube offers a unique platform to reach a global audience of different cultures and backgrounds, which is an exciting experience for those who do the grind.
But even more, here are other reasons why you should pursue a YouTube following:
YouTube provides a platform to showcase your unique talents and interests, whether it’s cooking, gaming, or DIY projects. Establish yourself as an authority in your niche and open doors to new opportunities like sponsorships and collaborations. YouTube offers various ways to earn money, from ad revenue and channel memberships to merchandise and Super Chat. Create a loyal community by engaging with viewers through comments, live chats, and community posts, building a dedicated fanbase. Not to add, creating YouTube video content helps you develop valuable skills in video production, editing, marketing, and public speaking.
Consider the foundational role of a robust web hosting service to ensure your content reaches your audience seamlessly.
This is where Hostinger comes into play, offering an unmatched hosting solution that you simply can’t overlook.
Discover the Hostinger advantage for your WordPress site:
Enjoy a 99.9% uptime guarantee Affordable pricing at just $2.49/month (use the code darrel10 to get a discount) Global performance and reach with Hostinger’s optimized hosting platform With Hostinger, you’re not just choosing a hosting service:
You’re choosing a partner dedicated to delivering speed, stability, and superior performance for your website.
Are YouTube videos still relevant today?
Despite the rise of different video and reel-sharing platforms, YouTube retains its primacy due to its ability to meet user needs and adapt to emerging trends.
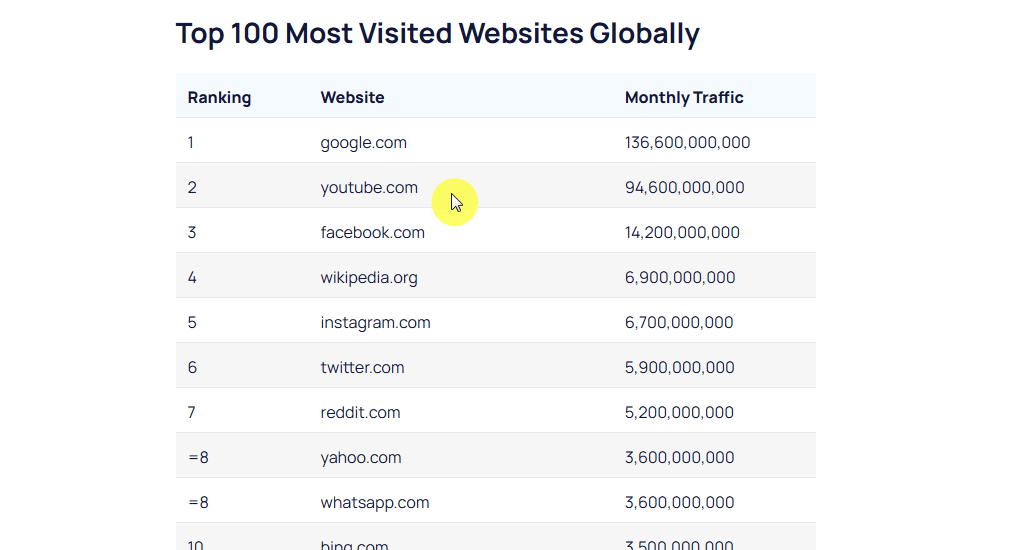
YouTube is the second largest search engine in the world, just behind Google. People still prefer YouTube to search for information, tutorials, reviews, and entertainment.
As of 2024, YouTube receives at least 94.6 billion traffic per month (source here
Video traffic accounts for over 80% of all consumer internet traffic , and this trend shows no signs of slowing down.
Clearly, YouTube remains an ideal platform for educators, experts, and anyone looking to share valuable insights — even for you and for what you have to say.
Launching Your First YouTube Video
Let’s now talk about the most important part of this article:
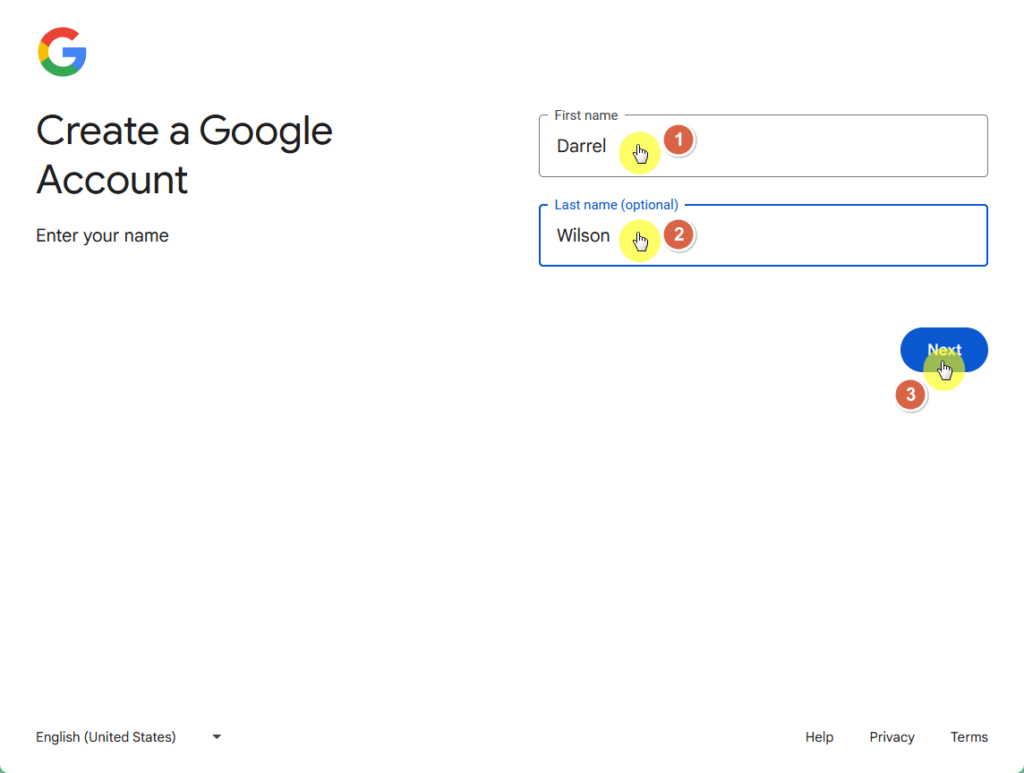
Step 1: Create a YouTube channel Naturally, since we’re talking about a YouTube video here, you will need to create a Google account to create a YouTube channel for your video.
If you don’t have one, click here
Like this:
This will lead you to the basic information page where, as the name suggests, you enter your birthdate and gender.
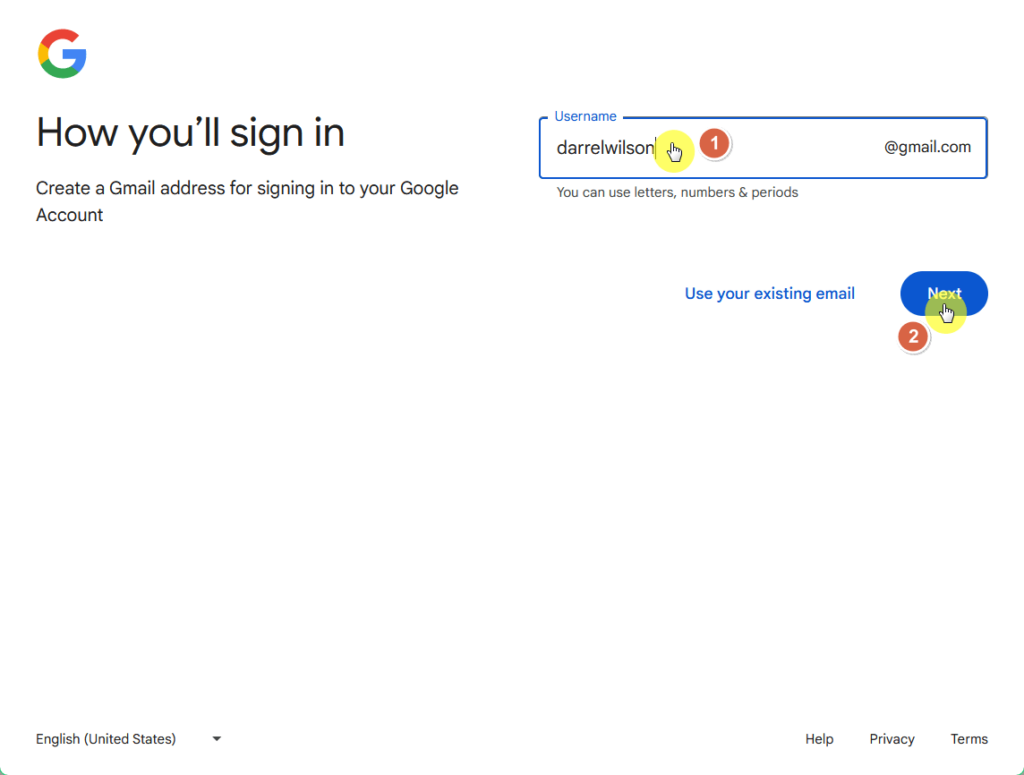
After filling those up, you will then have to enter a username for your account, which is also going to be your Gmail address.
This is what you will be using to sign in to your account:
⚠️ Note : Make sure that you can easily recall the username that you have entered here. Most use their names so it’s easy to remember.
Now it’s on to your password — make sure to create one that’s a combination of letters, numbers, and symbols so that it’s secure.
The next page is going to be about privacy and terms , where you simply need to scroll to the bottom and indicate that you agree.
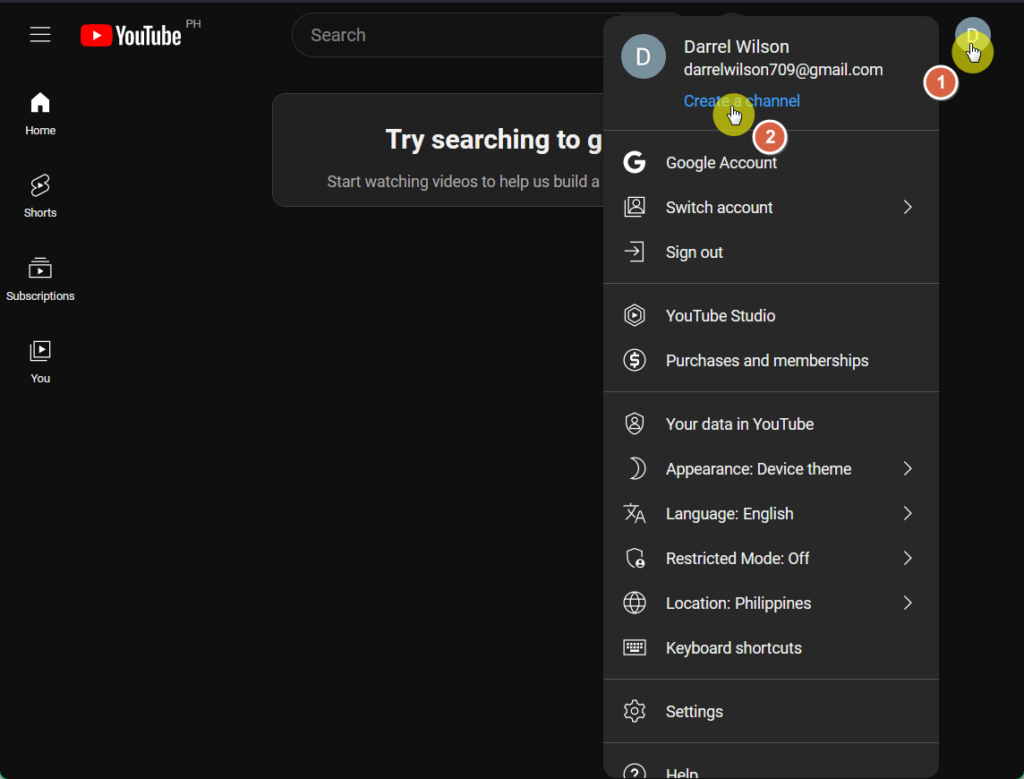
You will then be able to sign in to YouTube and create a channel:
From there, you will be able to customize your channel, including your name and handle, and your channel picture.
Step 2: Plan and prepare for your video Before hitting the record button, it’s important to plan and prepare your video to ensure it meets your goals and engages your audience effectively.
A good YouTube video doesn’t have to be perfect.
However, it must feature engaging content, high-quality visuals, clear audio, and be concise and well-paced to keep viewers engaged.
🖐️ Pro tip : Don’t hesitate to watch similar YouTube videos as the one you’re planning to get ideas, inspiration, or topics where your video can add new stuff.
Depending on your audience, there are a lot of video types you can choose from:
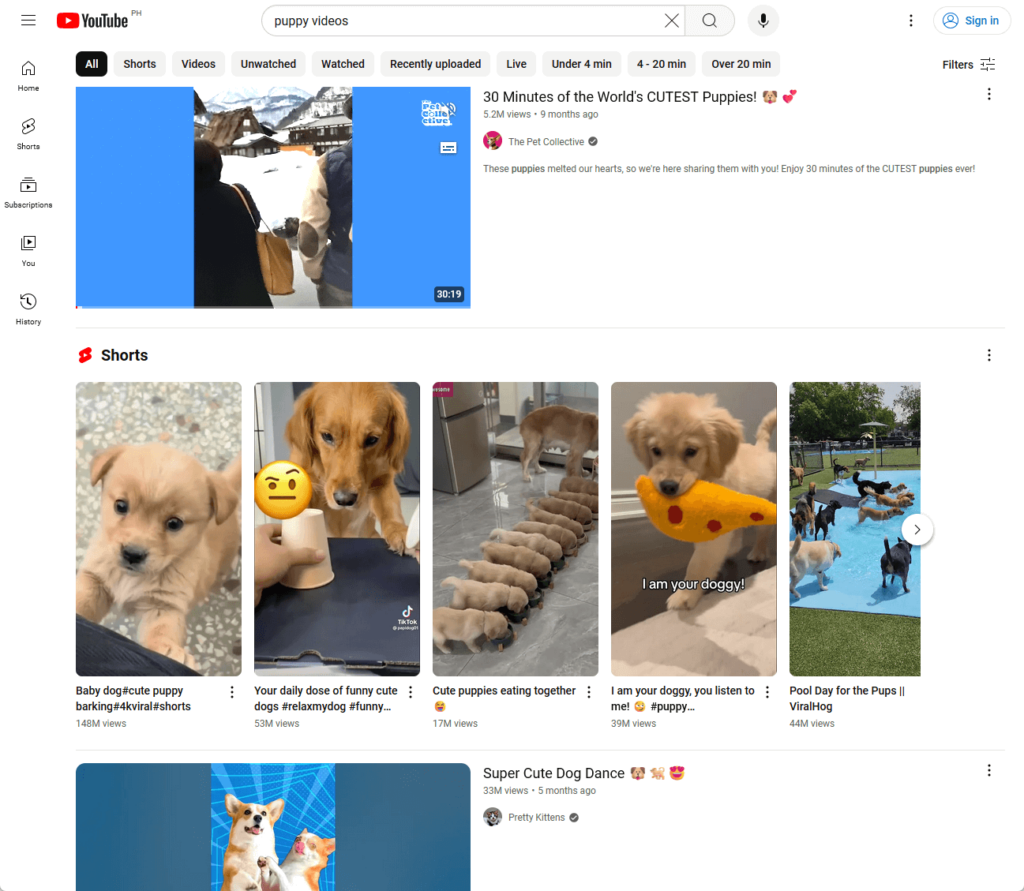
Vlogs Gaming videos How-to videos Pet videos Reviews Comedy sketches Compilations of other videos For example, Darrel’s videos are more on the tutorial side, so that’s how he formatted his videos — like this one that reached 1.6+ million views:
Fortunately, the best video you can start with is an instructional video.
According to a recent TechSmith study
Once you get this settled on what niche you would like to work on, move on to the following steps:
Define your goals: Identify the purpose of your video and what you hope to achieve, whether it’s educating your audience, entertaining them, or promoting a product.Research and ideation: Explore trending topics and brainstorm unique YouTube video ideas to create compelling content types that stand out.Create a content plan: Outline your video’s structure, and script key points, and consider storyboarding to visualize each scene and maintain a smooth flow.Set up your space: Choose an appropriate filming location with a clean background, good lighting, and minimal background noise to enhance the overall production quality.Gather your equipment: Ensure you have all the necessary equipment, such as a camera, microphone, and lighting, to produce high-quality footage. As for the last to-do, it may be intimidating to select equipment if you’re not that well-versed with technical stuff, but it doesn’t have to be that way.
The right camera depends on the video you’re making — use a digital video camera for high-quality filming, a smartphone for mobility, and a webcam for convenience.
If your budget permits, invest in a good microphone so that your audio quality is crisp, clear, and professional (if needed, get proper screen recording software).
Step 3: Film and edit your video Now we go into the nitty-gritty of your filming and editing process.
I originally wanted to write this in paragraph form, but I think it’s more effective to give you a rundown on the best things to do:
Whenever feasible, film your YouTube videos during daylight hours to take advantage of natural light. For nighttime scenes, ensure there’s adequate lighting so viewers can clearly see the content. Keep your camera steady by using a tripod to avoid shaky shots and look more professional. Use an external microphone to capture clear audio and reduce background noise. If you’re filming yourself, face the light, with the camera directly in front of you. Choose appropriate clothing, keep your background clean, and speak loudly and clearly. Even in Darrel’s latest videos, with his main channel having close to half a million subscribers, you can see that he still practices those things.
🖐️ Pro tip : Capture b-rolls or additional footage that can be used to improve your main content and keep viewers engaged.
On the other hand, if you’d prefer screen recording for your video, make sure to clean your desktop and close other programs to prevent notifications and unwanted pop-ups.
Some of the most reliable screen recording software you can use:
OBS Studio: This is a free, open-source software that offers powerful screen recording and live streaming capabilities, a popular choice for gamers and professionals.Camtasia: This provides an intuitive interface with robust editing features, ideal for creating professional-looking tutorials, presentations, and software demonstrations.ScreenFlow: Exclusive to Mac users, it’s known for its ease of use and high-quality recording, as well as its advanced editing tools for creating polished videos.Bandicam: This offers lightweight and efficient screen recording with high compression ratios for high-quality videos without significant file size increases.Snagit: This is perfect for both screen capture and video recording, providing a simple yet powerful toolset for creating detailed tutorials and instructional videos. After recording, edit your videos through a video editor to organize your footage, trim and cut segments, add transitions and effects, enhance audio, and add text and graphics.
For editing, here are some of the more popular video editing software:
Adobe Premiere Pro: Widely used, this offers advanced features and a flexible interface that makes it suitable for both beginners and professional editors.Final Cut Pro: Exclusive to Mac users, its powerful performance and user-friendly interface are ideal for creating high-quality videos quickly and efficiently.DaVinci Resolve: Combining professional editing, color correction, visual effects, and audio post-production, this is a comprehensive tool favored by filmmakers.iMovie: Perfect for beginners and available for free on Mac, iMovie offers a simple and intuitive interface with all the basic tools needed to create polished videos. When making the final cut, make sure that your video is free from mistakes , and has a simple video intro, with subtle music, good voice-overs, and a compelling outro.
A good outro would include specific calls to action , like encouraging your viewers to click on your channel and subscribe, or to visit another video of yours or an external link to your site.
Step 4: Upload and optimize your video After you’ve filmed and edited your video, you can now upload it to YouTube and optimize it for maximum reach and engagement.
You’re not only making videos that are good for users but also for search engines — optimization ensures that it reaches the right audience and gains traction.
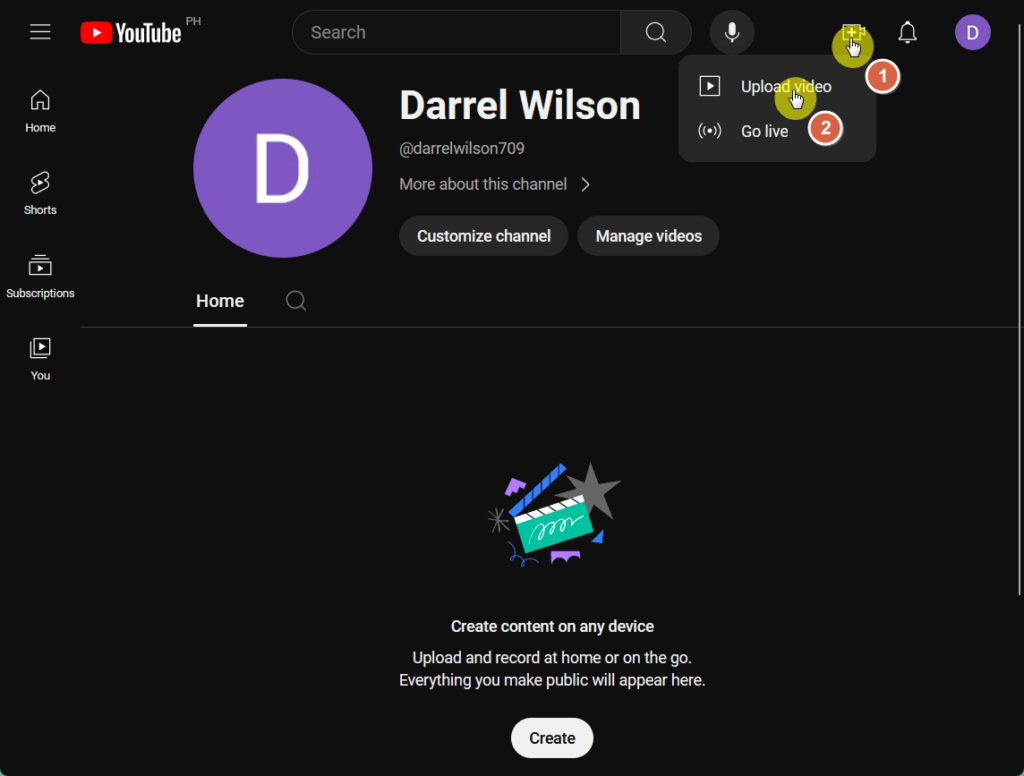
To do this, open your YouTube channel and click on the create button at the upper portion of your screen > click the upload video button:
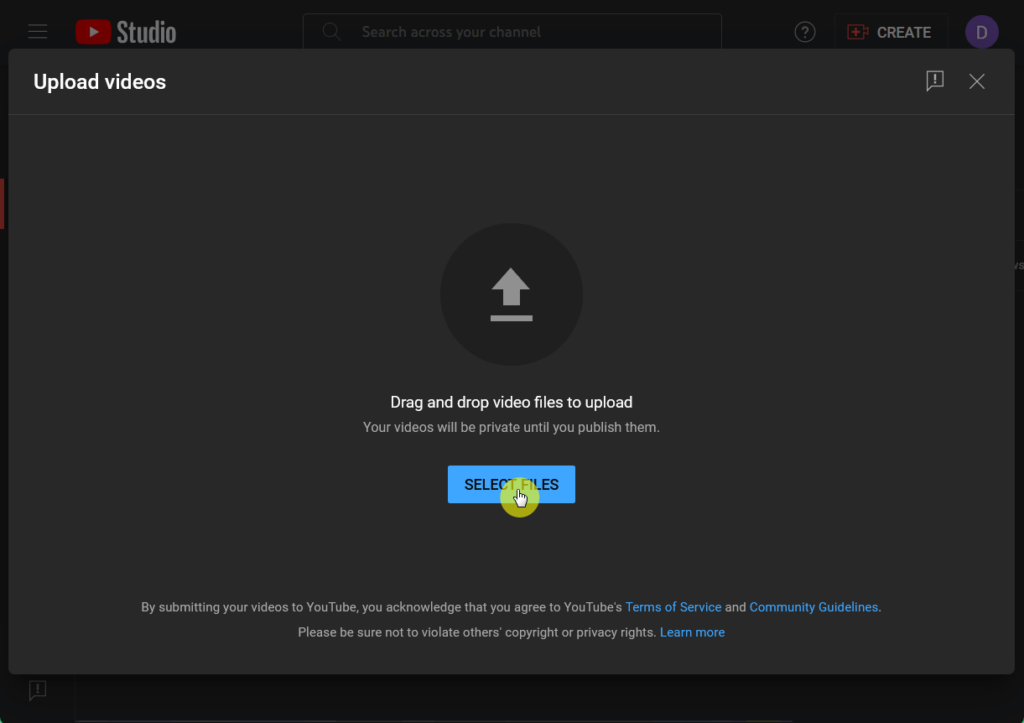
This will lead you to the Creator Studio.
Click on the select files button and find your video on your computer in the pop-up window or drag and drop your video here.
It looks like this:
⚠️ Note : If your video is less than 60 seconds long, it will upload as a YouTube Short.
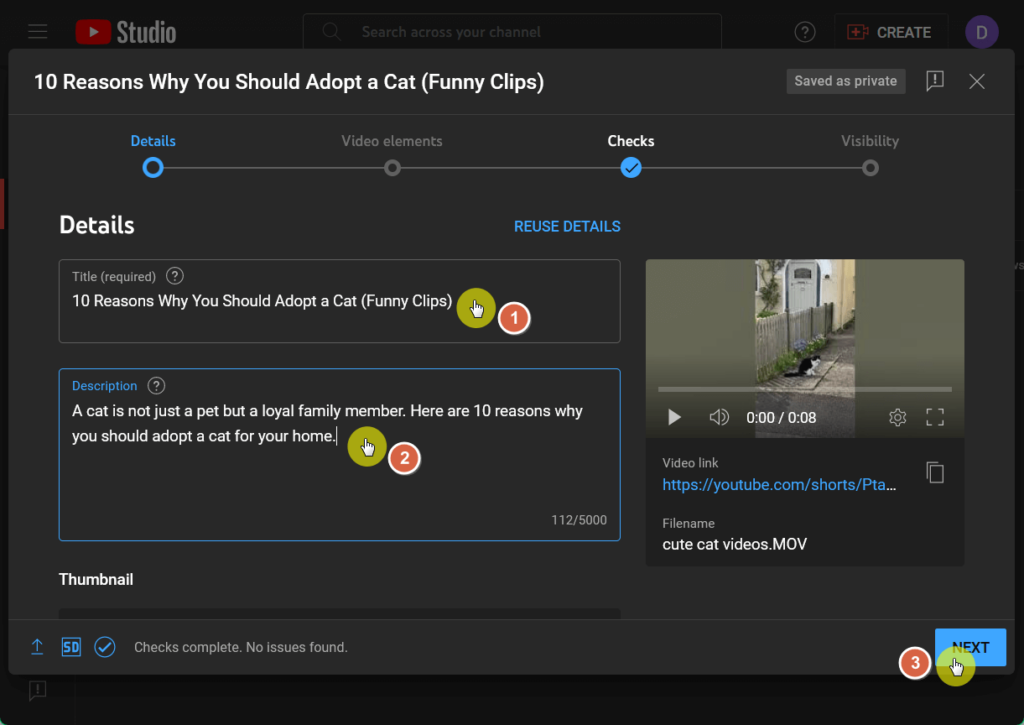
After that, you will have to add details to your YouTube video before posting it — choose a short yet catchy title and a video description that matches your video.
Scroll down the window to add a custom thumbnail, activate the age restriction, if applicable, and click next when you’re done.
Make sure to add tags to your video after adding a thumbnail (don’t forget to use good keywords for the tags, title, and description).
For the next pages:
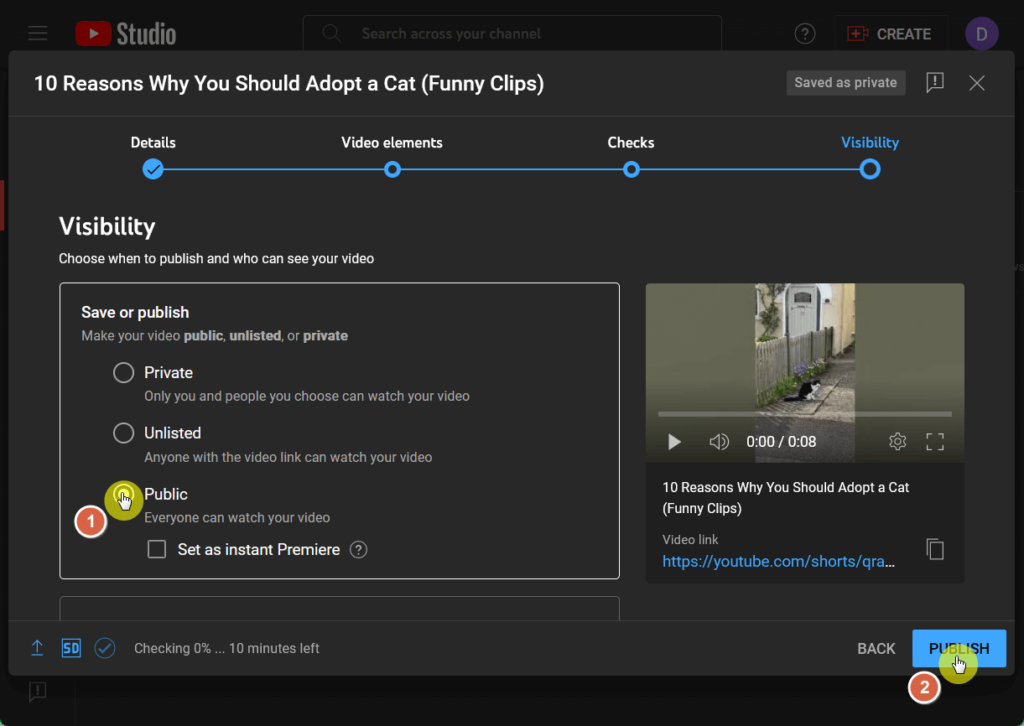
You can access options like adding subtitles, an end screen, and cards to show viewers related videos, websites, and calls to action. YouTube will then check your video for copyright issues that may restrict its visibility so that you can fix it before publishing. Now you will be on the final page on visibility where you can select your audience.
Click the public option so everyone can watch your video or scroll down for instant premiere settings and scheduling options.
When you’re all set, click the publish button to put your video on air:
Unfortunately, you’re not done yet. 😅
To maximize your video’s potential, optimizing your SEO is key so that it increases its ranking in the YouTube search engine.
To make sure that your SEO is top-notch, here are the things you must do:
Conduct keyword research: Google Trends, TubeBuddy, and VidIQ help find relevant keywords for your video topic that would likely match the user’s search box query.Optimize your video title and description: Include your primary keyword/s at the beginning of an engaging and accurate video title and in a detailed description.Utilize tags effectively: Use a mix of broad and specific tags, including variations of your primary keywords.Create eye-catching thumbnails: Design custom thumbnails with bright colors, bold text, and clear images to attract clicks.Add closed captions and subtitles: Upload accurate subtitles and closed captions to improve accessibility for your viewers and enhance SEO.Engage your audience: Encourage viewers to like, comment, share, and subscribe to boost engagement signals to YouTube.Use YouTube Analytics: Monitor your video’s performance using YouTube Analytics and refine your strategy based on the insights gained. Focus on viewer retention from the start of your YouTube video.
Encourage prolonged engagement within the first 10 seconds and provide compelling reasons for viewers to continue watching.
Lastly, since YouTube transcribes your content, say your main keyword/s at least two times in the script.
It’s a small thing, but it helps your video in more ways than one. 🙂
Getting your video in front of as many screens as possible is important for growing your YouTube channel and building an audience base that’s tuned to your updates.
If you’re into monetization, what’s more enticing is that YouTube grows as an ad-churning machine — top creators can make hundreds, if not thousands, of dollars a day.
Your video’s first 48 hours online are critical as this is where generating a substantial buzz and leveraging your current audience play a big part.
To put your best foot forward to a lot of viewers and expand your channel, consider doing the following promotional tactics:
Share on social media: Share your video across various social media platforms to reach a broader audience and consider email marketing.Collaborate with other creators: Collaborate with fellow YouTubers or influencers to access their audience and broaden your reach.Engage with online communities: Participate in forums and groups related to your video’s topic and share your video when relevant.Embed videos on your website: Embed your YouTube videos in relevant blog posts or pages on your website to increase visibility.Engage with your audience: Respond to comments on your video to foster community and encourage repeat viewers. If you have the resources, you can also run paid ads to endorse your video and quickly reach a larger audience.
But if you’re diligent enough to promote yourself, the grind will reward you already!
Creating a YouTube Video
Creating a video can be daunting, but with the right approach, you can set yourself up for success in creativity, personal branding, and yes, even becoming viral.
In creating your next videos, remember to stay consistent, focus on quality, and engage your audience, so that you establish a following base that’s tuned into your content.
Remember that things always change, so it’s important to keep learning and improving and to stay updated with the latest trends and techniques.
Wrapping up, it’s time to ensure your online presence is just as impressive..
Darrel Wilson offers a solution to simplify your web design process and maintain a visually appealing and professional website.
Secure lifetime access to all premium Elementor template kits:
Get lifetime access to all premium template kits designed for Elementor Complete with 2 years of dedicated support Only for $99 — that’s already for the lifetime access Ready to take your web design game to the next level? Explore the premium Elementor template kits today!