Hey guys! I am back with another super helpful WordPress guide for you, this time for boosting your business with an eCommerce website. This step-by-step, no-nonsense guide on how to make an eCommerce Website with WordPress is perfect for the entrepreneur in you.
ECommerce, as you may know, refers to the sale of goods and services online through the Internet. The online marketplace started in the early 1990s and is booming with buyers. Now a multibillion-dollar industry, an eCommerce website can be one of the most significant assets you have for your company.
We have covered you, from buying a domain to selecting a theme, creating your product catalog, and managing the eCommerce website. Read on to find the why and how of building an eCommerce website for your business.
Why Should You Hop Into The World Of eCommerce In 2021, eCommerce sales accounted for 19% of total retail sales , and this number is estimated to go up to 25% by 2026, with 218.8 million US consumers shopping online in 2023. Indeed, you will not want to miss out on this action.
eCommerce websites continue to grow popular globally because of a few simple reasons.
💸 They Are Cheap eCommerce websites are like a money-saving dream compared to those pricey brick-and-mortar shops! Forget about rent, electricity, staff, and all those other pesky expenses. You can create a dazzling online store for just a few bucks.
And the cherry on top? Those savings can be funneled back into your business, stocking up on more inventory or supercharging your marketing efforts. It’s a win-win situation that’ll have your sales soaring sky-high!
🌐 You Can Dip Into The Global Market Once you build your eCommerce website with the help of our guide, you will be able to serve customers all around the globe. People from different countries and time zones can visit your website whenever they feel comfortable without bothering you.
Expanding your customer base and market will surely boost your sales. Further, it will be your duty to create a trusted brand name that is known worldwide.
⏰ 24*7 Sales Without you having to invest all of your hours, your online shop is open for customers throughout the day, that too without any staff. This is highly effective when you dip into the global market. With an eCommerce website, you will not have to be awake round the clock to serve people from different time zones.
🛍️ Unlimited Shelf Space Compared to a brick-and-mortar store, your eCommerce store can display all your products simultaneously. As a result, you will no longer have to worry about selecting the best and keeping limited stock.
📊 Easy Data Collection When you operate your business through an eCommerce website, tracking sales and shipment becomes almost automated. This will reduce the time spent on logistics by a considerable margin and allow you to rectify any errors.
📧 Customer Data At Your Fingertips Once you hook your customers to your eCommerce platform, you will no longer have to worry about collecting their email and names. Instead, once they order or sign up for your newsletter, you will automatically receive the information.
According to w3techs, WordPress powers 43.2% of all websites , holding a 63% share of the content management system market. Therefore, I highly recommend using WordPress for any online presence you want to create, from starting a blog to running an eCommerce website.
WordPress is an open-source and free platform that comes with the basic framework of a website. From here, you can choose different themes and create millions of unique websites with the help of plugins and plugin extensions.
WordPress features make the task of building a website fairly easy. Moreover, With our guidance, you can create a website for starting your eCommerce business in no time.
Here’s why WordPress is the ideal platform for building your eCommerce website:
Improving Continuously WordPress has a massive user base. With millions of people using WordPress for their blogs and commercial websites, there is no doubt that the developers will continue evolving it.
Easy To Use WordPress is easy to use and can be figured out by hopping on the platform. You have to buy a domain, select a theme, add a couple of plugins, and you can start building pages.
However, if you are a noob and are worried about going wrong, a large community , including me, is there to help you gain the most out of WordPress, guiding you through different options and plugins to optimize your website.
Plethora Of Themes And Plugins With thousands of plugins, making websites on WordPress is a dream. WordPress.org itself has over 55,000 plugins , and creators are working on developing new plugins and extensions every day.
Many free themes and plugins enable you to create a unique website without spending any amount.
Easy To Maintain Compared to other CMS platforms, updating your website on WordPress is relatively easy. You only need to perform a few tasks regularly, which takes a little time once you get the hang of it.
Quick SEO Optimization WordPress gives you access to powerful SEO plugins to help optimize your website. This gives your eCommerce shop a higher SEO visibility, helping reach more customers and boosting sales.
Security WordPress continuously releases updates and security patches to help preserve your data. While you may need external security, it is one of the most self-secure CMS platforms. WordPress’s ease of use and maintenance make it the number one choice for building an eCommerce website without investing much money or time.
You can check our excellent step-by-step visual guide on starting your eCommerce website. You can also take help of the following steps, with which your eCommerce website will be up and running in no time:
Step 1 – Setting Up Your WordPress Website To get started, you must set up your WordPress account and website. This requires getting your domain name, configuring WordPress, installing plugins, and securing your website.
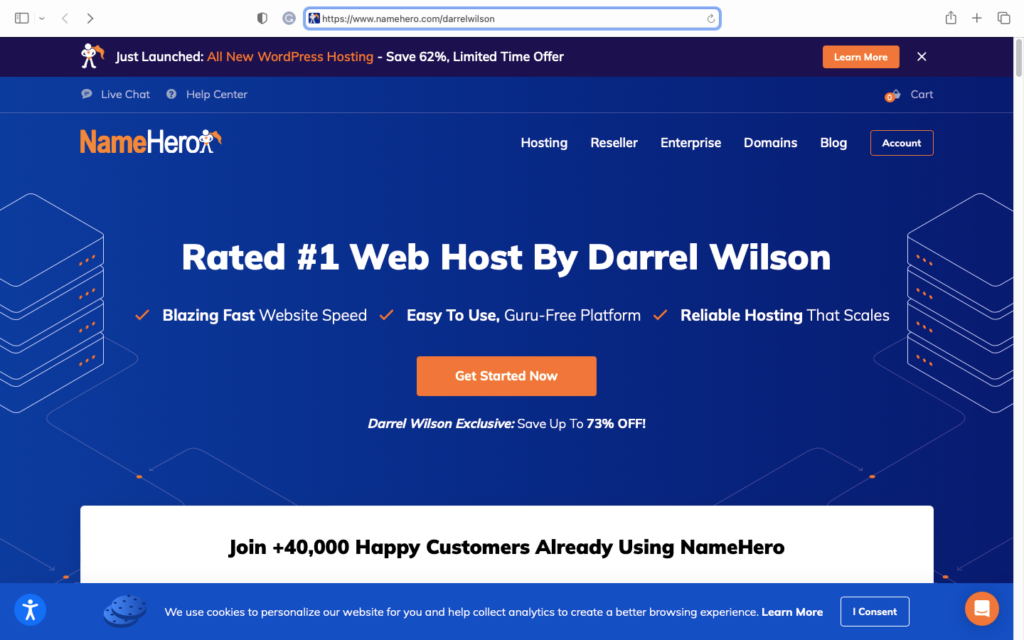
Register A Domain Name A domain name and web hosting is the first step to building your eCommerce website. I have been recommending NameHero for years. Its low downtime leads to reliable websites. Moreover, the loading time is less than a second.
Also, as if it was not already super-affordable, NameHero offers an exclusive 73% discount for all fellow Darrel Wilson learners. So grab this fantastic offer and get started with the following steps:
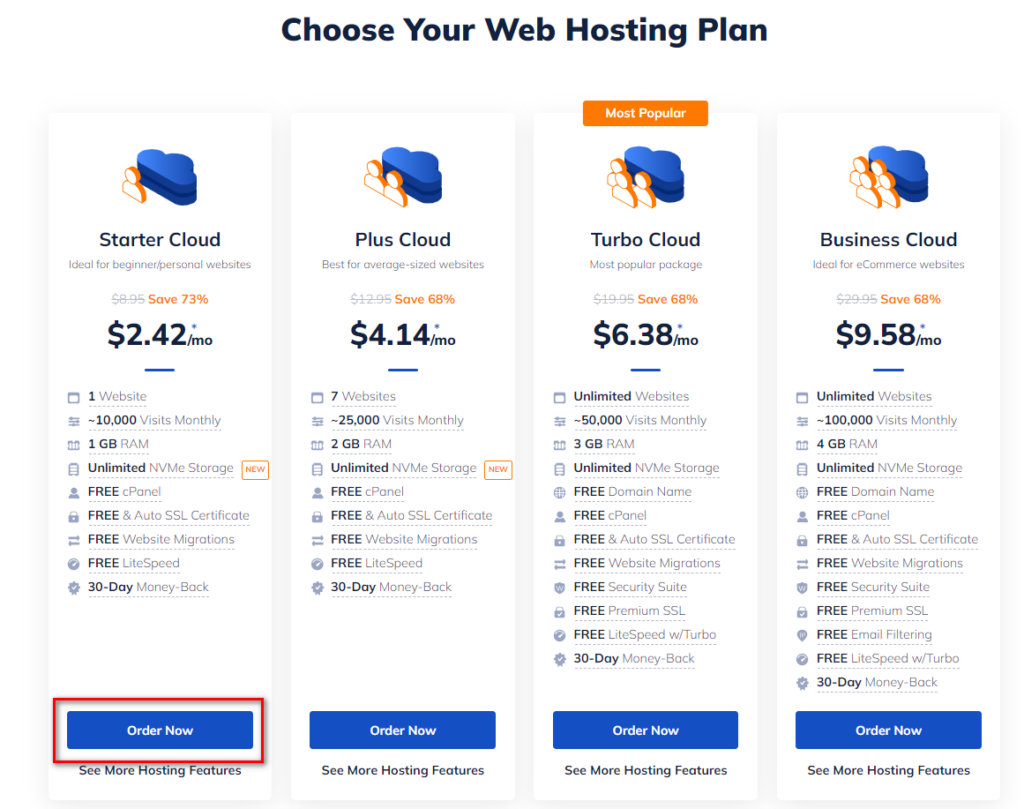
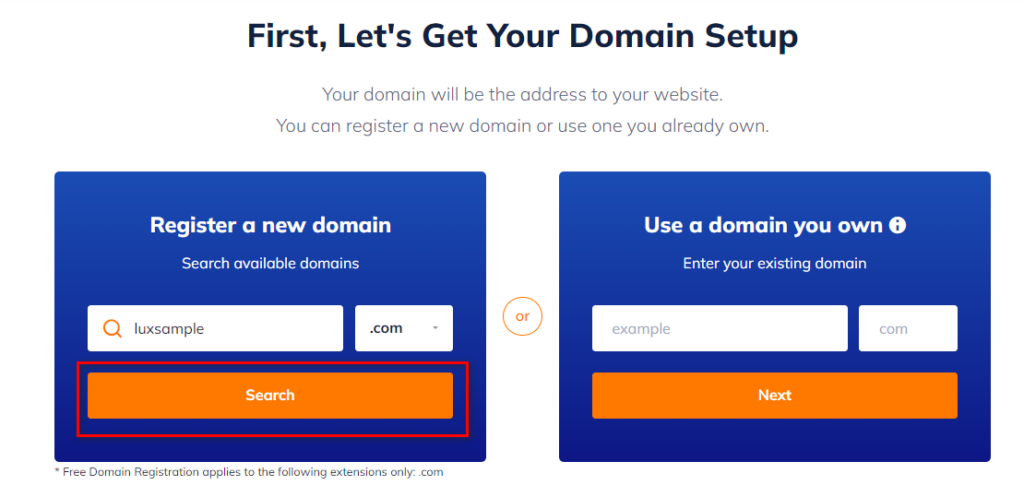
Visit NameHero and click on Get Started Now. Compare the features of different plans and choose the one that suits your needs and budget the best. Then, scroll down and click on Order Now. Type the desired domain or website name in the search domain box under register a new domain. 4. Search for the domain. You might get a few domains for free.
Click on Continue and select the billing choice of your preference. I recommend the 1-year cycle for the best rates. Scroll down and click on continue. Review your purchase, select the payment method that works best for you, fill in your payment details, and click on checkout to complete the purchase. You will be redirected to your dashboard and interface. Through these steps, you will have a domain to your name. Any customer visiting this domain will be directed to your eCommerce website. Further, however, to be able to customize the website, you have to install WordPress on the domain.
Install WordPress Once you have your domain, you need to link WordPress to be able to make and edit the website.
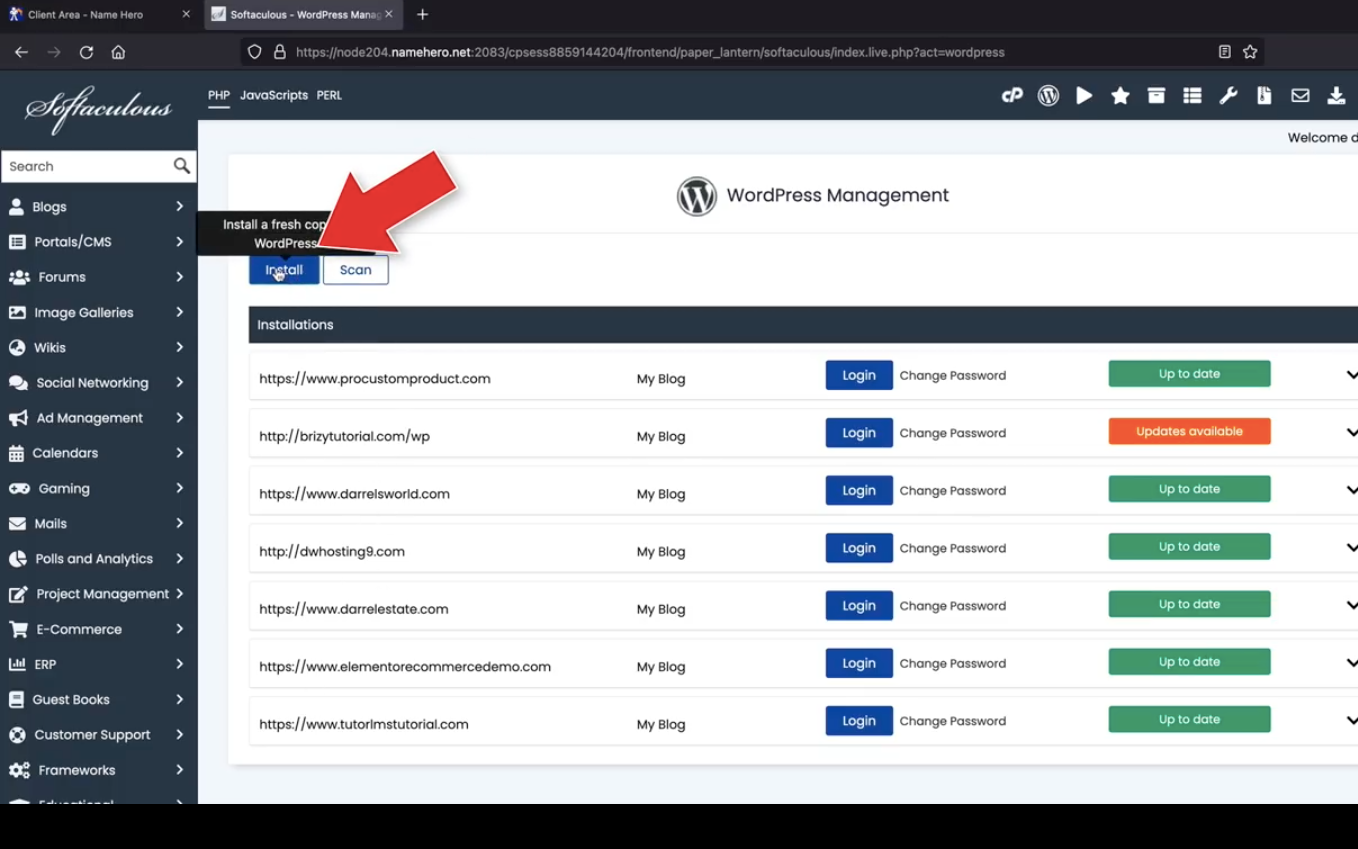
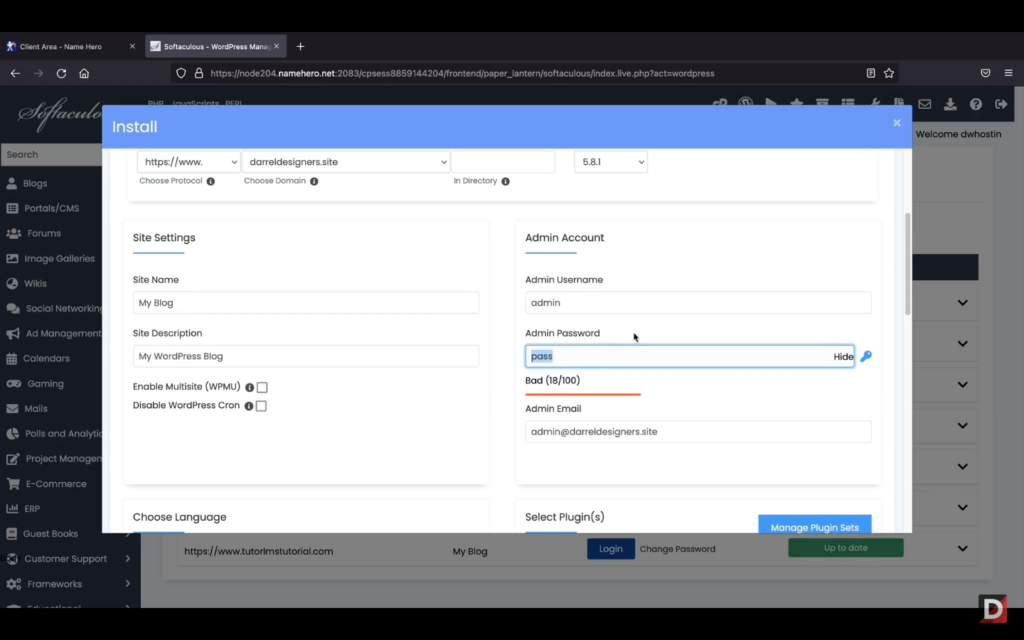
Click on My Cloud. Click on Hosting Package. Login into cPanel. Type WordPress in the search bar and click on WordPress Management. Click on Install. Search for the domain you purchased. Clear the in-directory section. Add an admin username, password, and email to login into the website hereafter. Configure the other settings according to your website needs and services. Click on Install. Click on the generated administrative URL, and you will be logged in to your website. And with a few simple steps, your website is live & ready to be customized and personalized.
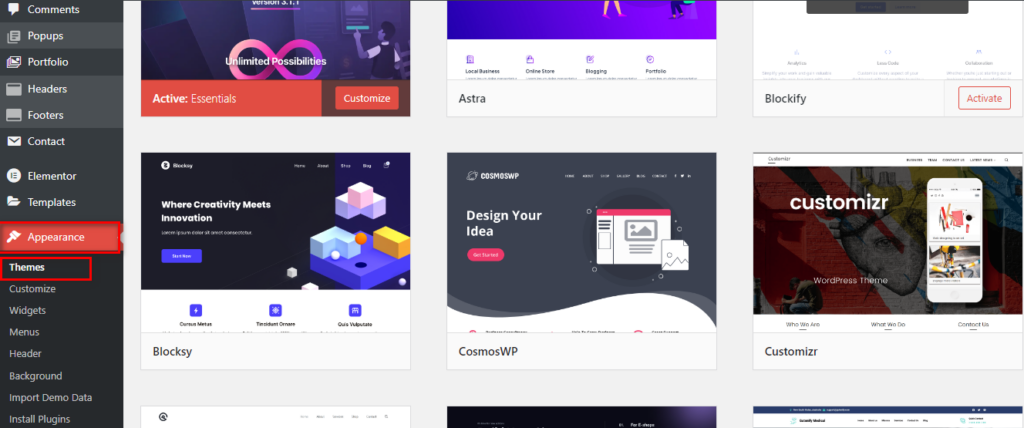
Select The Theme The theme of your WordPress website plays a massive role in how your website appears and whether it is user-friendly and attractive. To select a theme:
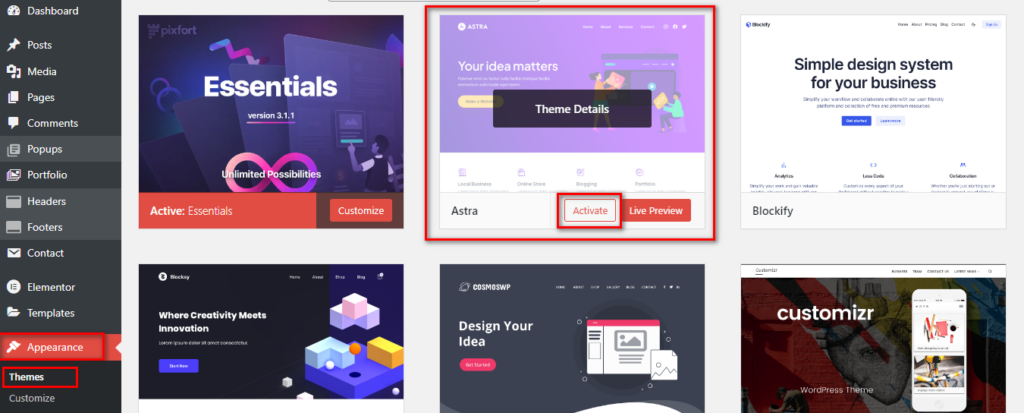
Go to your dashboard and click on Appearance, then Themes. Click on add theme and select the theme suitable for your eCommerce website. One of the most widely used themes we recommend is Astra . Click on Install in the top right corner. Once installation is complete, click on Activate. Go to Preview, and you will see how a simple theme changes the look of your entire website. With this layout, you can add pages and elements to help display your products and generate sales.
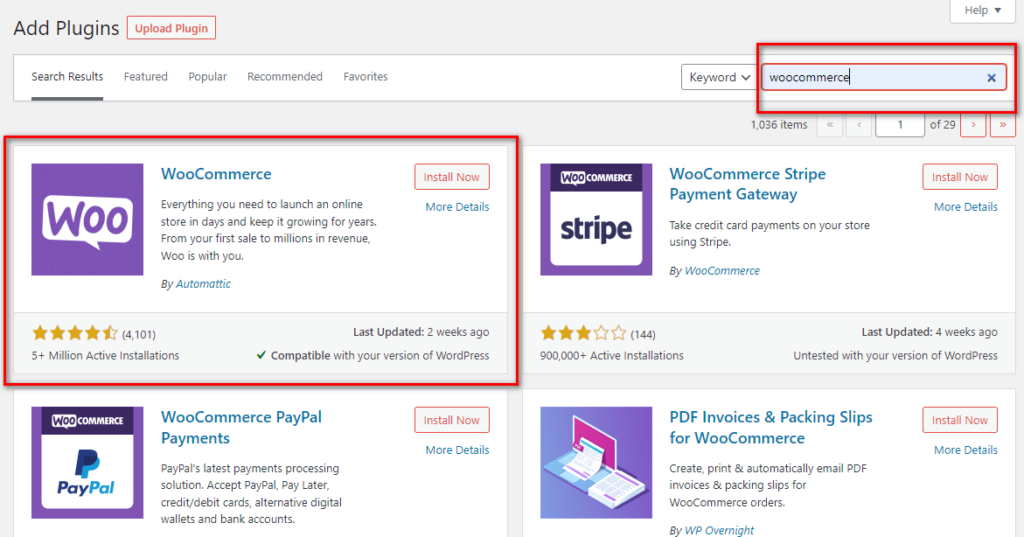
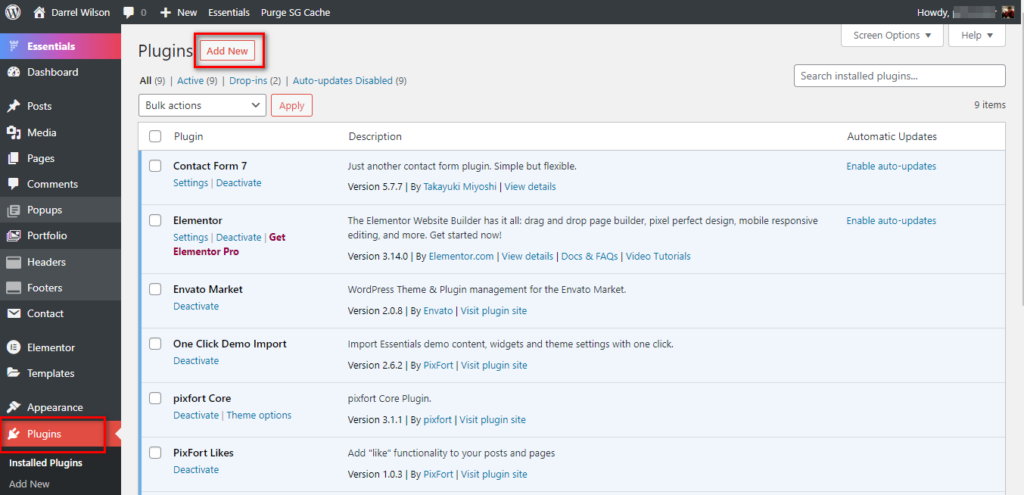
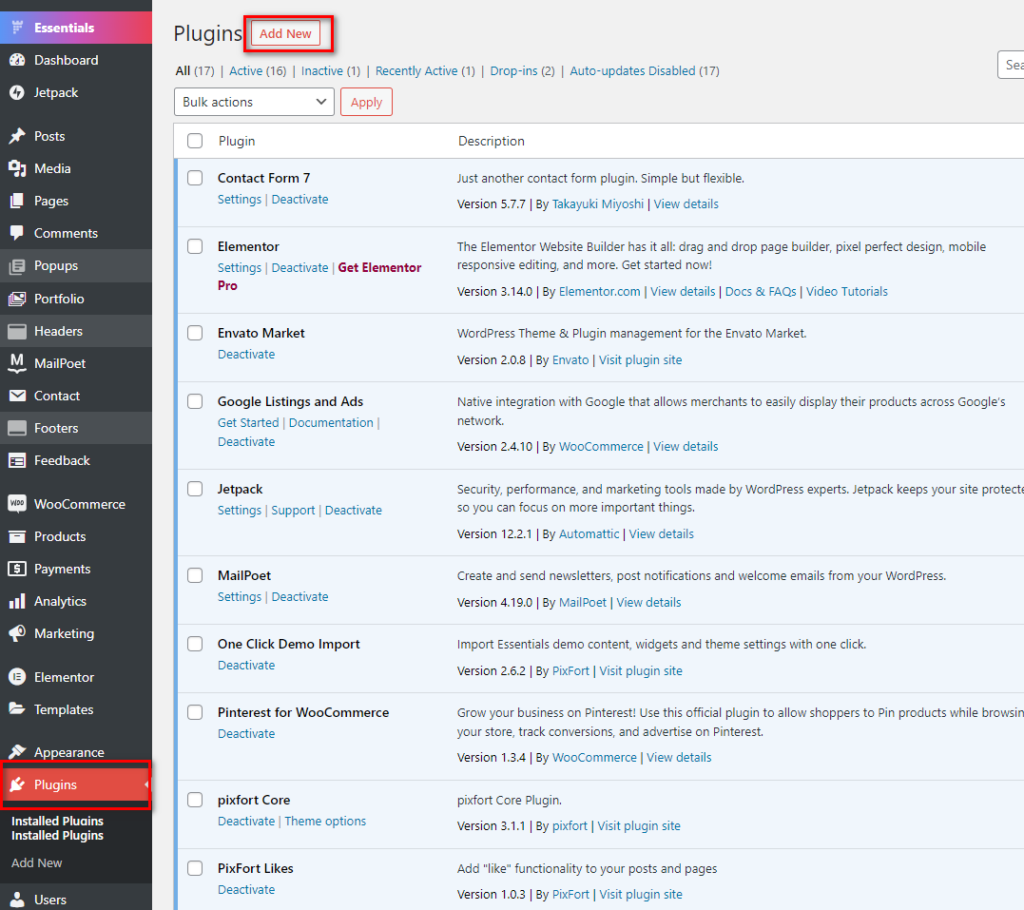
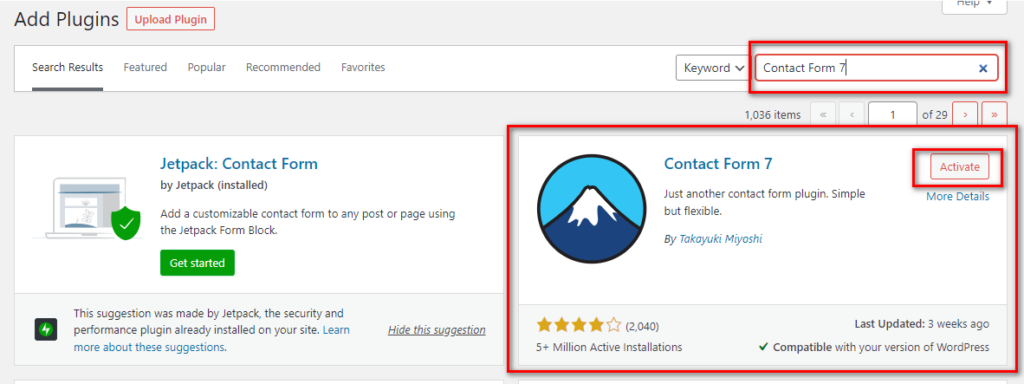
Install Plugins Click on the Plugins Tab on your WordPress Dashboard & Click the Add New Button. 2. Search for WooCommerce, and select it.
3. Click on Install Now.
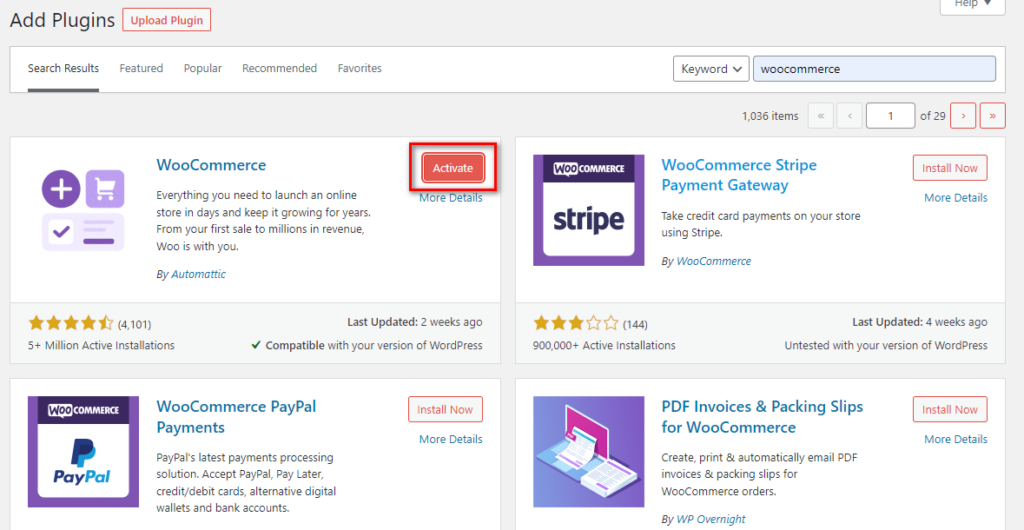
4. Once installed, click on Activate.
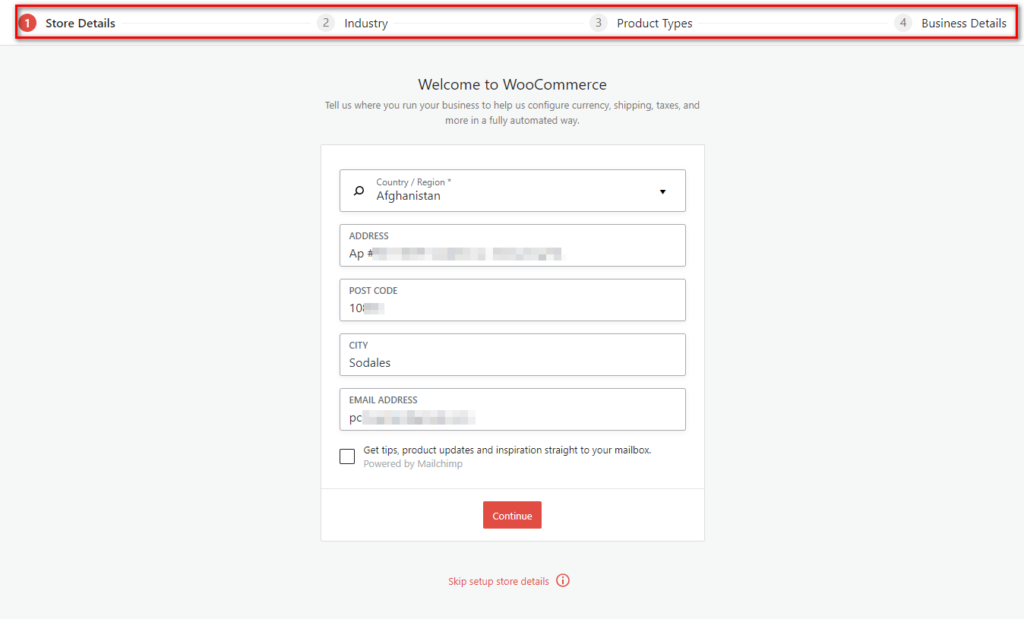
5. Add the details as required in the WooCommerce setup wizard, such as Store details, Industry details, Product Types (Single or with variants) & business details.
Set Up SSL Certificate You need an SSL certificate to help secure encrypted data for an eCommerce website. Most domain services come with an in-built or pre-installed SSL certificate, including NameHero . If you are using a different web-hosting site, you should check for an SSL certificate to enhance security.
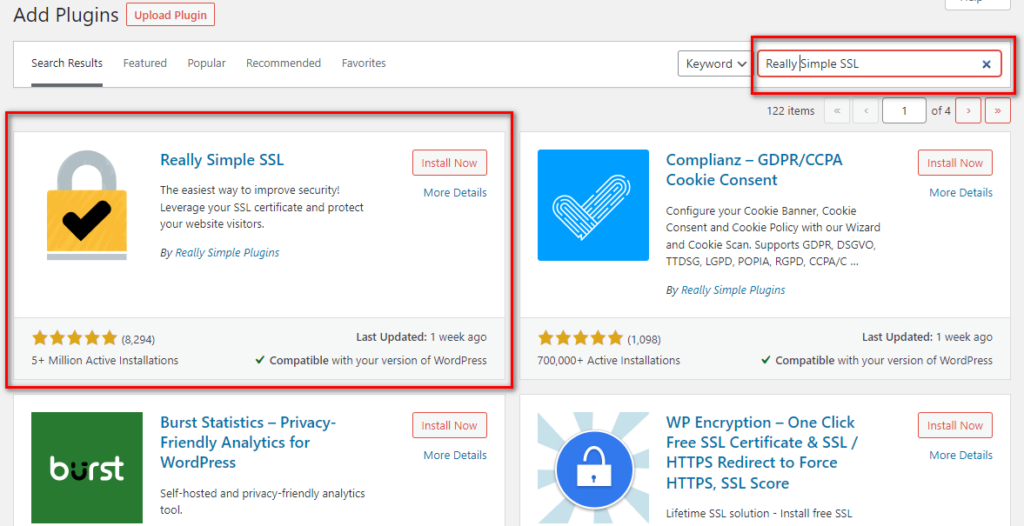
Click on the Plugins Tab on your WordPress Dashboard & Select “Add New “. 3. Search for your desired plugin, such as Really Simple SSL , and select it.
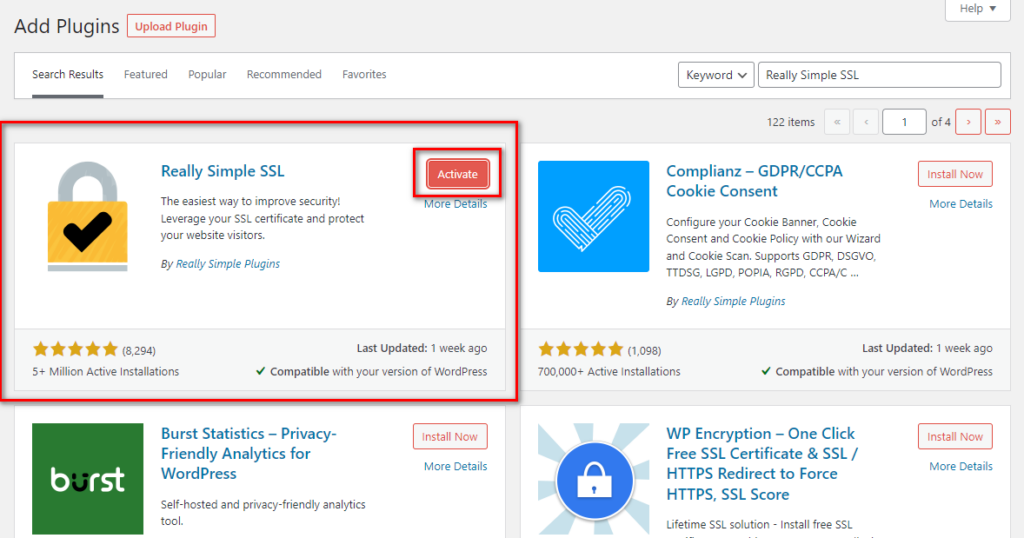
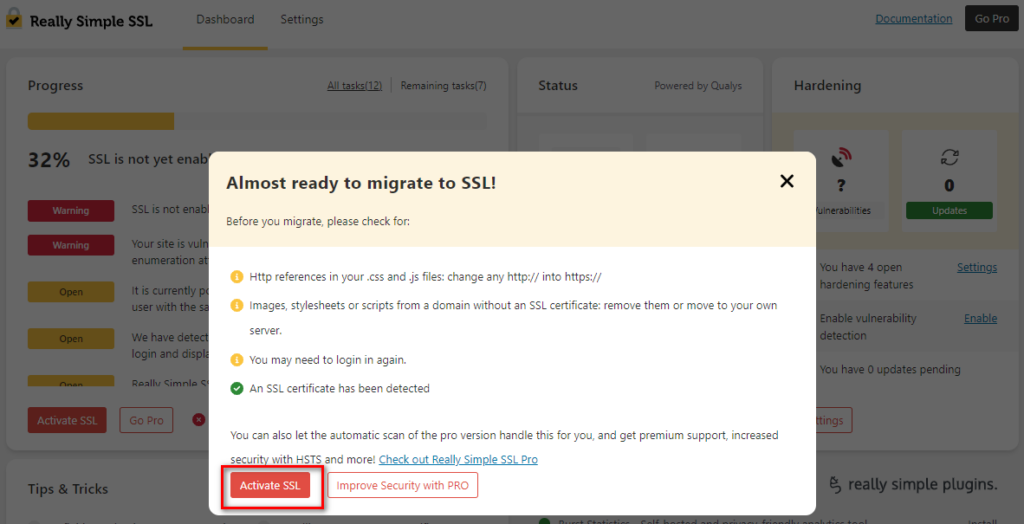
Click on Install Now. Once installed, click on Activate. 6. Once the plugin is activated, It will run a quick analysis on your website and will ask you to migrate your site to SSL click on “Active SSL “.
Congratulations!!! your website is now secure and ready to be designed
Step 2 – Designing Your eCommerce Website Now that you have your website, the next step is to design it. You can change the domain look and personalize it according to your brand through these steps.
If you have installed a WooCommerce plugin , most of your job for designing the website is done. Through their prompts, you can set up your:
Home Page Product Pages Checkout Page If you plan to add pages manually, we have got you covered. The following steps can help add a page to your WordPress website:
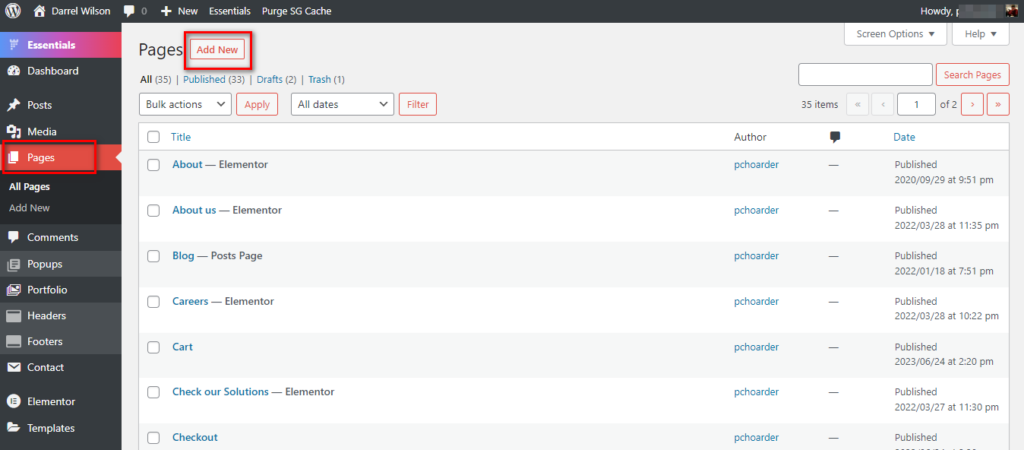
Go to your WordPress Dashboard. Select Pages -> Add New . Add a title for the page, and some content to it, and Click on “Publish “. Integrate Payment Gateways Integrating a payment gateway in WooCommerce is a straightforward process. Here are the steps to set up your desired payment method:
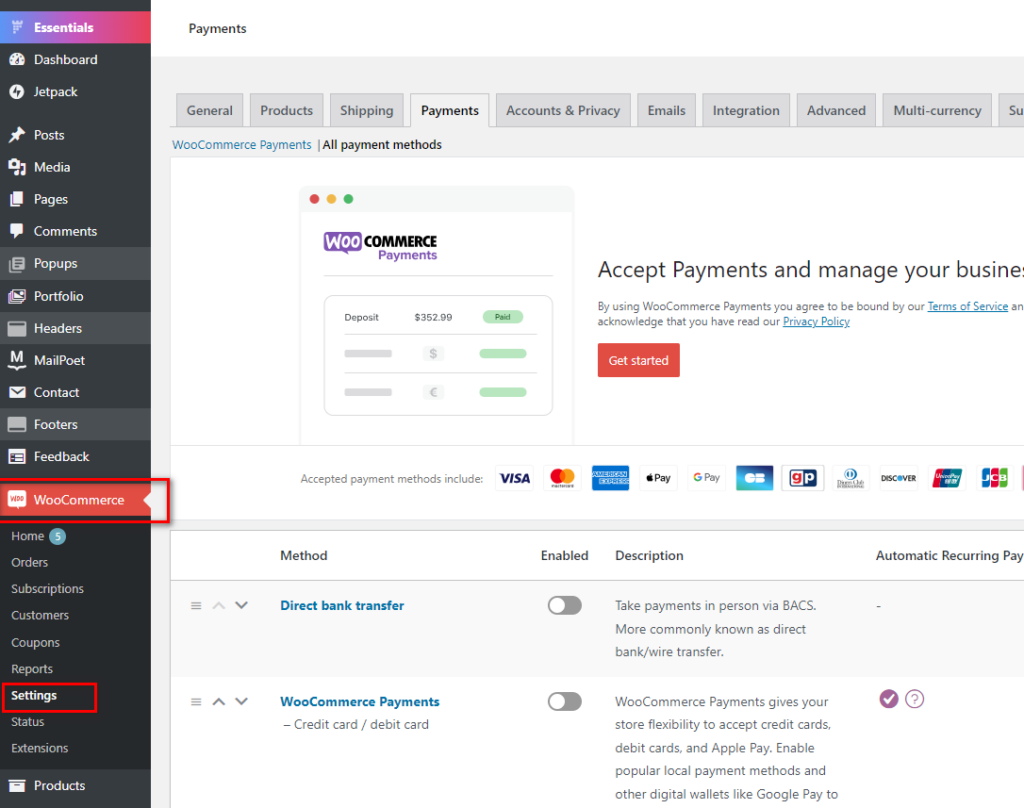
Access WooCommerce settings: From your WordPress dashboard, go to ‘WooCommerce’ > ‘Settings ‘. 2. Navigate to the Payments tab: In the settings panel, click on the ‘Payments ‘ tab to view available payment options.
3. Choose a payment gateway: WooCommerce comes with built-in support for several popular payment gateways like PayPal, Stripe, and more. Enable the desired payment gateway by toggling the switch beside it.
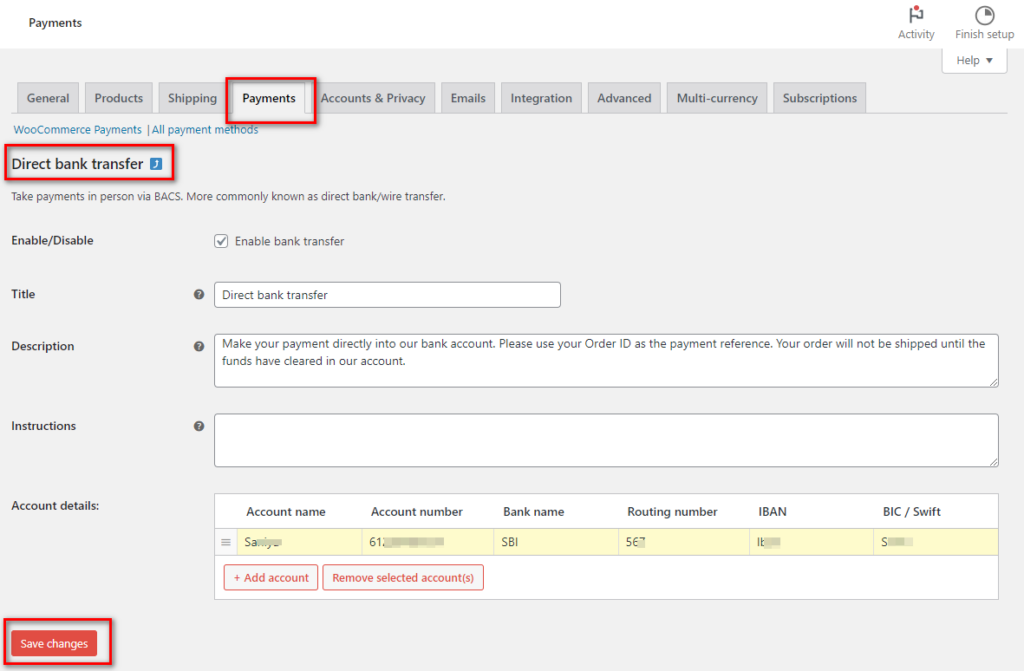
4. Configure the payment gateway: Click the ‘Finish set up Manage’ buttons next to the enabled payment gateway to access its settings. Fill in the required details, such as API keys, account information, and transaction settings, obtained from the payment gateway’s website.
5. Save changes: Once you’ve entered the necessary information, click ‘Save changes’ to complete the integration process.
6. Test the payment gateway: It’s essential to test your payment gateway to ensure it’s working correctly. Make a test purchase or use the payment gateway’s sandbox/test mode to verify transactions.
By following these steps, you’ll have successfully integrated a payment gateway into your WooCommerce store, allowing customers to complete purchases securely and efficiently.
Step 3 – Setting Up Your Product Catalog Once your website layout and design are set, it is time to add products and start selling. Again, this is best done with the help of WooCommerce .
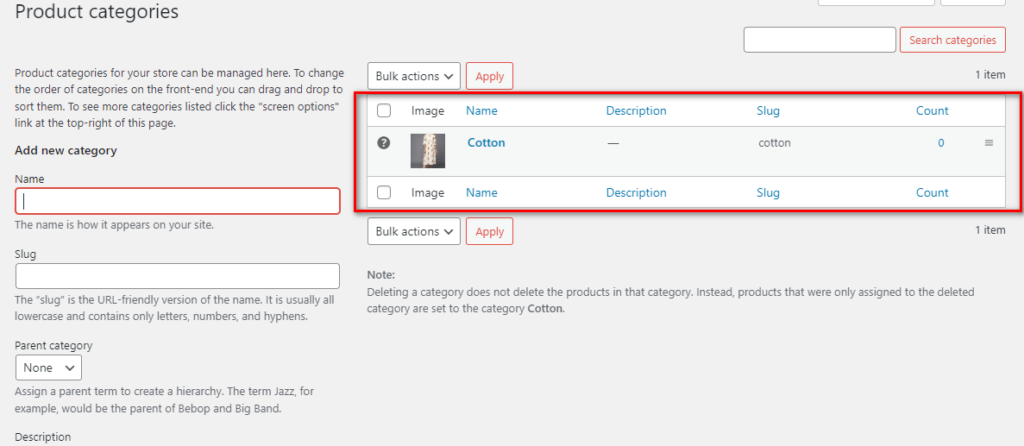
Organize Products Into Categories You need to first sort your products into different categories for easier browsing. For example, when running a clothing business, you will have categories like top wear, bottom wear, footwear, etc.
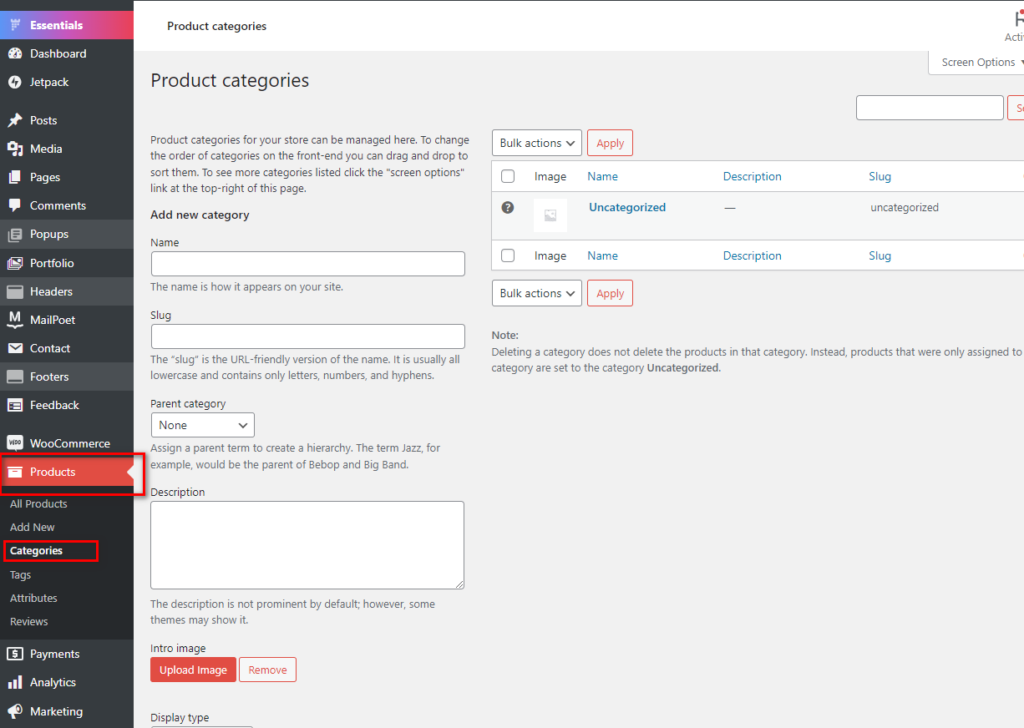
On your WooCommerce dashboard:
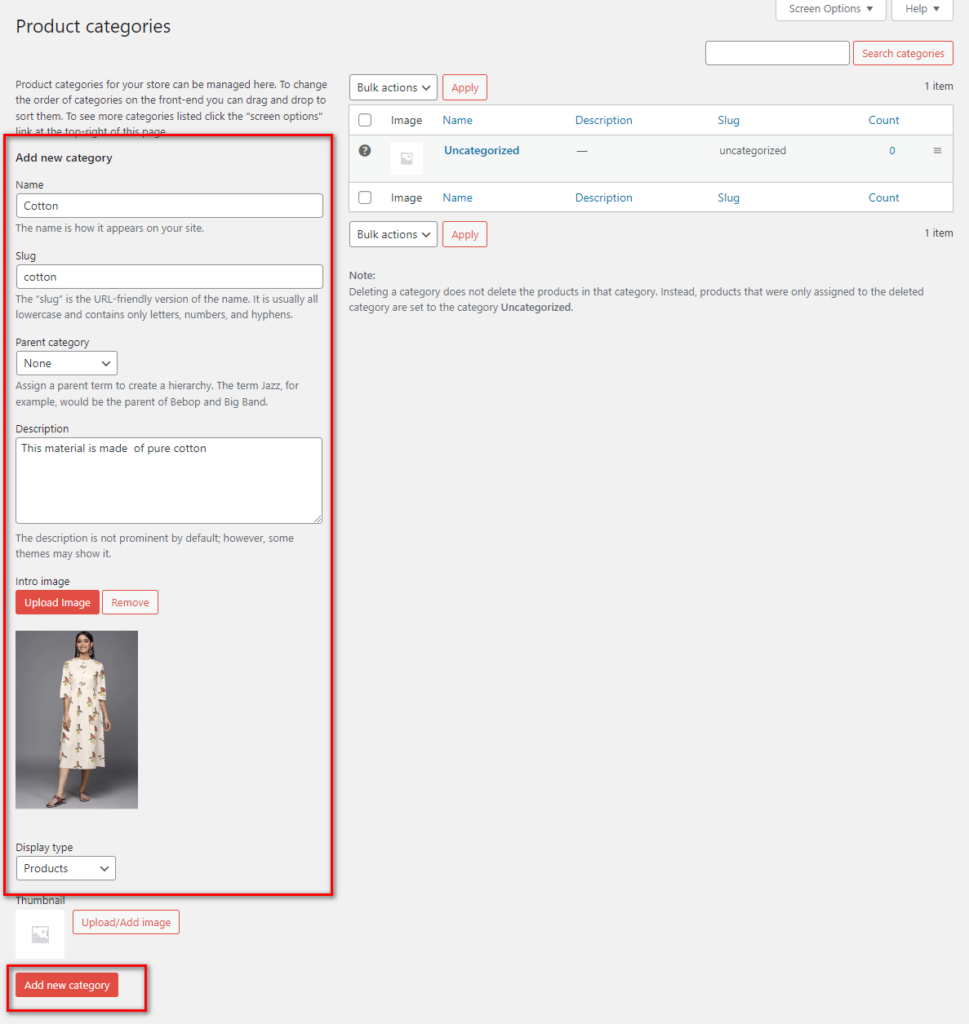
Go to Products -> Categories. 2. Add a Name for the category and its slug, select the “product category ” from the drop-down and enter the description, and upload the parent image for the category.
Similarly, you can add as many categories as required and view them on the right side of the category page. You can drag and rearrange these categories according to the sequence you want displayed on the page.
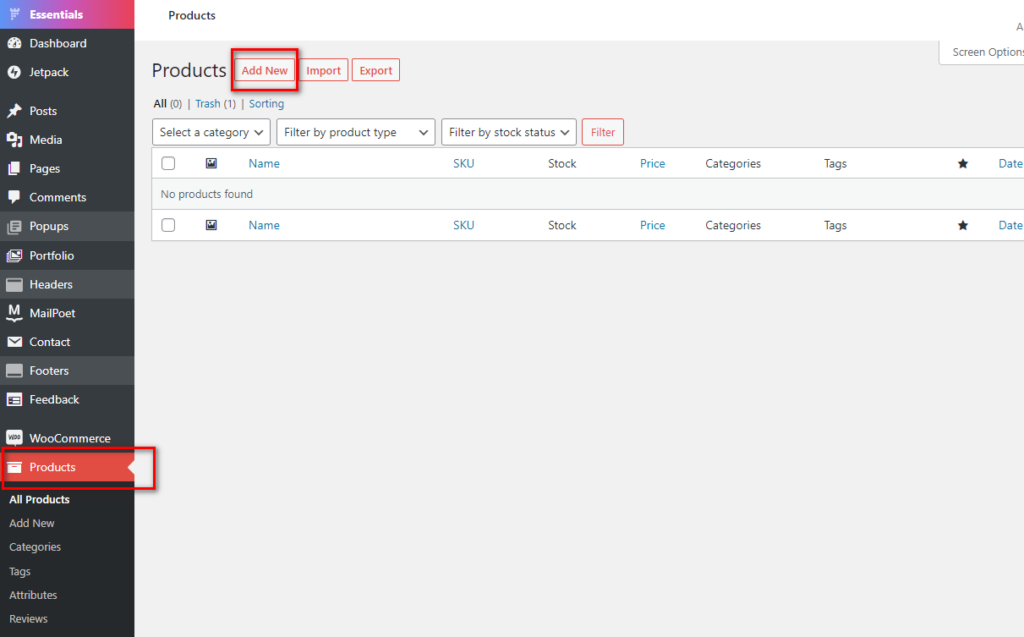
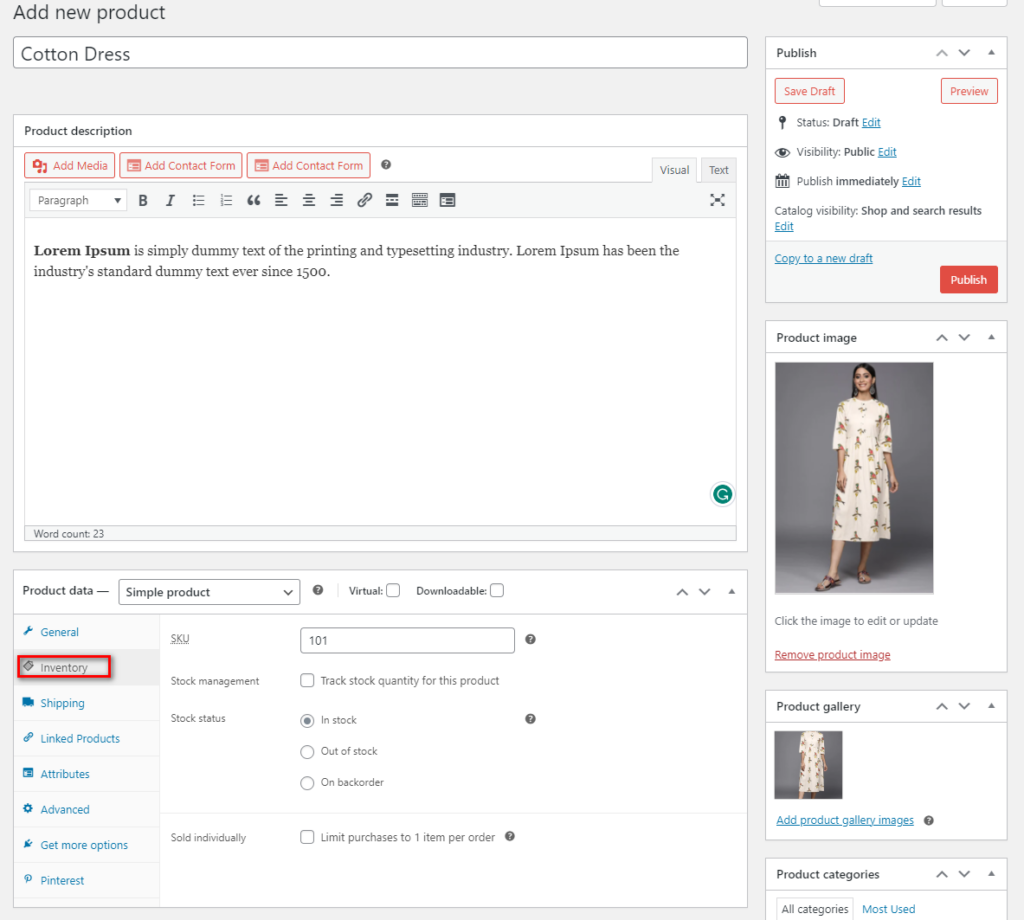
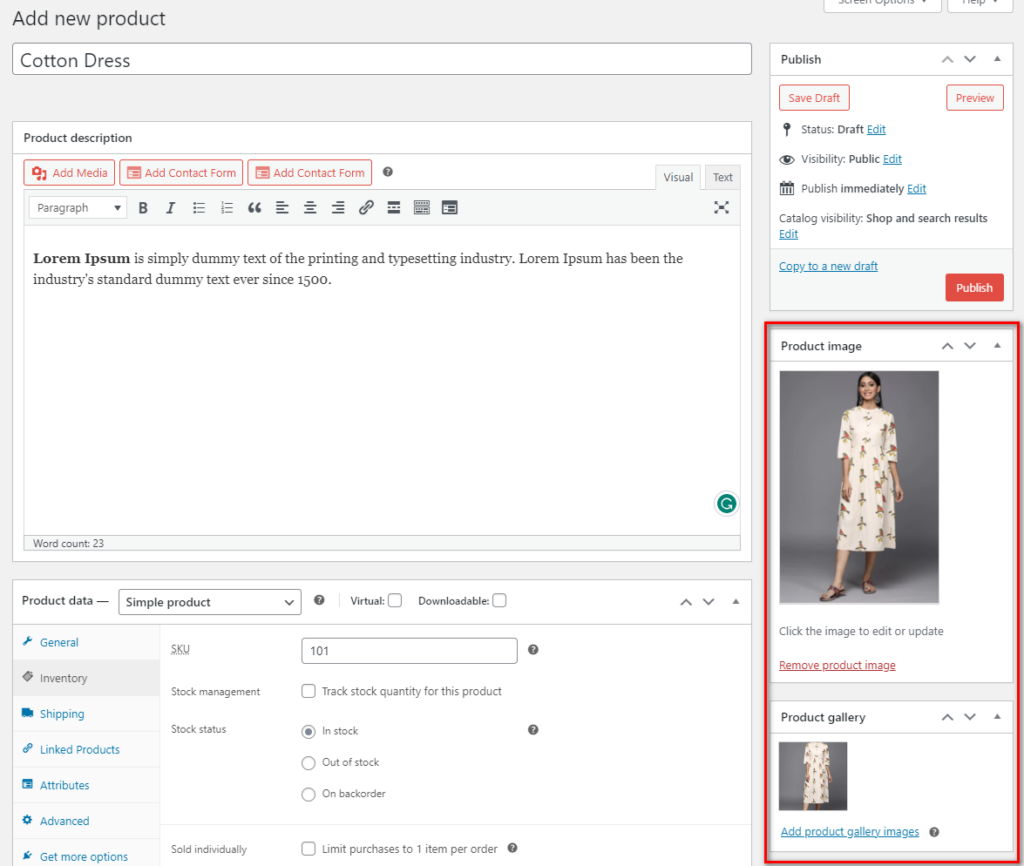
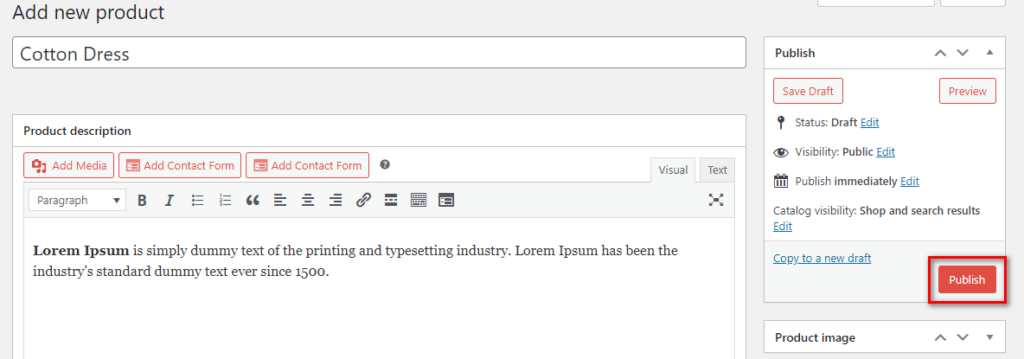
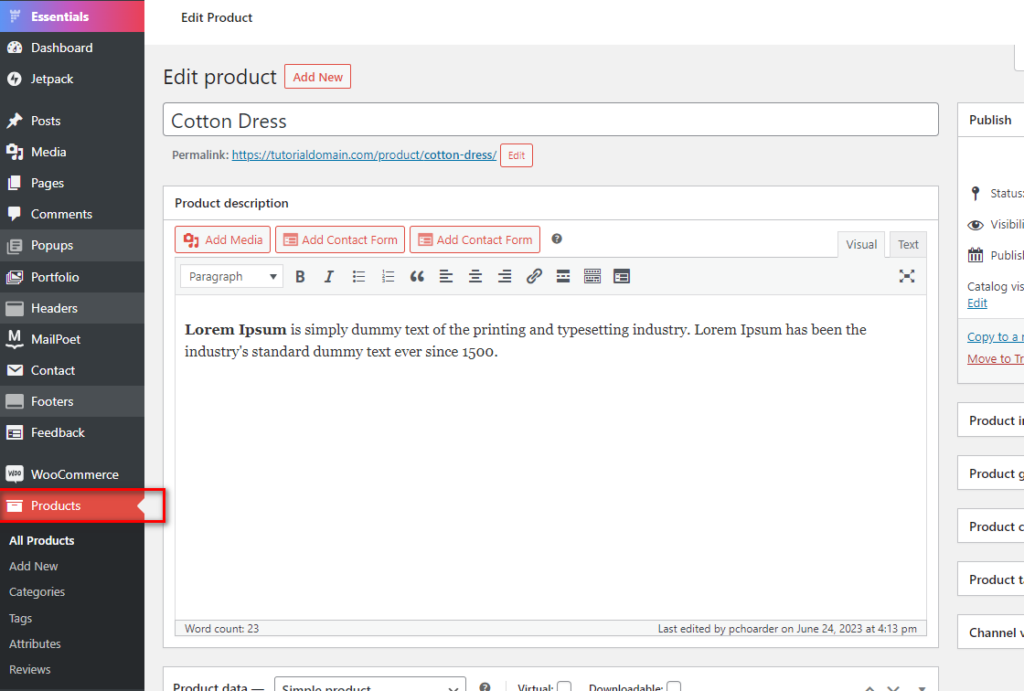
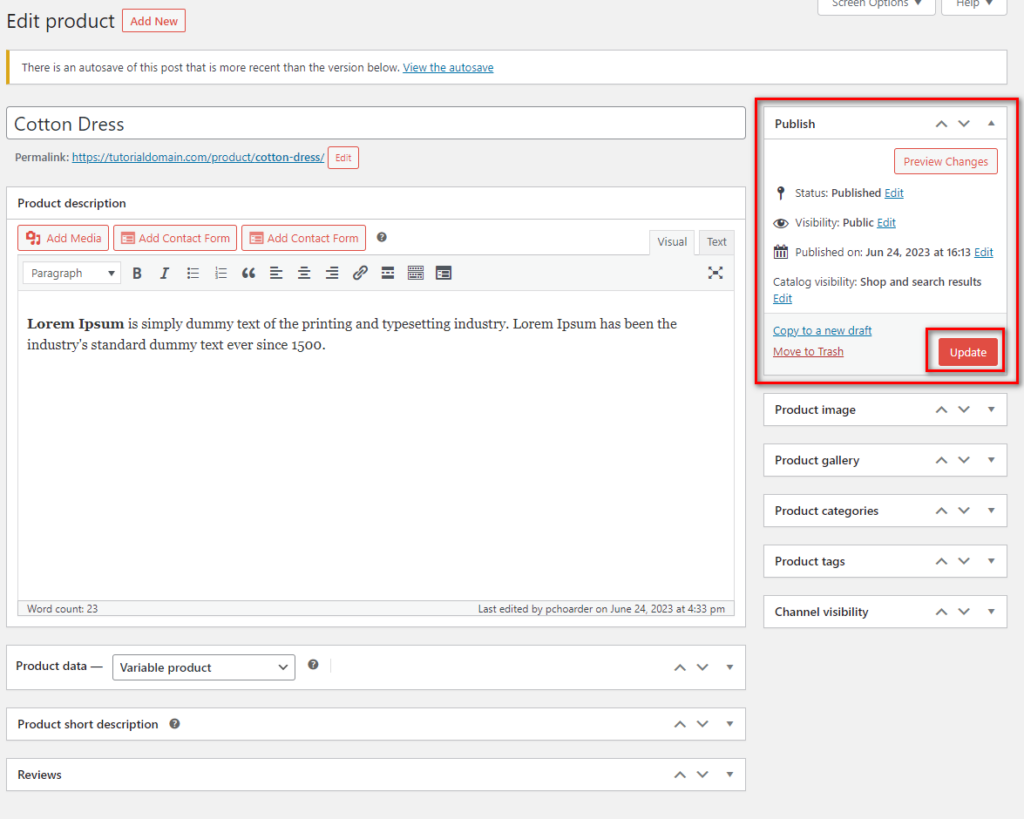
Set Up Product Attributes Go to the WooCommerce User interface and click Products on the left-hand menu and click on “Add New “. 2. Add the Product Name, Description, Pricing, Inventory, and all other settings.
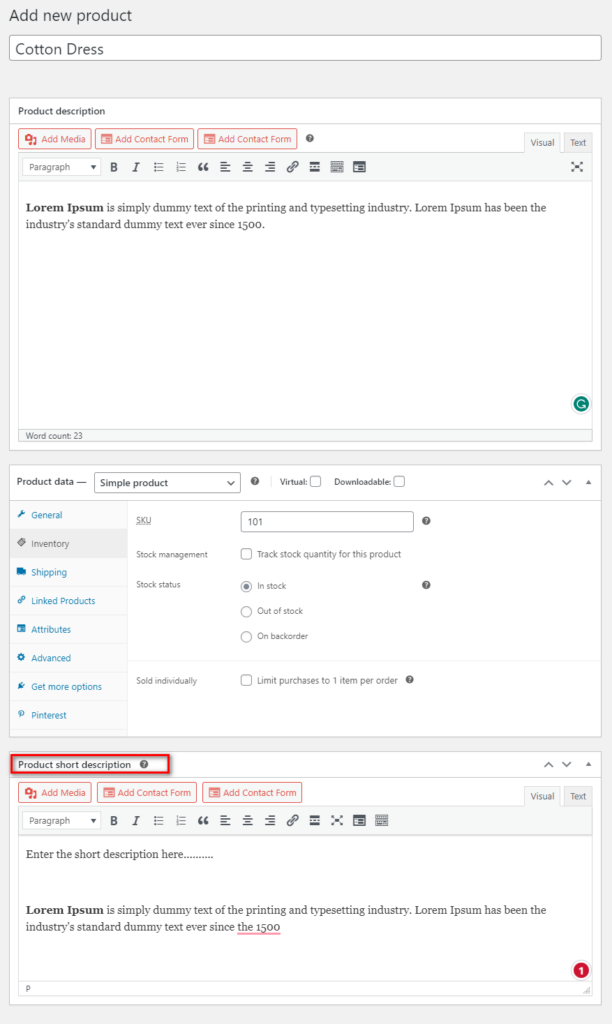
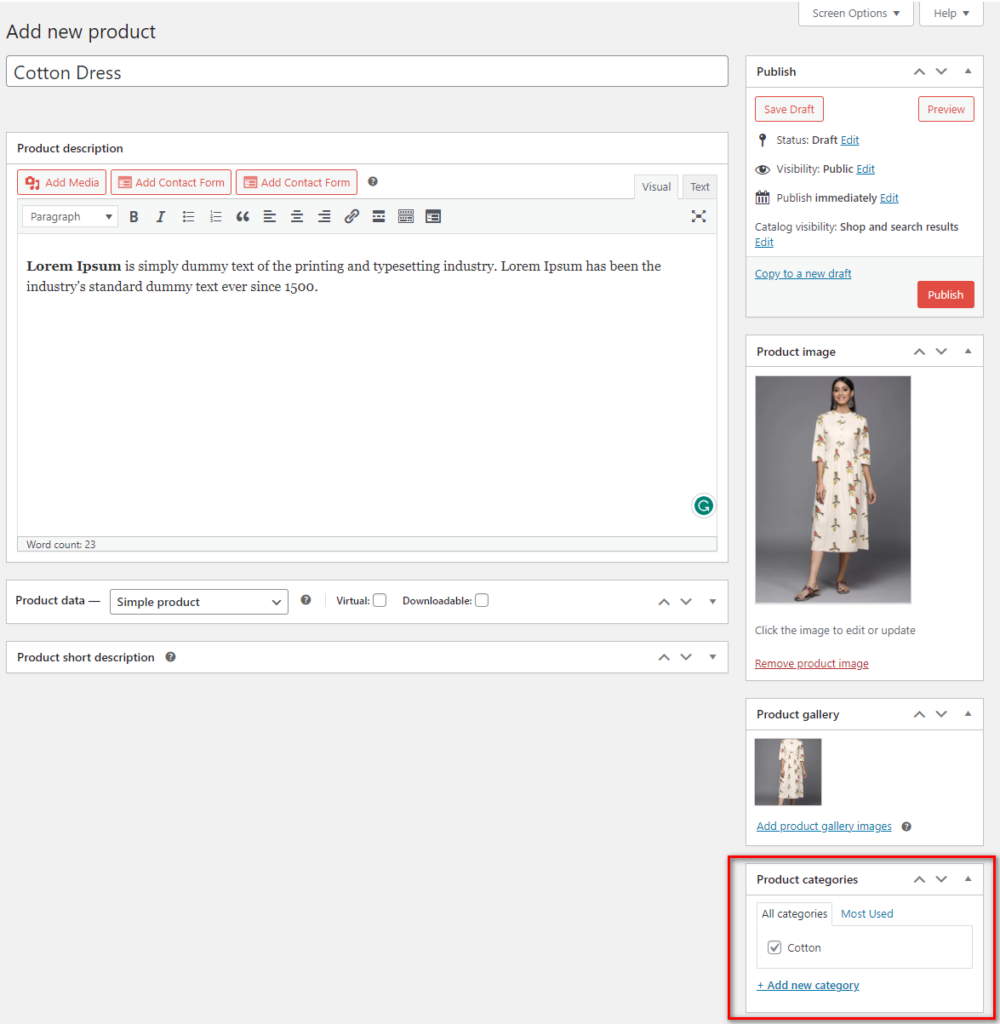
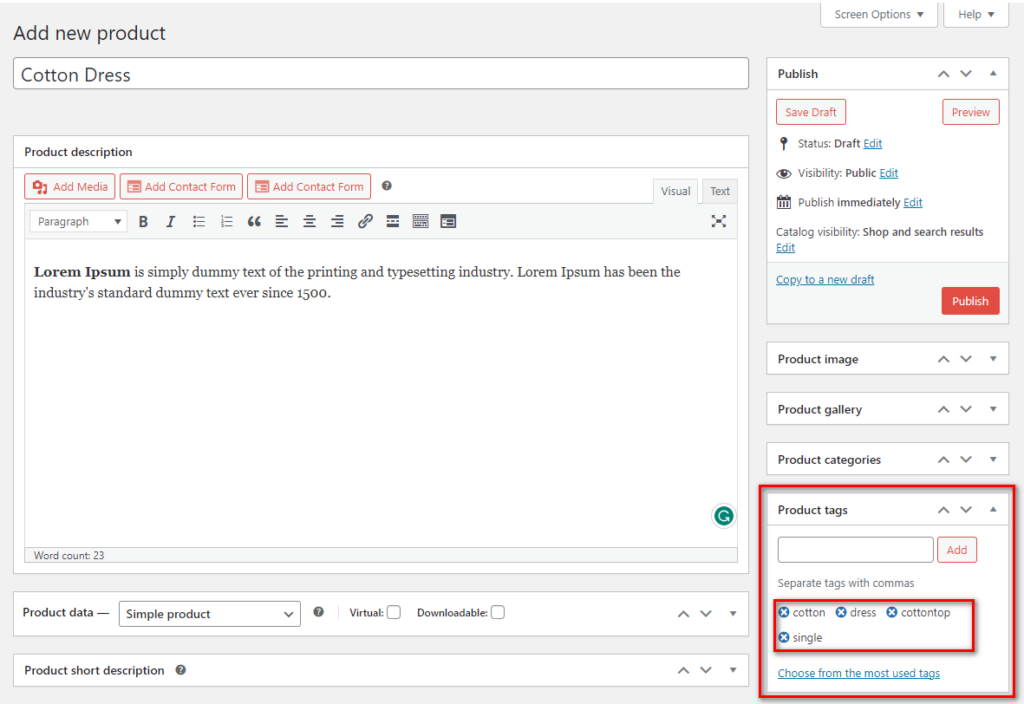
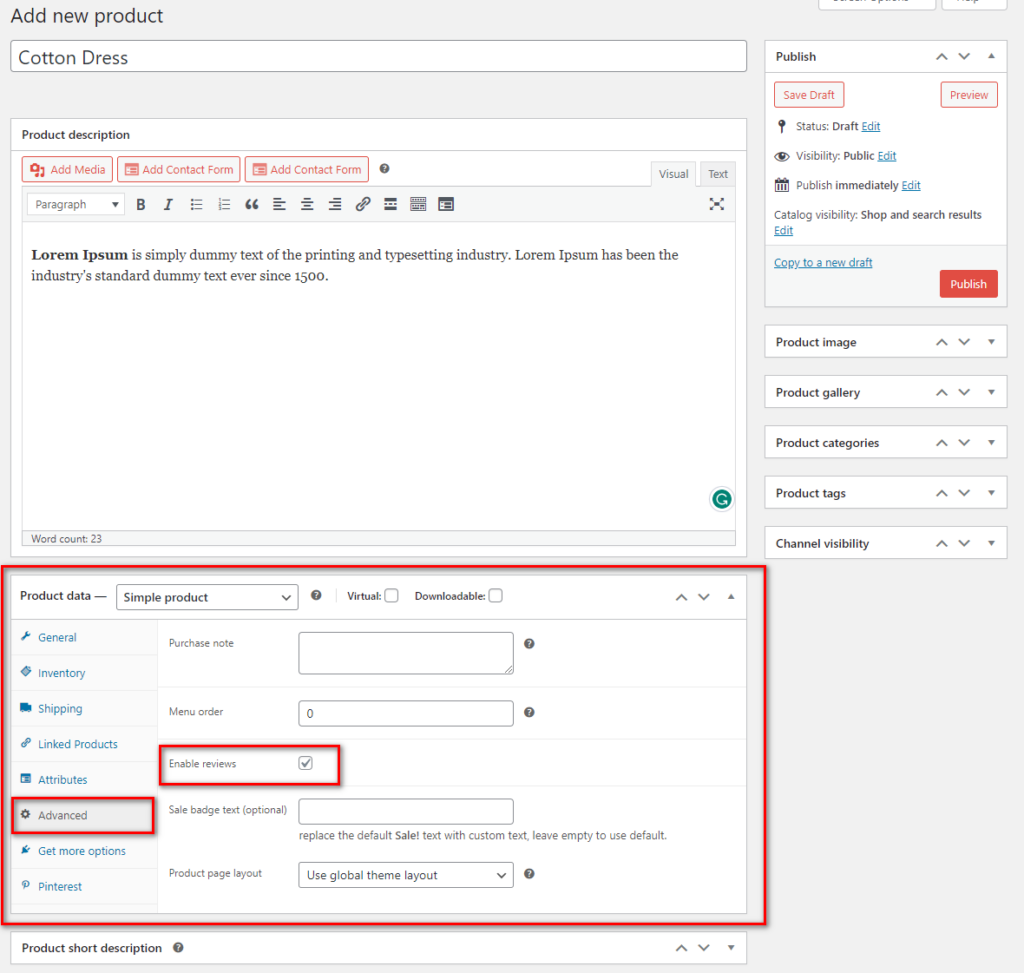
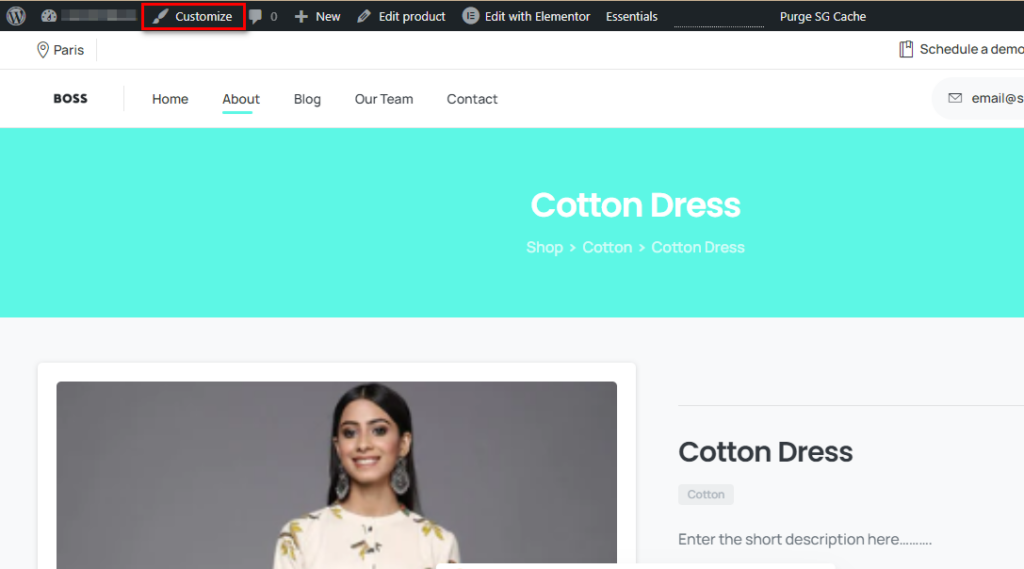
Add the Product’s Short Description, generally displayed under the price. Add the image of the product. You can click on the product gallery and add additional images if you have multiple images. Add the Product Category that you have defined above. Add Product Tags as this is important for enhancing your SEO ranking. Research your keywords well and add them to the product page to get premium listings. Enable Reviews in the Advanced setting so that users can rate your products. Remember, the higher the rating, the higher the sales. Click on “Publish “. You can change how the product page looks by clicking on Customize -> Product Page and selecting the best layout. If, however, you want to add a variable product, something that has attributes such as different sizes:
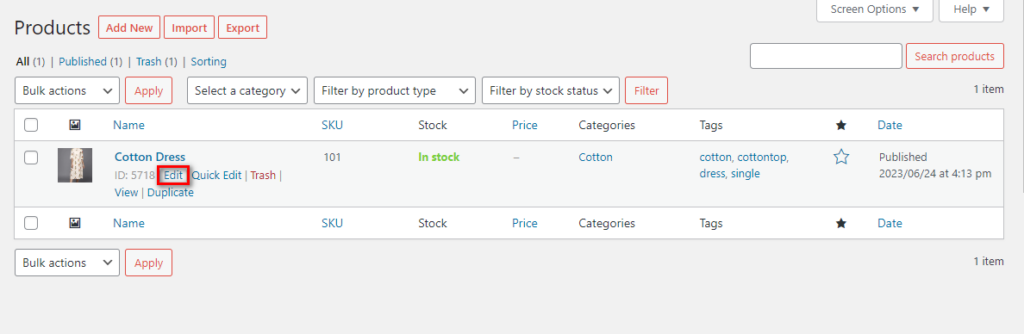
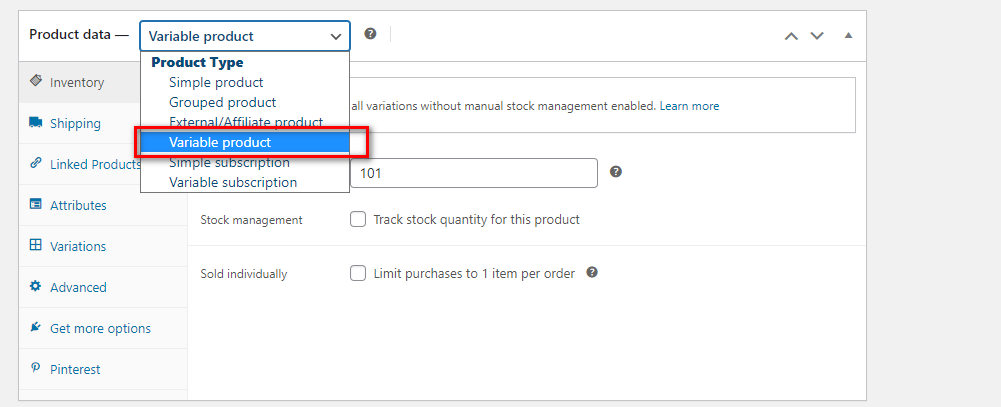
Go to the WooCommerce User interface and click Products on the left-hand menu. 2. Click on “Add New ” If you don’t have one else click on the “Edit ” button.
3. Choose Variable Product from the Product Data Dropdown box.
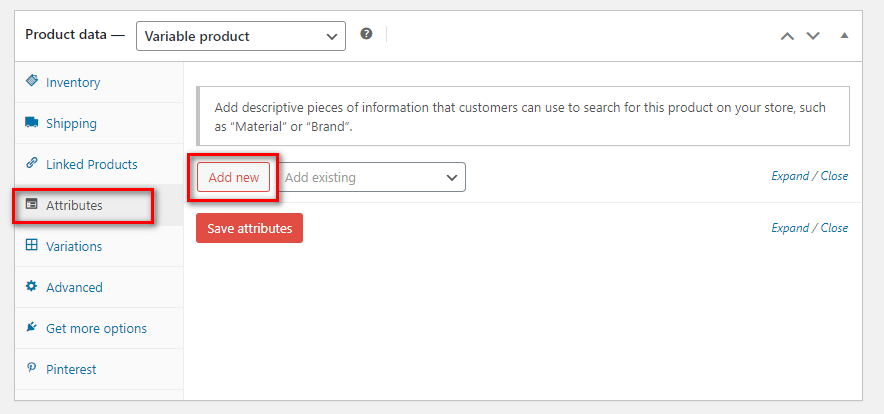
4. Go to Attributes and click on Add.
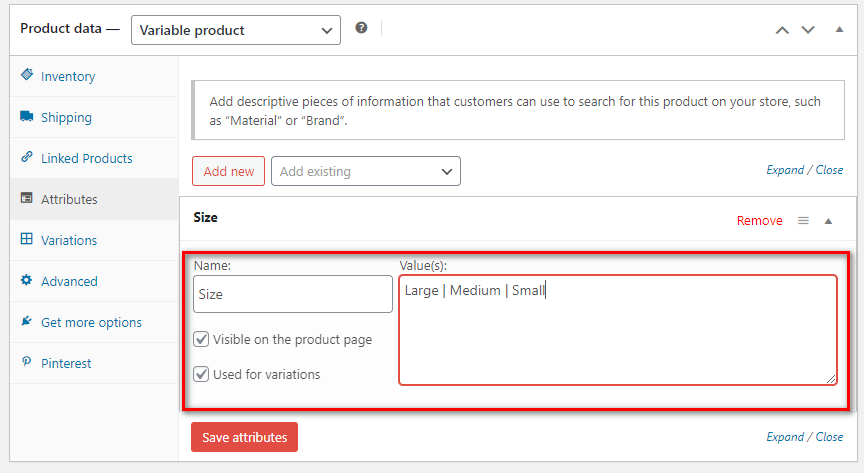
5. Type the Attribute name and add the values, separated by ‘|.’
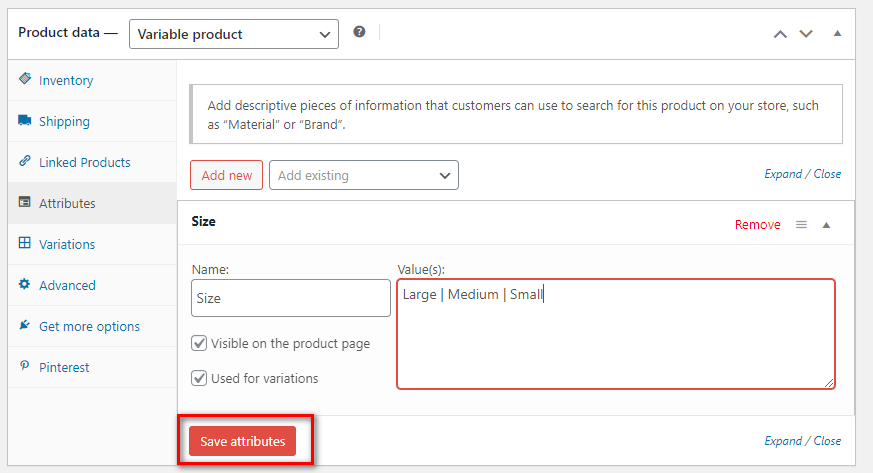
6. Save the attribute.
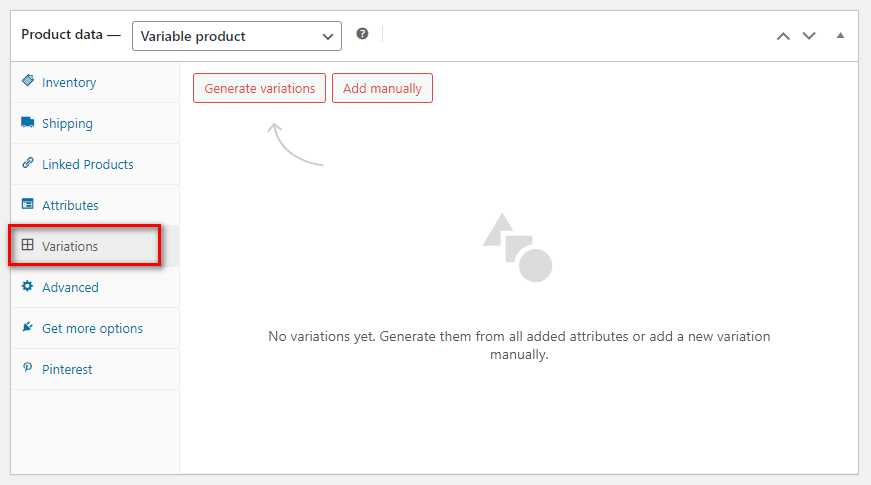
7. Go to Variations.
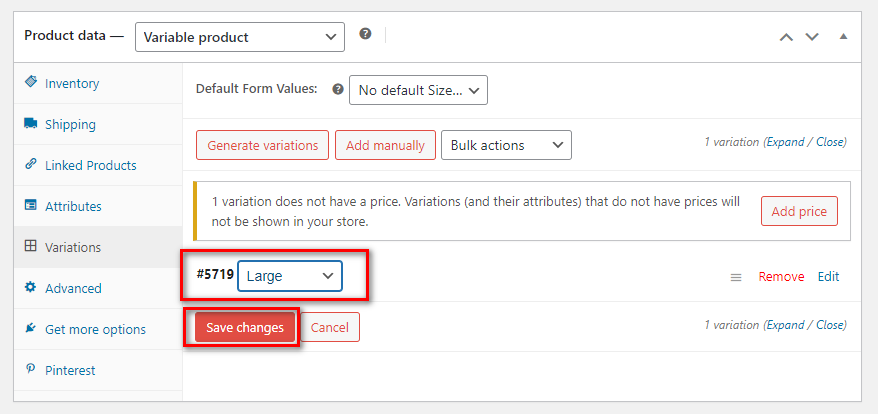
8. Please choose “Add Manually ” and observe the dropdown menu where you can find the attributes you want to add. Select a single attribute at a time and click on “Save changes .”
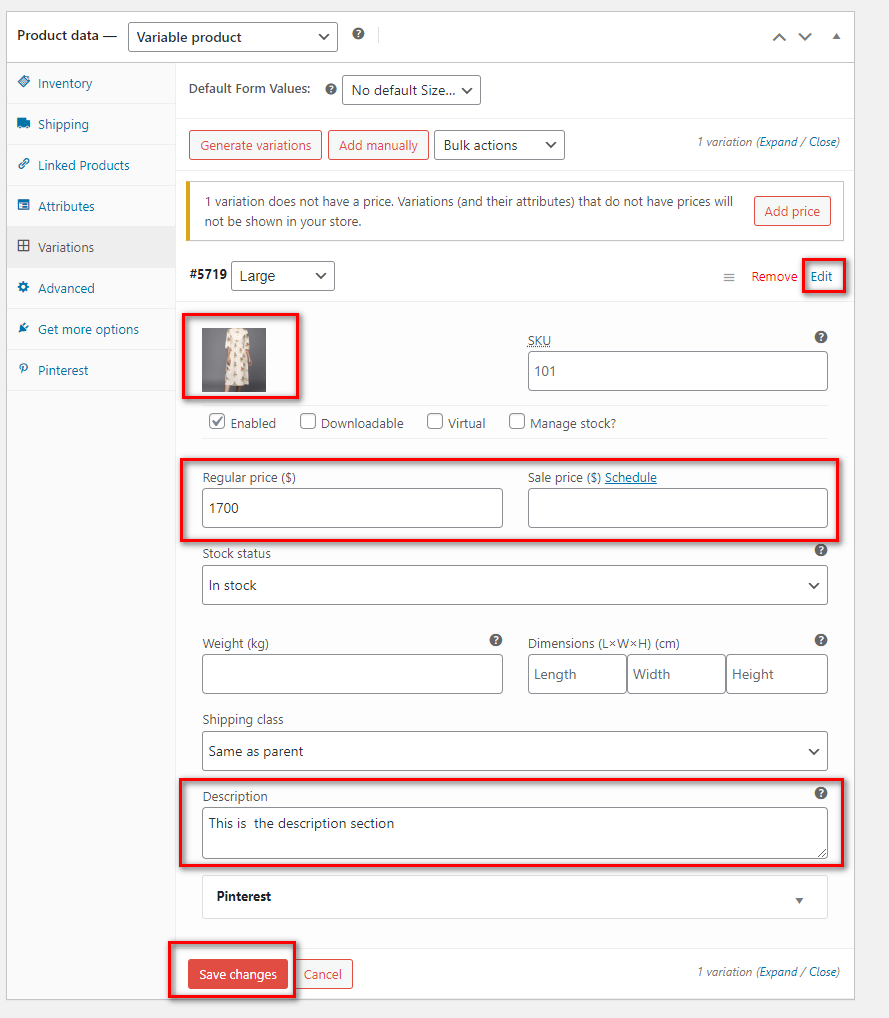
9. To add images for each variation, set the prices, and provide descriptions, click on the “Edit” button. Make the necessary changes, and once you’re satisfied, remember to click on “Save the changes” to finalize your updates.
10. Add the other data, such as Product description and category, as above.
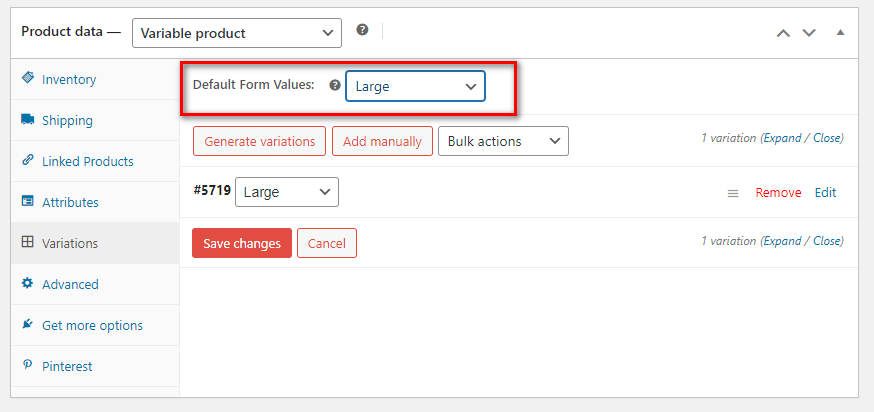
11. Set the default variable for the product.
12. Click on Publish/Update
Implement Inventory Management While WooCommerce supplies the basic inventory management tools to help track your sales and stock levels, you can add plugins suited best to your needs. These include plugins for generating barcodes, changing the order status, printing invoices, shipping products, and stock status.
Step 4 – Managing Your eCommerce Website With the steps mentioned above, I am sure your eCommerce website will be up and running soon. However, your work doesn’t end here. If you want your business to grow, it must rank high in search engines.
You must track your website’s performance, add SEO keywords, and start interacting with your customers.
Set Up Customer Accounts You must have a mailing list of your customers.
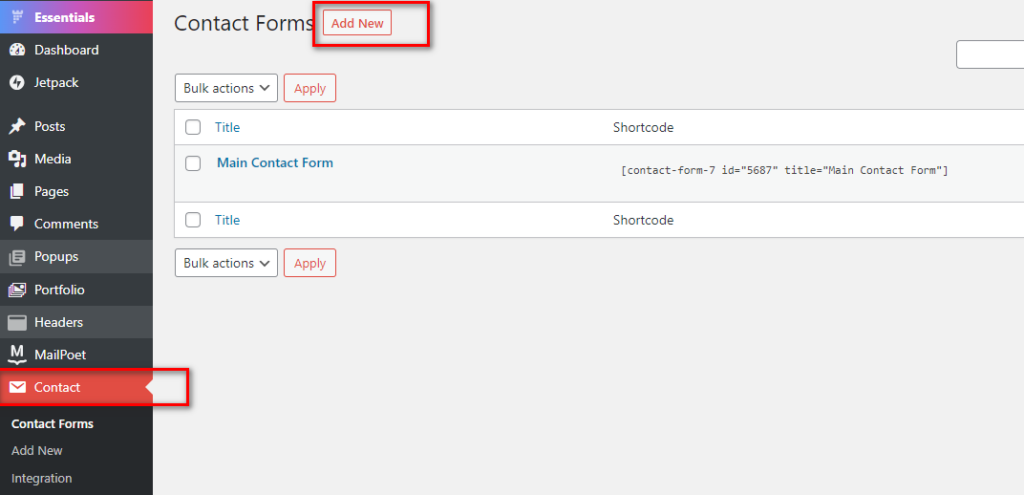
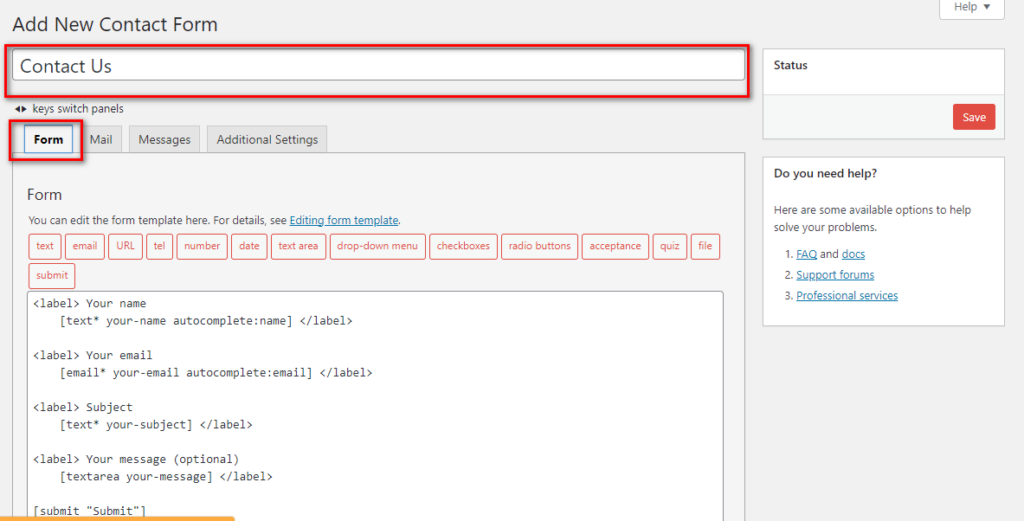
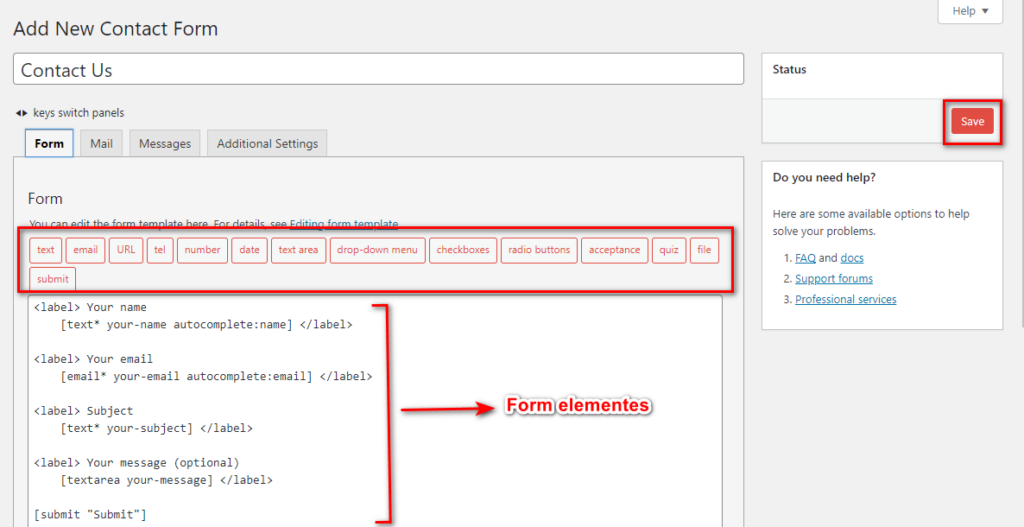
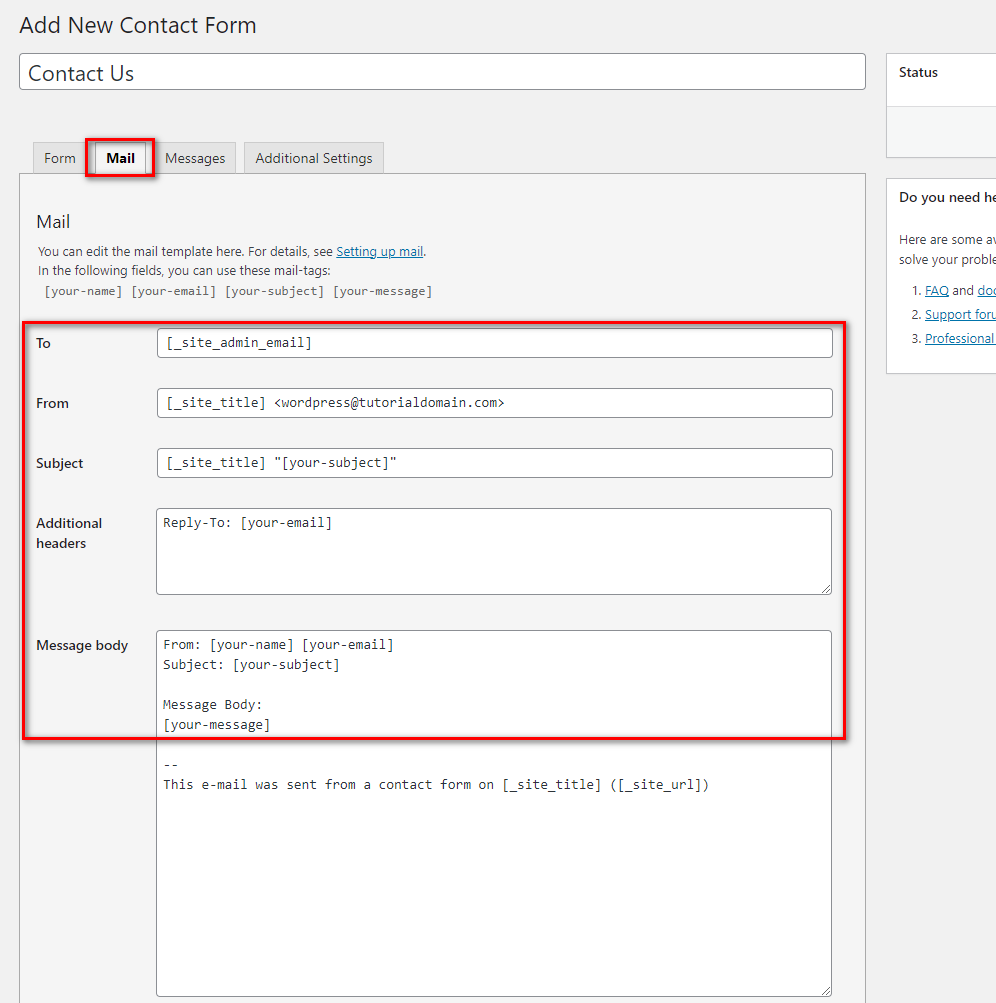
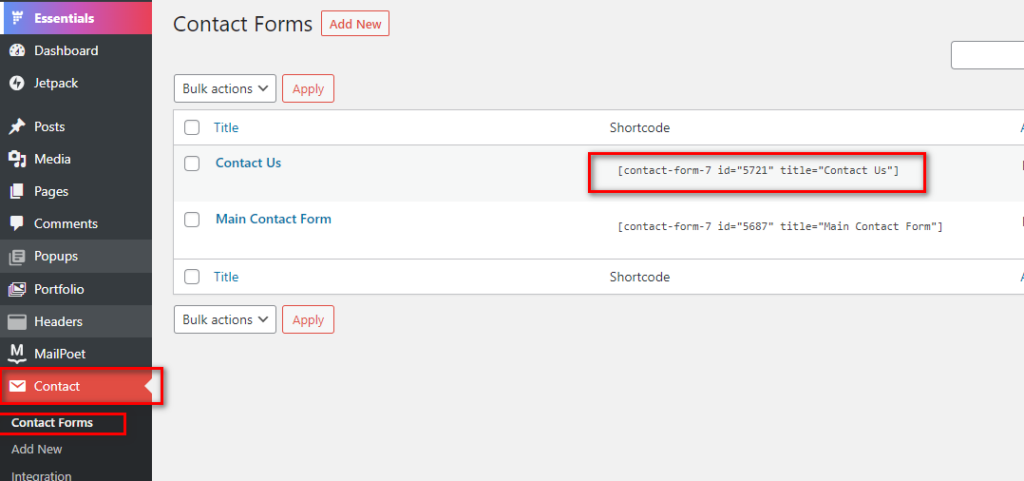
Go to your Dashboard. Click on Plugins and Add New. Search for Contact Form 7 . Click on Install Now -> Activate. Go to contact form > Add New from the WordPress Dashboard. Give the title for the form, and select the form tab. Select the form elements you need to create a form such as “email”, “URL”, “TextArea”, etc. And click on “Save “. In the mail tab, you’ll need to configure various email details including the recipient (“To”), the sender (“From”), and the message body. After creating the form on the View page, simply copy the “Shortcode” provided and paste it onto any page or post of your choice. Add A Blog Adding a blog to your WooCommerce store is like giving it a secret sauce that can boost sales and brand visibility! You see when you create engaging, informative, and valuable blog content, you’re not just entertaining your customers – you’re building trust, showcasing your expertise, and driving traffic to your site.
The more visitors you attract, the higher your chances of turning them into loyal customers. It’s also fantastic for SEO – search engines love fresh, relevant content, and with a regularly updated blog, you’ll rank higher in search results.
And the best part? You can integrate your blog seamlessly with your WooCommerce store, making it super easy for readers to shop while they’re already engaged with your content. Your blog can feature product reviews, tutorials, how-to’s, and tips related to your niche, sparking interest in your products and encouraging visitors to make a purchase.
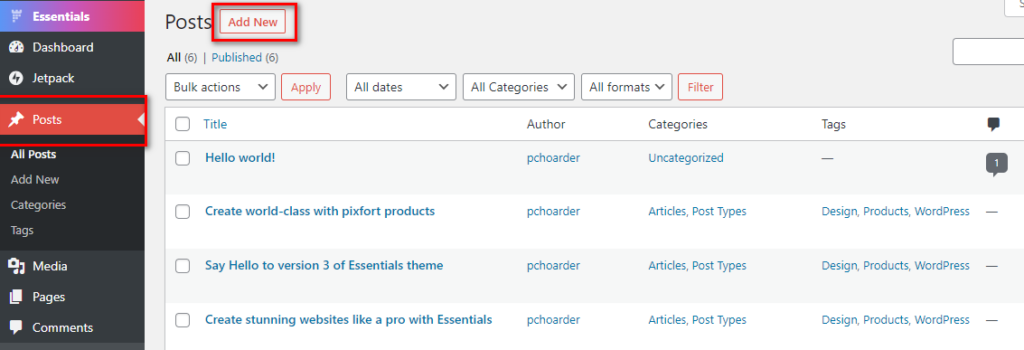
Click on “Post ” from the WordPress Dashboard and click on “Add New “.
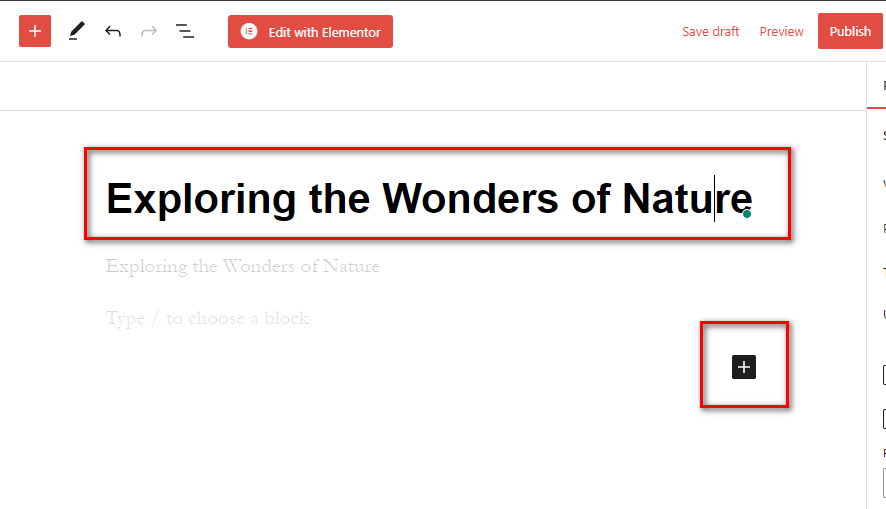
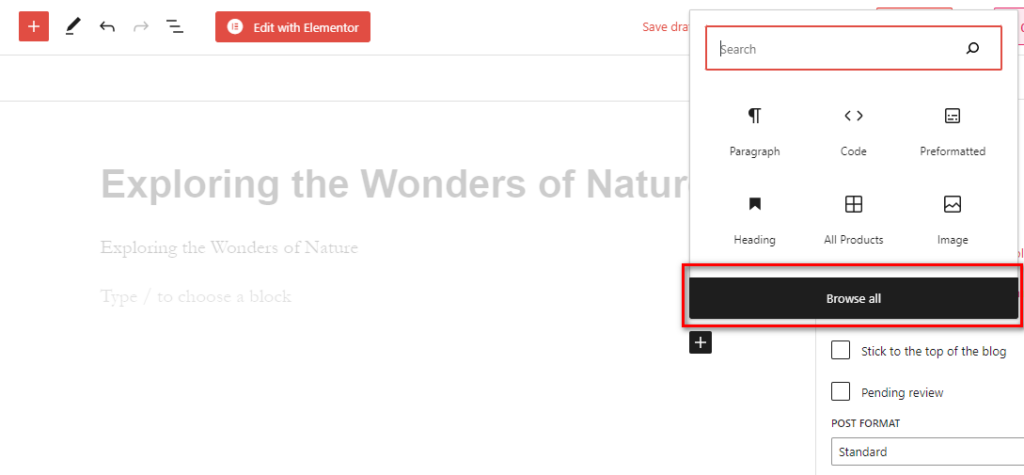
Give a title for your post, simply enter the desired text. To add product elements and more, click on the “+” button, which will provide additional options and features for your post. 2. You can click on “Browse All” .
3. Customize your blog content according to your preferences by selecting various elements from a wide range of options available to you.
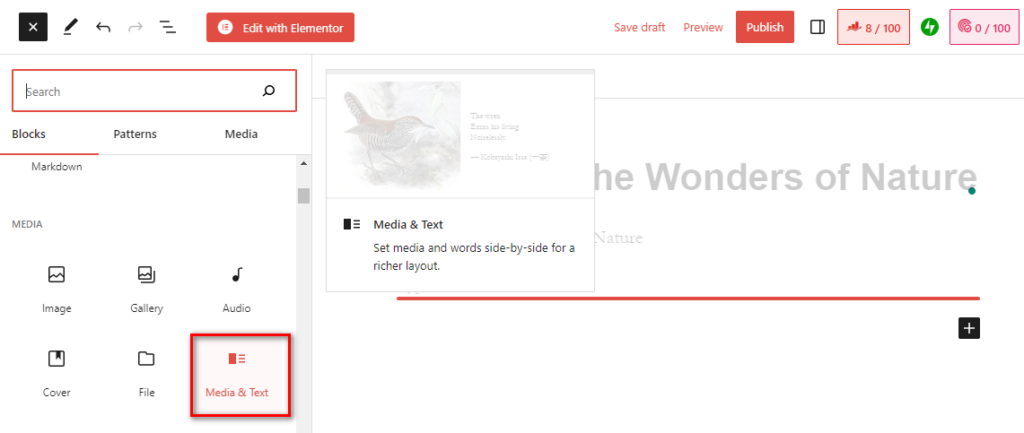
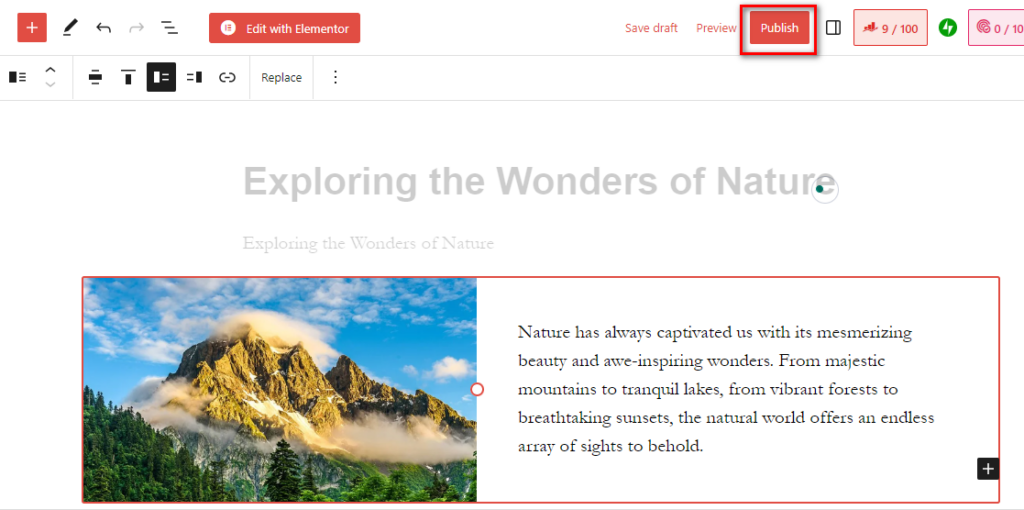
Eg: To achieve the desired layout of placing an image element followed by accompanying content, you can select the “Media Tex t” element from the available options. This element allows you to seamlessly integrate images with text, creating an engaging and visually appealing presentation for your blog.
4. Simply upload the desired image from the library in the image section, and add your preferred content in the corresponding content section. The element will automatically include them in your post.
5. After adding the desired content, you can further enhance your blog post by incorporating additional elements of your choice. Once you’re satisfied with the composition, simply click on “Publish ” to make your post available to readers.
In this way, you can start adding blog posts. Make sure to include SEO keywords to improve your SEO ranking.
And with this comprehensive guide, I am sure your eCommerce business will be up and running in no time. You can install different plugins and change your website’s themes, font, and layout. Remember to update your website daily and include keywords and posts that improve your SEO ranking to boost your sales.
Key Takeaways By now, you may have realized that creating your WordPress eCommerce website is easy, especially if you have the proper guidance. With a few simple steps, including buying a domain name, making a WordPress account, adding plugins, uploading your products, and improving SEO ranking, your eCommerce website will have great hits.
Remember to keep updating your store, adding new content, engaging with your customer, and optimizing your product descriptions. If you need any further clarification, watch my youtube tutorial.