Not sure how to secure the wp-admin directory of your website?
This guide will walk you through the different methods and steps to effectively password-protect your WordPress admin.
Here’s what you will learn:
Let’s dive in!
Securing your WordPress website is not just a priority — it’s a necessity.
One of the most crucial areas to focus on is your WordPress admin area, often referred to by its directory name, wp-admin.
This section of your site functions as its nerve center:
It’s where you curate content, install plugins, modify settings, and carry out a myriad of other administrative actions.
If an unauthorized person gains, they would essentially have the keys to your website, enabling them to wreak havoc on your website, compromise data, and more.
Simply put, an unsecured admin area is a treasure trove for hackers and a potential nightmare for you.
There are three basic reasons why hackers try their best to log in to your site’s wp-admin:
Boosting the security of your admin area comes with several benefits:
Remember, the best defense is a good offense.
The harder you make it for someone to gain unauthorized access, the less likely it is to happen.
While discussing wp-admin security, remember that a well-designed site is also crucial.
Darrel Wilson’s offer can enhance this area, much like password-protecting wp-admin boosts security.

Get lifetime access to all premium template kits designed for Elementor:
Just as you wouldn’t compromise on wp-admin security, don’t settle for less when it comes to your website’s design.
With this offer, you can ensure that your WordPress site is not just secure but also aesthetically appealing and easy to manage.
Before you try out any of the methods below, it’s important to back up your website and settings.
Even small changes can sometimes lead to big problems, and you don’t want to be left trying to piece your site back together.
Think of it as your safety net when you’re performing a high-wire act.
Well, if you have used WordPress before, then you must already have a way or two to back up your website.
But overall, the method revolves around any of these three:
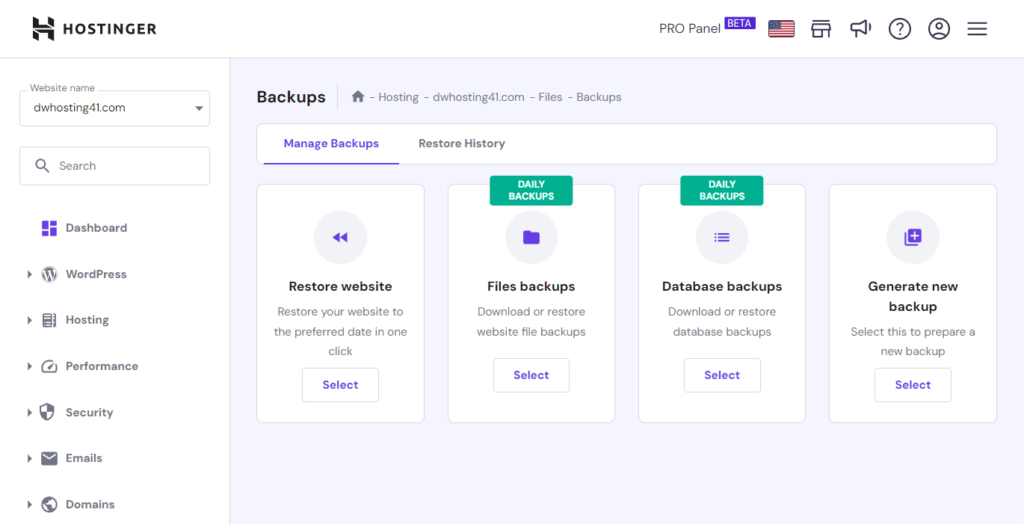
Many web hosting services offer backup features as part of their hosting packages.
These backups are generally automated and can be set to occur at regular intervals, such as daily, weekly, or monthly.
A good example of this is Hostinger:
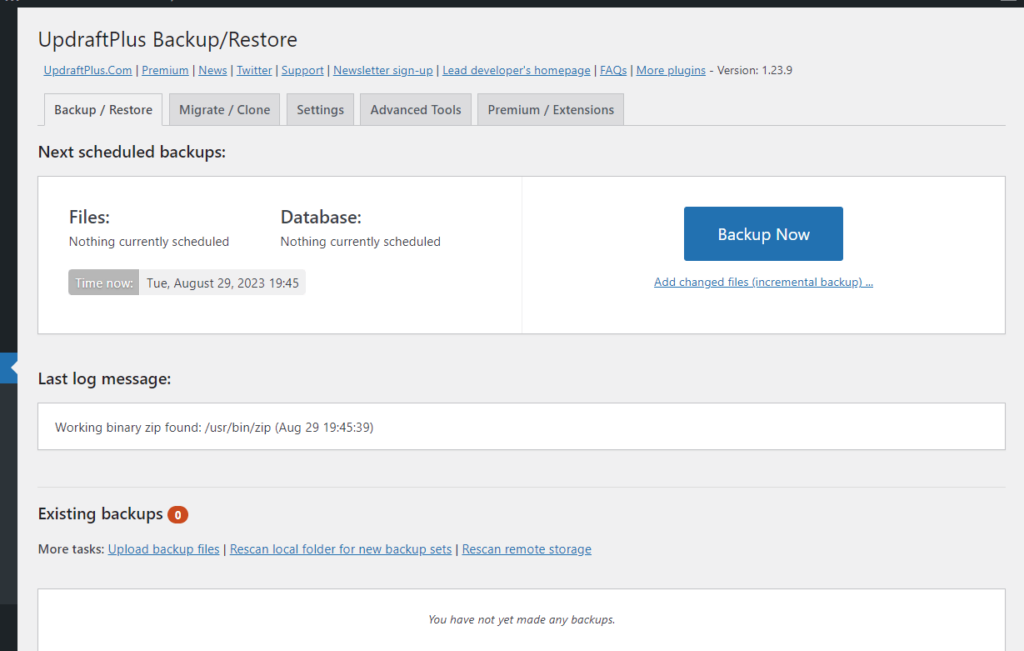
If your host doesn’t provide a backup feature, there are a lot of plugins designed to back up WordPress websites.
These plugins provide a range of features, from simple database backups to comprehensive backups that include all your website’s files, databases, and even email configurations.
Updraft is an example of such a plugin:
If you belong to the last group, then it’s likely that you know your way around the cPanel.
To put it simply, you will have to export the database and the site files — a tedious process if you think about it.
👉 Related: How to Backup Your Website
Alright, you’ve grasped the ‘why’ and you’ve got your backups. Now let’s get into the ‘how.’
There are multiple ways to protect your wp-admin directory:
I will discuss each one below, including the specific steps you need to take for each method.
This method is a bit more user-friendly, especially if you’re not comfortable fiddling around with your website’s files directly.
Most hosting services offer cPanel, which comes with built-in options to secure directories on your website.
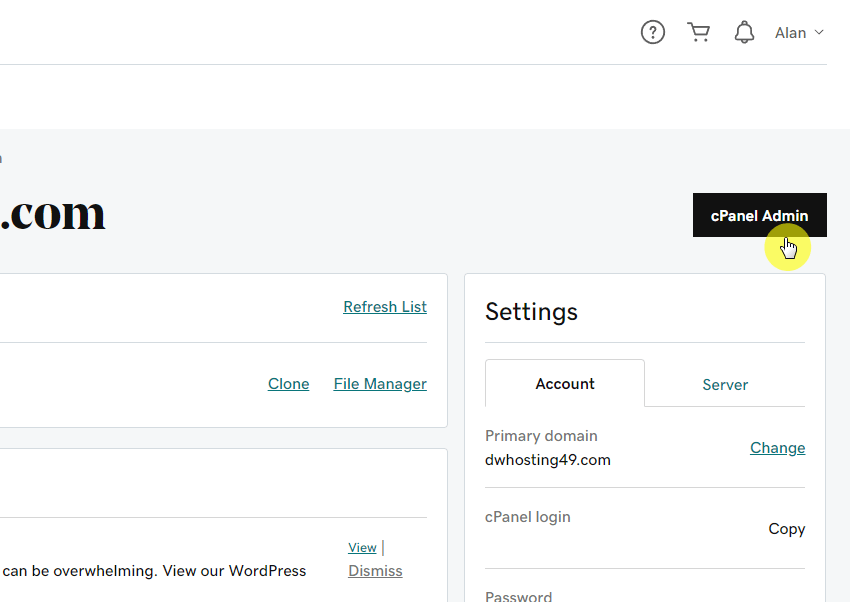
Usually, there is a button from your hosting service that will bring you right away into the cPanel.
For example, in GoDaddy, there is a big cPanel admin button on the hosting page:
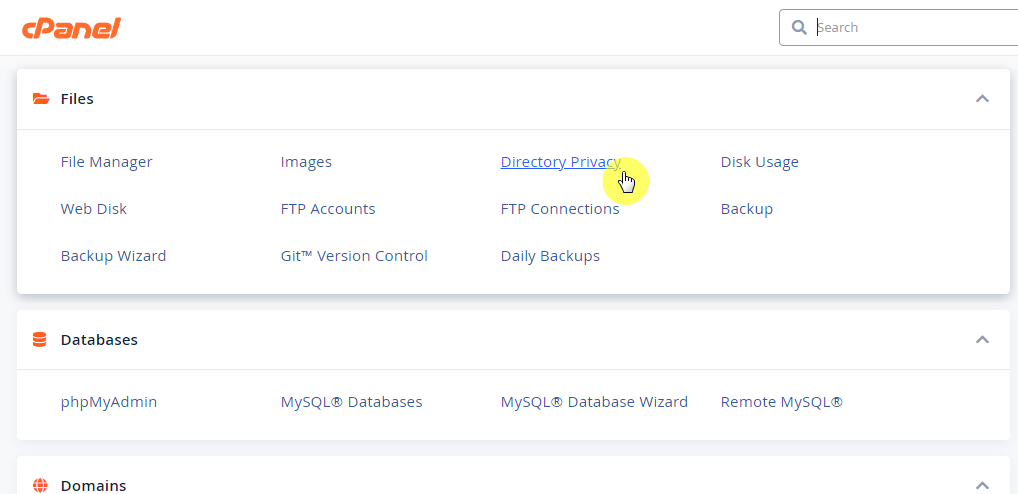
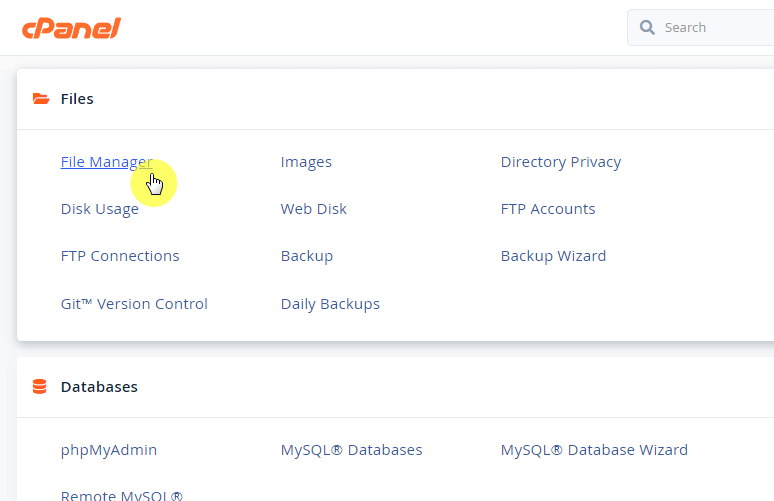
Once you’re in the cPanel, find and click the directory privacy folder icon, which you can usually find within the files group.
⚠️ Note: The appearance or style of cPanel might be different from what you will see below. However, the directory privacy folder is still found under the files group.
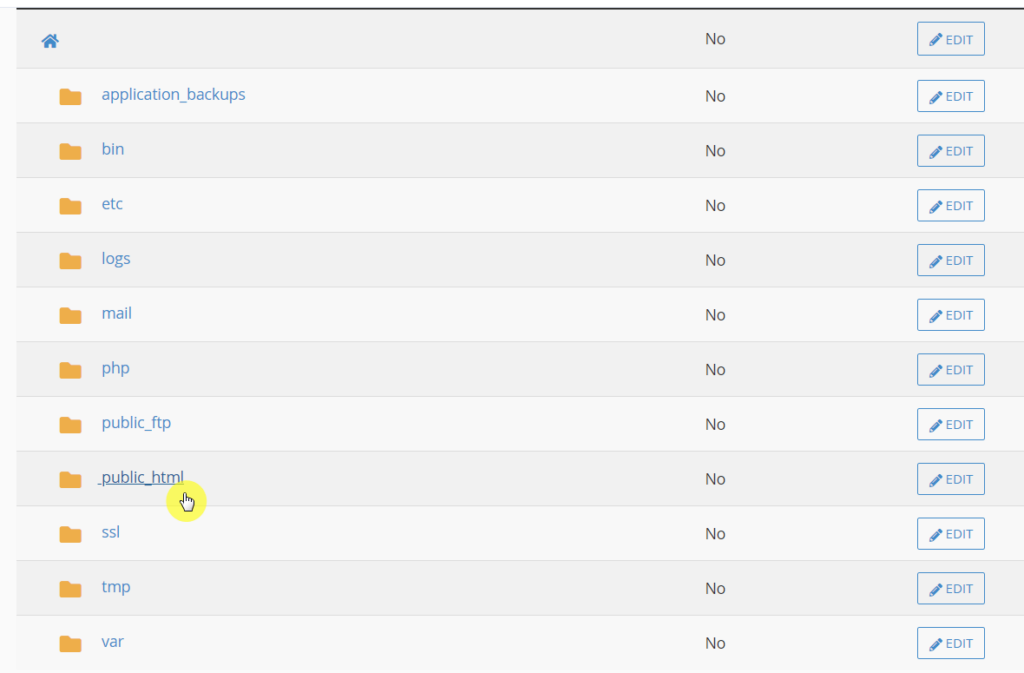
Since it’s a directory privacy, you will see the current directory that you have on the site’s server.
The goal here is to find the folder where your website files live — in most cases, this is the public_html folder.
Click on that folder:
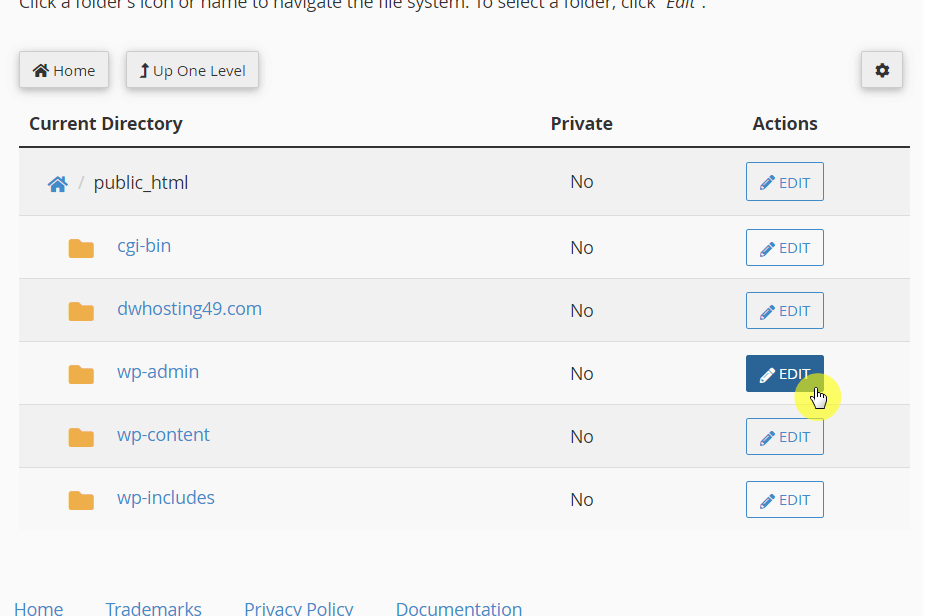
The next screen depends on a few factors, like whether you migrated the site before, the web hosting service you use, etc.
There are usually two scenarios here:
In my example below, you can see the wp-admin folder directly, though there is a folder named after the website’s domain name.
The likely reason for that is the migration I made when I created the website. But nevertheless, the important is seeing the wp-admin folder.
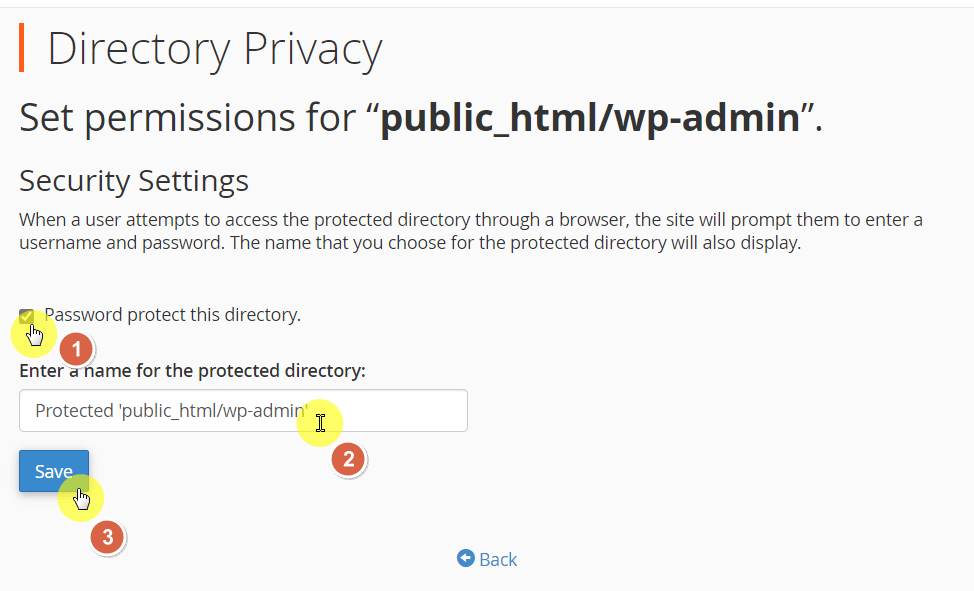
The next screen will allow you to enable password protection for that directory:
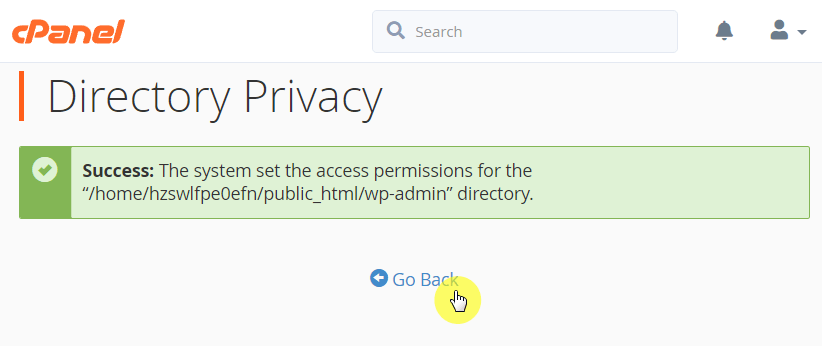
The next screen will show you a green notification to show that the operation was successful.
You’re still not done though — click the go back button and you will see why:
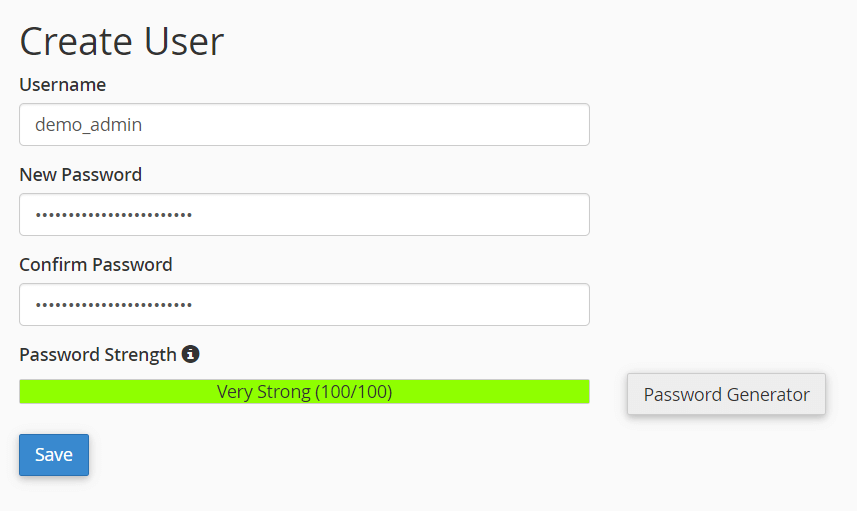
The next page will allow you to create a username and password that you can use to access the wp-admin directory.
Fill out everything here and click the save button:
If you’re having difficulty managing passwords, generating strong ones, or simply remembering your passwords, read the article below.
👉 Related: How to Manage Passwords for WordPress (Password Managers)
What happens now is that when someone tries to go to the wp-admin page of your website, a prompt for a username and password will appear.
Like this:

Try entering the username and password that you indicated earlier to make sure that you can log into your WordPress dashboard.
If you wish to undo the password protect feature, you can always uncheck the feature the same way you enabled it.
Once you hit save, the changes will take effect immediately.
If you’re more of a hands-on person, or your hosting service doesn’t provide an easy way to password-protect directories, then this is the alternative.
The steps here require a little tinkering with your website files. Only do the steps if you’re comfortable.
At the same time, I will also be as detailed as possible so you won’t get lost in the steps. If you have questions, just ask away in the comments.
You have two choices here:
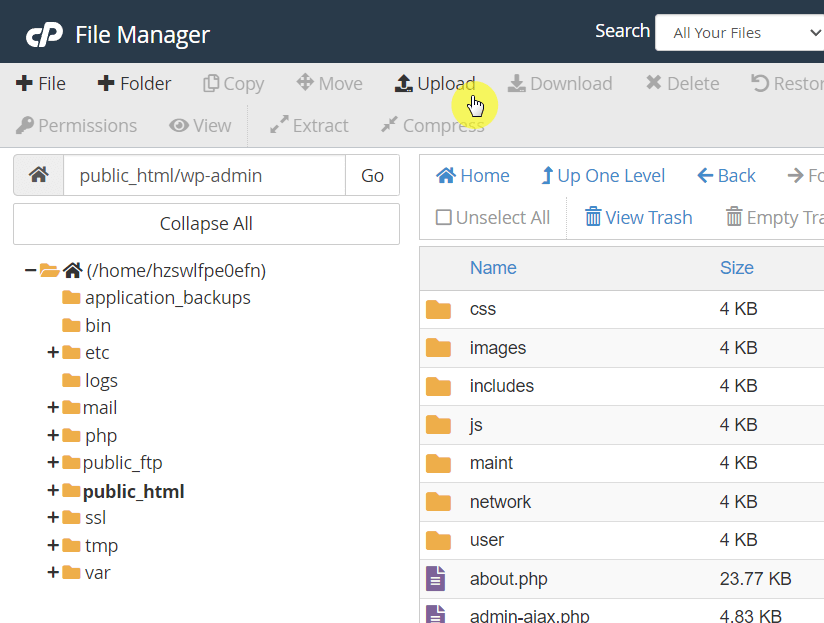
If you have access to cPanel, you can use the file manager app (which works like a web version of Windows Explorer) under the files group.
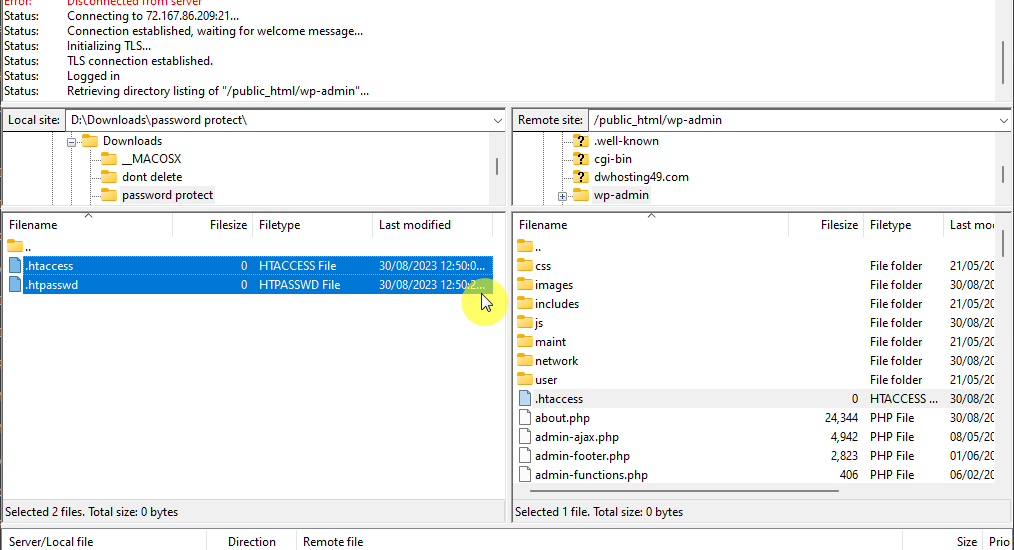
If you can’t use cPanel, your other option is to use file transfer protocol programs like Filezilla to upload/download files to/from your site server.
It looks like this:
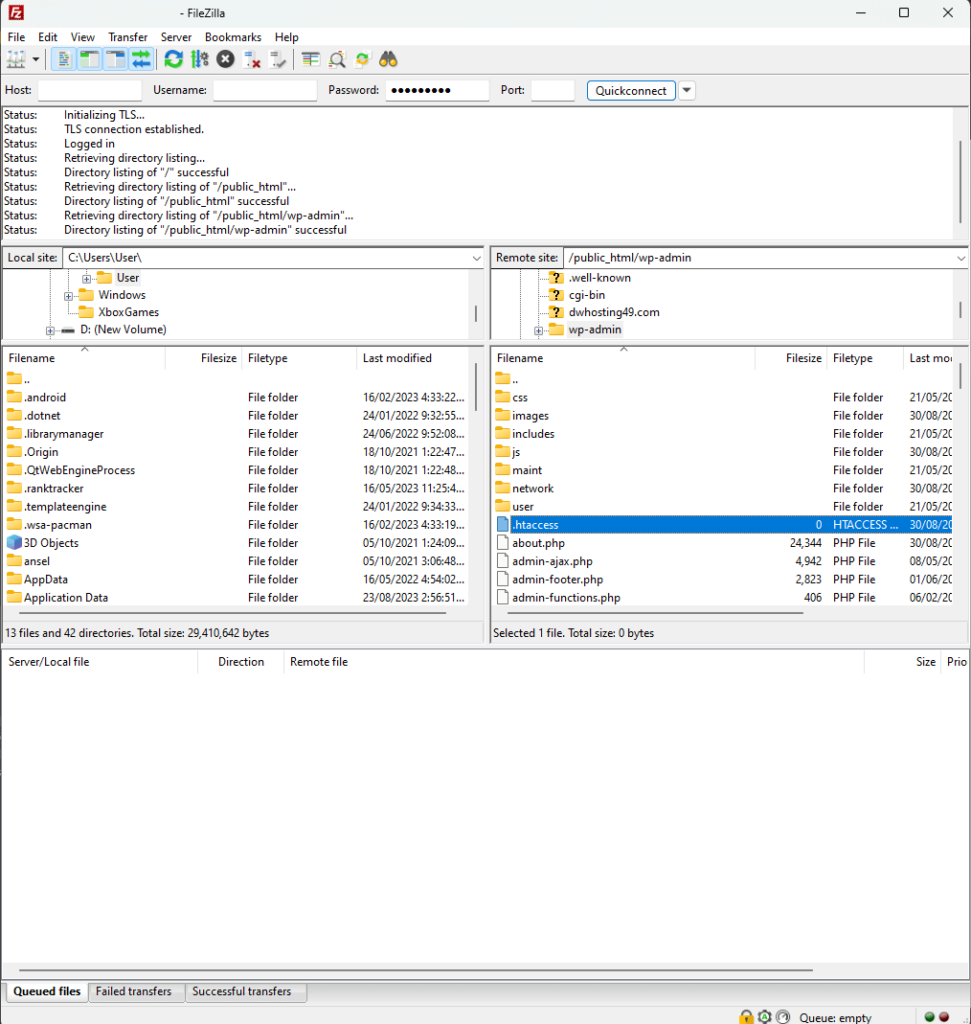
⚠️ Note: To use file transfer protocol programs, you need the IP address and server credentials (username and password). You can ask your host for this if you can’t see yours.
But anyway, for creating the .htaccess file, all you need to do is create a file on your desktop using a text editor and name it .htaccess.
Then, simply copy the following code below and paste it into the file:
AuthName "Admins Only"
AuthUserFile /home/user/public_html/site.com/wp-admin/.htpasswd
AuthGroupFile /dev/null
AuthType basic
require user username
Take note of the following:
The .htpasswd file basically stores usernames and encrypted passwords that work in conjunction with the .htaccess file.
The primary purpose of this duo is to protect directories and files within your web server by prompting users to enter credentials.
Here’s what you need to do:
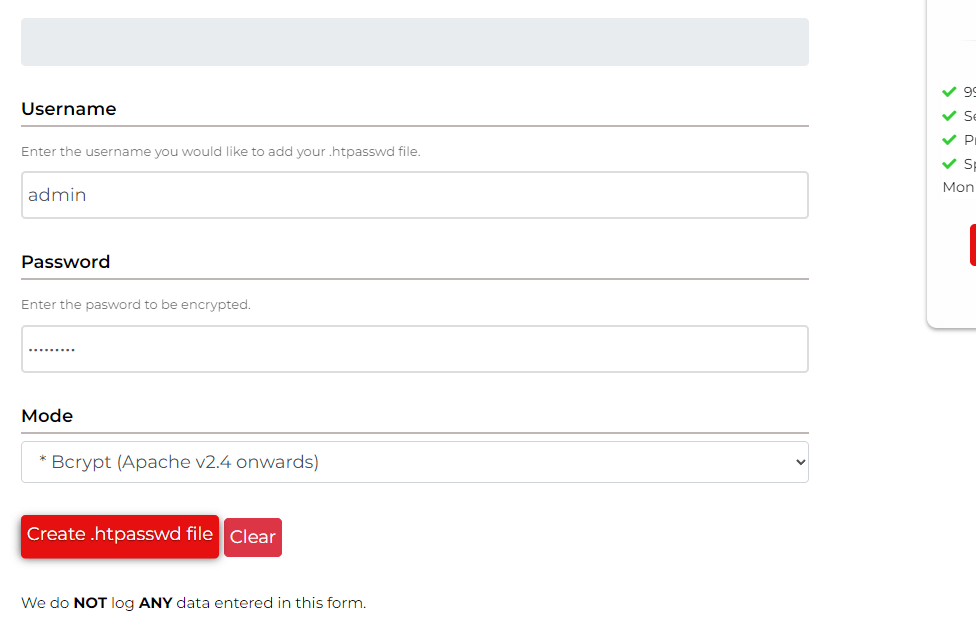
The generator will then give you a code snippet that looks like:
admin:$2y$10$asdkfadksaf/FkdUIsldk/LfgprfWmQMQO/ZF9nNL.90on3KCopy and paste that code snippet into the .htpasswd file and save the file.
Once you’re done, all that’s left is to upload both files into the wp-admin folder.
If you’re using the file manager app in cPanel (or something similar provided by your web host):
On the other hand, if you’re using Filezilla, you should know the following first:
On the left window, navigate first to the folder where you saved/stored the .htaccess file and the .htpasswd file.
Then, do the following:
Right after that, you will see the same results as with the first method.
If you go to the wp-admin login page, you will be prompted to enter the username and password.
While password-protecting your wp-admin directory adds an extra layer of security, it can also make it tedious to enter a password every time you want to access your admin area.
But what if you can make it so that you won’t have to enter the additional password when you access the website’s backend?
Well, this is where whitelisting comes into play — by doing this, as long as you’re accessing the site from the whitelisted IP address, you won’t have to sign in every time.
⚠️ Note: You can make this work together with password protection or you can also this method alone as it automatically blacklists everyone trying to access wp-admin besides the whitelisted IP addresses.
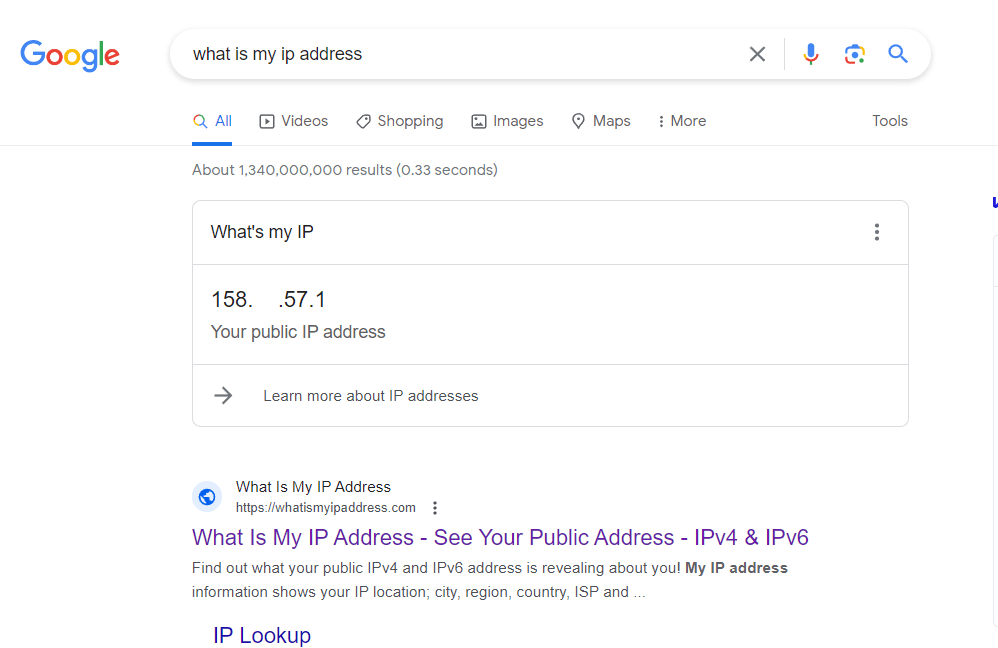
There are a lot of websites that you can visit that will tell you your IP address.
But here is an easier way:
Take note of the result:
If you have read the earlier method, you must already be familiar with this.
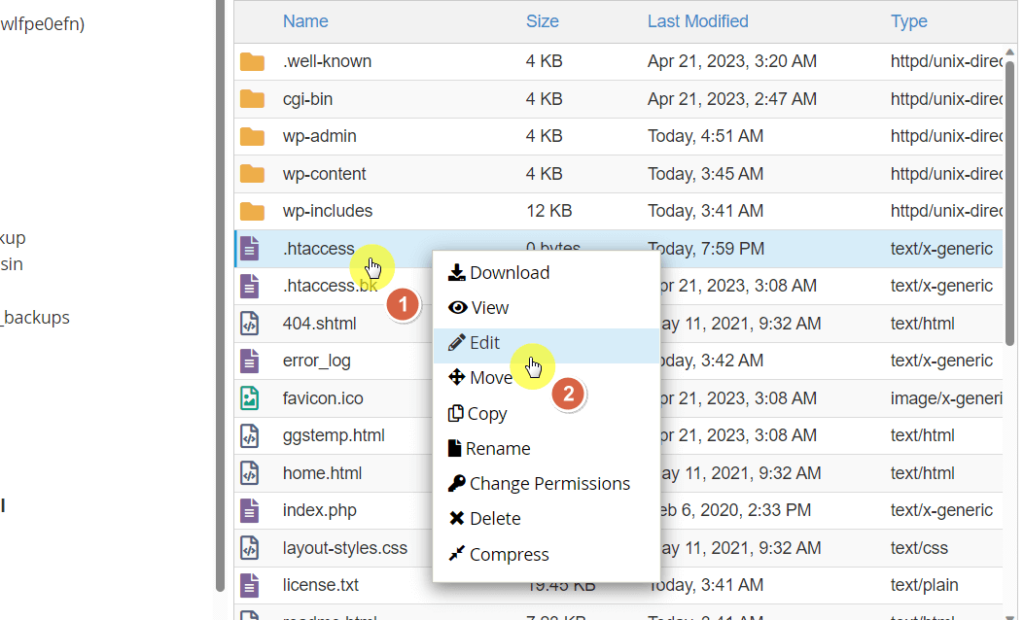
But anyway, you need to access the .htaccess file and edit it:
By default, files that start with a dot are hidden when using the file manager in cPanel.
You can enable it by doing the following:
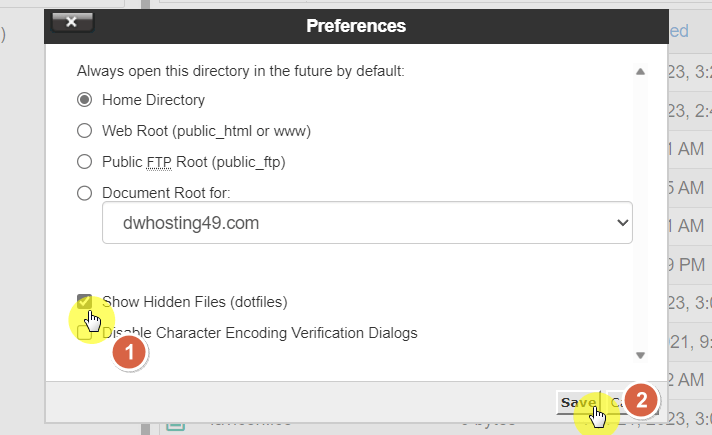
With that, you will be able to check and edit the .htaccess file inside the public_html folder.
You can simply right-click on it and choose the edit option:
Since we’re talking about protecting your WordPress admin directory, I will list out only the code snippets that can do that.
There are two choices here:
For the first one, copy the following code to your .htaccess file:
<Files wp-login.php>
order deny,allow
deny from all
allow from xxx.xxx.xxx.xxx
</Files>
The second one might seem a little confusing.
You need to replace the IP address with your own but don’t delete the slashes.
Here’s the code snippet:
RewriteEngine on
RewriteCond %{REQUEST_URI} ^(.*)?wp-login\.php(.*)$ [OR]
RewriteCond %{REQUEST_URI} ^(.*)?wp-admin$
RewriteCond %{REMOTE_ADDR} !^111\.222\.333\.444$
RewriteRule ^(.*)$ - [R=403,L]
You can always add more IP addresses to the whitelist by copying the line for the IP address.
Save the changes and you’re done. Only devices in the whitelisted IP addresses can access the core files.
This last option isn’t strictly about password protection — but it’s a great alternative for protecting your site backend.
There are so many of them out there, so I only picked out four that can protect your WordPress admin.
If you need more security options for your website, you can read the article that I will link below.
👉 Related: WordPress Security Guide: 20 Steps to Protect Your Site
The Limit Login Attempts Reloaded plugin serves as a robust security measure against brute force attacks on your WordPress website.
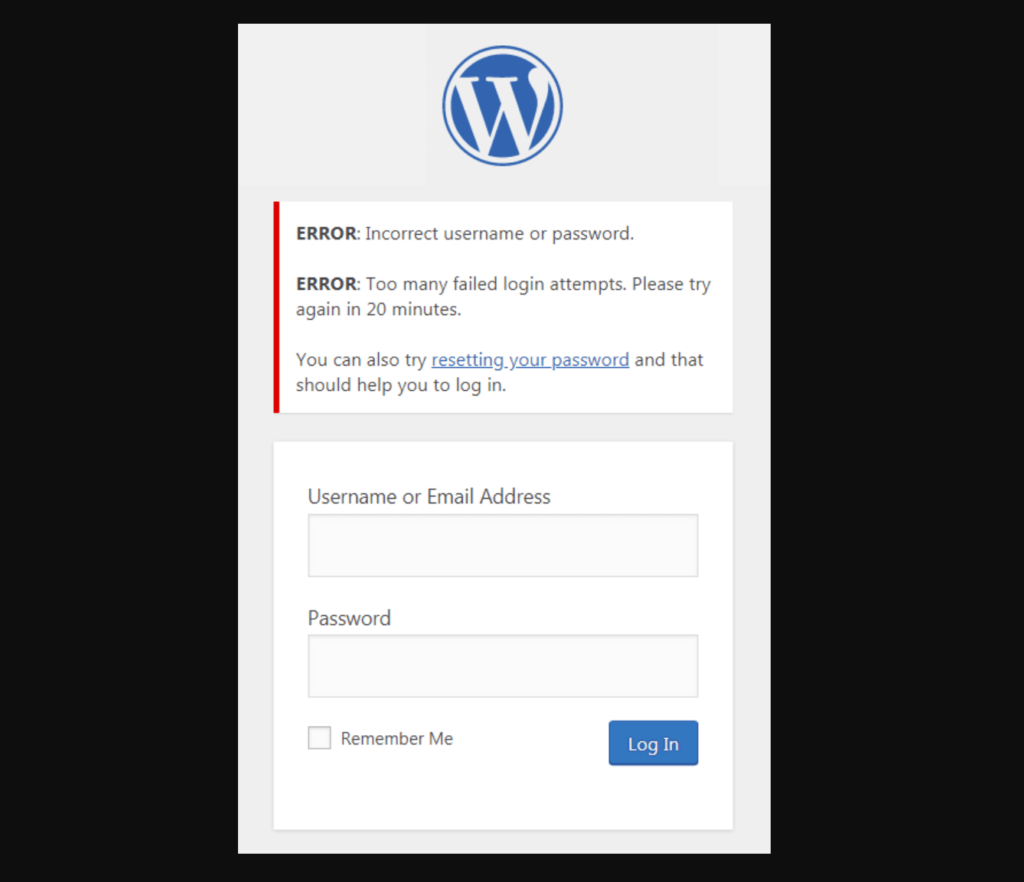
It restricts the number of login attempts from a particular IP address and/or username once a predetermined limit is reached.
The plugin is not limited to the standard WordPress login method but also extends its functionality to XMLRPC, Woocommerce, and custom login pages.
💻 Key features (free version):
The Change WP Admin Login plugin is a user-friendly tool that allows you to change the admin login URL of your WordPress website.
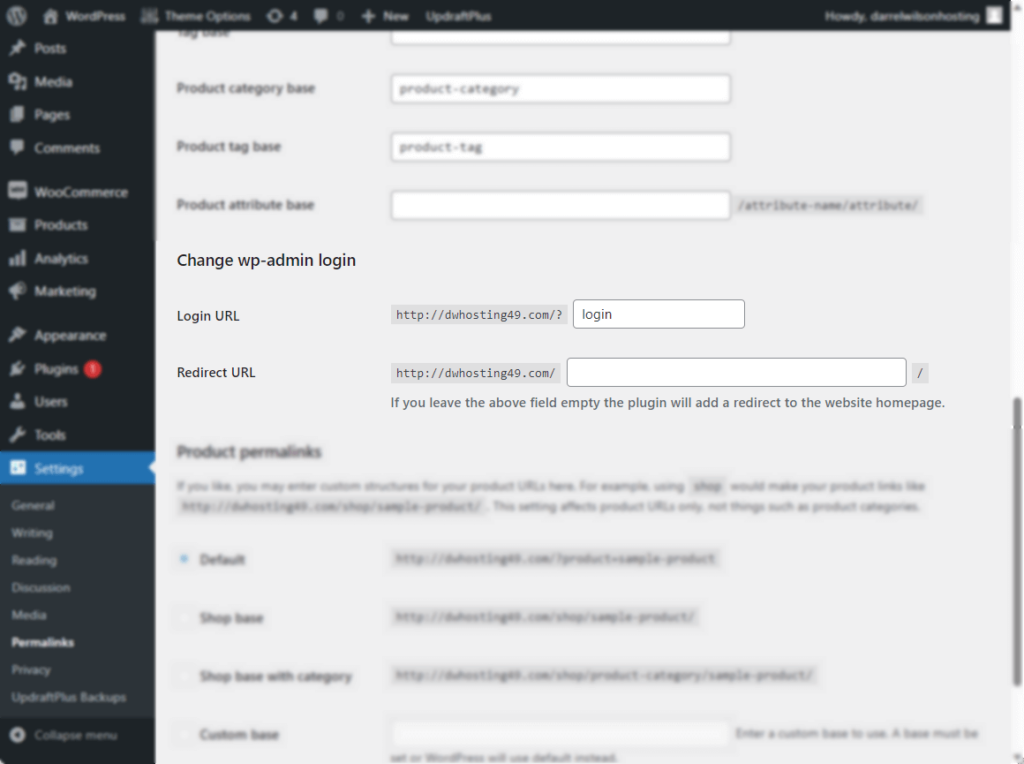
This plugin aims to enhance security by making it more difficult for unauthorized users to find your default login page.
This reduces the risk of brute force attacks and other cyber threats.
⚠️ Note: After activating this plugin, the wp-admin directory and wp-login.php page will become unavailable. It’s advised to bookmark or remember the new URL.
💻 Key features:
The WP 2FA – Two-factor authentication for WordPress plugin adds an extra layer of security to your WordPress website by enabling two-factor authentication (2FA).
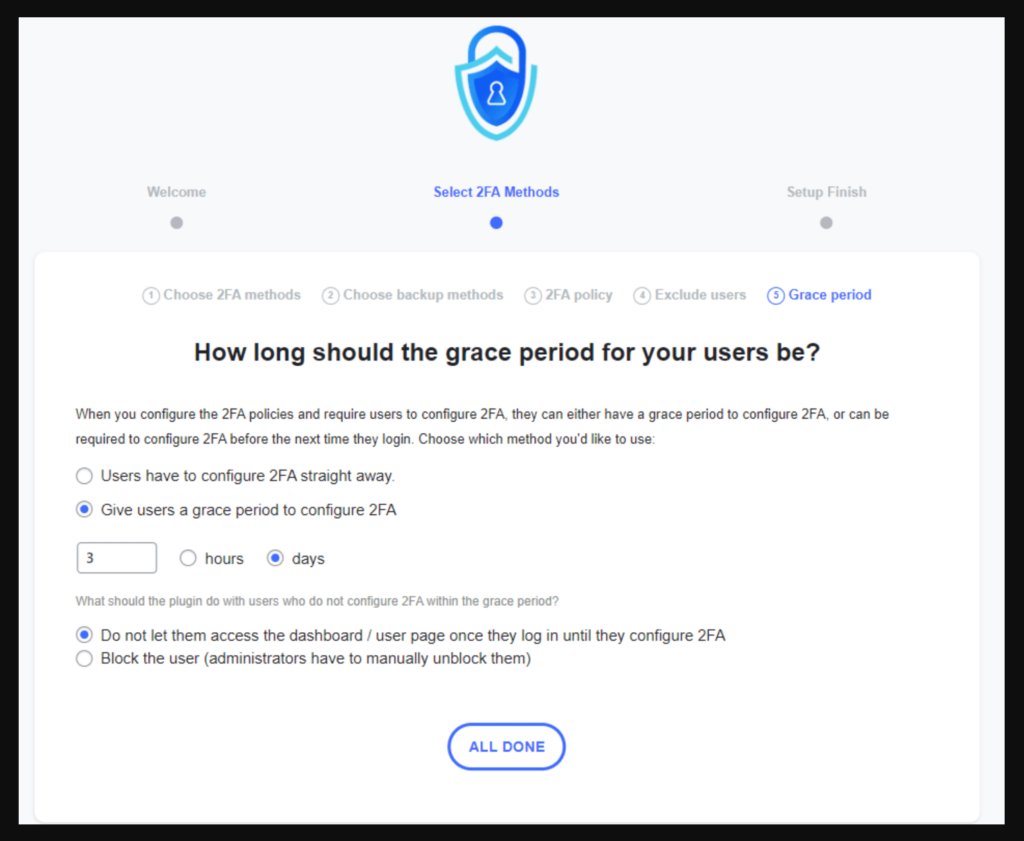
This feature is particularly useful in protecting against weak passwords, automated password guessing, and brute-force attacks.
💻 Key features:
Securing your WordPress website should be a top priority, and one of the most effective ways to achieve this is by password-protecting the wp-admin directory.
I walked you through several methods of fortifying your admin directory. These range from setting up basic password protection to manually configuring security via FTP/cPanel.
Taking steps to secure your WordPress Admin Directory is not just advisable — it’s essential for maintaining the integrity and functionality of your website.
Safeguarding your WordPress admin directory is vital for your website’s overall security.
As you take steps to protect this critical area, consider extending that diligence to your site’s design and functionality.
Darrel Wilson has an exclusive offer to help:
Just as you’ve invested in securing your WordPress admin directory, this offer provides an opportunity to invest in the site’s aesthetic and user experience.
Don’t miss out — elevate your WordPress security and design today.


