Need a ticketing system?
By the end of this guide, you will learn how to create a support ticketing system in WordPress using a simple plugin.
Here’s what we’ll talk about:
What’s a ticketing system What plugin to use How to create and manage tickets Ready? Let’s get started.
What is a support ticketing system? A support ticketing system is a tool that helps businesses manage and resolve customer inquiries and issues quickly and efficiently.
A good helpdesk ticketing system handles and ranks multiple customer support inquiries and manages these so your customers get faster replies from the right support person.
Here are some key features and functions that prove why you should have a support ticketing system of your own:
Centralized management: All customer interactions are stored in one place, making it easy for support teams to access and manage them.Automated ticket routing: Tickets can be automatically assigned to the appropriate team member based on predefined criteria.Status tracking: Each ticket has a status indicator (e.g., open, in progress, resolved) to enable customers and support staff to track progress.Communication logs: Keeps a record of all communications related to each ticket to secure context and continuity. Basically, this system acts as a central hub where each “ticket,” a unique customer query or support request, is logged, tracked, and resolved.
Support ticketing systems are common in service industries like hospitality and healthcare, IT support, and ecommerce markets for handling orders, returns, and product info.
Choosing the right plugin is crucial for creating an efficient support ticketing system.
However, your web hosting also plays an important role in your site’s overall performance and reliability.
Discover the Hostinger advantage for your WordPress site:
Enjoy a 99.9% uptime guarantee Affordable pricing at just $2.49/month (use the code darrel10 to get a discount) Global performance and reach with Hostinger’s optimized hosting platform With Hostinger, you’re not just getting a hosting service:
You’re investing in a reliable partner dedicated to enhancing your website’s performance and user experience.
What should you consider when selecting a plugin? Fortunately, there’s no need to start from scratch as you can create a ticketing system by using plugins that are focused on accommodating customer service.
Rely on these criteria when selecting a plugin:
Features and functionality: The plugin should be user-friendly for both your support team and customers.Integration capabilities: Ensure the plugin allows for customization and integrates well with other tools you use.Scalability and performance: The plugin should be capable of managing a high volume of tickets without performance issues.Support and documentation: Reliable support and documentation are essential for troubleshooting and optimizing your tool. Naturally, check the cost of the plugin about your budget and assess whether the features and support justify the price.
There are a lot of tools that work great for building support ticketing systems such as:
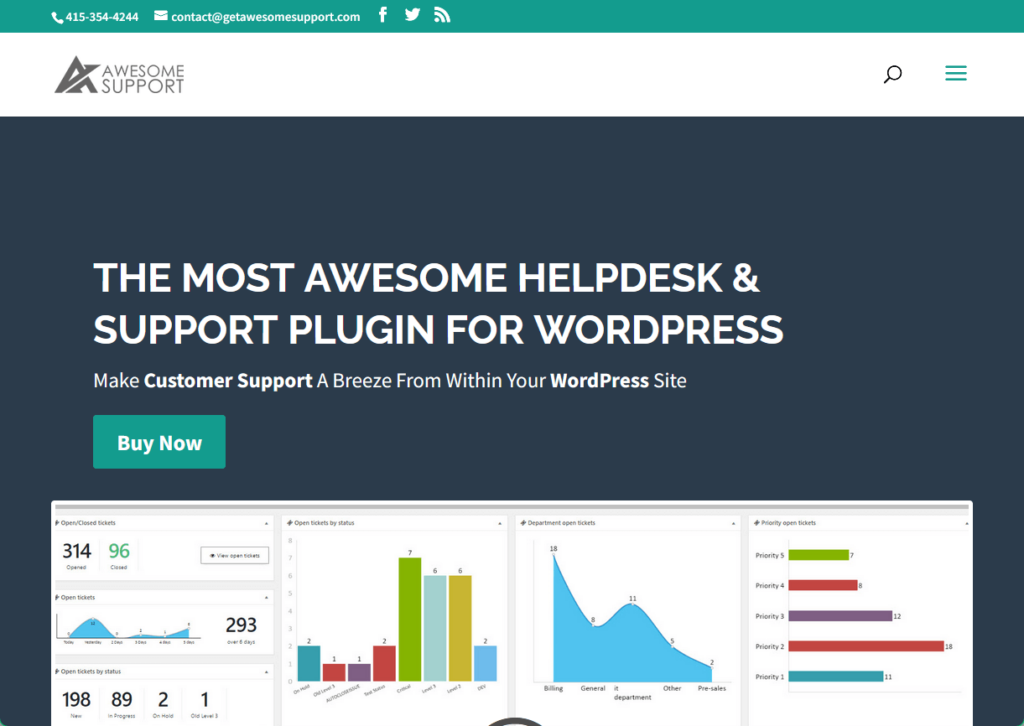
But for this tutorial, let’s have one of the most simple and reliable plugins out there: Awesome Support
Creating and Managing Tickets Awesome Support is a highly versatile and feature-rich helpdesk and support ticketing plugin that will enable you to create a free support ticket system.
Designed for businesses of all sizes, it supports ticket management, live chat, and knowledge base management, providing top-notch customer service.
The core version is free, with premium add-ons available for extended functionality (that means users to scale their support system as their business grows).
Key features:
Unlimited tickets and agents: Manage an unlimited number of tickets and agents with scalability in priority.Automated ticket routing: Automatically assign tickets to the appropriate support agents based on predefined rules.Customizable ticket fields: Create custom fields to capture specific information needed for each ticket.Private credentials vault: Securely store sensitive information such as passwords with additional encryption.SLA management: Set and track service level agreements to ensure timely responses and resolutions.Advanced reporting and analytics: Generate detailed reports to track performance metrics and gain insights into support operations.Integration with WooCommerce and Easy Digital Downloads: Synchronize product lists and validate licenses directly within the support system. These features make Awesome Support a powerful all-in-one tool for managing customer support efficiently and effectively on a WordPress site.
⚠️ Note : If you need a WordPress advanced ticket system, you may need to invest on a premium tool or plugin.
Now here’s how to use it:
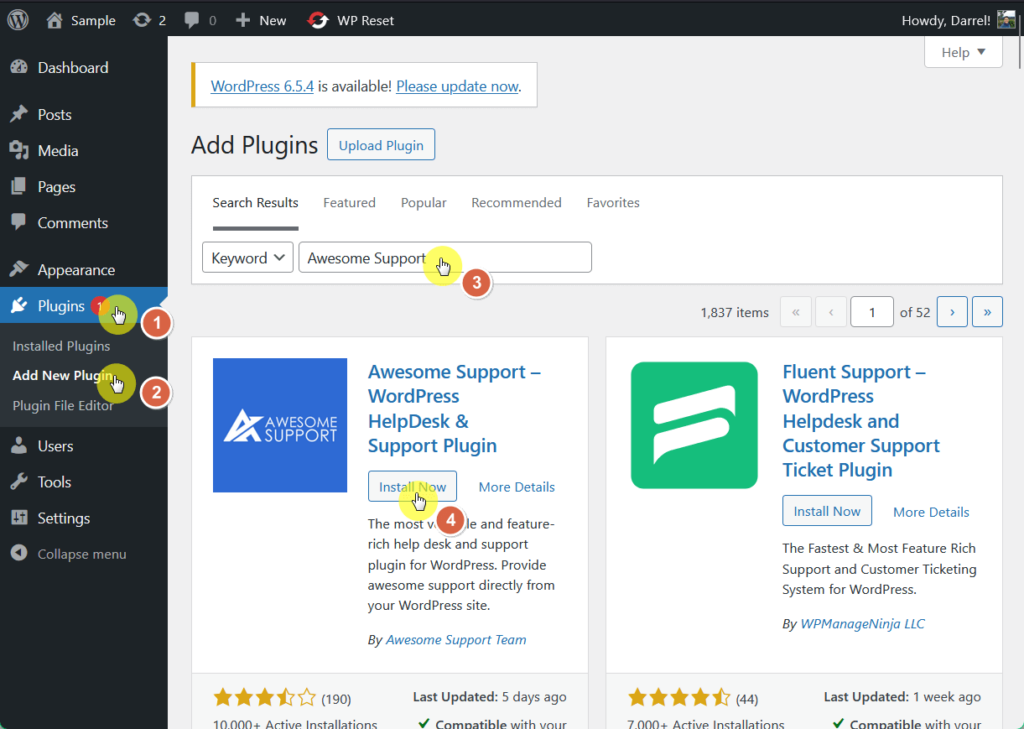
Step 1: Install and activate the plugin Head over to the WordPress dashboard.
Hover over the plugins tab on the sidebar and click on the add new plugin button in the drop-down options.
In the search box, type “Awesome Support” and press enter — from among the search results, select the corresponding plugin and click the install now button
Once installation is complete, click the activate button so the plugin will be ready for use.
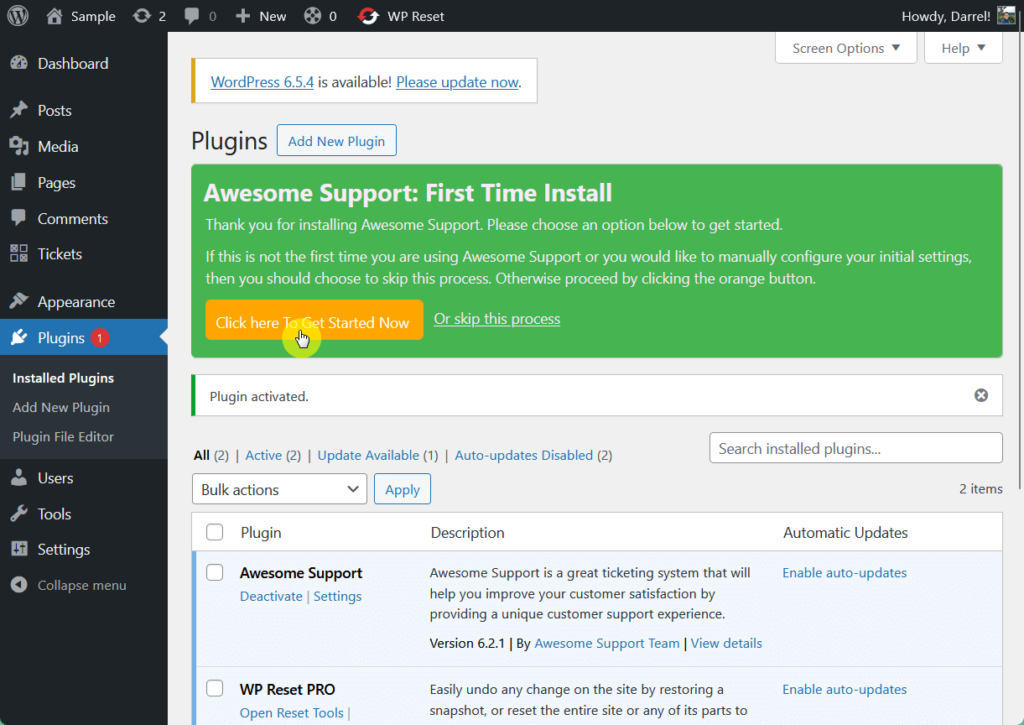
Step 2: Launch the setup wizard After activating the plugin, a setup wizard will appear to assist you with the configuration process (you can choose to skip this step and complete it later if you prefer).
For now, let’s follow and press the click here to get started now button:
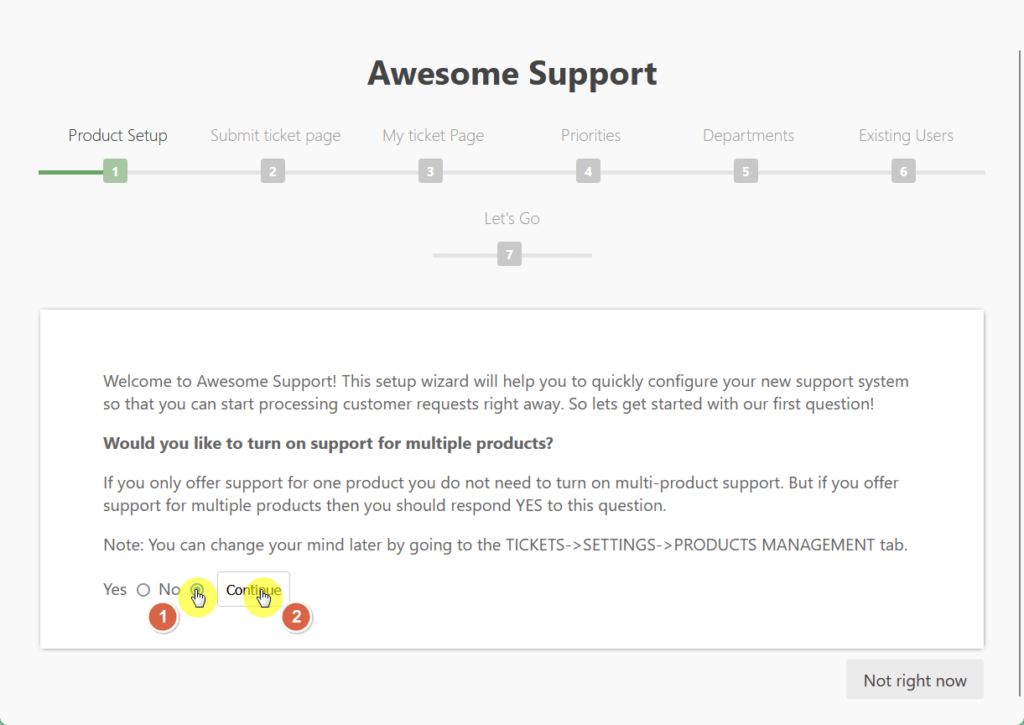
The product setup page will welcome you and ask you if you want to turn on support for multiple products.
If you run an online store with various products , you may want to enable this feature so customers can indicate which specific product they need assistance with.
If you don’t, then select the no option and then click the continue button:
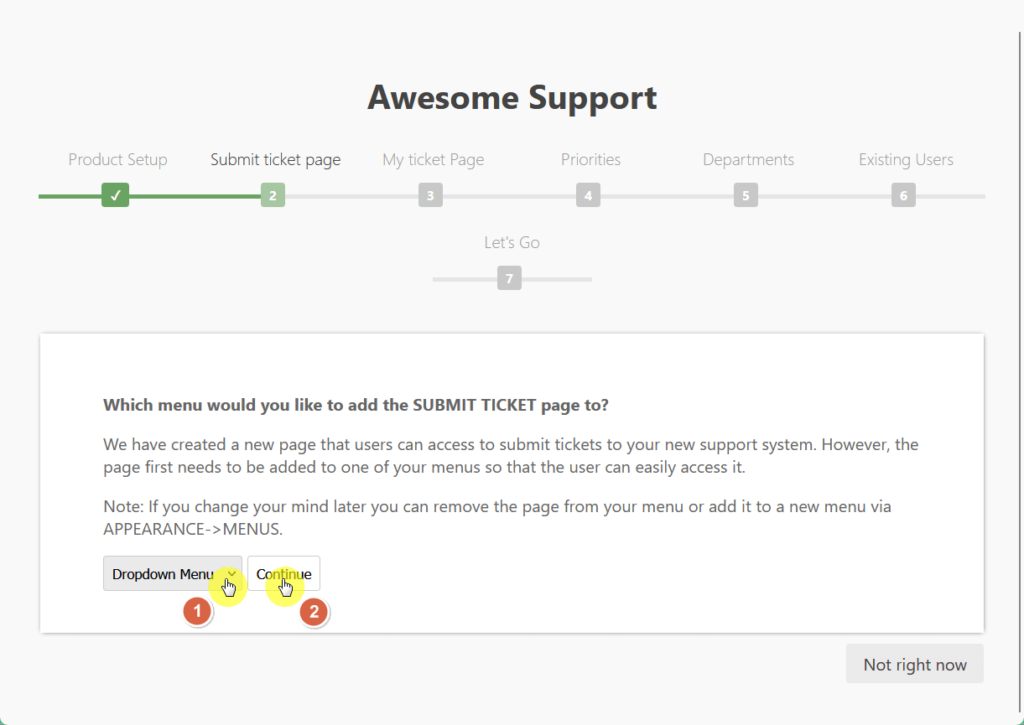
On the submit ticket page , choose the menu where you want to add your WordPress support ticket system, then click continue.
Note that you will first have to create a menu in the appearance tab of your WordPress sidebar in order to get this going.
Again, choose the same placement on the my ticket page and click continue once again.
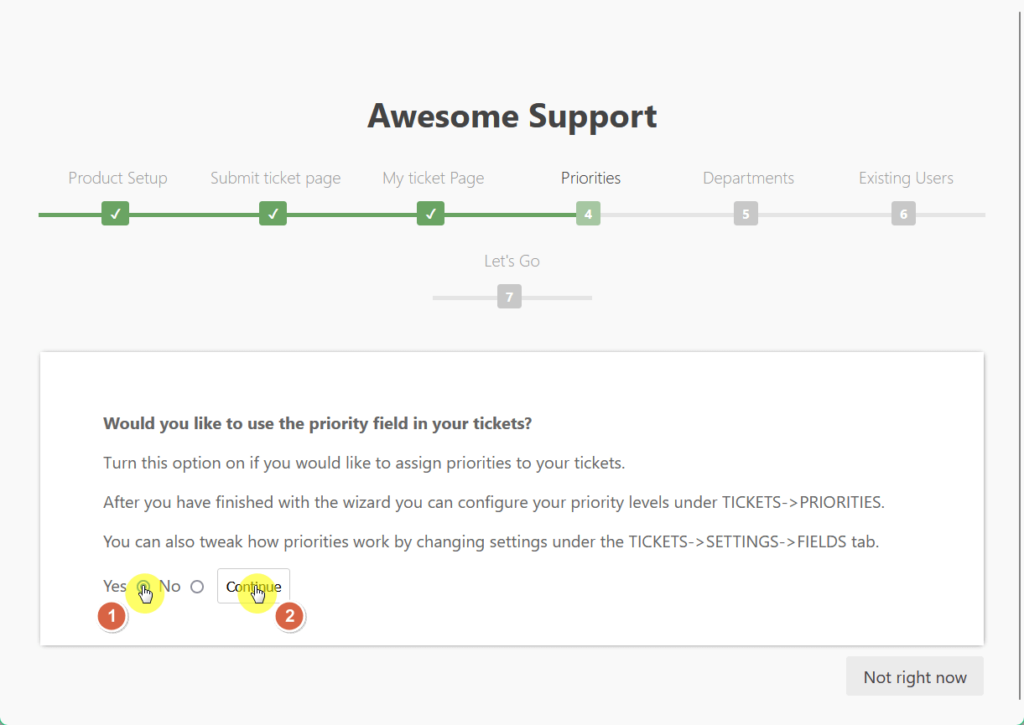
On the priorities page , activate this feature if you wish to assign priorities to your support tickets.
The setup wizard will let you know that you can set priority levels after the initial plugin setup by navigating to tickets > priorities in your WordPress dashboard.
On the “departments” page:
If you have multiple departments and want to route customer support tickets directly upon submission, enable this feature and click the continue button.
Continue with the rest of the settings until existing users. 🙂
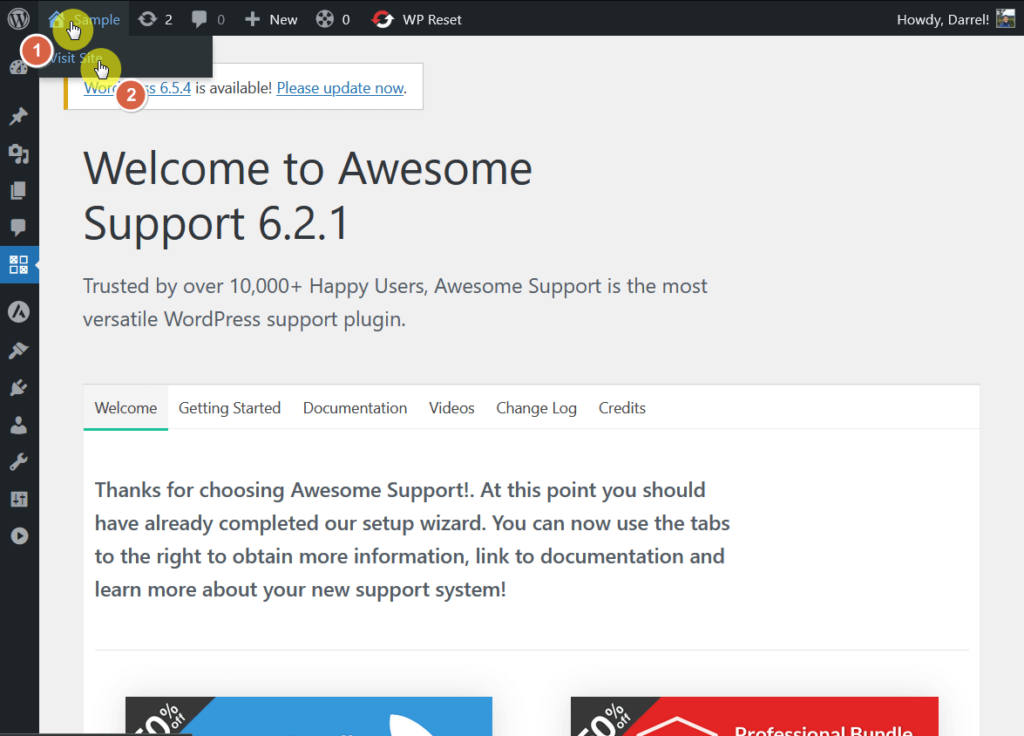
Step 3: Test the support ticket on your site After you finish the setup wizard, things are basically ready for use.
You will still need to manage smaller details like your company’s departments and menu placements.
However, before going into those tasks, test a support ticket on the front end to ensure everything is functioning correctly.
Beside the WordPress logo in the upper-left corner of your screen, hover over the sample button and click on the visit site button in the drop-down menu.
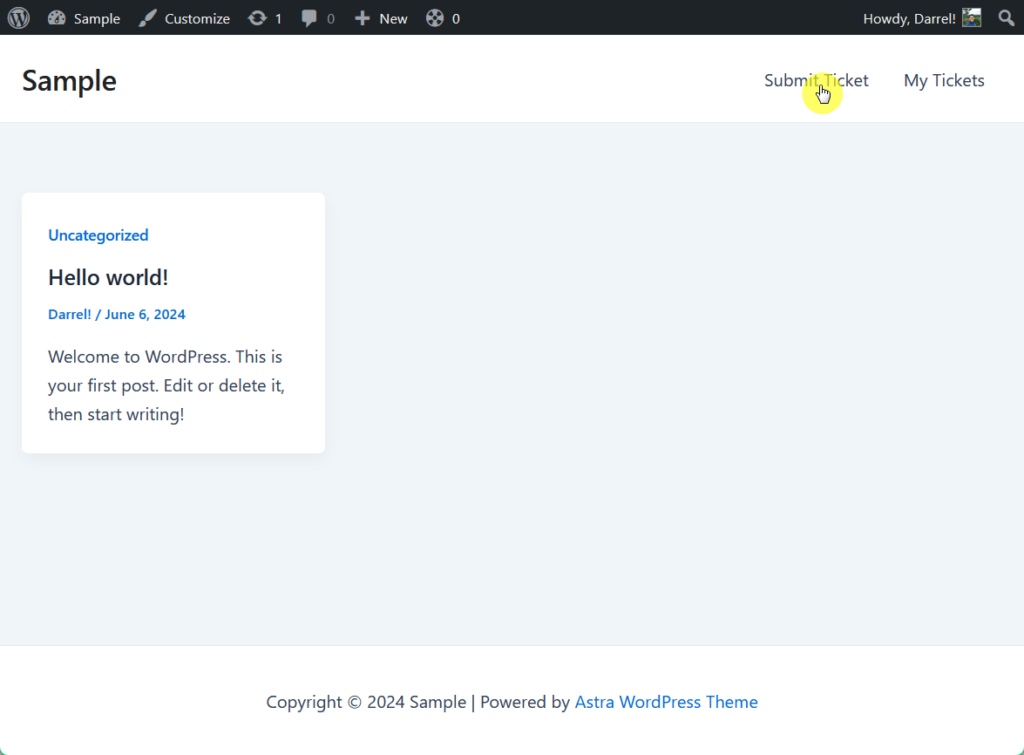
This should bring you to the front page of the site.
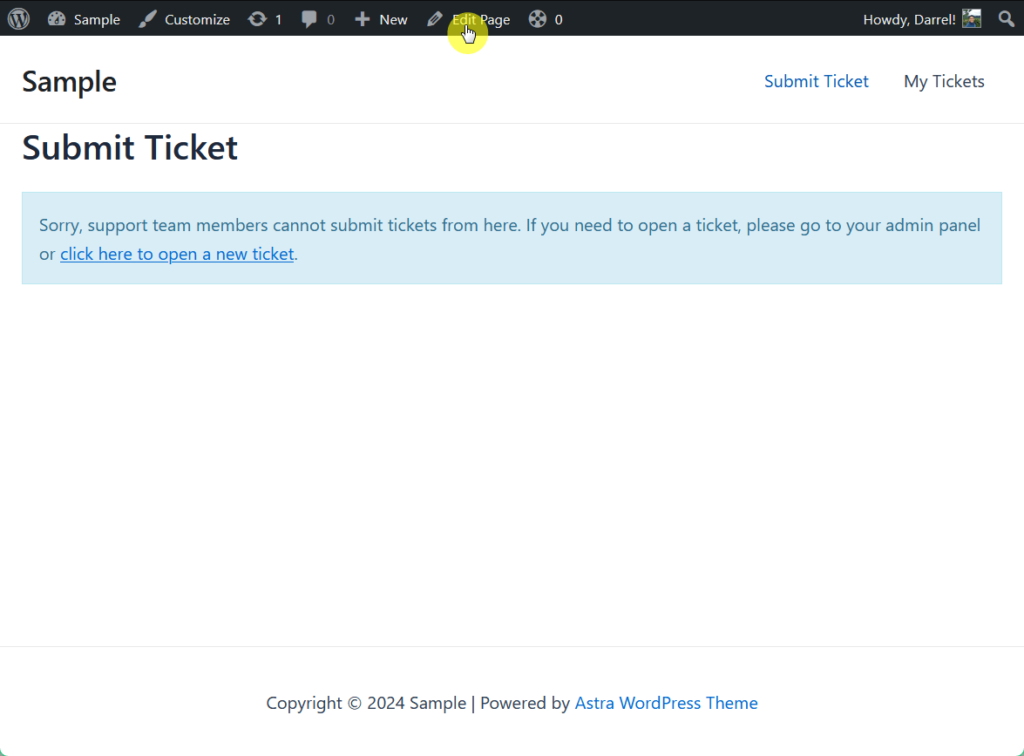
Click on the submit ticket button:
However, once you click this button, you will not be allowed to submit a ticket as a support team member.
That’s why you need to get the actual permalink (URL) of your submit ticket page and open it on a separate browser.
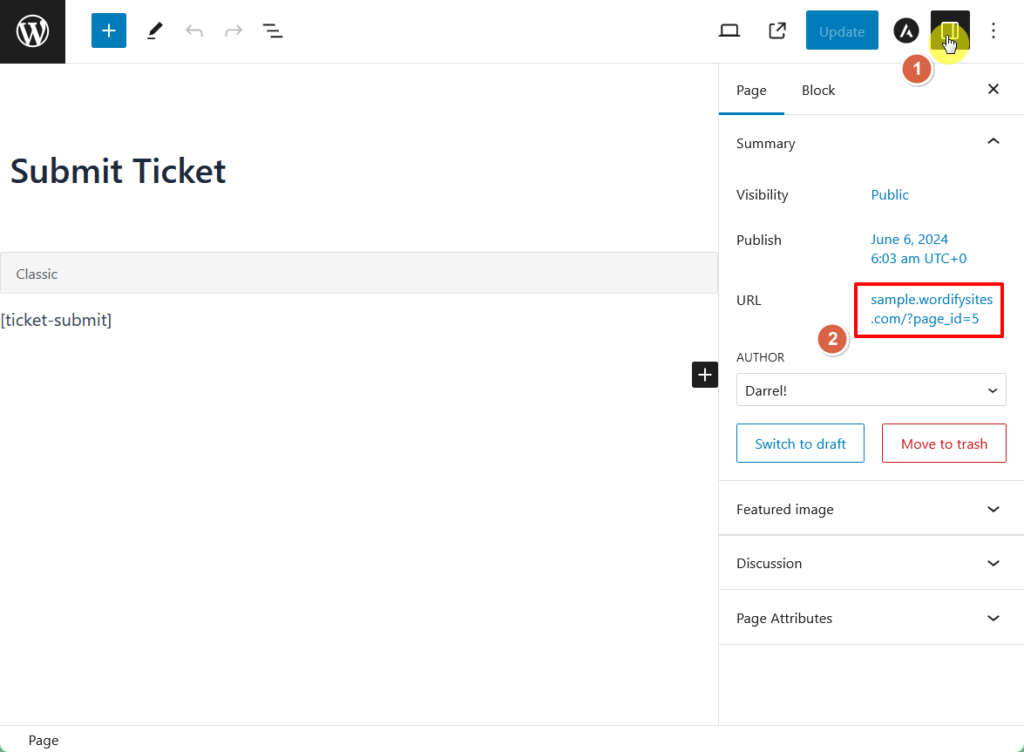
To do that, click on the edit page button in the top bar of your site:
This will lead you to the edit page window.
From there, click on the settings button in the upper-right corner of your screen and copy the URL of your submit ticket page.
Open this URL on a new window.
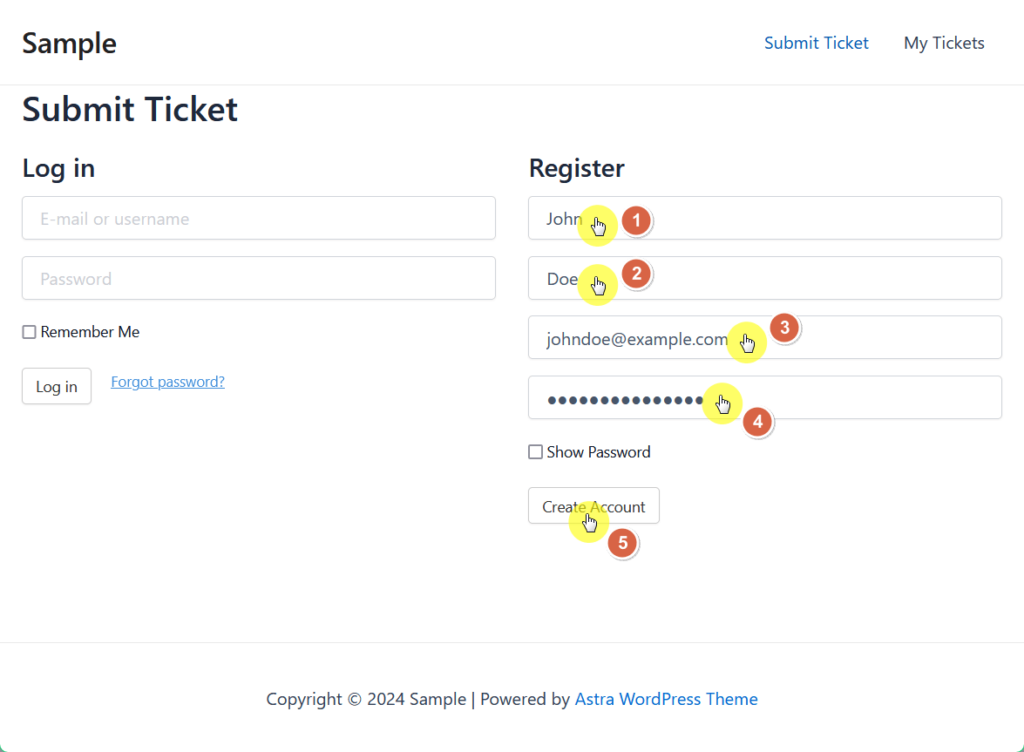
Here, you can register as a new customer by filling out the necessary details and when you’re finished, click the create account button:
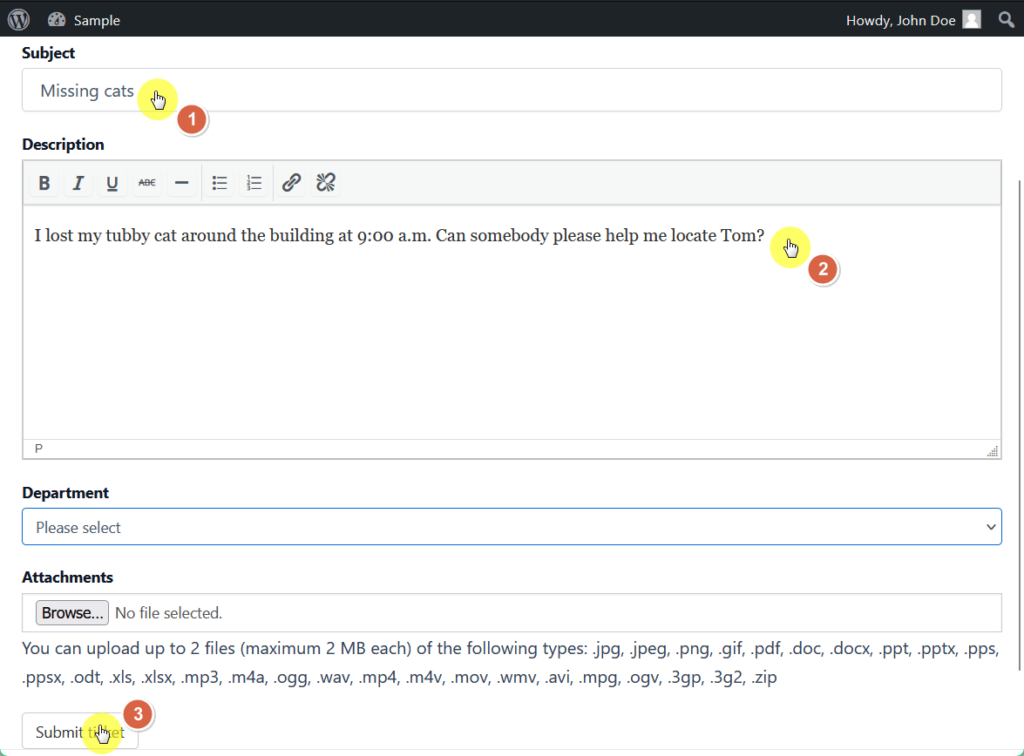
Once the account is created, you can now fill out a support ticket as a customer.
Enter a subject and a description for good measure and click on the submit button:
After you submit, you will see the ticket status of your ticket immediately.
You can also access this information by navigating to the my tickets header that the plugin created for you.
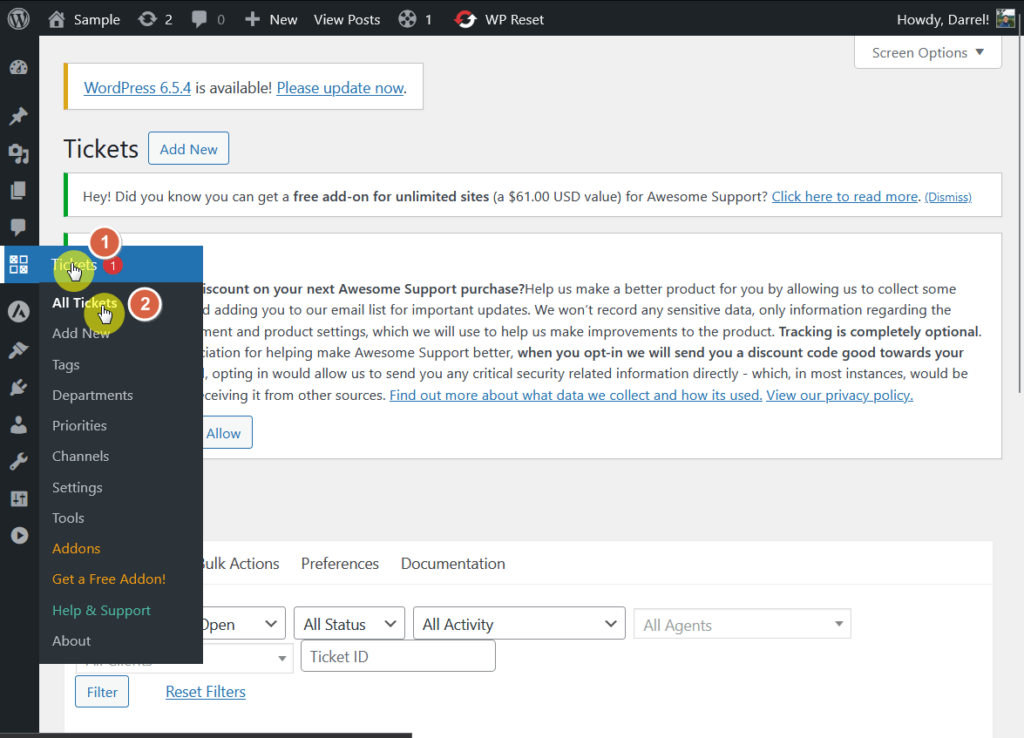
Step 4: Reply to your sample ticket Go back to your WordPress dashboard and see the support ticket you just submitted by heading over to tickets > all tickets .
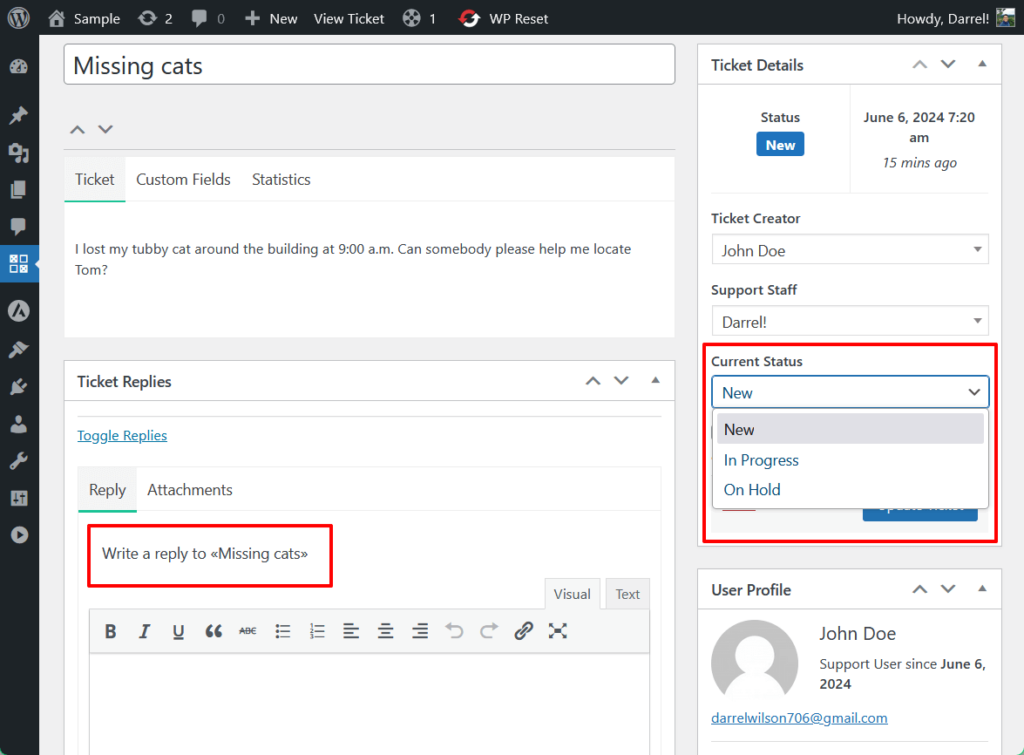
You will see here the sample ticket you just sent and its status, creator, agent, and more.
Click on the ticket you wish to respond to and it will expand to show options where you can reply or change its status to “new,” “in progress,” or “on hold”.
Just like this:
You can also click the “close” button once the issue has been resolved.
The ticket is then automatically removed from the list when you “close” that ticket.
Easy and quick! 🙂
Optimizing and Maintaining Your Support System After setting up your system, ongoing optimization and maintenance are important to ensure it continues to meet your business needs and provide excellent customer service.
The key here is to track key metrics like response times, resolution times, and customer satisfaction scores to gauge performance trends and bottlenecks.
More importantly, through feedback forms and surveys, regularly update your UI, knowledge base, FAQs, and support team to help customers find answers quickly.
Wrapping up, you might be considering streamlining your website design process.
Elementor template kits provide pre-designed elements that make your website look professional without extensive coding.
Secure lifetime access to all premium Elementor template kits:
Get lifetime access to all premium template kits designed for Elementor Complete with 2 years of dedicated support Only for $99 — that’s already for the lifetime access Invest in your website’s future today and enjoy the ease and efficiency of Elementor template kits.