Curious about how sticky posts can enhance your blog’s visibility?
By the end of this guide, you will know different methods of using sticky posts to highlight important content on your WordPress site.
Here’s what you will discover:
Ready? Let’s get started!
In WordPress, sticky posts highlight specific content by keeping them at the top of your blog’s homepage, no matter when they were published.
Sticky posts are primarily used to draw attention to important content because they remain at the top of your blog’s post list, making them the first thing visitors see.
Depending on your WordPress theme, multiple sticky posts can be styled differently from regular posts, and you can easily remove them when no longer needed.
With plugins or custom coding, you can extend the functionality of sticky posts. For example, you can create rotating sticky posts, category-specific stickies, or add custom styling.
Here are some examples of situations where sticking a post would help:
In short, a sticky post is ideal in several scenarios where you want to ensure certain content remains highly visible and easily accessible to your audience.
Timing the use of a WordPress sticky post is as important as selecting a dependable hosting service for your website’s performance.
Elevate your WordPress experience with Hostinger’s exceptional hosting solutions, crafted for optimal efficiency and robust performance.

Discover the Hostinger advantage for your WordPress site:
With Hostinger, you’re not just selecting a hosting provider:
You’re partnering with a service that’s committed to propelling your WordPress site to new heights of performance and stability.
There are several ways to create sticky posts in WordPress — among the most convenient are through the use of WordPress’ built-in editors or through plugins.
The key factor here is to discover one that’s easy to use and matches your style as well to enhance your productivity.
This first method is handy if you’re already editing the post. Think of this and the next method as the WordPress sticky post feature.
Access your WordPress Dashboard and navigate to the “Posts” section.
Choose the blog post you want to make sticky.
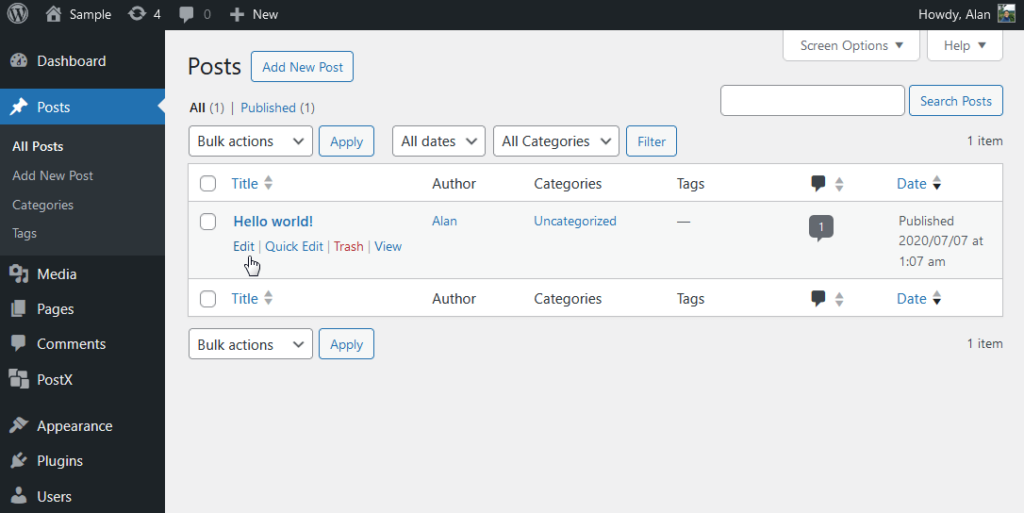
This will open the post editor and show you the content and settings related to that post.
Now this is optional in case you can’t see the settings panel.
All you have to do here is to click the panel settings icon in the upper right-hand corner.
This will open the panel that contains several settings related to publishing, including the visibility options for your post.
Inside the post tab of the settings panel, check the box that will allow you to stick the post to the top of the blog.
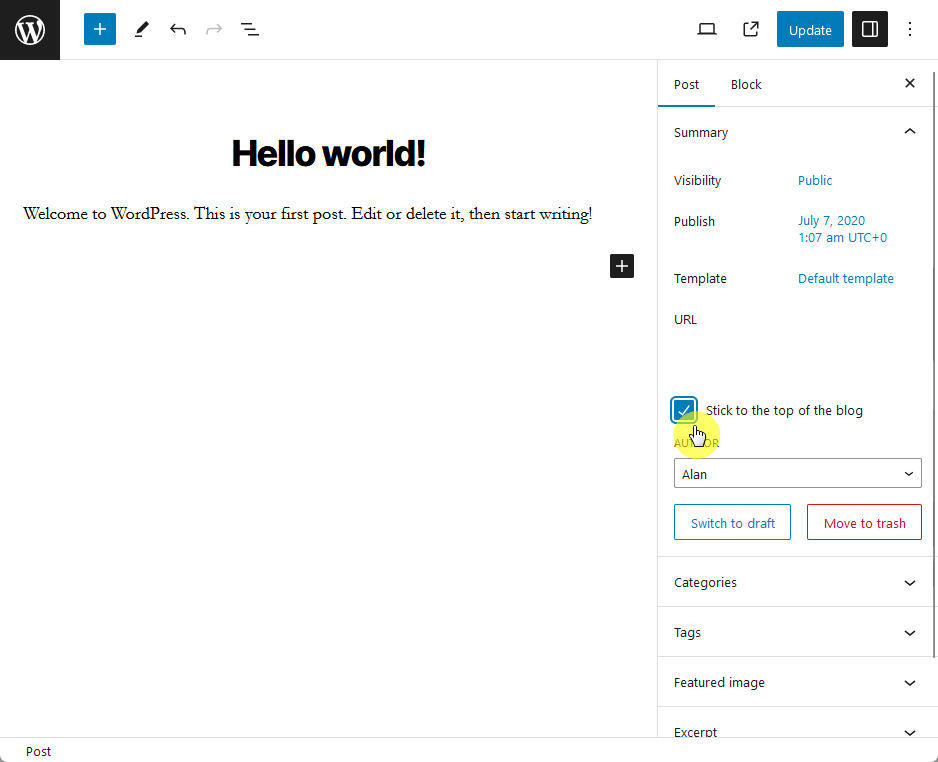
Don’t forget to update the post through the update button beside the panel settings icon.
Refresh the site and the post should now show at the top of the blog section.
This method is ideal if you want an older post to show at the top of the blog section (although this could also work on newer posts).
Similar to the method earlier, navigate to the post section of your admin dashboard.
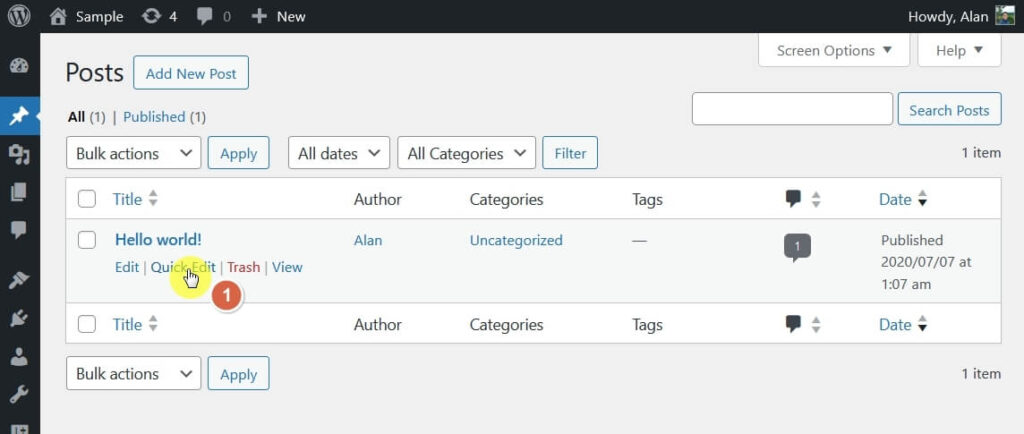
This will allow you to modify various post settings without opening the full post editor.
In the quick edit settings, you will see several options, including checkboxes and input fields.
All you have to do here is to click on the checkbox that will make this post sticky.
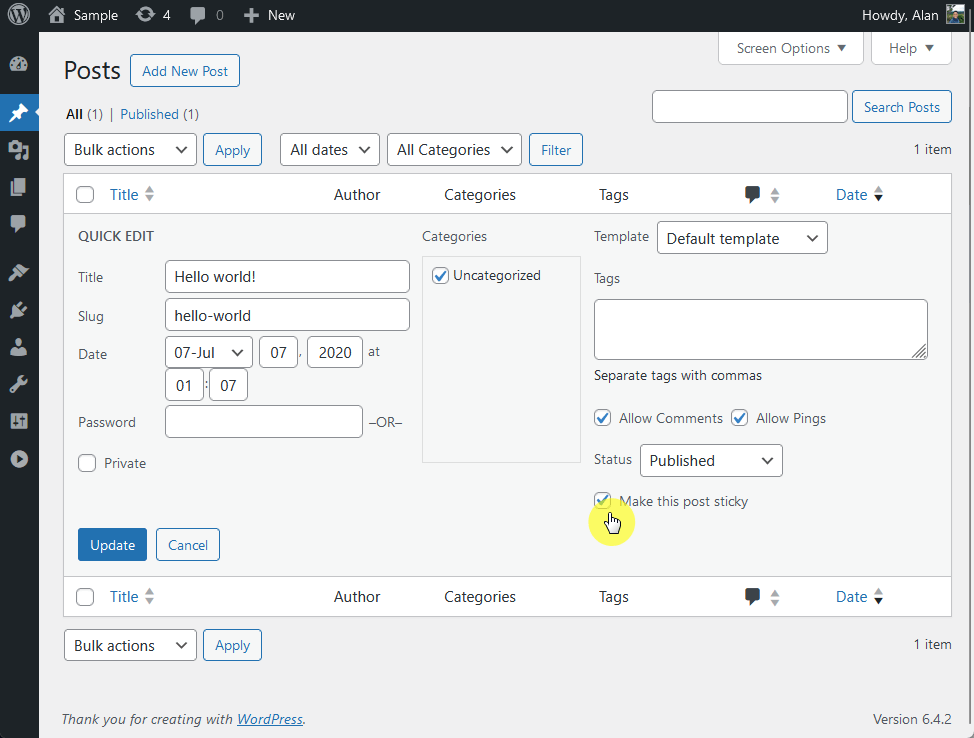
Save the changes by clicking on the update button.
The quick editor provides the same result as the post edit screen with fewer steps (which is why this is better if you’re not editing a post).
Sticky Posts – Switch is a free sticky post plugin for WordPress and provides a convenient way to manage and utilize the sticky post feature, extending it beyond its default limitations.
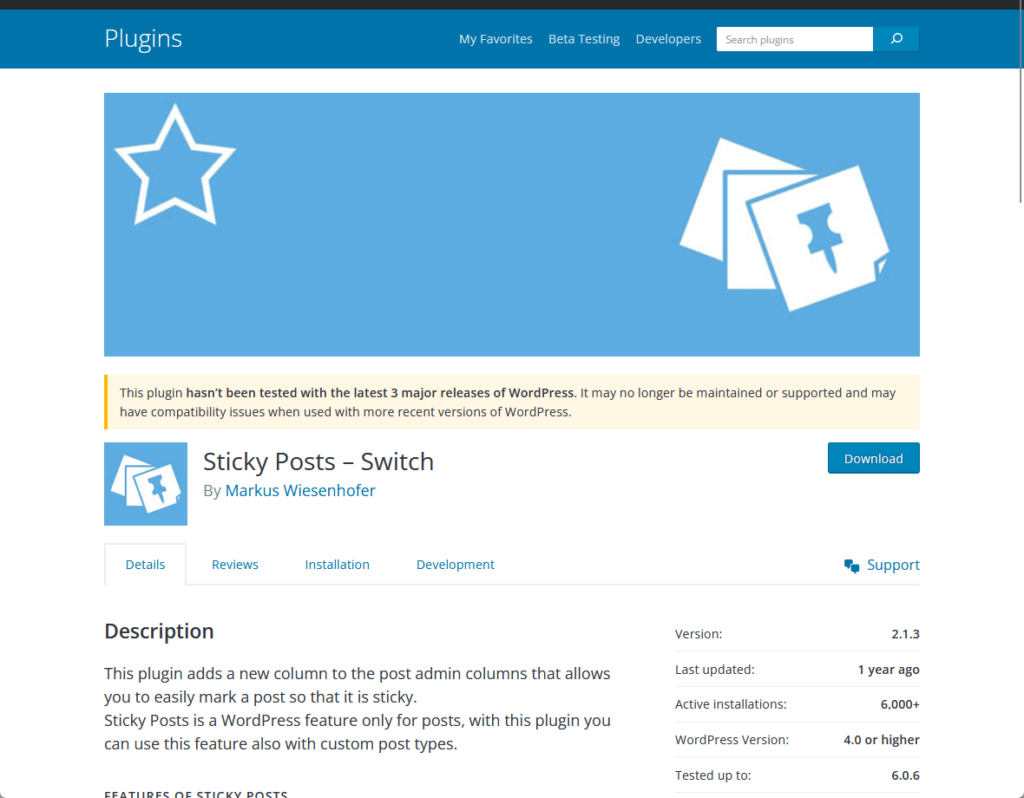
This plugin adds a new column to the post admin columns in your WordPress dashboard, making it simple to mark a post as sticky directly from the post admin area.
The plugin supports quick and bulk editing options and extends the sticky post feature capability to custom post types, archive pages, and taxonomy pages.
⛔ Warning: As of the time of writing, the plugin hasn’t been tested with the last few WordPress versions. No negative feedback though, but try at your discretion.
Here’s how to use it:
Go through the usual steps of adding a new plugin:
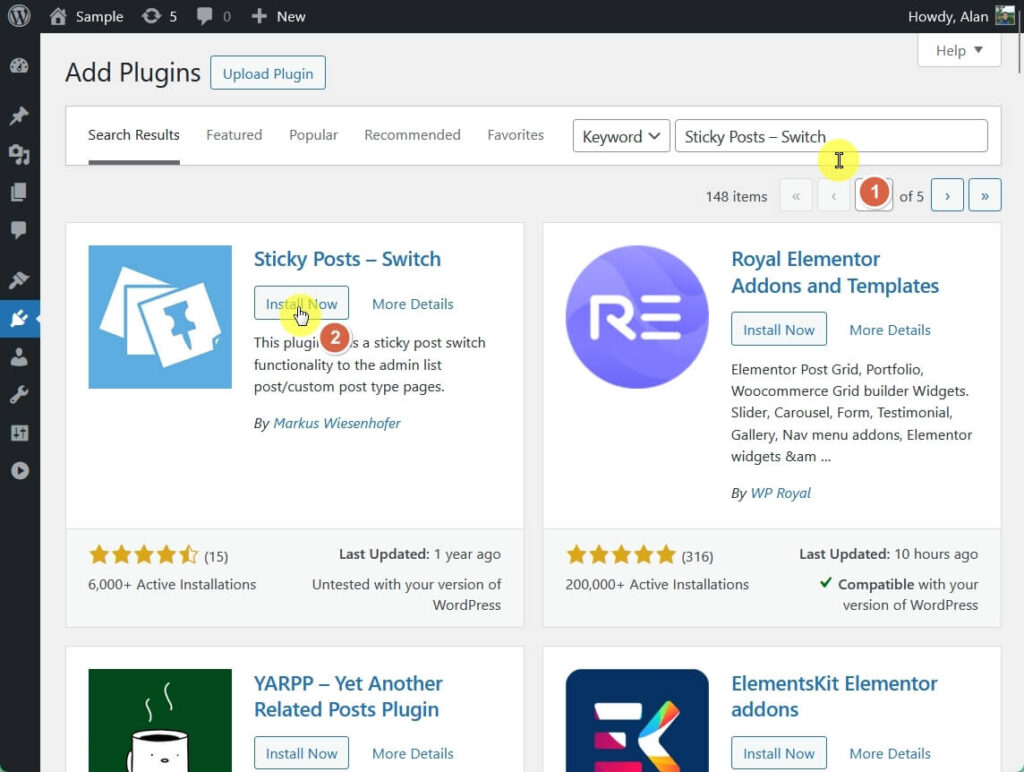
Once the plugin is active, proceed to the next step.
Basically, this plugin would add a sticky post-switch functionality to the custom post-type pages.
Navigate to the posts section:
The star button representing the plugin function is an easy, handy, and catchy way to make your posts sticky.
Utilizing sticky posts in WordPress is a simple yet powerful way to enhance the visibility and accessibility of key content on your website.
However, it’s also important to use sticky posts sparingly because this may lead to a cluttered and overwhelming experience for your visitors.
Regular reviews and updates of your sticky posts are recommended to keep content fresh and relevant.
As you now understand the power of sticky posts in WordPress, it’s time to consider the broader aspect of your site’s design and functionality.
Darrel Wilson brings you an exceptional offer to enhance your website’s appearance and user experience with premium Elementor template kits.

Secure lifetime access to all premium Elementor template kits:
Don’t let your website’s design fall behind.
Achieve web design ease and efficiency with Darrel Wilson’s premium Elementor templates.


