Looking to elevate your website with a custom author page?
This step-by-step guide will walk you through everything you need to know to create an impressive author page that stands out.
In this guide, you will learn:
The importance of an author page Different methods to create a custom author profile page Step-by-step instructions on the methods Let’s get started!
What is an author page?
Starting with the basics…
An author page in the context of a WordPress website is a dedicated page that provides information about a specific author who contributes content to the site.
This page usually includes the following:
Author’s name Brief biography Profile picture List of articles or posts written It serves as a mini-portfolio for each writer on your website.
Is an author page in WordPress important?
If you know any content writers around, try asking them and they will write you a short book on the importance of an author page.
But to answer the question, yes, it’s important for authors, the website/business owner, and the brand for authors to have their own page.
For starters, here is a list of why it’s a good idea:
Credibility and trust : Custom author pages build author credibility and enhance website trustworthinessBranding : Unique author pages maintain consistent branding on your siteAuthor recognition : Multi-author blogs give contributors their own spotlight, motivating and attracting talentSEO benefits : Optimized author pages can boost website traffic, especially with expert authorsContent discovery : Author pages aid content discovery, improving user engagement and reducing bounce ratesSocial media and networking : Author pages link to social profiles, extending your website’s reachProfessionalism : Custom author pages enhance website professionalism, crucial for monetization and authorityPersonalization : Author pages allow you to add elements like sign-up forms, recent posts, or FAQs for a tailored experience A custom author page not only adds a personal touch to your website but also brings a variety of practical benefits ranging from SEO to improved user engagement.
It’s a simple yet effective way to enhance both the author’s and the website’s image.
After exploring the benefits of a custom author page, let’s tackle another common issue: frequent theme and template updates.
Darrel Wilson understands this struggle and has an incredible offer that aligns perfectly with your need for a personalized, high-quality website.
Get lifetime access to all premium template kits designed for Elementor:
Get lifetime access to all premium template kits designed for Elementor Complete with 2 years of dedicated support Only for $99 — that’s already for the lifetime access By taking advantage of this offer, not only can you improve your author page but also the entire look and functionality of your WordPress site.
Creating a Custom Author Profile Page
Before everything else, you should know that in WordPress, each registered user who has authored at least one post automatically gets an author page.
By default, this page is generated using the author.php template file in your WordPress theme.
However, the default layout and information provided can be quite limited, which is why many opt to customize this page for a more unique and informative experience.
Here’s an example:
With that in mind, there are two methods that I will explain — using author/membership plugins and using Elementor Pro.
⚠️ Note : Besides these two, you actually have the option of using code to manually create a custom author page. But the truth is, there aren’t that many people who will go that route, especially not on WordPress.
Method 1: Using an Author/Membership Plugin
This is the easiest method since all you have to do is install a plugin, do some minor configurations, and you’re done.
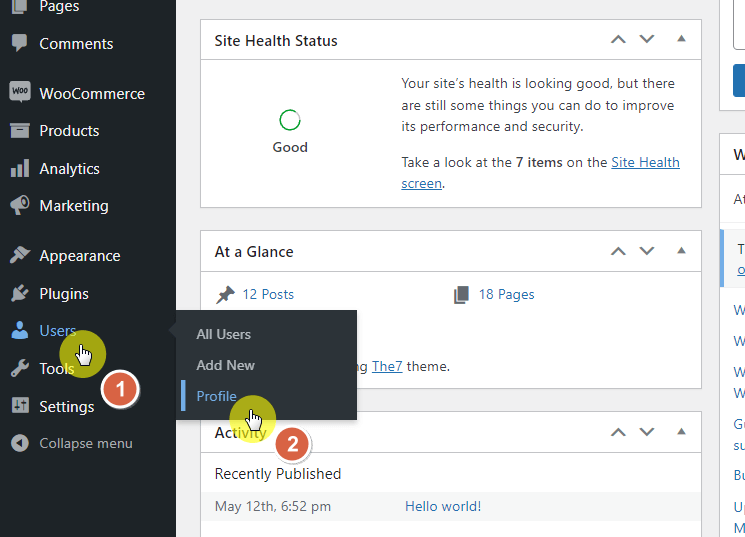
Before we proceed, make sure that you create a backup of the website and fill out your basic information on your profile page (user > profile on the left panel).
These are the:
First name Last name Nickname Display name publicly as Biographic info Profile picture ⚠️ Note : For the profile picture, you will have to connect/create a Gravatar account. If you don’t want to, you can use a plugin like User Profile Picture to upload a custom profile picture.
With that, I will list out three plugins you can use, along with how to use each one:
1. Ultimate Member
Most people use the Ultimate Member plugin for WordPress to create an online community or a membership site.
That’s because this plugin is designed to make it incredibly easy for users to sign up and become members of your website.
How it works is simple — you can use this plugin to create user pages, which function as author pages when a reader clicks on an author’s name.
💻 Key features:
Front-end user profiles : Allows users to create and manage their profiles directly from the front-endCustom form fields : Tailor the registration and login forms to your needsMember directories : Create directories to easily find and interact with membersContent restriction : Limit access to certain parts of your website based on user roles or membership levelsCustom user roles : Define roles and capabilities for different types of usersDeveloper-friendly : Comes with dozens of actions and filters for further customization
The plugin is highly extendable and offers both free and paid extensions to add functionalities like social logins, real-time notifications, and more.
I will now show you how to use this plugin (skipping the part where you download and activate the plugin):
Step #1: Create the user page
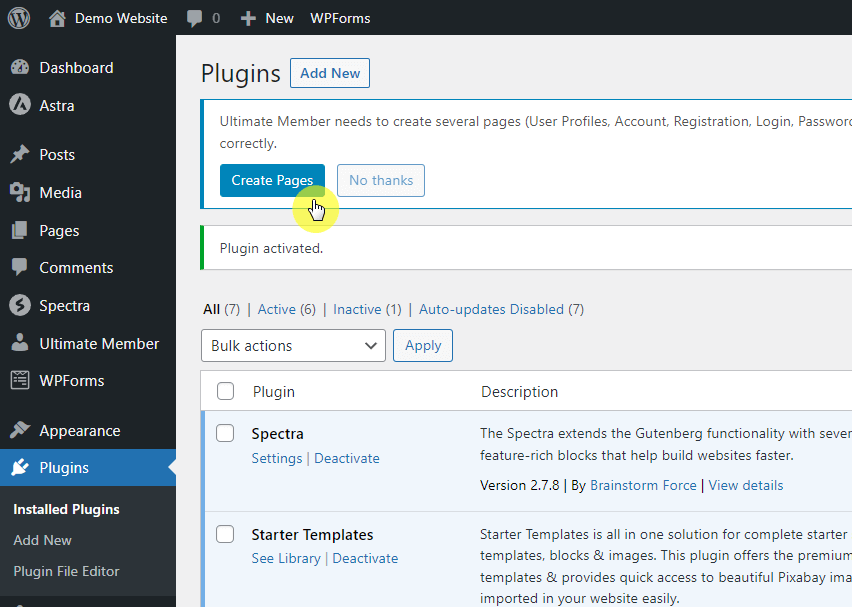
After activating the plugin, you will see a notification about how you need to create several core pages for the plugin to function correctly.
⛔ Warning : Don’t dismiss any notification that you see after installing and activating the plugin. I tried finding a way to do the next steps manually without this first step. The only one that worked was rolling back to a previous backup of the website.
All you have to do here is click the create pages button:
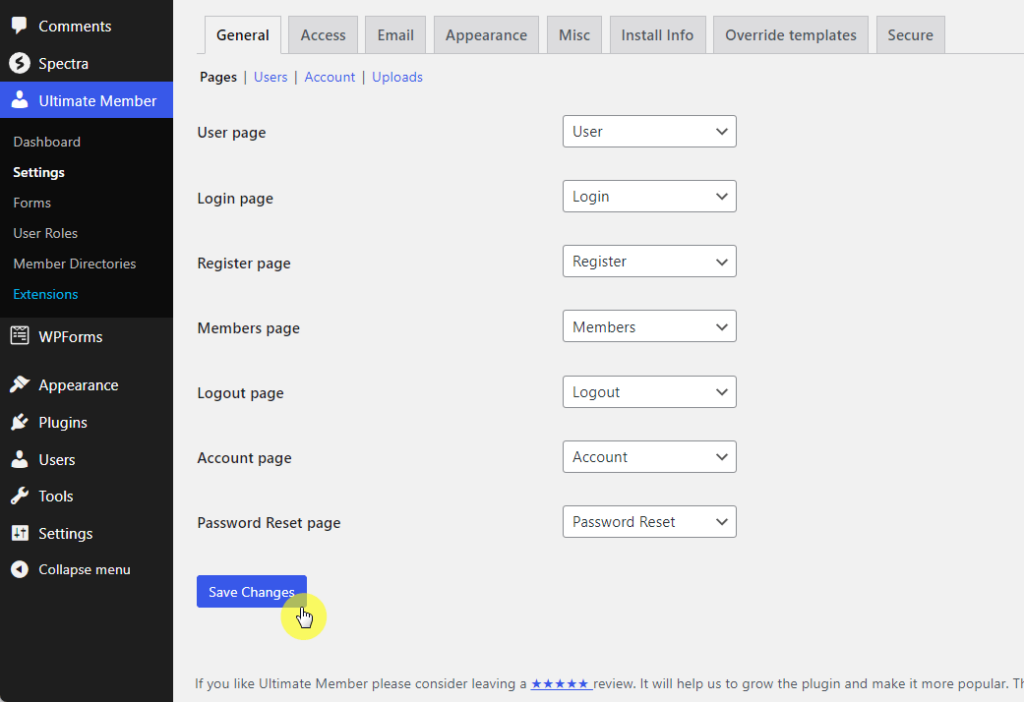
After that, you will arrive at the settings > pages of the plugin showing you the different core pages created.
The reason I warned you earlier about dismissing the notification is that there is no way to manually create these pages with the elements from the plugin (no blocks for it).
From here, all you need to do is click the save changes button:
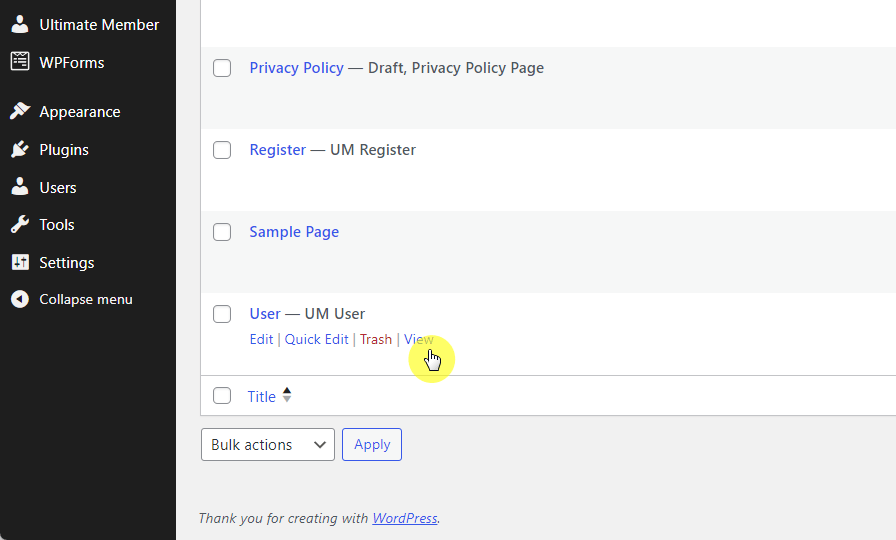
Step #2: Access the created user page
If you visit your pages list, you will see a bunch of pages created by the plugin — all labeled with the acronym “UM”.
You can check the pages by going to pages > all pages on the left panel of your admin area:
Scroll down until you see the User-UM User page.
Hover over it and click the view button:
Step #3: Customize the author page’s content
Following the steps above, this is what you will see:
From this page, you can upload a cover photo and replace the profile image.
To edit more than that, you can also click the gear icon > edit profile button:
On the next page, you will be able to edit the:
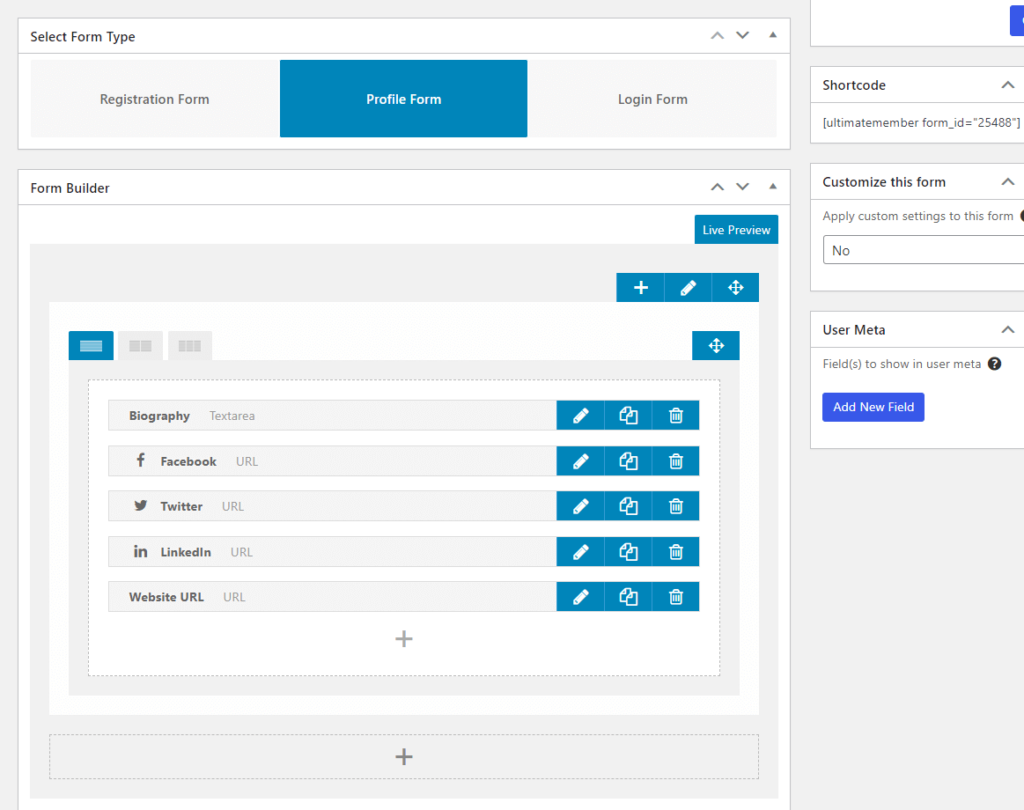
Cover photo Profile image Author bio About details (when present) For the about details (further customization), you can create a profile form from the plugin’s menu in the WordPress dashboard area.
You can then add predefined fields or new fields like the following:
These fields will then show up when you edit the profile (earlier in this step) and those same details will then appear on the front end.
2. WP User Manager
WP User Manager is a comprehensive WordPress plugin designed to enable website owners with the ability to create highly customizable user profiles and community spaces.
This plugin is not just about user management — it’s about enhancing the entire user experience from registration to profile customization.
💻 Key features:
Frontend forms : Enables users to register and login directly from the website’s front end, with customizable registration formsCustom email notifications : Tailor the emails sent to users upon registration, password reset, and other activitiesElegant user profiles : Each user gets a public profile page that displays their dataContent restriction : Limit access to specific content based on user roles or logged-in statusCustom fields editor : Create custom fields to collect additional data during registrationSEO URLs : Generates SEO-friendly URLs for user profiles and other pagesStripe integration : Allows for payment collection at registration, making it suitable for membership sites
Unfortunately, this may fall a little short compared to what the first plugin can do in terms of the default design and customizations.
On the bright side, this plugin also comes with extensive documentation to help you get the most out of its features.
Here’s what to do after installing and activating the plugin:
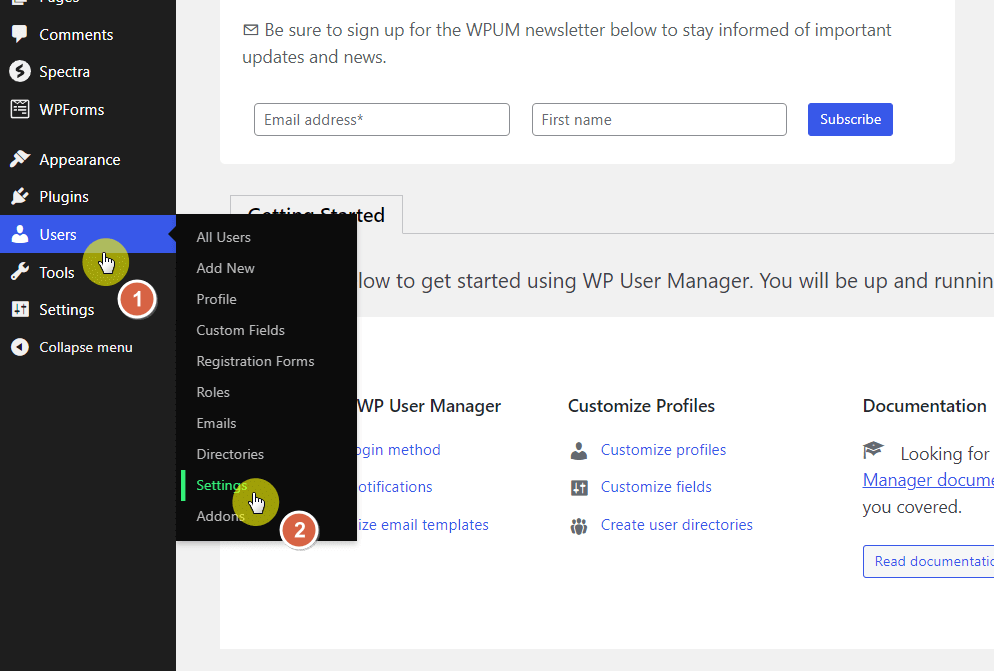
Step #1: Change the profile settings
Go to users > settings from the page where you’re currently on:
One difference between this plugin and the previous one is that WP User Manager automatically creates the core pages.
The first page you see on the settings page shows you the different pages created by the plugin — including the profile page.
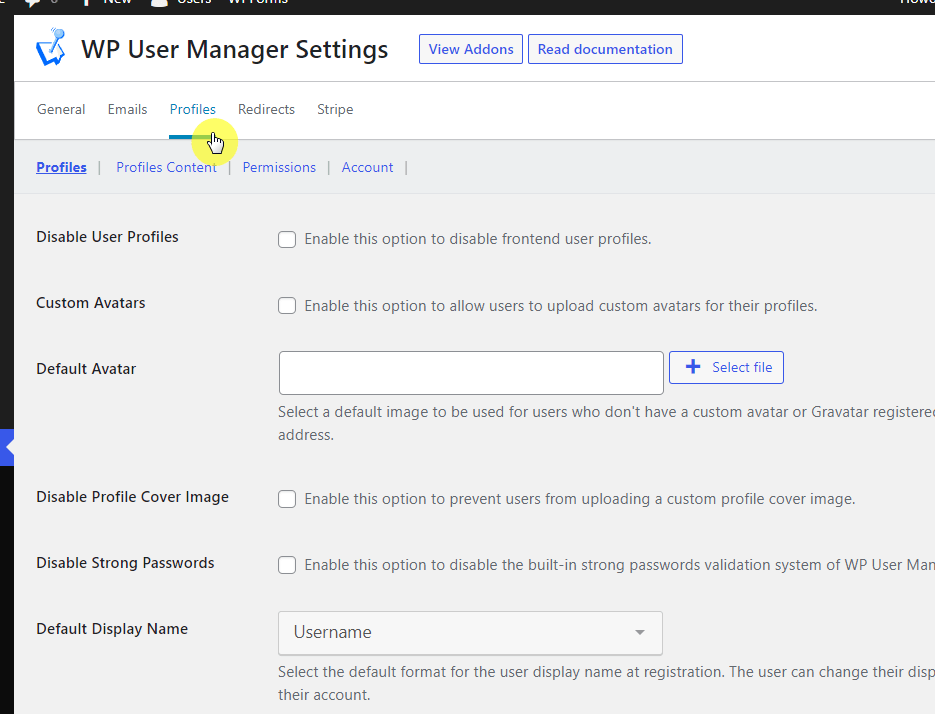
From there, go to the profiles tab:
This page lists out profile settings such as disabling:
User profiles Custom avatars Profile cover Out of all the settings here, my advice is to change the default display name to first and last name in case someone uses a weird username (default).
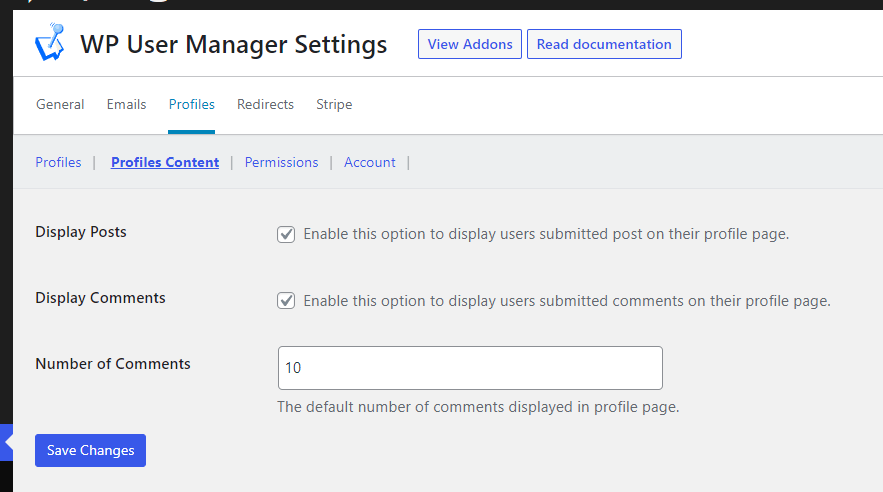
By default, the plugin doesn’t show posts and comments on the author page.
You can change that by going to the profile content tab within the profile settings and then enabling those elements:
Don’t forget to save the changes.
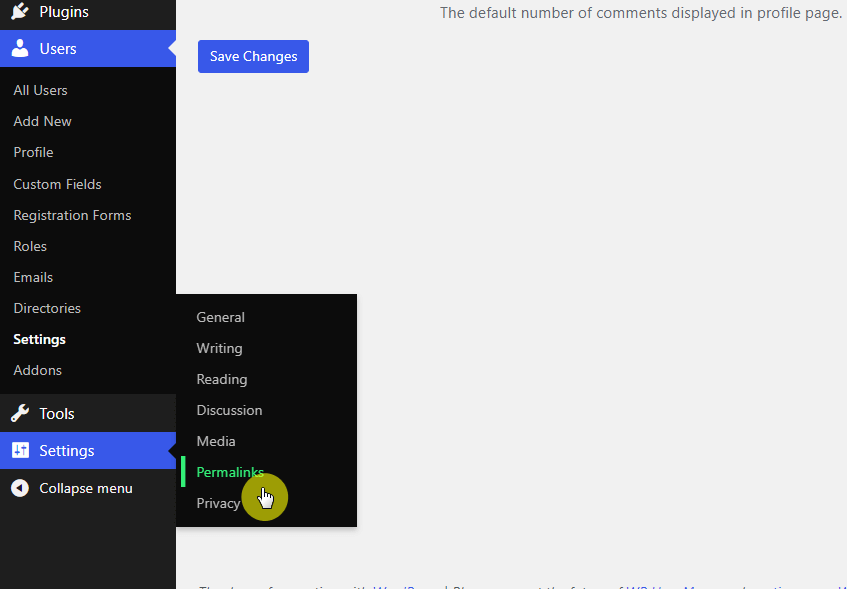
Step #2: Change the user profiles permalink base
Unfortunately, the plugin sets the user profile link based on the username , which isn’t a good practice (some people have a username that isn’t their name). 🤐
To change this, go to settings > permalinks from the page you’re on:
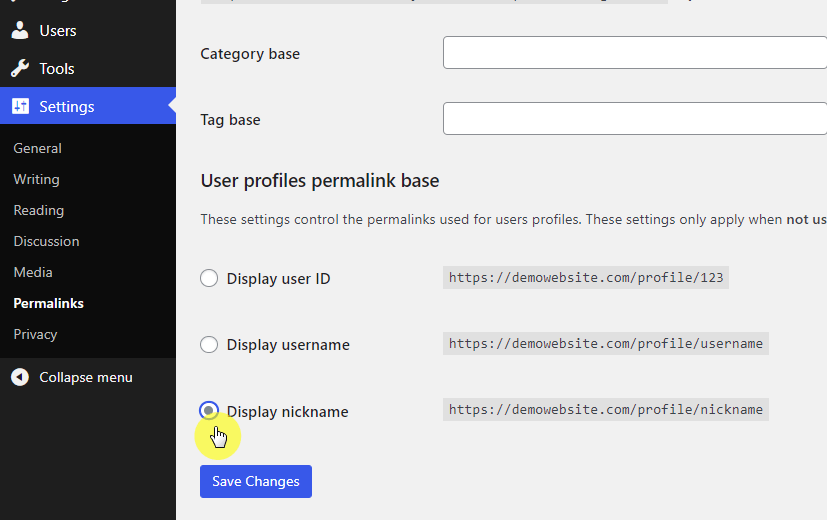
From here, change the settings to have the permalink based on the display nickname , which makes more sense in terms of security and optimization.
Don’t forget to click save after you’re done:
Step #3: Access the new author page
It’s now time to check your new author page.
All pages created by the plugin will have the plugin’s logo on them. Check the pages > all pages to see all the pages on the site:
Scroll down and find the profile page Hover your mouse over itClick the view button You will then see the custom author profile page complete with your information, posts (author archive), and comments.
This is what it looks like:
⚠️ Note : By the way, clicking the edit account button beside the author name will allow you to change your profile settings and password.
3. PublishPress Authors
PublishPress Authors is a versatile WordPress plugin that aims to revolutionize the way you manage and display authors on your website.
This is a great plugin if you’re running a multi-author blog, a news portal, or a collaborative platform due to its range of features available.
💻 Key features:
Author box : Automatically displays an author box under each post, complete with profile detailsMultiple authors : Breaks free from WordPress’s single-author limitation, allowing you to assign multiple authors to a single postGuest authors : Enables you to add guest authors who don’t have an account on your website, making it easier to collaborate with freelancers or guest contributorsAuthor pages : Offers customizable author pages to showcase each author’s work, complete with an author box and a list of their posts
Actually, most people I know of use this plugin if they want to display multiple authors on a single post since that’s not available by default.
How to use PublishPress Authors
Of all the plugins here, this is the easiest one to use.
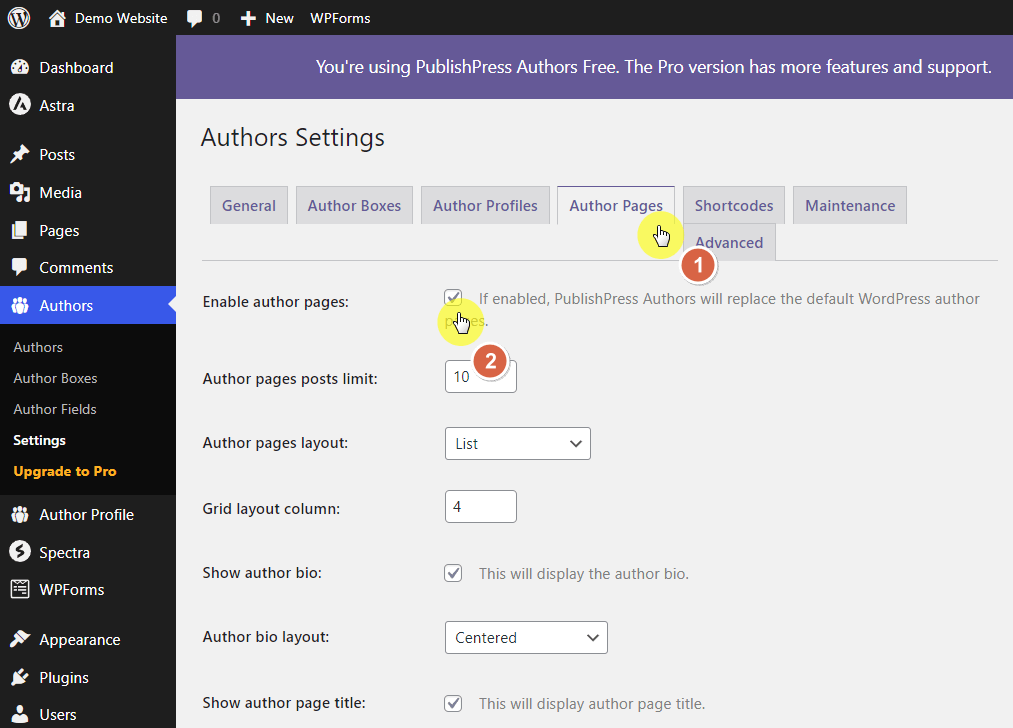
After activating it, go to authors > settings from the page you’re currently in:
By default, the plugin will not replace the default WordPress author pages — you have to enable it yourself first.
From the general tab, go to the author pages tab and enable author pages from there:
The display settings of the author page are also here such as:
Author bio layout Show author page title, featured image, post date, etc. The number of posts to show and grid layout columns For checking the new WordPress author page, you will not see a custom author page in the all pages list in the admin area.
You need to go the usual route of checking a post and clicking the author name/link — this will bring you to the author page:
Method 2: Using Elementor Pro Theme Builder
If you’re already using Elementor Pro, then I don’t see the reason why you shouldn’t use it.
After all, Elementor Pro makes it incredibly easy for you to create a tailored author page that reflects your brand and keeps your readers engaged.
Here’s what you need to do (assuming you already installed Elementor and Elementor Pro):
Step #1: Add a new archive template
To start, go to templates > theme builder while you’re in the admin dashboard:
Now that you’re in the theme builder:
Hover your mouse over archive from the site parts panel Click the add button
Step #2: Build the custom author profile page
A list of templates will then show up, which you can use if you want to start from an existing template.
But if you want to start from scratch, you can always click the close (x) button in the upper-right corner:
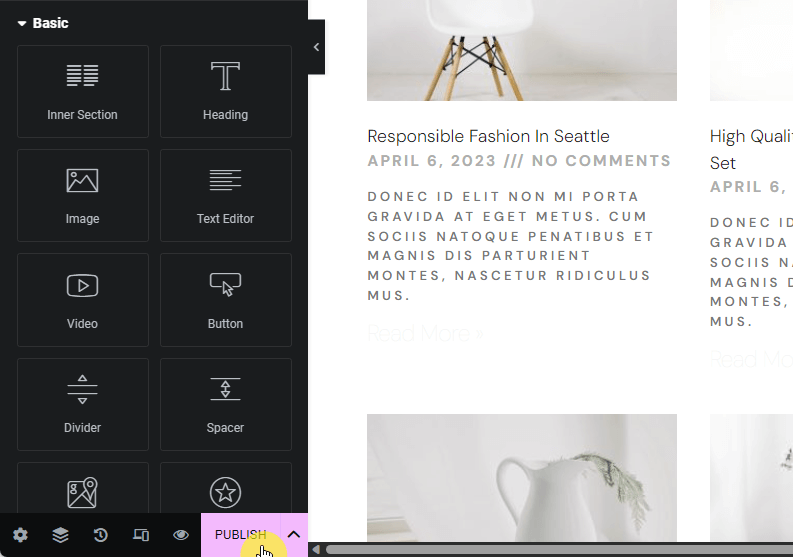
From there, all you have to do is drag the elements that will make up your author page such as:
Author box Archive title Archive posts Here’s an example:
You can include as many elements as you want here. Unlike with the plugins, you’re free to design the page however you like.
Step #3: Display the template as an author archive
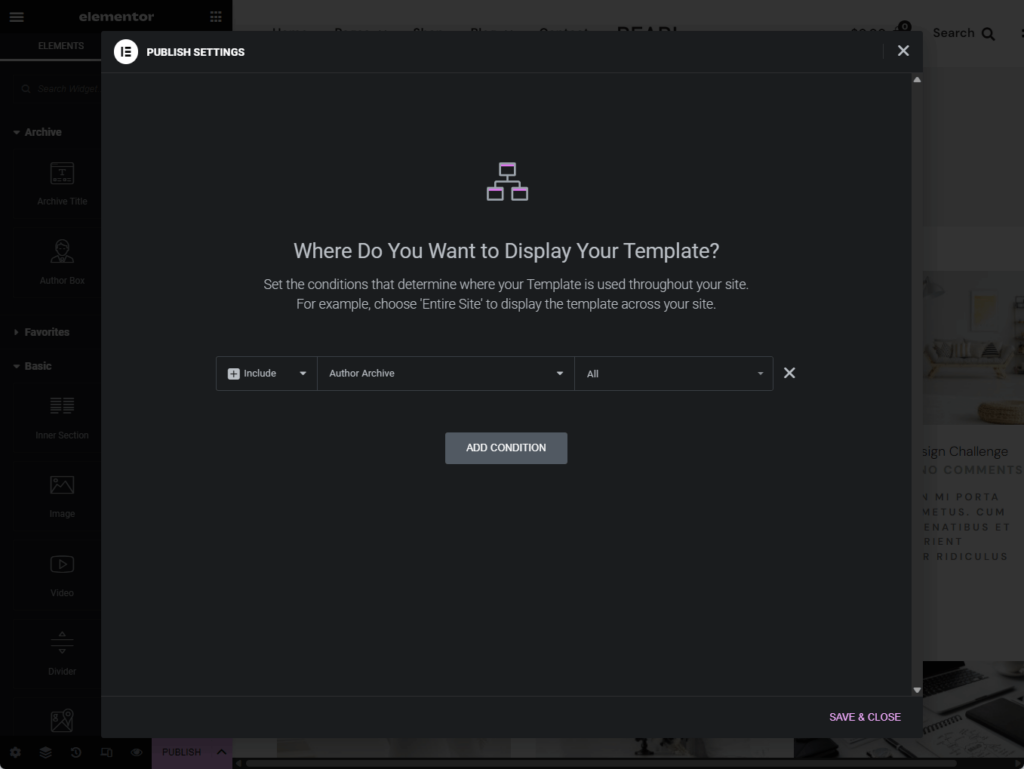
Once you’re satisfied, click the publish button:
On the publish settings:
Add a condition Choose the author archive for the condition Set it to affect all Then click the save and close button.
Congratulations! You now have a custom author profile page that you designed from scratch.
Now, I’m not as good as Darrel when it comes to designing websites and pages — so how about I just show you the author page of one of our recent templates:
Adding a Custom Author Profile Page
Creating a custom author page in WordPress is not just a luxury but a necessity for websites that aim to provide a more personalized and informative experience for their readers.
Each method comes with its own set of features and steps, allowing you to choose the one that best suits your needs.
Whether you’re looking to simply change profile settings or build an entirely new author profile page from scratch, the options are plentiful.
A custom author page can elevate your personal brand and reader engagement.
Ready for more? Consider Darrel Wilson’s unbeatable offer to upgrade your themes and templates.
Lifetime access to premium Elementor template kits:
Get lifetime access to all premium template kits designed for Elementor Complete with 2 years of dedicated support Only for $99 — that’s already for the lifetime access Take your website to the next level today!