Want to add Google Maps to your website?
By the end of this guide, you will be able to easily add Google Maps to your website in different ways from using a plugin to a theme.
Here’s what we’ll cover:
Why add Google Maps Google Maps plugin Google Map’s embed feature Using a theme/builder that supports Google Maps Ready? Let’s get started.
Why add Google Maps to your WordPress site?
The short is that it can significantly improve user experience by giving visitors clear directions and a visual representation of your business location.
It also boosts local SEO and increases your visibility in local search results, potentially driving more traffic to your site.
Furthermore, interactive maps can serve as a valuable resource for content , highlighting routes, attractions, or points of interest related to your site’s niche.
Method 1: WordPress Google Maps plugin
What I like about this method is that it is user-friendly and doesn’t require coding skills.
Although there are a lot of respectable Google Maps plugins, for this method, we will be using the WP Go Maps plugin
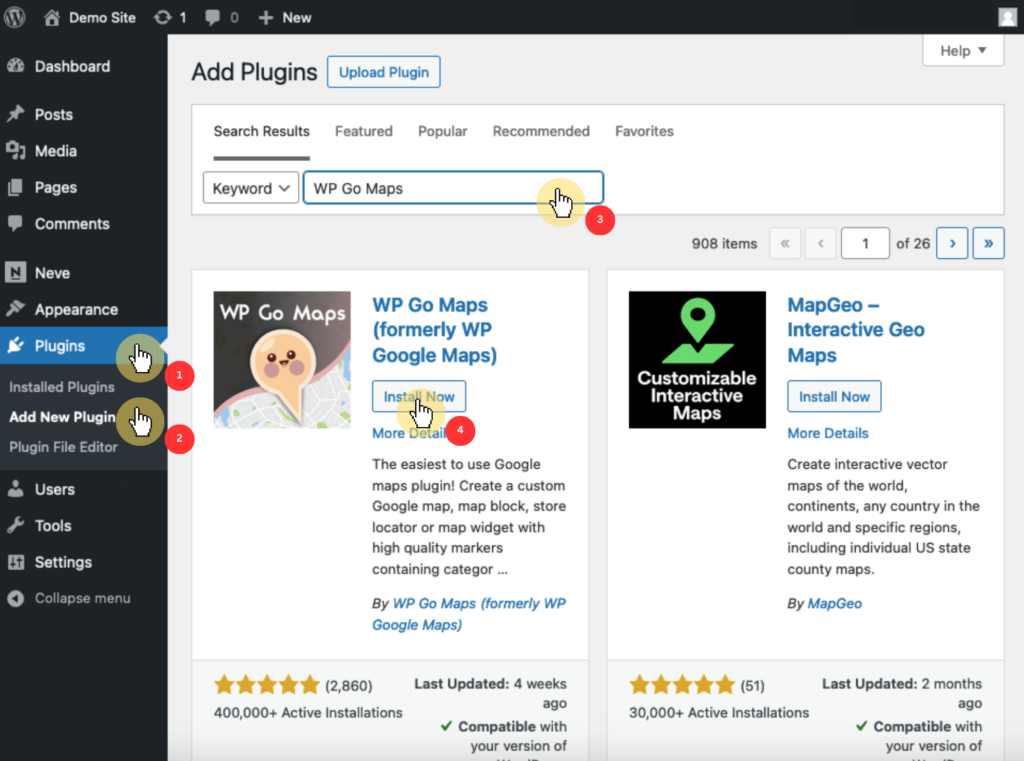
Step 1: Choose and install the plugin
Naturally, you must first install the plugin.
On the dashboard:
Go to plugins > add new Search for the plugin’s name Click the install button Like this:
After activating the plugin, you can access its settings by locating the maps option in the sidebar of your dashboard.
When it comes to choosing a hosting provider, you want reliability, speed, and great support.
That’s where Hostinger comes in.
Discover the Hostinger advantage for your WordPress site:
Enjoy a 99.9% uptime guarantee Affordable pricing at just $2.49/month (use the code darrel10 to get a discount) Global performance and reach with Hostinger’s optimized hosting platform Hostinger offers robust hosting solutions that are perfect for running WordPress sites smoothly.
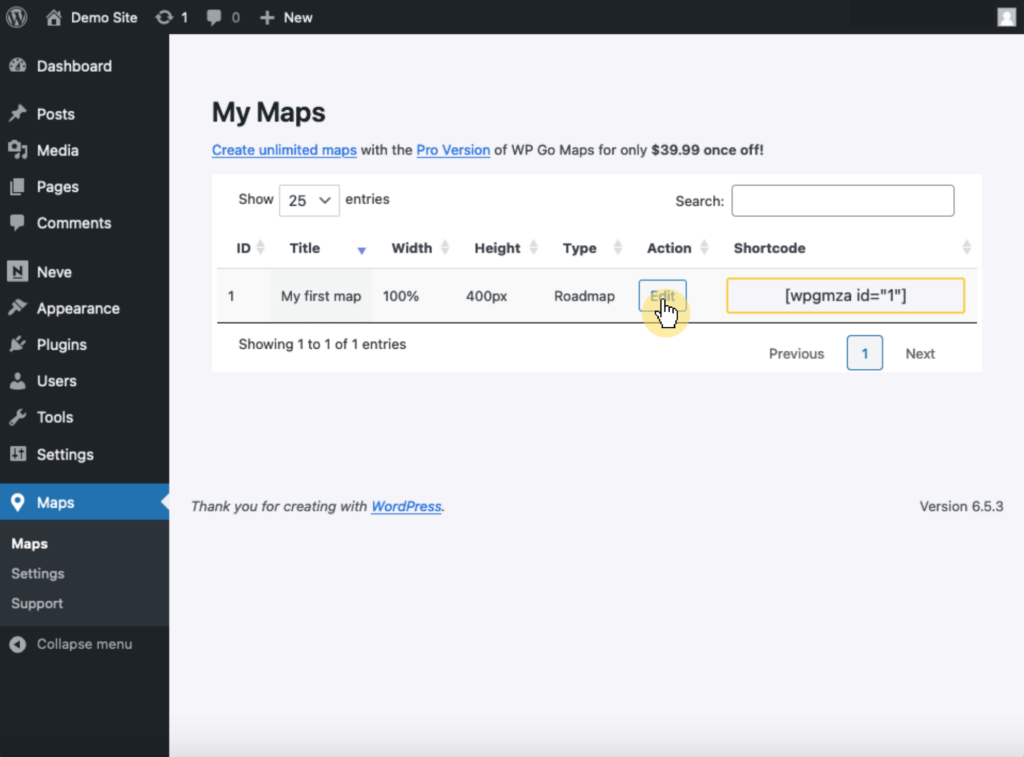
You need to access its settings for you to be able to configure the plugin.
Go to maps > edit in the dashboard:
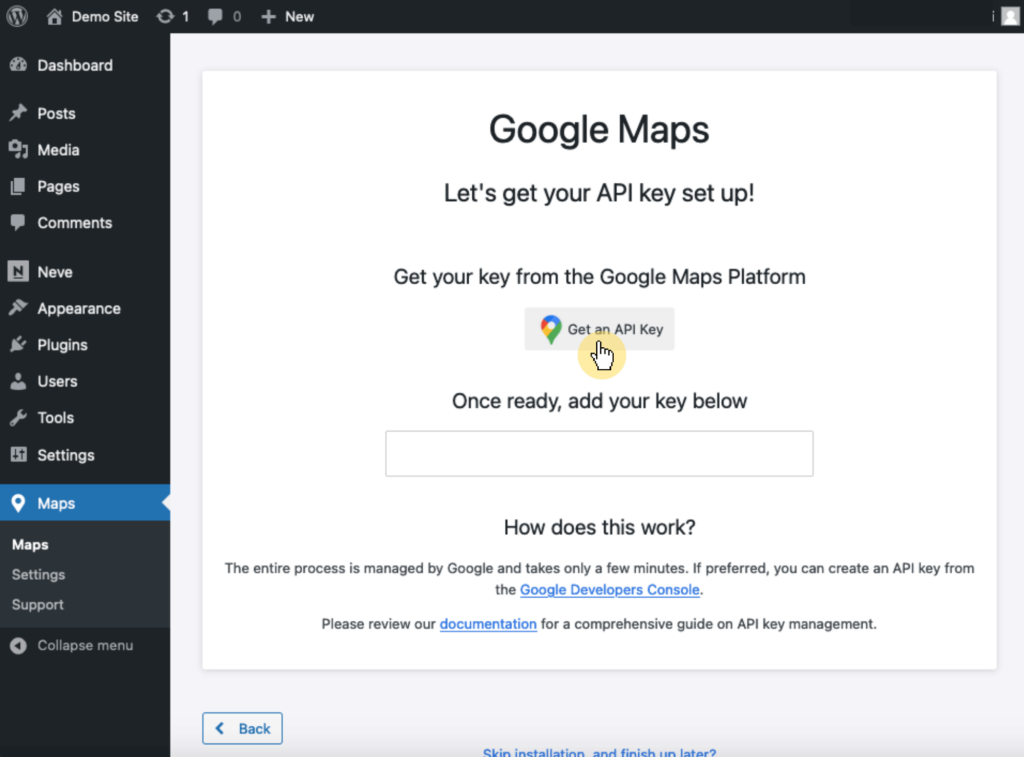
You will need to enter a Google Maps API key.
Click the get an API key button and follow the subsequent prompts:
Make sure to enter the API on the field provided once you have it. 🙂
If this is your first time creating a Google Maps API key, you will have to visit Google enable the API key from there.
⚠️ Note : Google Maps will require billing information for authentication and security purposes.
Step 3: Create a new map
After successfully adding the API key, the WordPress map plugin will automatically create your first map, aptly named as such.
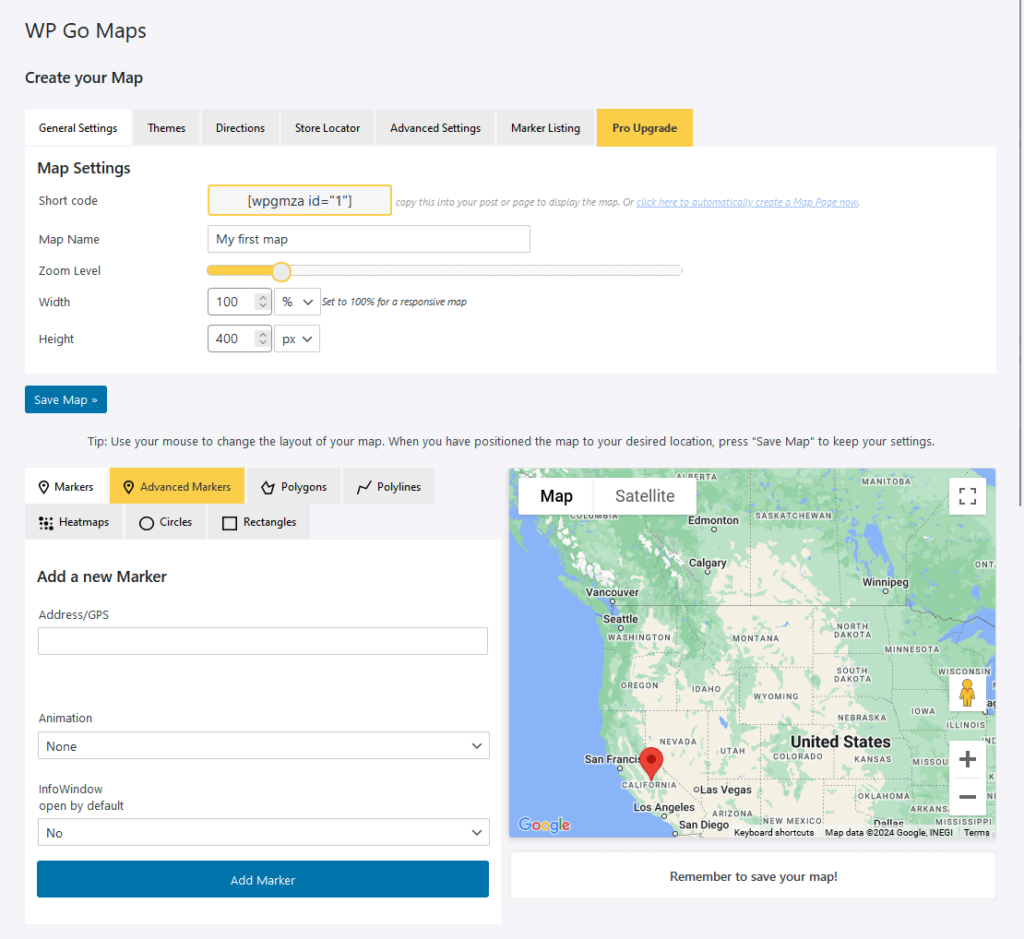
This is the configuration screen where you can set up your map:
There are a lot of things you can define here, such as:
Map’s dimensions Select the type of map (such as a roadmap or satellite) Adjust the zoom level Set the center point You can add detailed markers to your map with the advanced markers tab at the bottom (section beside the actual map).
This allows you to input location details and choose a custom icon for each marker, enhancing the map’s interactivity and usefulness.
⚠️ Note : For the free plan of this plugin, you can only edit this first map. You can add unlimited maps with the pro plan though.
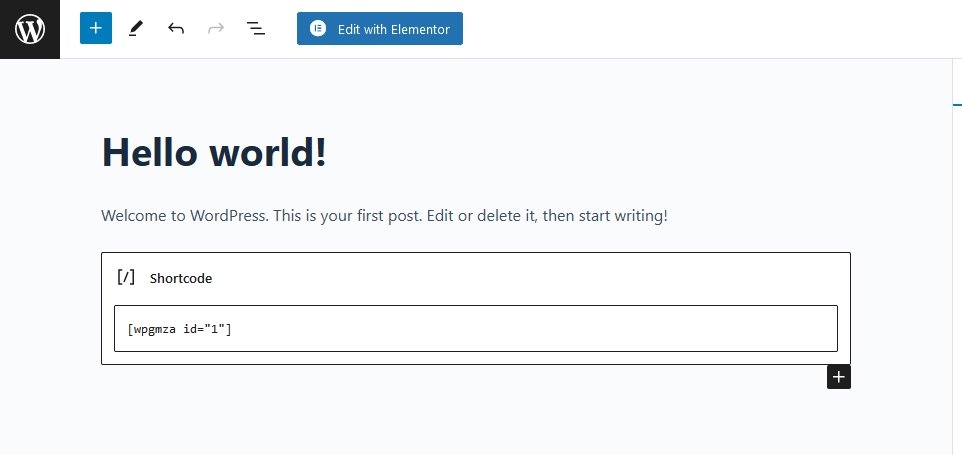
Step 4: Paste the shortcode
From the config page, you can see the shortcode under the map settings:
Copy this shortcodeEdit the page or post where you wish to display the map Paste the shortcode directly into a shortcode block For example, if you’re using the Gutenberg Editor:
Don’t forget to preview the page or post first to confirm that the map is displayed correctly and as expected.
If you are satisfied with how the map looks in the preview, you can publish or update your page or post and make the map visible on your live site. 👍
Method 2: Google Maps’ embed feature
You can easily embed Google Maps using the iframe code provided by Google Maps to embed a specific location directly into your WordPress content.
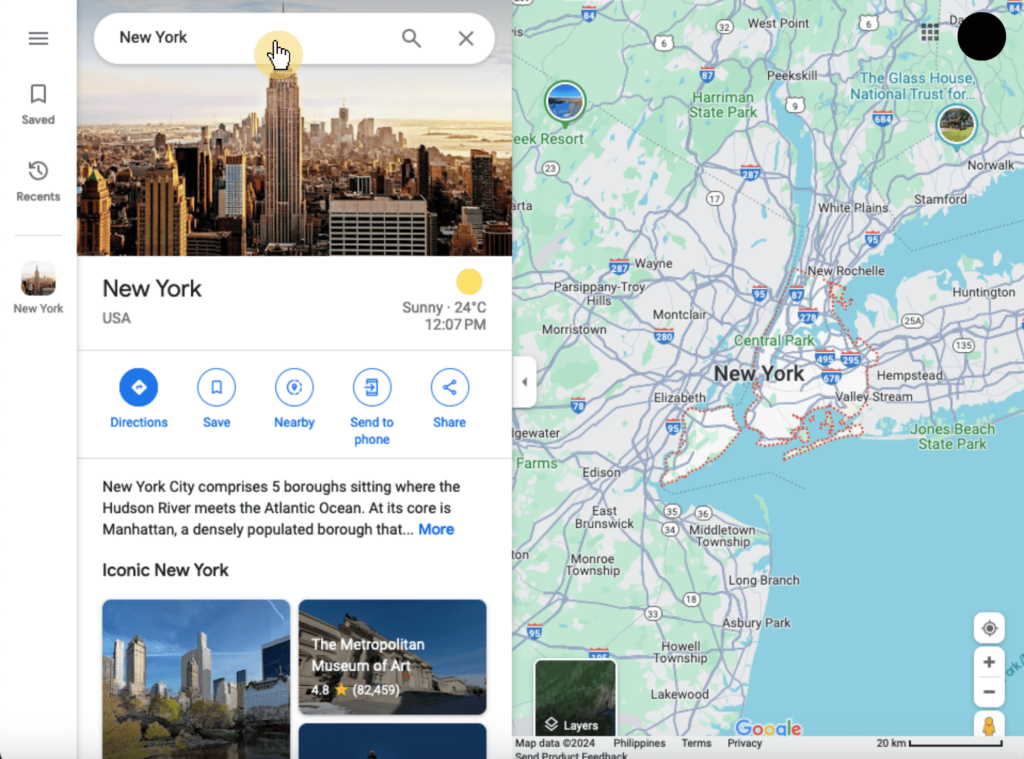
Step 1: Find your desired location
Start by going to the Google Maps website.
Once there, use the search bar at the top of the page to enter the address or name of the location you wish to display.
For example:
After searching, click on the desired location to view it on the map.
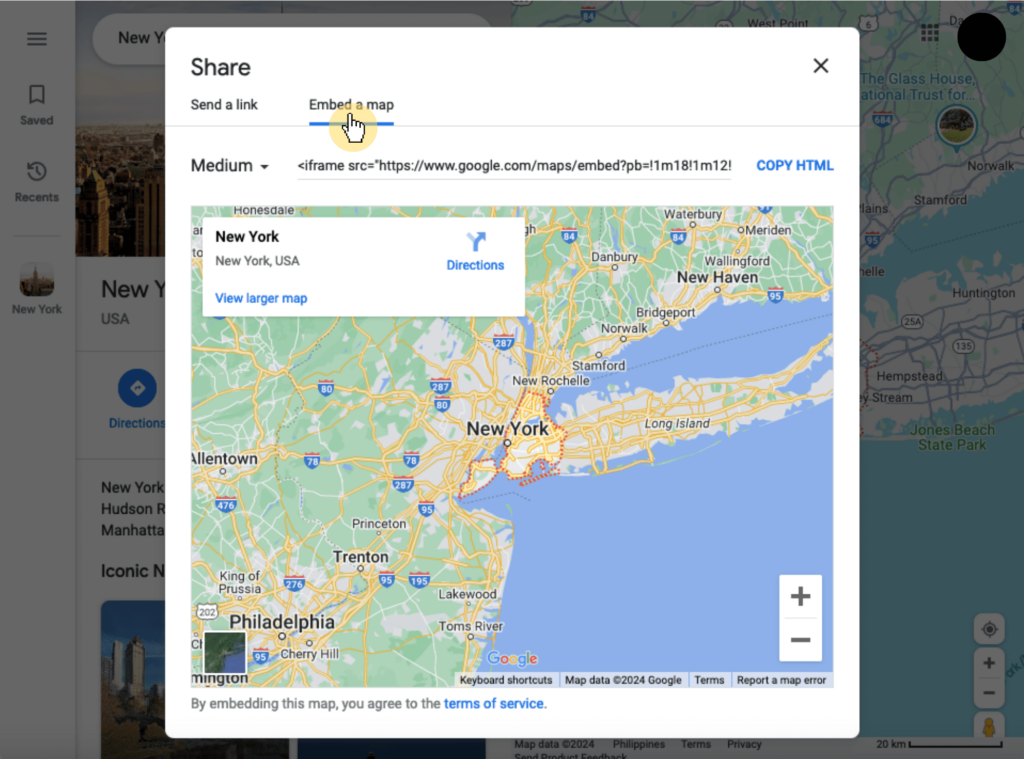
Step 2: Access the embed option
Proceed by locating the share button, which is usually found on the left sidebar or under the location name.
In the popup that appears, select the embed a map tab — this will show you the iframe code that you can use to embed the map.
Like this:
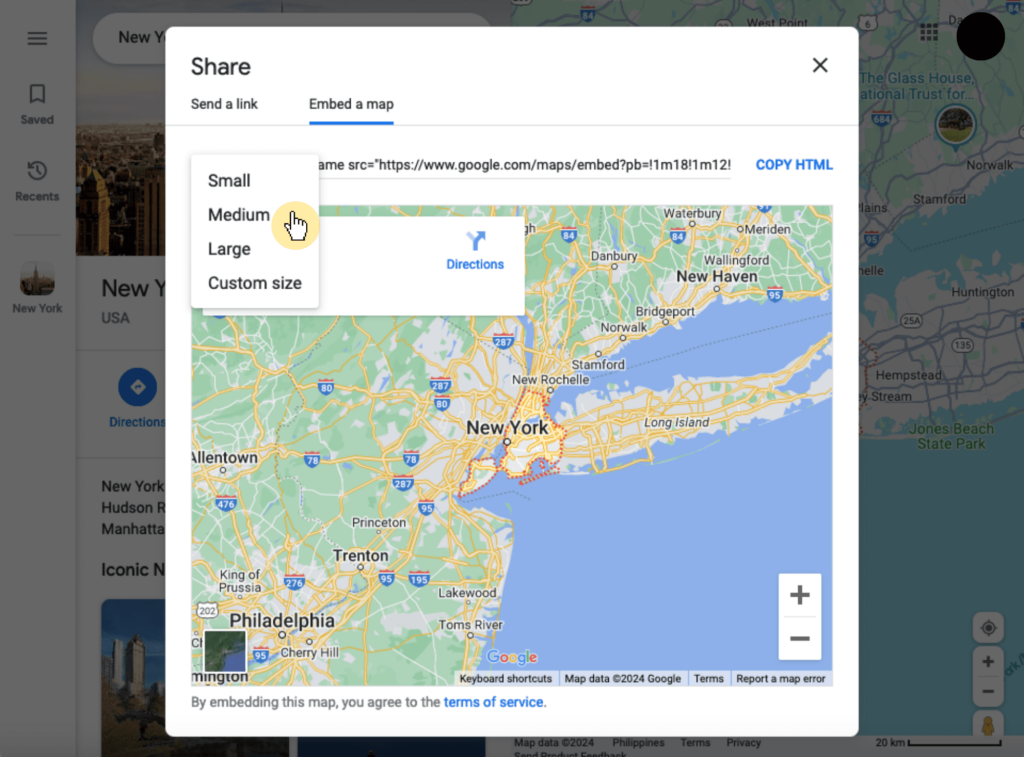
You can then customize the size of the map to ensure it fits well within the design of your site.
There are four options here:
Small Medium Large Custom size Pick your option:
If you choose the custom size option, you can enter the height and width , and even preview the actual size (this will open another browser window).
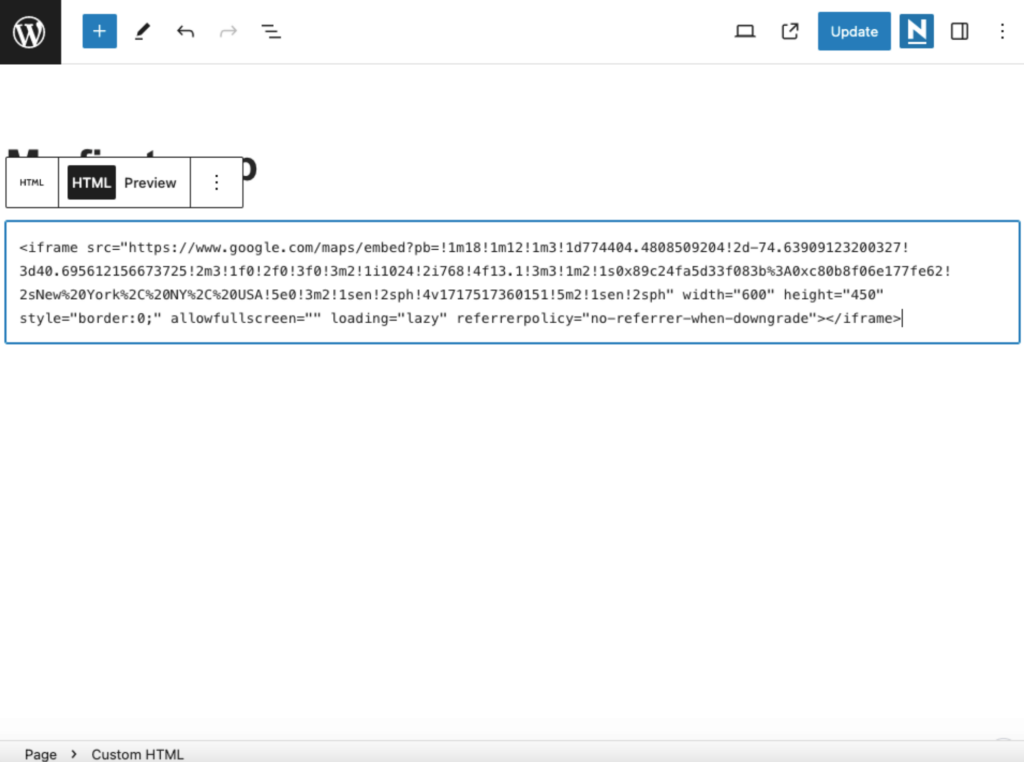
Step 3: Copy and embed the code
If you’re satisfied with the size, you can then click the copy HTML button to copy the iFrame code to your clipboard.
This code is what you will embed into your WordPress site.
Once again, open the page or post where you want the map to appear:
Add a custom HTML block Paste the embed code there This process integrates the map directly into your content, which displays it as a part of your page or post.
Nice and effortless! 😅
Method 3: Using a Google Maps theme/builder
Well, if you’re planning to switch to a theme that includes built-in Google Maps capabilities, then this method might be the best one.
Step 1: Choose a suitable theme
Start by choosing a WordPress theme that has built-in support for Google Maps.
The following themes/builders are known for this functionality:
For this example, I will be using Divi simply because I already have it on my demo website. 🙂
👉 Related : Best WordPress Themes: Handpicked and Ranked (Updated)
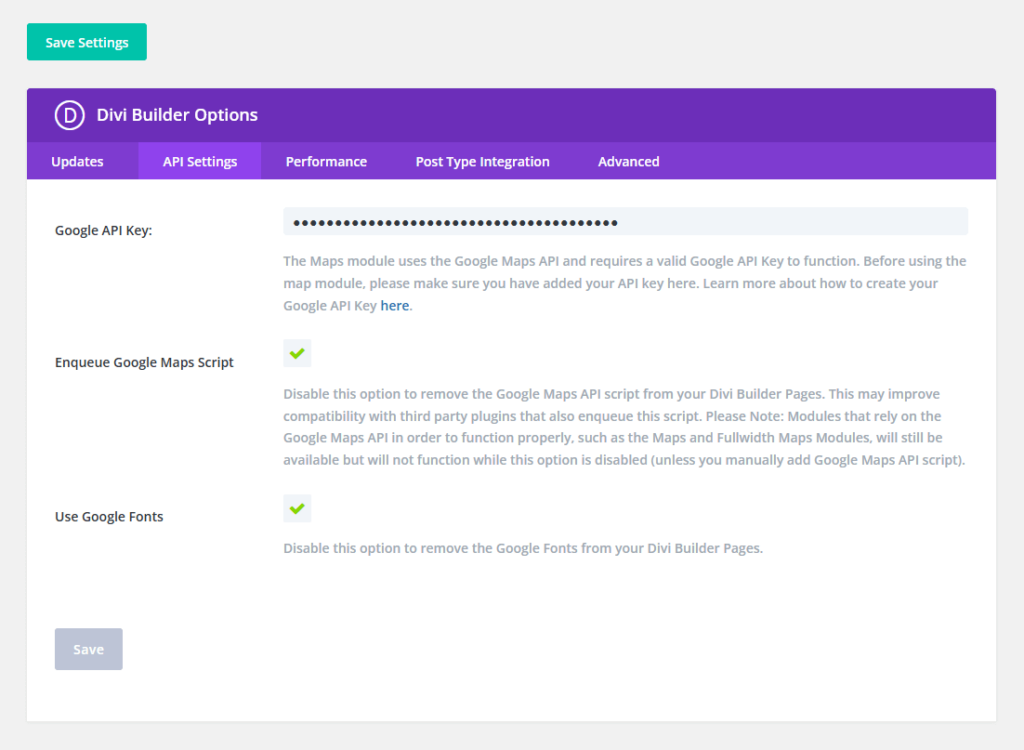
Step 2: Enter the Google API key
The steps here might differ depending on what theme or builder you want to use.
If you’re using the Divi Builder, you need to enter the Google API key in the API settings of the Divi Builder options.
Like this:
You might want to try to go into your theme or builder settings and see if there’s an option there to add the API key.
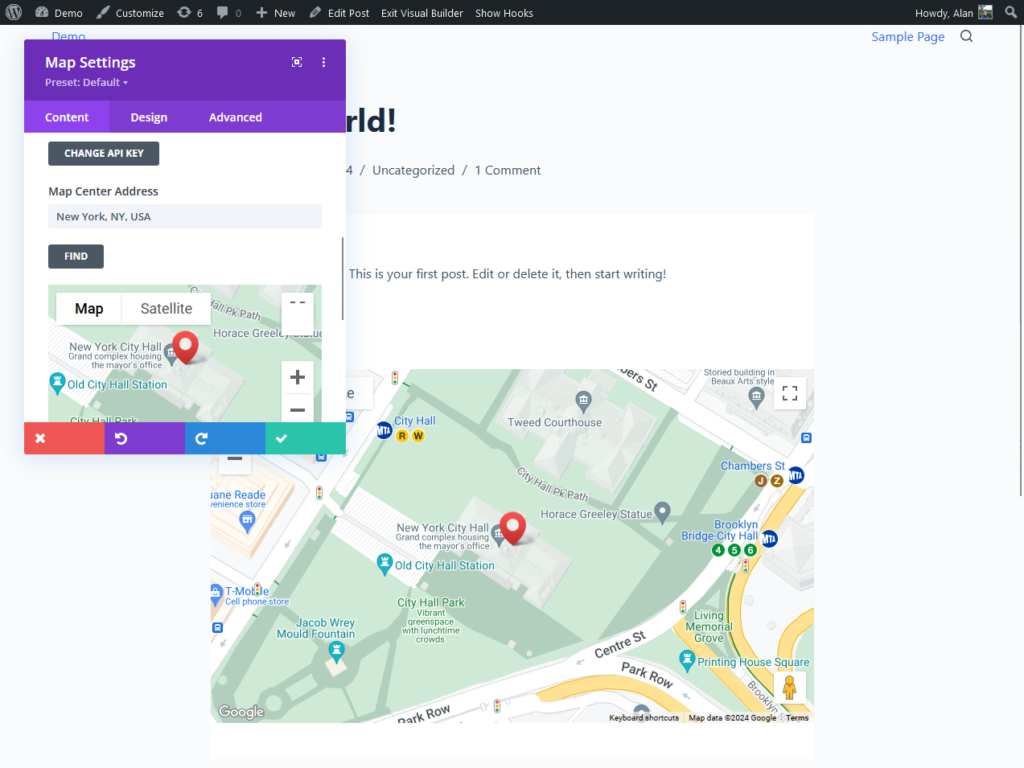
Step 3: Add the map to the post or page
If your theme uses a page builder like the Divi Builder, you can add a Google map to your pages by selecting the map module .
Place the module where you want the map to appear, and configure it by entering multiple locations, adjusting the size, and adding markers.
Here’s an example of what it looks like:
Many themes allow you to further customize the map’s appearance directly from the module settings like adding custom markers.
⚠️ Note : Before making the map live, preview the page to make sure that the map displays correctly and that all settings are configured as desired.
Adding Google Maps
Using Google Maps on your WordPress website not only improves navigation but also improves user engagement with interactive and visually appealing maps.
Each of the methods offers distinct advantages — ease of use, the simplicity of direct embedding, or seamless integration.
Choosing the method that best fits your technical skills or the assets that you already have (like if you’re already using a page builder that supports it).
Are you tired of constantly updating your website themes and templates and paying for support?
Darrel Wilson has an incredible offer that you simply can’t ignore.
Secure lifetime access to all premium Elementor template kits:
Get lifetime access to all premium template kits designed for Elementor Complete with 2 years of dedicated support Only for $99 — that’s already for the lifetime access This is the new era of Elementor templates, and it’s designed to make your life easier.