The main goal of my article “How to Make a Post with WordPress” is to walk you through the process of creating and publishing a post on a WordPress website. I intend to assist beginners and people new to WordPress in understanding the process of making a post, which includes adding content, selecting categories and tags, and publishing the article.
WordPress is a popular open-source Content Management System (CMS) that allows users to create and manage websites, blogs, and other online content. In 2003, developers initially released it, and since then, it has grown to become one of the most popular website-building tools
One of the biggest advantages of WordPress is its simplicity. Even those with no technical skills can use WordPress to construct and administer their websites. It has a simple interface and a variety of themes and plugins that allow you to easily alter the look and functionality of your website.
It can be used to build websites of any complexity and scale, from simple blogs to substantial e-commerce sites. Furthermore, WordPress is designed to help your website rank higher in search engine results pages (SERPs). It contains several SEO plugins that may assist you in optimizing your content for search engines, making it easier for users to find your website online.
We will provide you with comprehensive and simple instructions to create and publish your content on a WordPress website.
Let’s start and take it one step at a time!
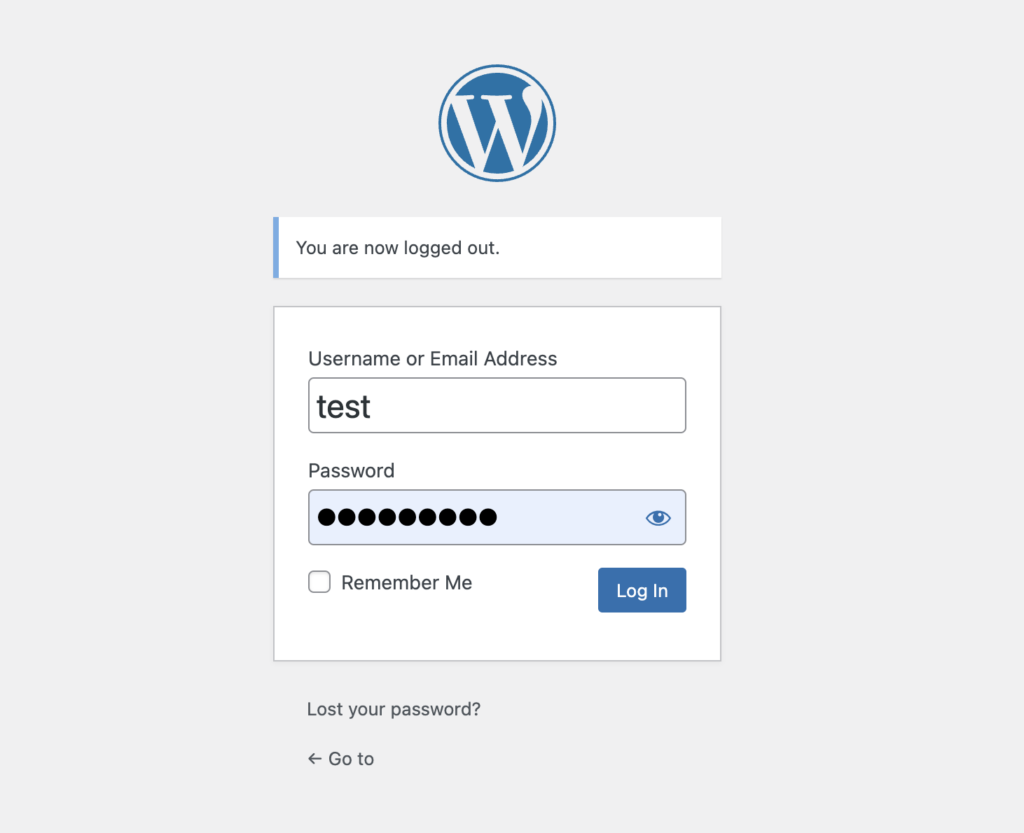
WordPress Log In Follow these steps for logging in to the WordPress Dashboard:
Step 1: Open a browser window and navigate to the login page of your WordPress website.
Step 2: Enter your username/email address and password in the page login box.
Step 3 : To proceed, please click on the “Log In” option.
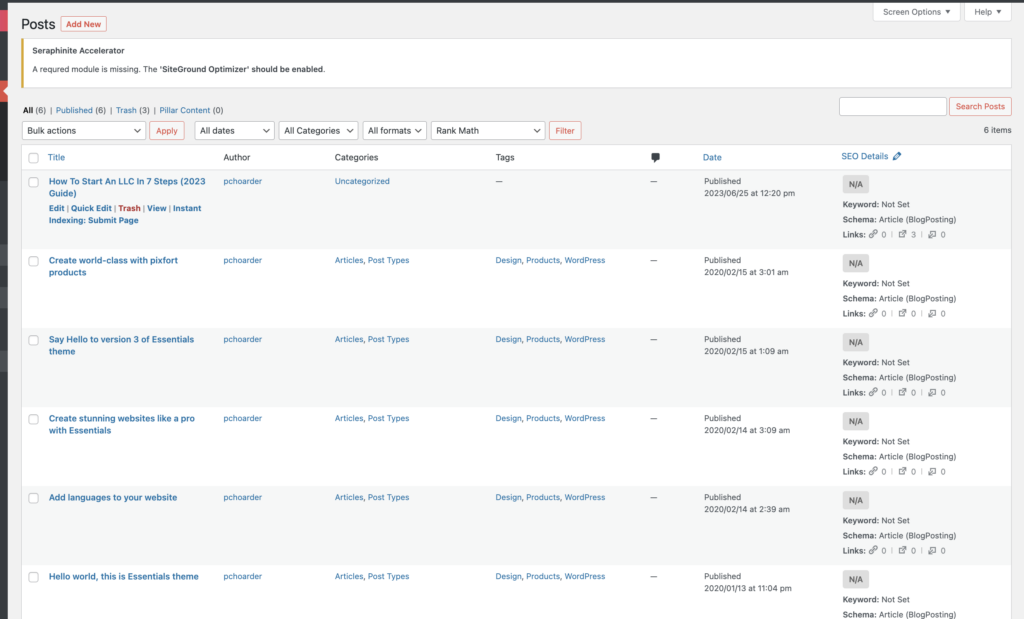
Posts Screen Navigation The “Posts” panel allows you to view and control all of the content on your WordPress website.
Difference Between Posts And Pages WordPress pages and posts are fundamentally different. The posts give the reader timely, dynamic information on a particular subject. It displays them in reverse chronological order, so the most recent post first appears on your blog’s main page. You can archive and sort them by tags and categories, and you can also broadcast them in a feed. By default, the system enables post comments.
The users commonly use pages to represent the static section of their website. It is possible to design promotional pages that are only accessible after a marketing or advertising campaign. However, users should avoid letting them become outdated as this would be inappropriate. You can arrange WordPress pages systematically but not categorically.
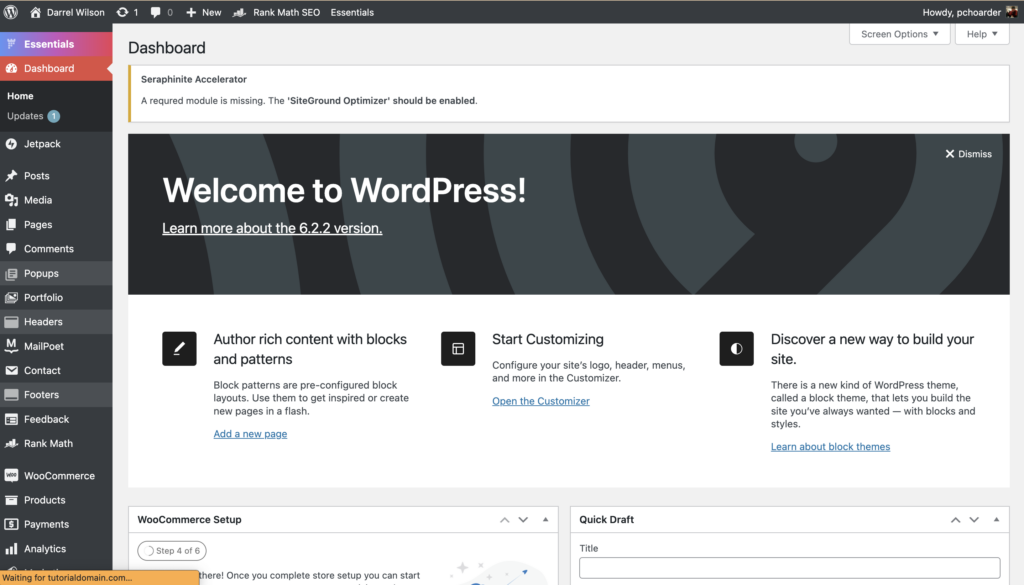
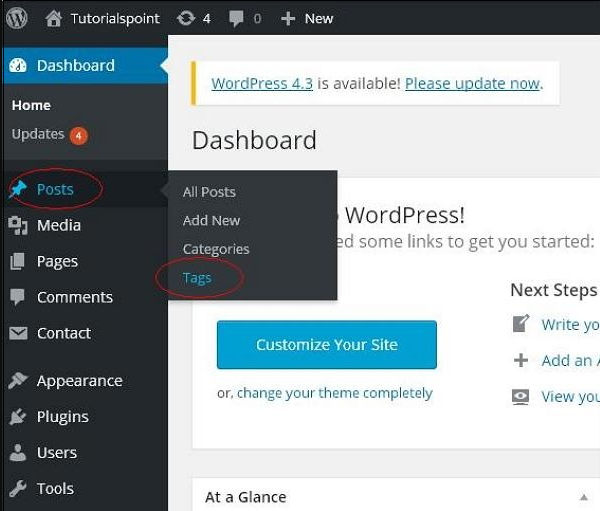
How to Navigate to the ‘Posts’ Screen Follow these steps to Navigate to the Post screen:
Step 1: Once you have successfully logged in, you will be directed to your WordPress Dashboard.
Step 2: Hover your mouse over the ‘Posts’ item located in the left-hand menu.
Step 3: The ‘All Posts’ sub-menu option will display click on it.
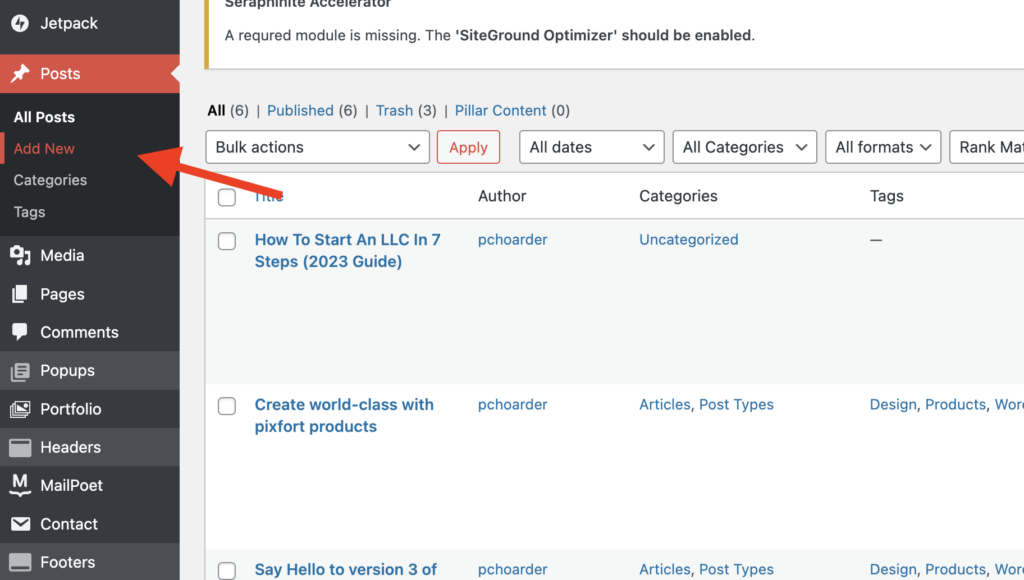
Alternatively, you can see a list of all your posts by selecting the ‘Posts’ option from the left-hand menu. You can then browse all posts, draft posts, published posts, or those that fall under a category or tag.
Creating A New Post Making a new post in WordPress is an easy procedure. Below is the step-by-step procedure to create A New Post:
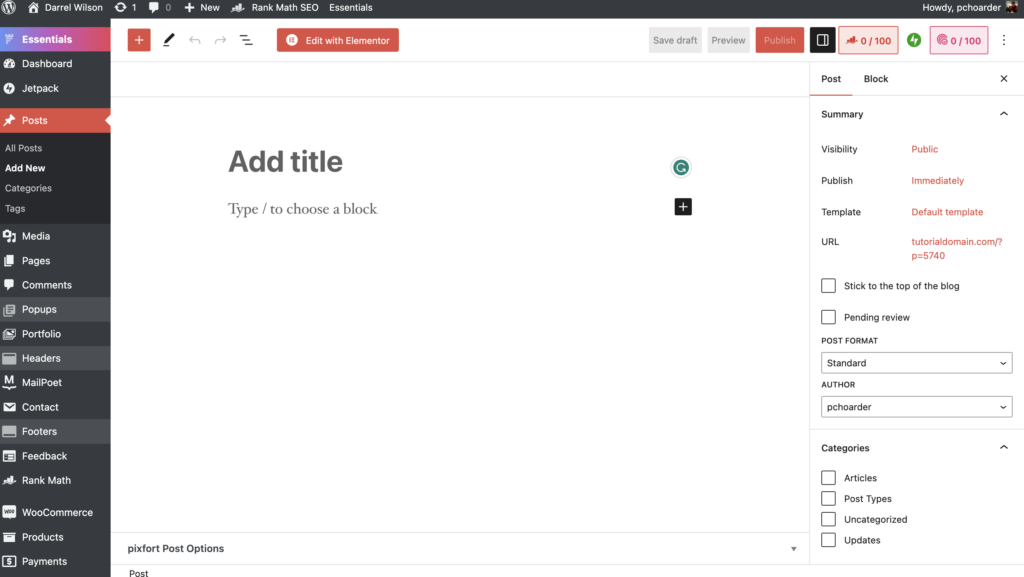
Step 1: At the top of the “Posts” screen, click the “Add New” button to start a new post.
Step 2: You will be then sent to the “Add New Post” screen, where you can begin writing your article.
Adding Title To Post After Logging in to WordPress and Creating A New Post, you can easily Add a Title on the top field provided in your editor screen.
Creating Titles that Turn Heads: An Essential Skill Without question, the most significant part of every blog post or article is its title. It is the first thing readers see and could impact their decision to click on and read your content. As a result, creating a captivating and compelling title is necessary.
A powerful title can serve multiple purposes. To begin with, it may inspire individuals to click on your material, increasing traffic and activity on your website. Second, it may quickly and accurately describe the material in your article, helping readers in deciding whether the content is relevant to their interests or needs.
When creating a title it is essential to consider your audience and what they are looking for. What questions or concerns do they have, and how might your post help them resolve them? A title that addresses the needs and objectives of your audience is more likely to receive clicks and be read.
It’s also important to keep your title brief and to the point. A lengthy or complex title may confuse and turn away potential readers. A title that is simple, concise, and effectively communicates the topic of the article will acquire more attention and shares.
Tips For Creating A Catchy Title Making content for your site undoubtedly consumes a significant amount of your time. Producing high-quality content is essential if you want to get the most out of your business blog, but without an engaging title, no one will bother reading what you write.
Consider the following tips and tricks to make your title stand out:
Use numbers and lists in your titles: People are more likely to pay attention to and understand the content that contains numbers and lists. Consider the following topics: “10 Ideas for Creating a Successful Blog” or “5 Methods to Improve Your Writing Skills” are two examples.
Keep it simple and short: short, straightforward titles have a larger effect. Keep your title as short as possible since search engine results limit the characters to 60.
Ask a question: Including a question in the title of your post could grab readers’ attention and convince them to read on to find out the solution. For example, “Why You Should Start a Blog Right Now” or “How to Write a Blog.”
Maintain the integrity of your titles: Nobody wishes to be misled. Your content must perfectly match the headline. As we have often mentioned, if you fail to meet readers’ expectations, they will be disappointed.This might result in a negative user experience, a lack of confidence, and, eventually, fewer readers. Make your blog names as dramatic as possible unless you are confident that your content will meet up to user expectations.
Use Keyword Research: If you have a blog, you’re already doing keyword research to figure out what your visitors are thinking about, looking for, and what language they use. Use the information to build blog article titles.
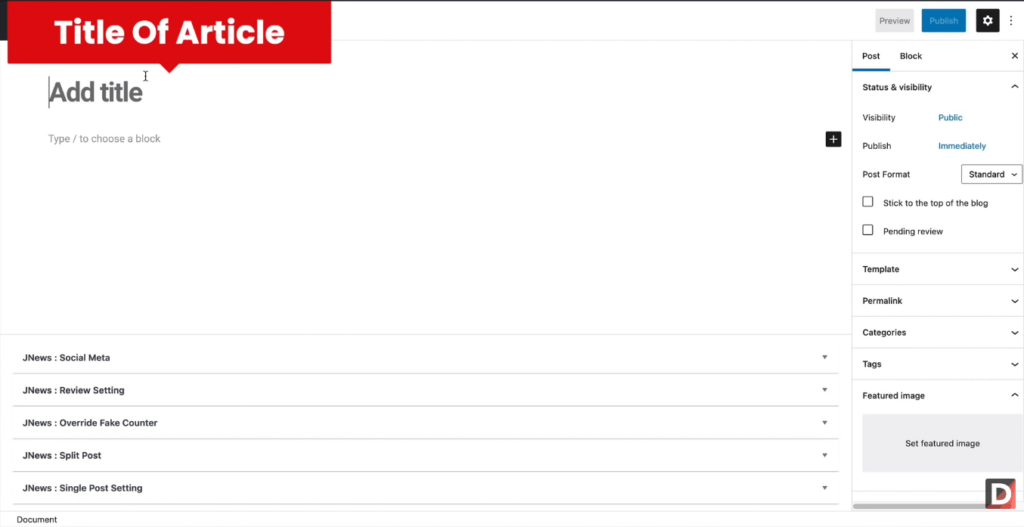
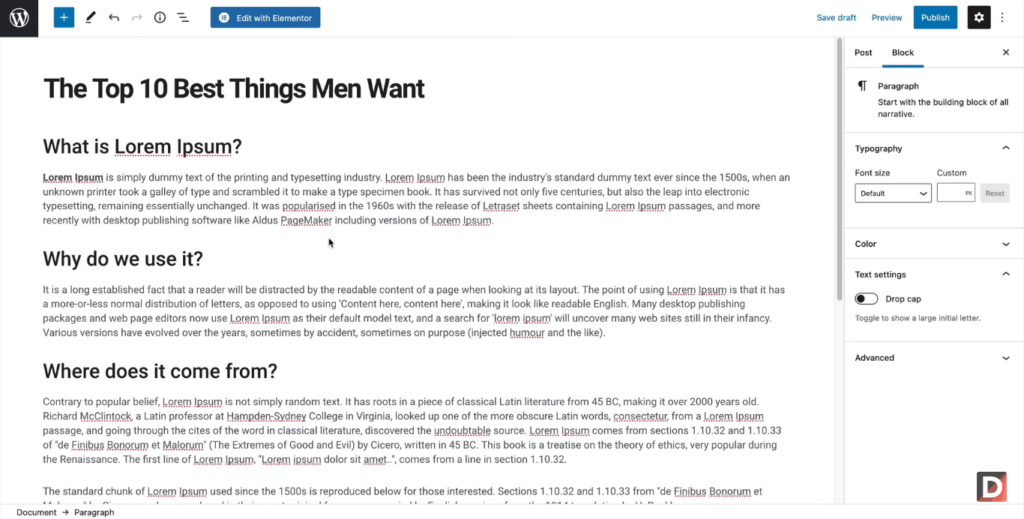
Adding Content In Your Post Following the title, add your content to the text editor by using the formatting options, such as bold, italic, and underline, that the text editor offers while writing your article.
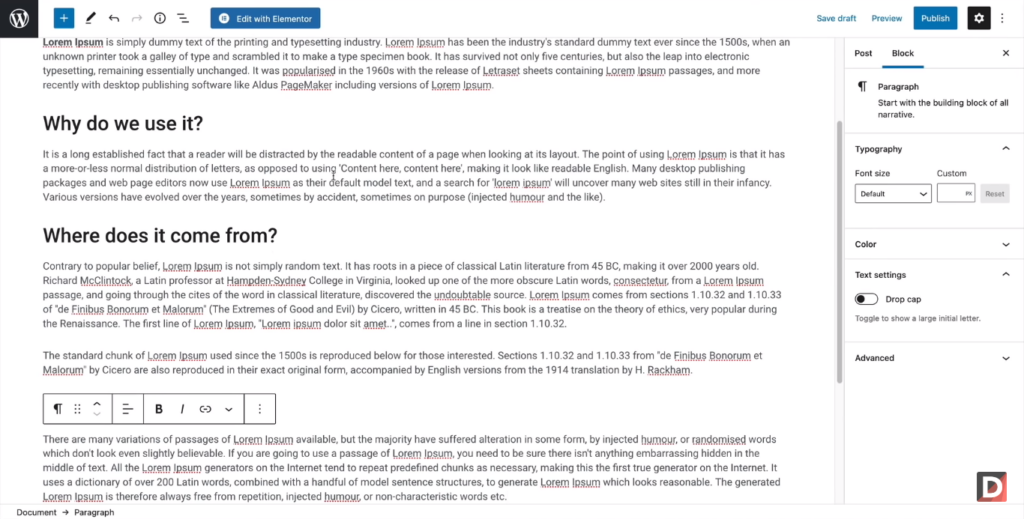
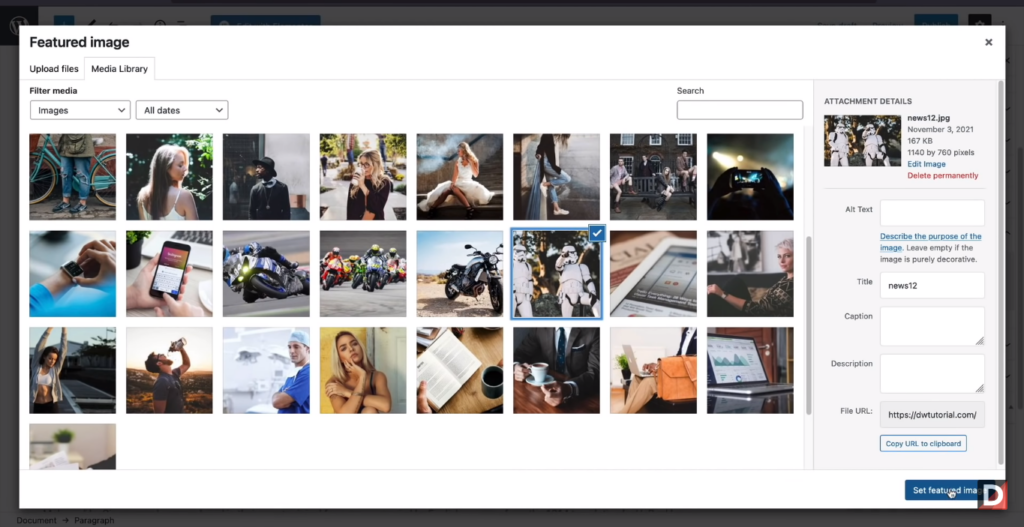
Instructions For Using The WordPress Text Editor To Add Content To Your Article You can find the text editor in the middle of the screen when you reach the “Add New Post” page. You can add content to your post by simply starting typing in the text editor on the Visual tab. The toolbar above the editor allows you to format the content by adding headings, bolding or italicizing text, creating lists, and other choices. To add images or other media, select “Add Media” from the menu that appears above the text editor. This will open the WordPress media library, where you may upload images or videos from your computer or pick from content already in your collection. Text Formatting, Media Addition, And Readability Tips Following are some formatting, adding media, and readability suggestions for your text to help you create high-quality content for your WordPress article:
Text Formatting:
Use headers (H1, H2, H3, etc.) to make your text easier to understand. Use bullet points and numbered lists to organize the text and make it more visually appealing. Use bold and italic styles for highlighting key concepts or quotes. Media Addition:
Use relevant images and videos to make your material more fascinating and visually appealing. Compress the images before uploading them to the web to reduce file size and ensure fast page loads. Add alt tags to the images to boost accessibility and search engine optimization. Readability
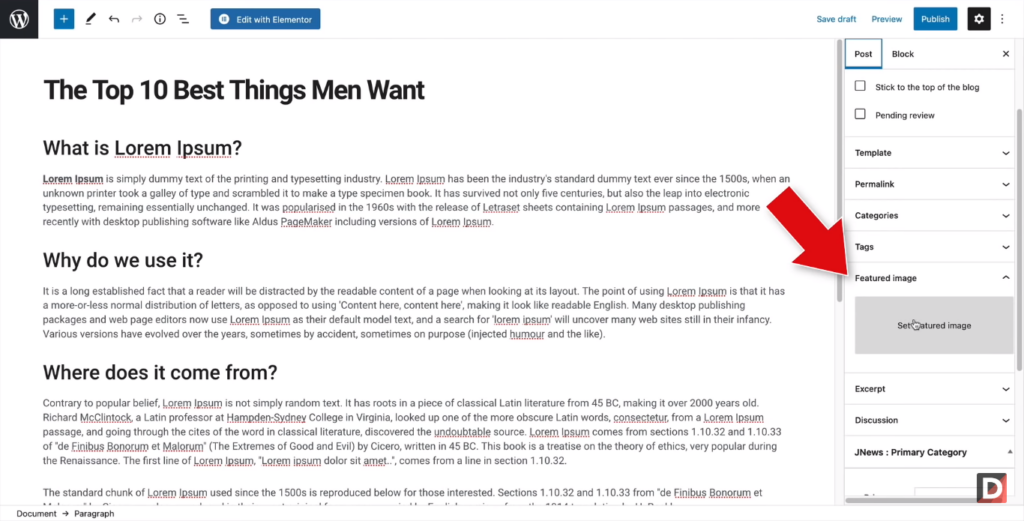
Maintain clear, direct sentences and paragraphs. Avoid using specialized or technical terms that readers may find perplexing; instead, use simple English. You can divide long paragraphs using subheadings, images, or other visual content. Use a simple, readable font. Adding Tags And Categories To Your Post It is crucial to add tags and categories to your posts to manage your content and make it simpler for users to search for similar content on your website.
An Explanation Of Why Adding Categories And Tags To Your Content Is Important WordPress site owners and writers frequently ask, “What are categories and tags, and how do I use them on my blog?” They seek to enhance their blog’s optimization.
The similarities between categories and tags are what confuses WordPress users the most. Categories and tags are both utilized in WordPress site blogs to effectively structure and organize the content.
Post tags are used to provide more specific classifications than categories. Tags, like the index of a book, should help the visitors identify subjects that your blog commonly addresses. Tags can be single words or entire phrases. If you use words like “News,” “Events,” “Awards,” and so on as category headers, add the enterprises you serve and the essential services you provide in tags. You can tag various blog postings related to projects, employees, recruiting, sustainability, and any other relevant topics.
Effective use of categories and tags can increase audience engagement, navigation, and SEO.
The following steps will instruct you how to add categories and tags to your WordPress posts:
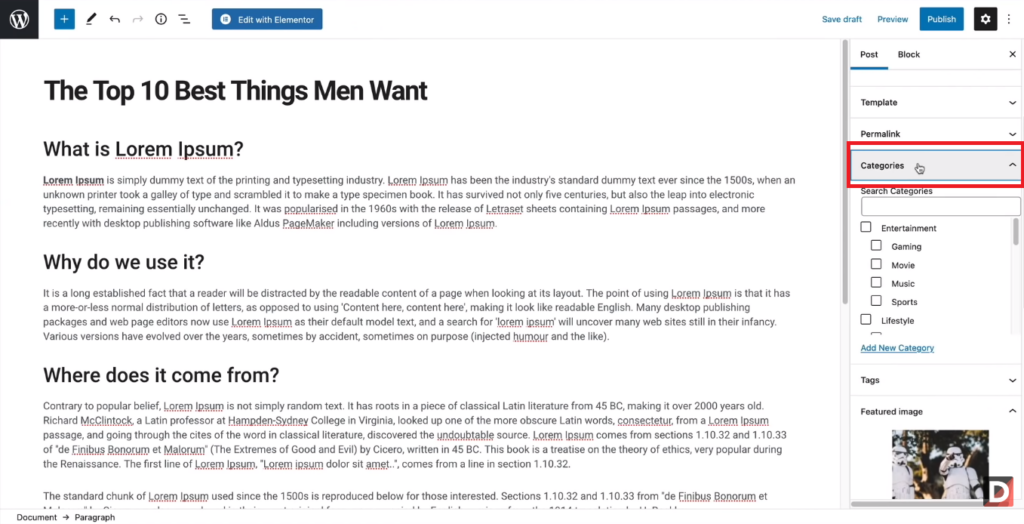
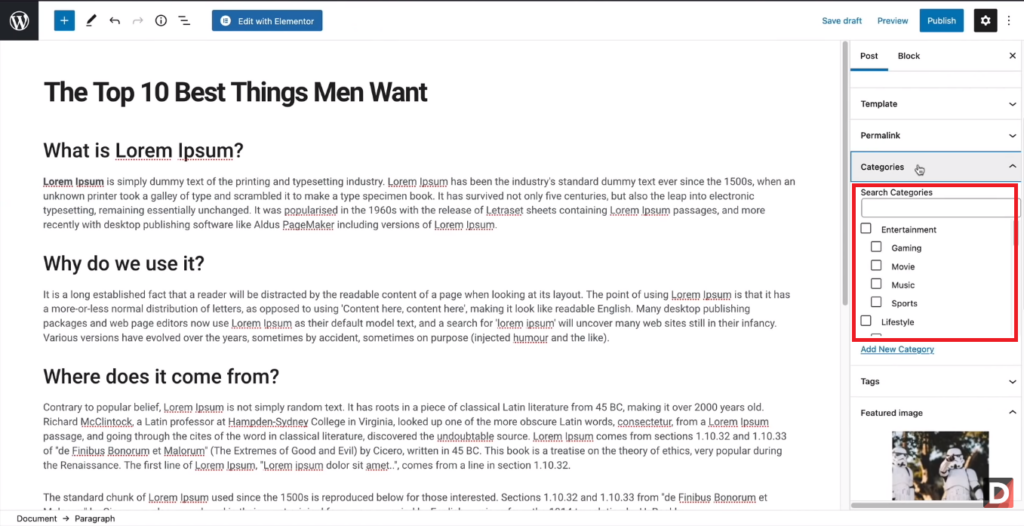
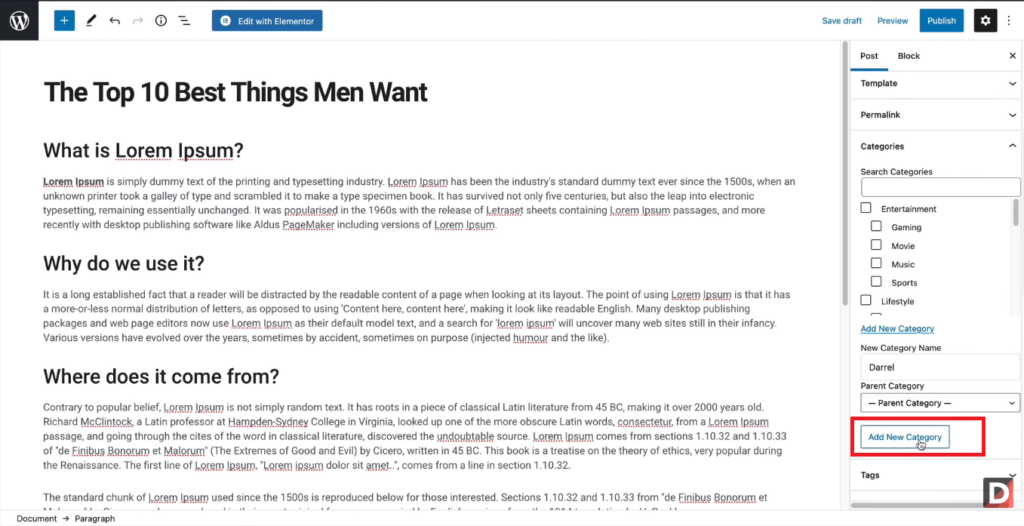
Step 1: The “Categories” area is on the right side of the screen. If it is not already visible, pick the “Document” tab at the top of the screen.
Step 2: You can either select an existing category from the list or create a new one by clicking the “Add New Category” option.
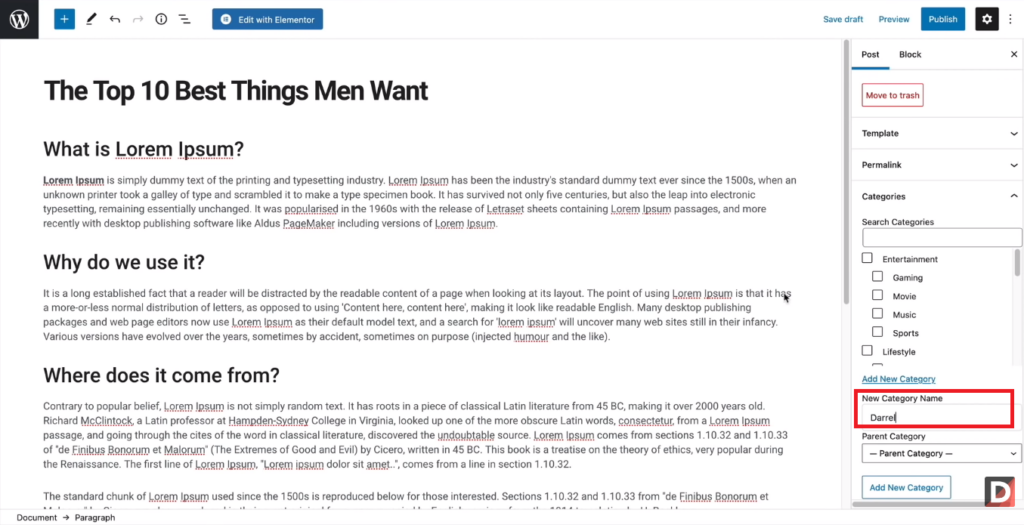
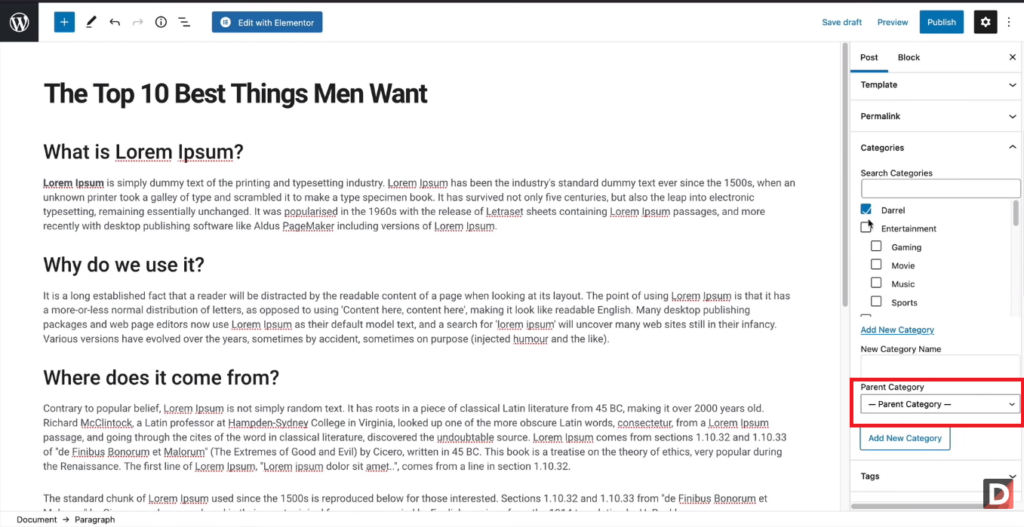
Step 3: You should fill up the “Name” box with the name of the category you want to add.
Step 4: If necessary, you can add a slug, description, and parent category.
Step 5: By selecting “Add New Category” from the menu or you can save the new category.
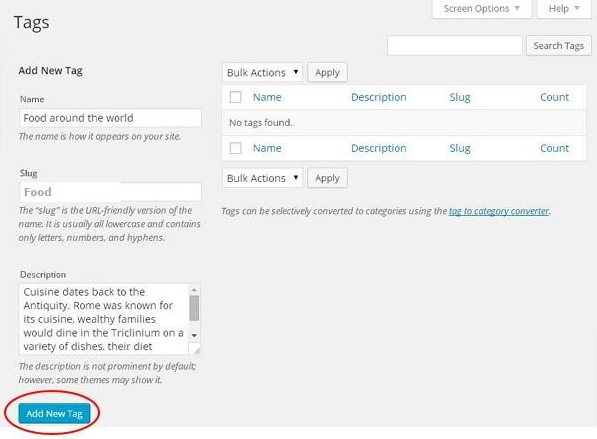
Step 6: Select the “Tags” section on the right side of the screen.
Image Source
Step 7: Fill in the “Add New Tag” field with the tags you wish to apply to your article, and then hit the “Add New Tag” button.
Image Source
Previewing And Publishing Your Post Previewing your post after adding the text, tags, and categories can be beneficial in ensuring its quality and presentation.
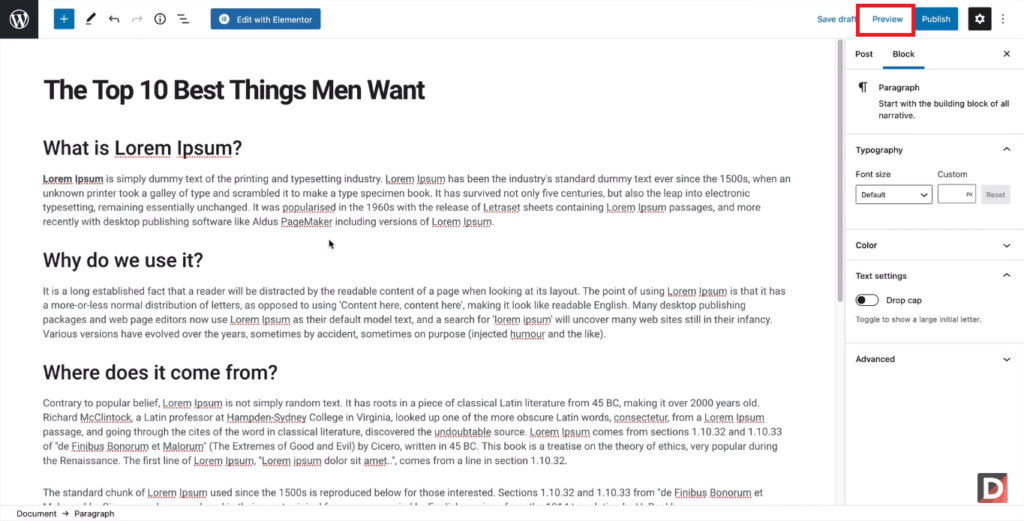
Instructions For Previewing Your Content Before Posting It By previewing your content before submission, you can verify that it appears exactly as you intended, ensuring its accuracy and desired presentation.
Click on the post you want to get to the editing screen. In the upper right-hand corner of the screen, click the “Preview” button. This will open a new tab in your browser and show you how your post will seem to your visitors. Review your article to confirm that everything appears good, including the formatting, images, and any other materials you’ve added. If you see any issues, return to the editing screen and make any necessary changes. After ensuring that your post appears as desired, you may close the preview tab and return to the editing page. Step-By-Step Directions For Publishing Your Article To publish your article after creating and editing it in WordPress, follow these simple steps:
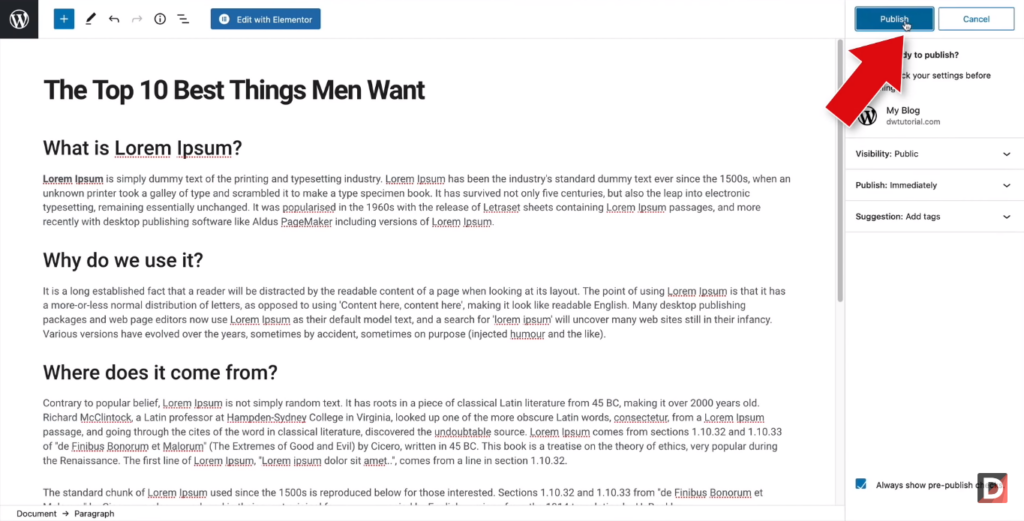
Step 1: Once you have completed the necessary modifications, proceed by clicking the “Publish” button positioned at the top right corner of the screen.
Step 2: Click the “Edit” link next to “Publish immediately” to select a future day and time for your article to become online.
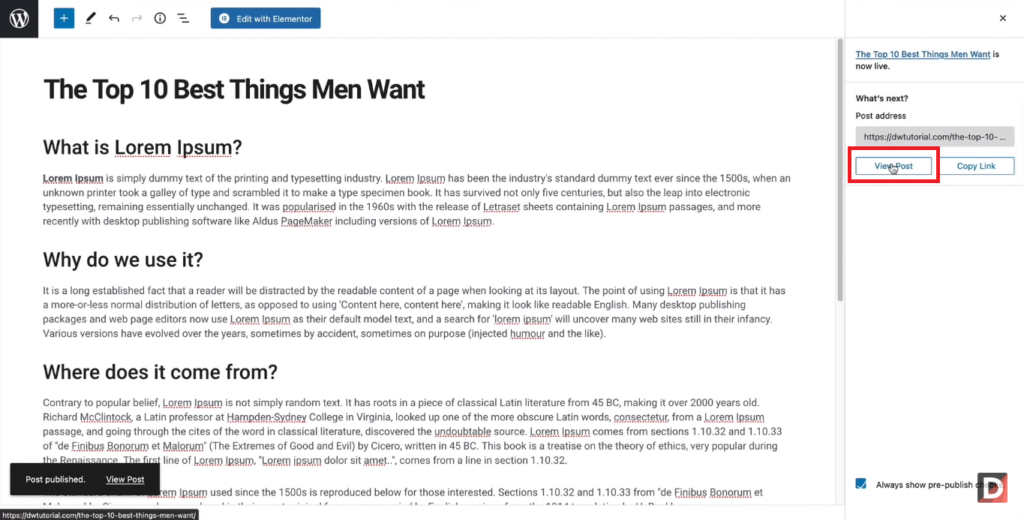
Step 3: You can review that your content shows properly on your website after scheduling or publishing it.
Conclusion If you’re reading this, you’re likely interested in creating your content and promoting your ideas, opinions, or products to the rest of the world. The good news is that starting with WordPress has never been simpler. It’s a fantastic platform for doing just that.
Everything you need to know to start writing WordPress articles is covered in this detailed article. No matter if you are a blogger, freelancer, small business owner, or aspiring writer, WordPress provides the tools to help you reach your audience and achieve your goals successfully.