Need to migrate your website?
By the end of this guide, you will learn different methods of migrating your website, from manual migration to using the cPanel.
Here’s what we will talk about here:
Ready? Let’s get started.
Website migration is moving a website from one environment to another — due to changes to the domain name, hosting provider, or overall structure of the site.
It involves transferring the website’s data, files, and configurations to the new location without loss or deterioration of data security.
This process is significant enough to potentially impact the site’s indexability and visibility in search engines, so careful planning and execution are important.
Following a structured approach and using the appropriate tools is essential to ensure a smooth transition and maintain the website’s performance and SEO rankings.
Let’s talk about the first method:
This process involves manually moving files and databases between servers, typically for smaller websites or when lacking hosting provider migration tools.
Manual migration usually requires downloading files via FTP, exporting the old server’s database, and then uploading the files and importing the database to the new server.
To back up your existing website, start by connecting to your current hosting server via FTP.
Then do this:
Select all the files and folders > right-click on them > click on the download button to save them to your local computer.
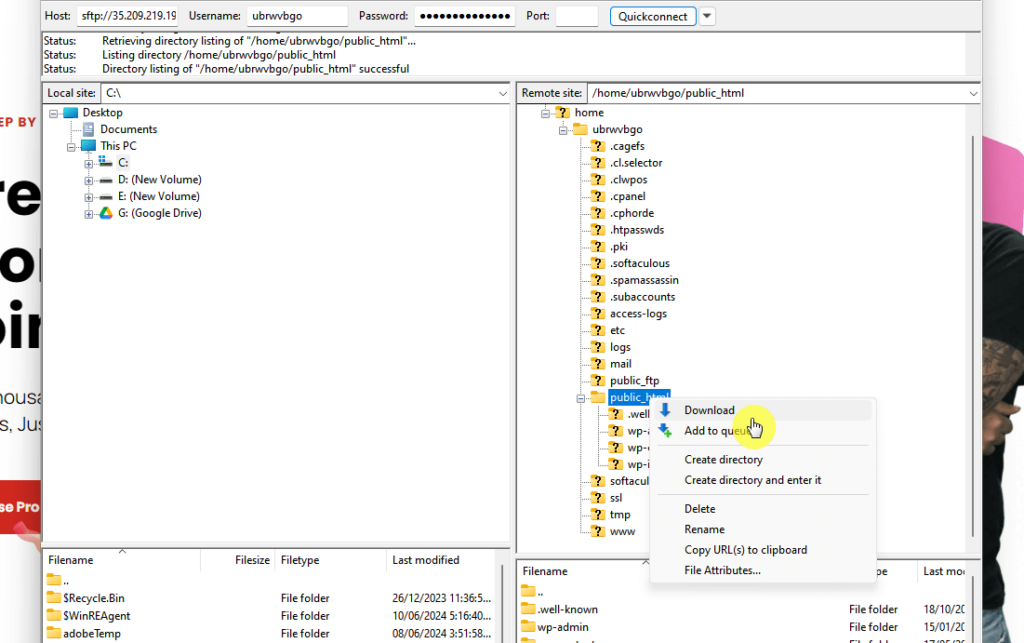
⚠️ Note: If you’re not sure where your files are, they’re usually in the public_html or www directory.
After that, you also need to export your database.
The initial steps may vary on how to access the database, but usually:
phpMyAdminMake sure the quick export method is selected before hitting the export button:

This will then download the SQL file into your computer.
You need to ready the new hosting provider first, though the actual steps depend on the web host you’re using.
For example, Hostinger makes it easy with a guided setup:

But anyway, what you have to do here is just the opposite of the previous step — upload the files and import the database.
For the database, you need to create a new database in the hosting environment first and then import the SQL file:

The point here is to duplicate what you have in the original site.
👉 Related: Hostinger Review: Budget-Friendly Hosting Powerhouse?
Migrating your website can be a daunting task, but with the right web hosting provider, it becomes much more manageable.
This is where Hostinger comes into play, offering a reliable and efficient hosting solution.

Discover the Hostinger advantage for your WordPress site:
With Hostinger, you’re not just getting a hosting service:
You’re investing in a partner dedicated to optimizing your website’s performance and security.
This is like the finishing touches to the migration process.
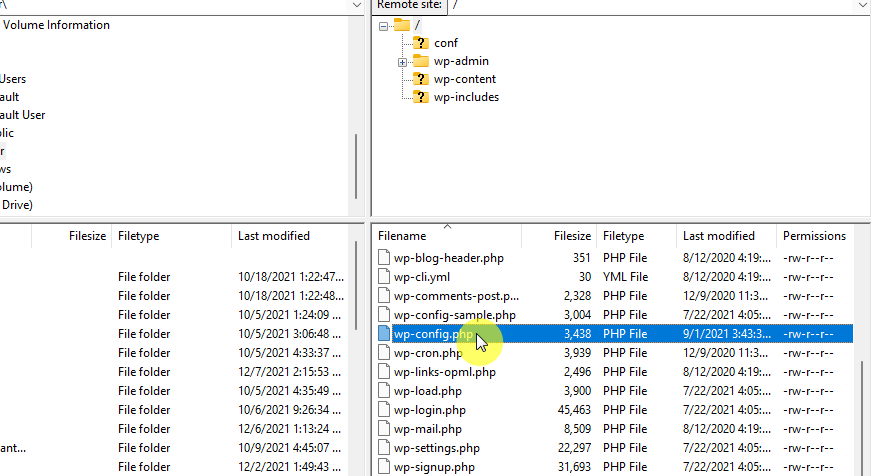
If you want to do it manually, you can go to the wp-config.php file and update the database name, username, and password.
You can download the file using Filezilla and then upload the edited file:
⚠️ Note: Check and update any hardcoded file paths to reflect the new server’s paths.
The next part is to update your DNS settings.
Your web hosting provider should have DNS settings where you can update the nameservers or A records to point to the new hosting server’s IP address.
It looks like this on Hostinger:

This is important — be aware that DNS changes can take up to 48 hours to propagate, though in some cases, it’s faster than that.
After that, make sure to test and monitor your website after migration, especially the performance and functionality. 👍
Websites using content management systems like WordPress can use plugins that automate the migration process and simplify the transition.
These plugins can handle the transfer of files, databases, and even configurations specific to the CMS so you don’t have to do most of the work.
Let’s use Duplicator as an example:
To install and activate Duplicator, log in to your WordPress dashboard.
Then navigate to plugins > add new > search for the plugin > click the install now button:

Don’t forget to activate the plugin once it’s installed.
The key here is to create a package of your site that you can upload on the new host.
Navigate to the plugin settings by going to Duplicator > Packages and clicking on the create new button:

Follow the on-screen instructions to create a package, which includes your site’s files and database.
Once the package is built, download both the archive file and the installer.php file to your computer.
To upload to your new web host and run the installer, connect to your new hosting account using an FTP client like FileZilla.
Upload both the archive file and the installer.php file to the root directory (often public_html) of your new hosting account.
In your web browser, go to https://yournewdomain.com/installer.php and follow the steps provided by the installer to deploy your site on the new host. 🙂
Don’t forget to test and clean up your site by thoroughly testing your site after the migration to ensure everything works as expected.
⚠️ Note: After the migration, you can use the Duplicator installer to remove installation files and clean up any temporary files.
For websites hosted on servers with cPanel, the migration can often be performed through cPanel’s built-in tools.
This method involves generating a full backup of the website on the old server and then restoring this backup on the new server.
⛔ Warning: This method only works if both web hosting providers support cPanel. Some managed hosting providers don’t use cPanel.
To generate a full backup on the old server, log into cPanel by accessing the cPanel dashboard on your old hosting account.
Navigate to the “Backup” or “Backup Wizard” option within the cPanel dashboard.

Select the option to generate a full backup, choose the home directory as the destination, and enter your email address to be notified when the backup is complete.
It looks like this:

Once the backup process is complete, download the generated backup file to your computer.
👉 Related: NameHero Hosting Review: Are the High Costs Worth It?
Check for compatibility by verifying that the new server’s cPanel version and PHP settings are compatible with your website’s requirements.
To restore the backup on the new server, access the backup feature again in the cPanel, and this time, go to the restore options.
Browse for the file:

Upload the backup file you downloaded from the old server and select the appropriate options to restore files, databases, and other components included in the backup.
Since the cPanel method doesn’t include updating the DNS settings, you need to manually do this yourself.
The steps are similar to what you have to do in the first method, simply go to the DNS settings of the host you’re using now.
Update your domain’s DNS records to point to the new server’s IP address after the restoration is complete.
As always, thoroughly test your website to ensure that all features and functionalities are working correctly on the new server.
Successfully migrating a website requires meticulous planning, the right tools, and careful execution to ensure data integrity and minimal downtime.
By choosing the most suitable migration method, you can streamline the process and mitigate potential risks.
Ultimately, a well-executed website migration not only preserves your site’s functionality and SEO rankings but can also open up new opportunities for growth and performance.
Wrapping up, it’s time to take your web design to the next level.
These template kits are created to provide you with all the tools you need to create a stunning, professional website with ease.

Secure lifetime access to all premium Elementor template kits:
Take advantage of the ease and elegance of this offer and transform your web design experience today.


דירה דיסקרטית בחולון
Everything is very open with a really clear clarification of the issues. It was definitely informative. Your site is extremely helpful. Many thanks for sharing!