Wondering how you could use rich snippets?
By the end of this guide, you will learn the steps for using WordPress rich snippets using two plugins — AIOSEO and Schema Pro.
Here's what you will learn:
Ready? Let's get started.
Rich snippets are enhanced bits of information, implemented through structured data, that appear in search engine results and are added to the basic metadata from your website.
They offer a more detailed and visually appealing preview of your content in search results and are thus essential features in promoting site visibility and user engagement.
For instance, if you run a recipe website, rich snippets could display star ratings, preparation time, or even calorie count alongside the usual title and description in search results.
This not only makes your content stand out but also helps users get a better idea of what your page offers before they click through.
The process is generally made simple with the help of rich snippet plugins.
These plugins provide a straightforward way for you to integrate rich snippets into your site without the need for extensive coding knowledge.
I will introduce you to two popular and user-friendly WordPress plugins for adding rich snippets.
Each plugin offers its unique features and ease of use, catering to different needs and preferences, whether you're running a blog, an ecommerce site, or any other type of website.
👉 Related: Best Rich Snippets Plugins for WordPress: Top Picks
It's important to consider the foundation of your website's performance and reliability: your web hosting.
Hostinger steps up as the ideal partner in this journey, offering an unbeatable hosting solution that complements your SEO efforts.

Discover the Hostinger advantage for your WordPress site:
With Hostinger, you're not just choosing a hosting provider:
You're investing in a service that amplifies your website's potential, making it faster, more reliable, and ready to climb the SEO ladder.
To incorporate rich snippets effortlessly, there are robust SEO plugins like All in One SEO (AIOSEO) Pro that can do the job in one stroke.
AIOSEO is renowned for its comprehensive suite of features designed to optimize websites for better rankings in search engines.
Supported by over 3 million website owners, AIOSEO supports multiple languages and is translation-ready, making it accessible to a global audience.
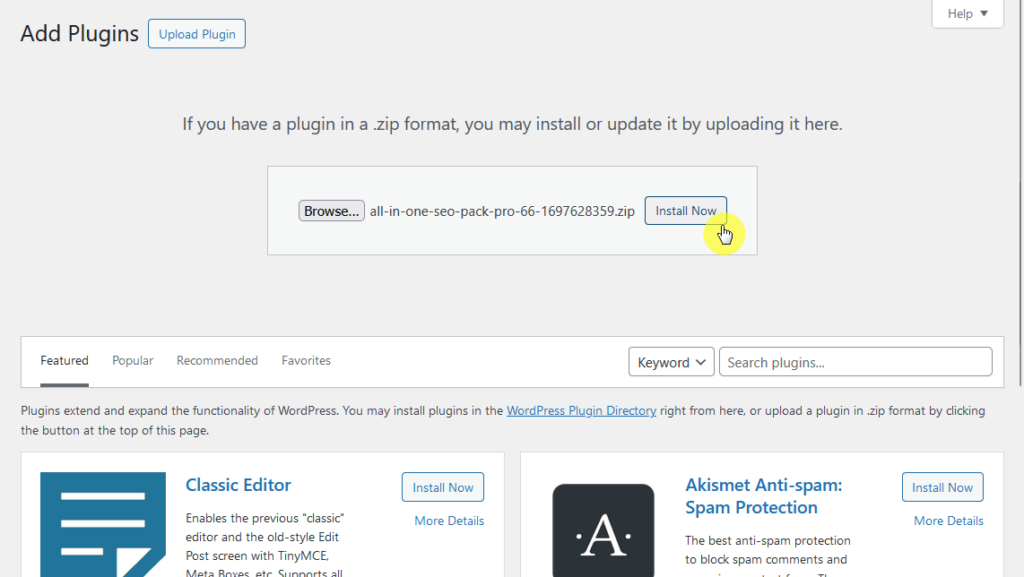
Install and activate the pro version of the plugin.
You can either connect and install the pro version from the free version or manually upload and install the plugin.
You will then be greeted by AIOSEO’s setup wizard —complete this setup, especially in step #2 where you have to select what your site represents.
⚠️ Note: If you run an online store, the plugin also helps in the rich snippet graph by extracting your seller details and including them in your Google search engine results page snippets.
Navigate to the plugin settings on your dashboard and go to the search appearance page.
Afterward, get to the content types tab.
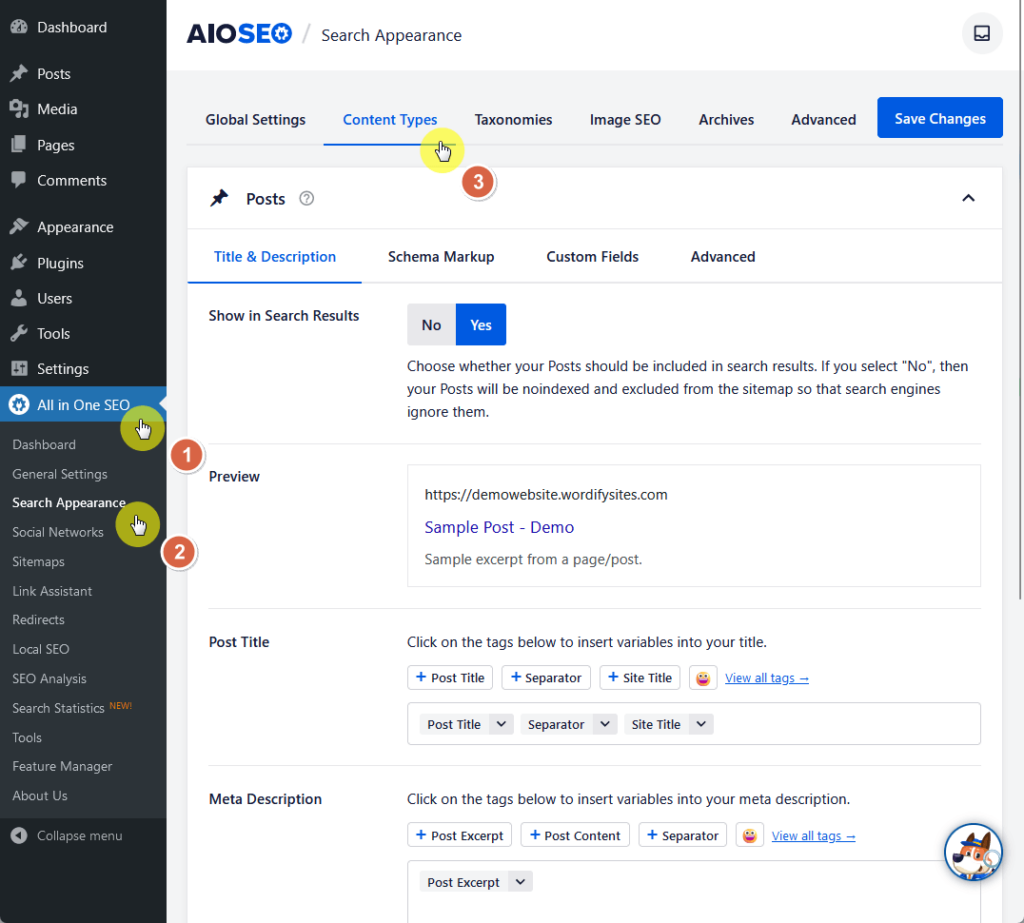
Under content types, you will see sections for each type of content on your site, such as posts, pages, and products.
In this example, we’re going to add schema to your posts:

Regarding the options:
You can repeat these steps for pages and products too.
Once you've included the schema markup for your entire website, the final step is to apply rich snippets to individual posts and pages.
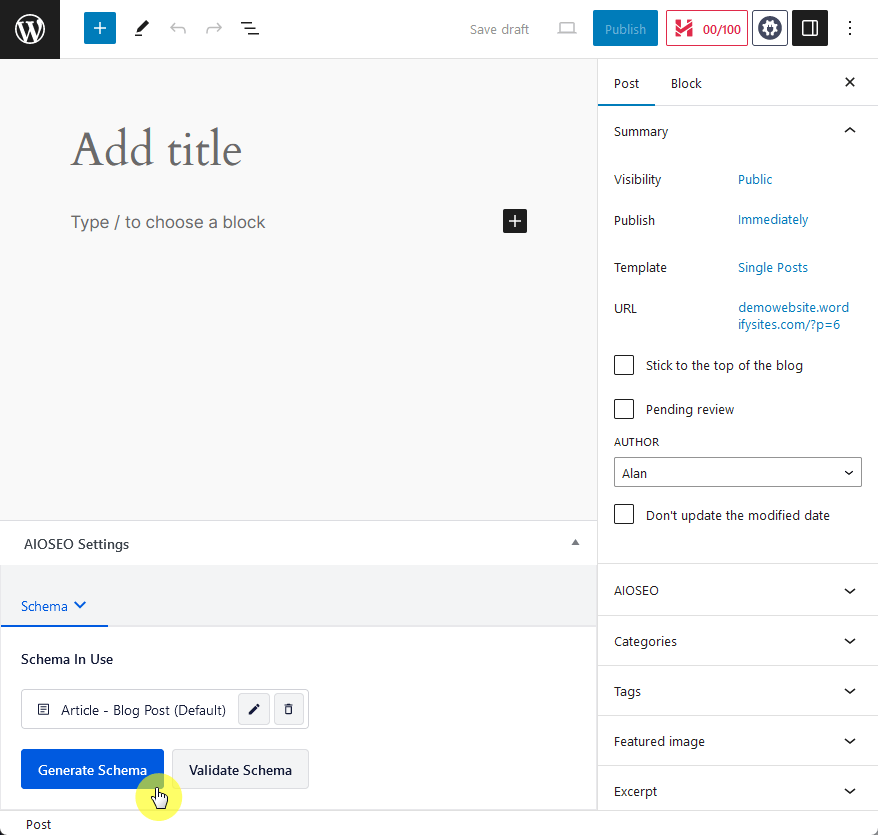
By default, the schema type is set to article — blog post.
Click on the blue generate schema button to select and optimize your schema type — this will open up the schema catalog.
Now that you’re on the schema catalog, you will find a range of schema types that you may select and add to your post or page.
Click on the + sign next to your schema type of choice to add it to your page.
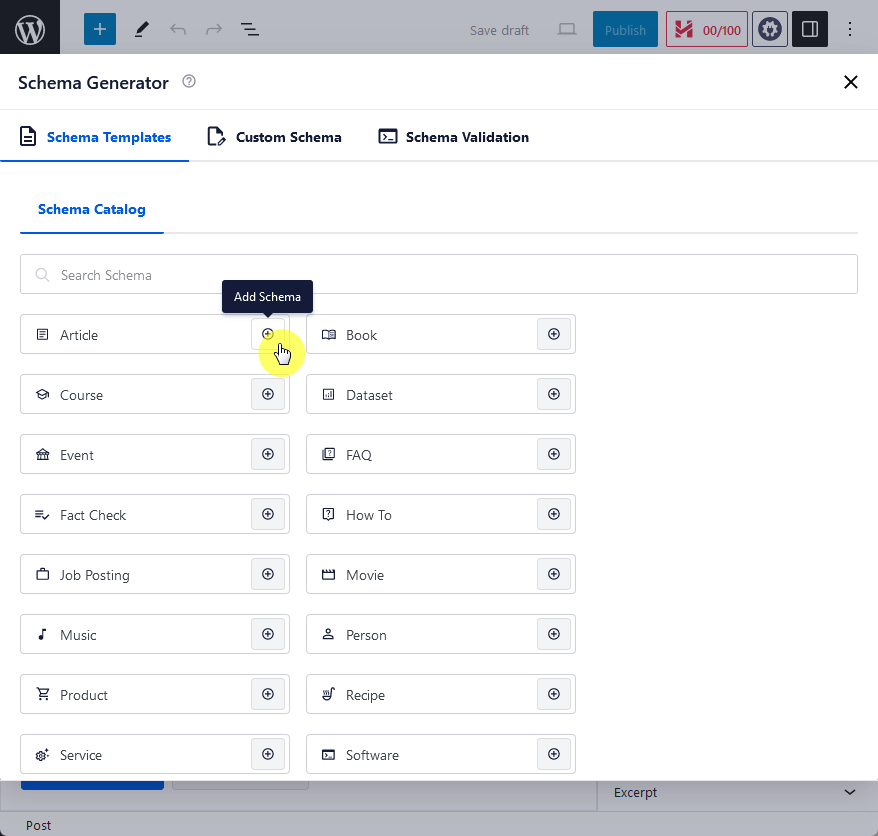
Doing so will open up a modal where you can input all the necessary information needed to generate an accurate schema for your post or page.
Once you've filled out the necessary details, click the add schema button to generate and apply the schema markup to your post or page.

Alternatively, you can click on the save schema as template button to save the schema markup as a reusable template.
Another versatile and easy-to-use rich snippet WordPress plugin for generating rich snippets for your site is Schema Pro.
It’s great for those with limited coding knowledge, thanks to its user-friendly interface for choosing and applying schema types to your posts or pages.
It supports a wide range of schema markups including review, local business, article, service, product, person, job postings, software application, and many more.
Start by installing Schema Pro and activating it in your WordPress editor.

Head over to the “Settings” button in your WordPress dashboard, then the “Schema Pro” button among the drop-down options.
From here, click on the “Plugin Settings” tab and click on the blue “Start Setup Wizard” button.
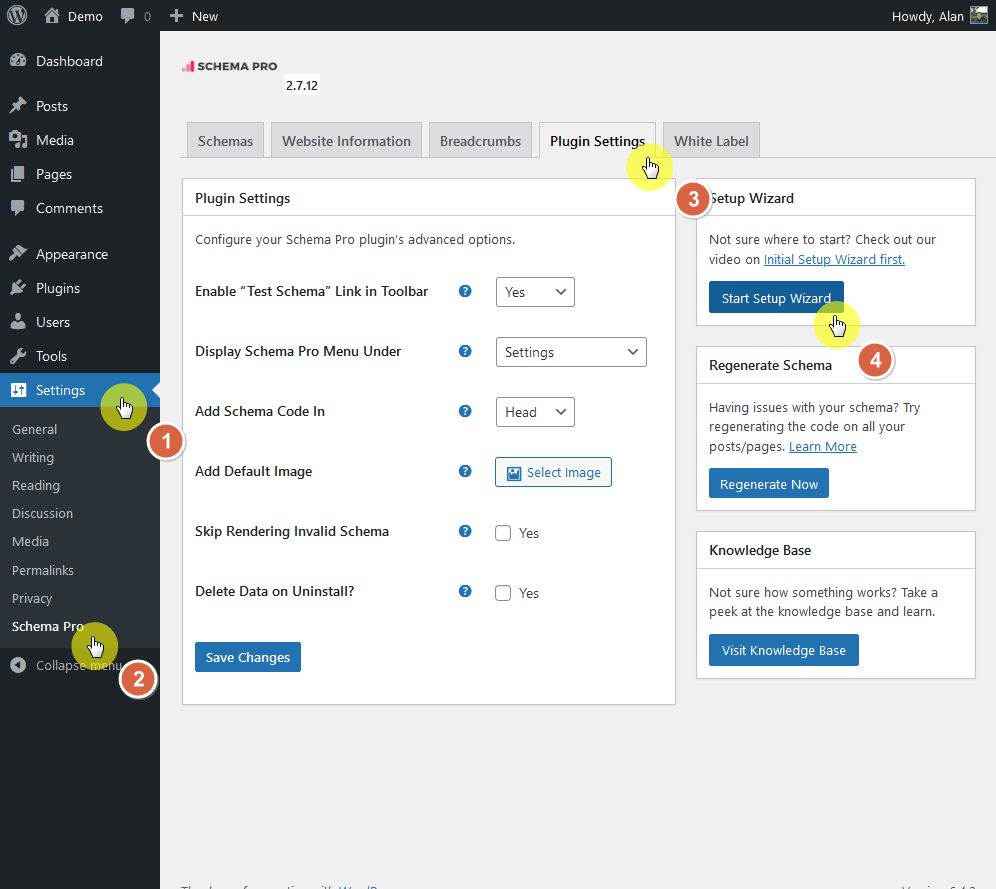
Make sure to finish the whole process.
If you’re not sure what a specific feature does, you can click on the question mark to see an image of how it affects your search results.
Now that you’ve finished up the basic sitewide settings, you’re ready to create the first schema for your content.
Head over to the “Schemas” tab and click on the “Add New” button to open the schema selection interface.
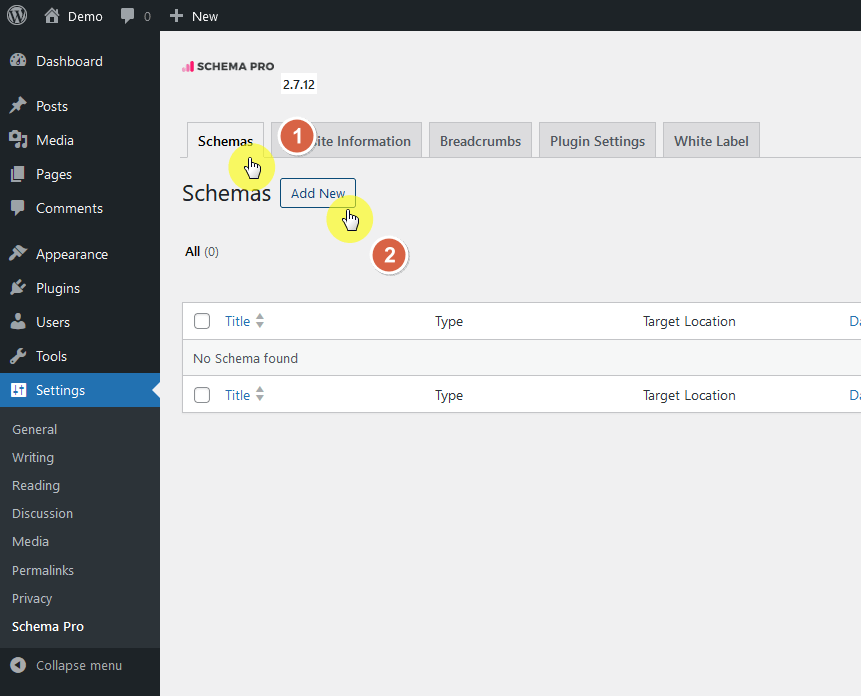
In the schema selection interface, you will find a wide range of schema types that you may implement on your posts or pages.
For now, let’s select the article type and click the blue next button.

Next, you will need to select where to apply the chosen schema type. You can also utilize include or exclude rules to target specific content.
However, for the article schema type, it's better to click the dropdown button and enable it for all posts.
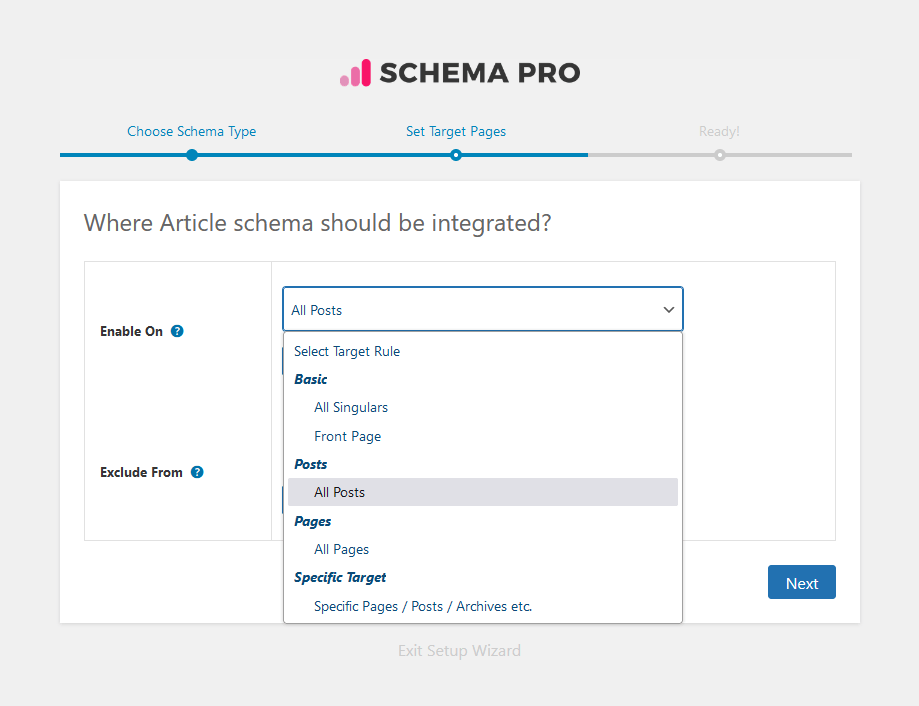
This tells Schema Pro you want to automatically apply the article schema to all your current and future posts.
Once you’ve done that, you will see a button to complete the setup:

Now you’re all set!
Using WordPress data, Schema Pro automatically adds the right schema markup to almost all your content, saving you from manual work.
However, if you already feel comfortable tweaking, you can use the dropdown buttons in the schema settings to manually adjust things and other relevant information.
Adding rich snippets to your WordPress site is a strategic way to enhance your site's visibility and appeal in search results.
By doing so, you're not just improving the chances of higher click-through rates but also providing a better search experience for your audience.
Although rich snippets boost your site's search result appearance, prioritize crafting top-notch content for your audience.
Wrapping up, consider the next step in elevating your site's design and functionality.
Darrel Wilson's exclusive offer brings you the ultimate solution in web design ease and efficiency.

Secure lifetime access to all premium Elementor template kits:
This offer is not just about templates — it’s about upgrading your entire website experience.
Keep your site contemporary and engaging, all while saving time and resources with Darrel Wilson's Elementor template kits.